
This small-batch ciabatta recipe uses just one cup (120 grams) of flour to make a mini loaf of ciabatta bread with a gorgeous, flour-dusted crust and soft, airy interior.
One loaf of mini ciabatta is the perfect size for one or two people to share, and is small enough to make in a toaster oven. Bake it as one whole loaf or portion it into two long sandwich loaves or four dinner rolls!

Once you get the hang of this mini ciabatta recipe, check out the rest of my popular small-batch recipes. You'll be making your very own small-batch baguette in no time!
5 star reader review
“As someone who’s new to bread making, this recipe is extremely easy to follow and makes absolutely delicious bread. My husband and I were thoroughly impressed with the results and I’ve been looking for a way to make them every day since.”
—Hannah
Small-Batch Ciabatta Bread
For this small-batch ciabatta recipe, I scaled down my full-size soft ciabatta recipe, which takes 3 hours, and made some adjustments to speed up the timing to just about 2 hours. That way, you don't have to work so long to make just one small loaf!


This is a very hands-off bread recipe that is meant to have a rustic, imperfect shape. After you mix the dough together, there's a few short resting periods with less than 5 minutes of work between them, so the amount of active work time is minimal. This is a great baking project for a lazy weekend.
Because ciabatta is a very free-form bread, you don't need a special pan to bake it. Just plop it onto a parchment lined sheet pan, and you can bake this mini ciabatta in your oven or in a toaster oven if that's all you've got!
Small-Batch Ciabatta Ingredient Notes

My ciabatta recipe uses regular all-purpose flour! I use King Arthur Baking Company's all-purpose flour, which has a slightly higher protein content (closer to bread flour) than other brands of all-purpose flour, so if you're using a different brand of flour, you may have better results with their bread flour.
Mixing Small Batch Ciabatta Bread Dough
If you're new to baking or bread making this is a great place to start. You can do this!


I like using a dough whisk for mixing sticky, wet doughs like this. If you don't have a dough whisk, a spatula or your hands will work just fine.
Resting and Folding (Bulk Fermentation)
During this one-hour rest (called "bulk fermentation"), you're going to periodically build strength and structure into the dough using a technique called folding.
By letting the ciabatta dough rest between these sets of folds, air bubbles and gas (produced by the yeast) are trapped inside the dough's gluten network, which gives the ciabatta an open, soft, and airy crumb.
Basically, it's a one-hour rest, with folds every 20 minutes. That's three sets of folds total.
After the initial 20 minute rest, you'll do the first set of folds. Gently grab the top edge of dough with a damp hand and stretch it away from you. Then fold it down over the center of the dough, like you're folding it in half. Rotate the bowl a quarter turn and repeat all the way around, tucking all the edges up across the center.
On the first set of folds the dough might feel very weak or even tear slightly. That's okay. Just keep going. It will continue to strengthen as you keep folding.

Stretch the dough away from you. Then fold it down over the middle.

On the last stretch and fold, flip the dough over so the seam side is facing down.
On the first fold in the set, the dough is fully relaxed and will be easier to stretch. By the final fold in the set, you'll notice you can't stretch it quite as much. That's because the gluten network is getting stronger.
Each time you do a set of folds you'll notice the dough feeling airier, smoother, and stronger. The dough will relax into the bottom of the bowl between sets of folds, then tighten up as you fold it.

Learning what the dough "should" feel like takes practice. Pay attention as you do the folds — when it looks smooth and doesn't want to stretch much anymore, stop folding. Cover the dough and let it rest.
After the final set of folds, flip the dough so the seam side of the dough is underneath, cover the bowl, and let the dough rest for 30 minutes. This is the end of the bulk fermentation period.
There Are Lots of Ways to Cut Ciabatta
You don't have to cut this small-batch ciabatta into pieces before baking, you can absolutely just bake it whole. I tested a bunch of other ways to cut it to see if this mini dough makes enough and these are the ones I think worked best:
- Cut in half: Each half is perfect for a sausage sandwich, hoagie, etc.
- Cut in quarters: Soft dinner rolls, mini sliders, etc.
- Cut into breadsticks: Follow the instructions for shaping these twisted ciabatta breadsticks.
Use a sharp knife or bench scraper in a clean up-and-down motion to make your cuts, and leave the cut edges facing open. Don't tuck them under or try to hide them. Ciabatta is a very loose bread — no fancy shaping required.


Ciabatta is a very freeform loaf — you can try to gently stretch or shape it into a square or an oval or a circle, but ultimately it's going to be a bit unpredictable.
When you take the ciabatta out of the oven, it will feel hard and very crusty but it will soften as it cools.
5 star reader review
“This is the first time that a recipe from the internet actually worked as advertised for me. Now I don't have to drive several miles every few days to have great ciabatta rolls.”
—Jim T.


I feel like I'm not getting the hang of the folding. Help!
First of all, take a deep breath. It will be okay. If you find it easier to just do stretch and folds, stick to those the whole time. If you find the gentle slap and fold is easier for you, do that the whole time. You can also use a plastic bench scraper or a spatula to help fold the dough over itself in the bowl.
There are a lot of different folding techniques out there — coil folds, etc. Pick the one that you're comfortable with and do about 8 of them total. It doesn't matter that you do them perfectly. It just matters that the gluten network in the dough is getting folded at all. If there's a different method or technique that works better for you — use it!
💭 Have More Baking Questions?
I've rounded up answers to common baking questions and how-to guides, including:
- Ingredient swaps and FAQs
- Why my recipes are written in grams and not cups
- How to quickly bring eggs and butter to room temperature
- Ingredients I use (salt, flour, yeast, etc.)
- Step-by-step guides for bread and baking techniques
See my baking techniques & troubleshooting guide and ingredient swaps and FAQs for more!

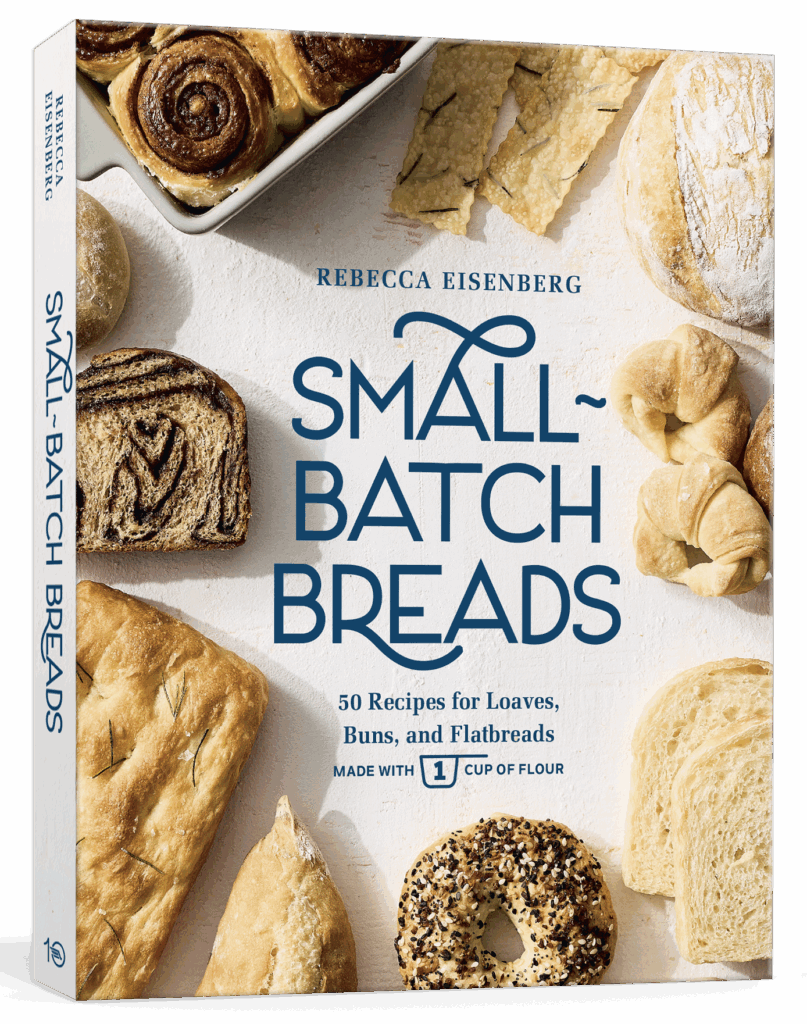
Want more small-batch recipes?
My Small Batch Breads cookbook is now available for pre-order!
Featuring fifty easy-to-follow bread recipes made using 1 cup of flour.
TL;DR - Recipe Summary
- Mix the dry ingredients together. Make a well in the center and add the water and olive oil. Mix to form a shaggy dough.
- Cover and bulk ferment for 1 hour with folds every 20 minutes (a total of 3 sets of folds).
- After the final set of folds, cover and rest for 30 minutes.
- Turn the dough out onto a well floured counter and dust the top with flour too. Cover and rest for 5-30 minutes.
- Immediately before baking, lift or flip the dough onto a parchment-lined sheet pan to reveal the floury stripes.
- Bake for 20-22 minutes at 450°F. Let cool before slicing.
📖 Recipe

Small Batch Mini Ciabatta (Made with 1 CUP of Flour)
Recipe Notes
- If you are measuring with cups, it is super important that you measure the ingredients properly. See my guide to measuring as accurately as possible by volume for how to do this. If you measure with cups/teaspoons and the recipe did not turn out right, that is likely why. Try again!
- Resist adding flour to the dough during the folding stages. This is a wet, sticky dough by design — use damp or lightly oiled hands to keep it from sticking to you instead.
- If you cut the dough into smaller rolls, reduce the bake time by 2-3 minutes.
- Baking at high altitude: Increase the water to 110 grams. You can add up to an additional 2-3 grams of water beyond that if it still seems very dry. Use wet hands for the folding stages. You may also find that a higher protein bread flour works better for you!
- Keeping Track of Timing: To keep track of your timing with the folds, set a 20-minute timer and a 1 hour timer when you finish mixing the dough. Reset the 20-minute timer when you do the first set of folds. When you do the second set of folds, there should be about 20 minutes left on the 1 hour timer (it may be off by a minute or two given the time it takes to do the folds themselves!).
- Be gentle. The folding process is as much about incorporating air as it is about building strength into the dough. You don't want to knock all the air out of it. Once it's in the final rest, handle it as little as possible to preserve the air inside the dough. This doesn't mean you can't gently stretch it into a long rectangle shape or cut it into rolls — just use "fingertip light" pressure.
Ingredients
- 120 grams all purpose flour (1 cup, aerated and loosely scooped, plus more for dusting)
- 3 grams diamond crystal kosher salt (1 teaspoon; use half as much of any other brand)
- 3 grams instant yeast (1 teaspoon)
- 105 grams warm water (⅓ cup + 5 teaspoons, 90°F)
- 5 grams extra virgin olive oil (1¼ teaspoons)
Instructions
- In a medium bowl, whisk together flour, salt, and instant yeast. Make a well in the middle of the bowl; pour the warm water and olive oil into it.
- Mix with a dough whisk until the dough comes together in a messy ball in the bowl. Scrape down the sides of the bowl, make sure there's no sneaky lumps of flour hiding inside. Cover the bowl and let the dough rest for 20 minutes.
- First set of folds: Use a damp hand to gently grab the top edge of the dough, stretching it away from you, then down over the center of the dough. Then rotate the bowl a quarter turn and repeat, grabbing the new top edge, stretching it away from you, then folding it down over the center. Repeat two more times for a total of four folds. On the last fold, flip the dough over and do a gentle slap and fold in the bowl by scooping the dough up in one hand, "slapping" the side closest to you it down in the bowl and folding the dough over itself and away from you as you slide your hand out from under it. Rotate the dough or the bowl a quarter turn between each set of folds, so you're always sliding your hand under the tucked under edge of dough facing away from you. Cover the bowl and let the dough rest for 20 minutes.
- Second set of folds: Use a damp hand to repeat the 4 stretch-and-folds followed by 4-5 slap and folds in the bowl. Cover the bowl and let the dough rest for 20 minutes.
- Third set of folds: Perform one final set of stretch-and-folds and slap-and-folds in the bowl. Do your best to get all edges tucked underneath with nice smooth surface tension on top of the dough. The dough should feel much more bubbly and airy at this stage and won't stretch as far as it did on the earlier sets of folds. Cover the bowl and let the dough rest at room temperature for 30 minutes.The dough will spread out and rise slightly in the bowl during this final rest, but may not double in size.
- Preheat the oven (or toaster oven) to 450°F while the dough rests.
- Dust the top of the dough in the bowl with flour, then gently tip it out of the bowl and on to a well-floured clean countertop so that the un-floured side is now facing up. Be patient and gentle with the dough so it doesn't deflate.
- Dust the sticky top side of the dough lightly with flour. If you're cutting it into smaller rolls, do so now using a sharp bench scraper in clean up and down movements. Cover with a clean dish towel and let the dough rest for about 5-30 minutes. If you need to let it keep resting for another 5-10 minutes while the oven gets to temp that's okay — just cover it with a clean dish towel so it doesn't dry out. It's better to get it in the oven at the right temperature than to rush it!
- Line a sheet pan with parchment paper. Dust any excess flour off the top of the dough, then slide a bench scraper under the ciabatta loaf in one quick movement. Lift and gently flip it over onto the sheet pan so the underside is now facing up. For a less floury ciabatta, gently dust any excess flour off the top. If you don't have a bench scraper, use your hands to flip it.
- Bake for 20-22 minutes until puffed up and browned on top. If you want to be precise, you're looking for an internal temperature of at least 190F. For a softer ciabatta, bake for 18 minutes. Ciabatta will seem very hard and crusty when it first comes out of the oven, but will soften as it cools. Let cool before slicing!
Nandini says
We are loving this ciabatta ! I have graduated from the mini to x3 and they turn out so amazing and delicious. My hubby is scoffing half a loaf in one day, that's because I keep an eye on him! He'd eat the whole loaf otherwise! Thank you❤️🥰
Monica says
I tried this recipe today as I've always wanted to make ciabatta but low on flour I searched and found this recipe. I haven't tried it yet as it's cooling but it looks better than I thought it would. My dough was tacky even after adding extra bits of flour, sure if I folded it too little or too much but thank you for this recipe and I will try it again!
Rebecca Eisenberg says
This is a very tacky dough so it sounds like you were doing it right! It takes a bit of getting used to handling sticky doughs, but you’ll get there! Keep on baking!
Izzy says
Success on the first attempt! Can’t say that about many recipes. Thanks for the detailed step-by-step. Off to attempt the one-cup challah.
Jenbowd says
I made this recipe for the first time today, and I am thrilled with the results! I am still a klutz, but I’m gaining confidence and skill with each small batch bread recipe I’ve made. I struggle with the slap and fold step, but I know I’ll improve with time and it didn’t have a negative effect on this loaf.
The only adjustment I made to the recipe was to use 5 grams of active dry yeast. I still have a bunch to use up before I can switch to instant.
Small batch is perfect since there are only 2 of us. Plus, these recipes are so clear and simple to follow that success is much easier to accomplish than with a typical recipe from other sources. I cannot wait for the cookbook!
Jenbowd says
I meant to mark this with 5 stars!!
Rebecca Eisenberg says
Thank you Jen!
Christi Piner says
This was amazing!! I can't wait to make the recipe that makes a bigger batch. I didn't think it was going to work because the dough just didn't look like other bread dough but I kept the following the steps, and I'm glad I did. My husband doesn't normally get too excited about bread but he also thought it was great. Thank you!!
Colleen says
I made this with my 8 year-old. It was her first time making bread herself (I helped with the folds). I loved this recipe. It was fun, tasty, and easy.
Plus, these small batch recipes are perfect for my kids and I to make together.
Lajja says
This is the best beginner friendly bread recipe i have followed, so easy to make , and great for preparing it for 1or 2 people...I made it for making paninis for me and a friend and i now am baking another batch already , it definitely is a hit.
Already looking forward to 1 cup focaccia recipe
JM says
This turned out wonderful! So nice to find a small batch recipe that actually works.
Julie L-S says
I keep coming back to this recipe! I love how it turns out.
Nabiha says
Absolutely amazing! Loved how perfect they turned out considering I used volumetric measurements. Thank you!
Susan H. says
I’m fairly new to bread making and this little recipe was so much fun to whip
up compared to the full sized version.. we loved it and it was gone in 20 minutes 😁 making another today!
Love your small batch recipes and look forward to more of them, thank you!
Claire says
I only had one cup of bread flour left in the pantry, and I was trying to find a way to use it up. I’m so happy I found this recipe. I’ve never made ciabatta before, but the instructions were simple and easy to follow! I have to admit I was a bit confused about the “slap and fold” step and didn’t realize there was a video tutorial attached to the article lol.
That being said the bread turned out absolutely delicious with an amazing texture—fluffy, airy, and perfectly balanced in flavor. The fresh hot bread paired beautifully with a bit of cold butter. I only got a few bites before my husband wolfed down the entire loaf so I’ll definitely be making this ciabatta again!
Michele says
Like others, I've made your small batch focaccia bread a few times as a new bread baker and really enjoyed it. I decided to try the ciabatta on Christmas day as something different. I especially liked your directions on folding - find what works for you. I know I don't do the slap and fold right, but I do something. I weighed all the ingredients except the water. By the 3rd fold, I really thought I did something wrong because the dough was so sticky, so I incorporated a little bit of flour (less than a tablespoon) thinking the water ratio was off. Even as I got it into the oven to bake I was sure this was going to be an epic fail on my part.
I was wrong. This is my new favorite weekend bread recipe! It turned out so airy and yummy, and it really is simple to make.
Rebecca G says
I did it!
I have watched Rebecca post videos of this on IG for forever and always thought, one day I will. But never bit the bullet because I felt like I just wouldn't be successful.
I finally made a batch last night! I cut it into two smaller loaves, baked them in my toaster oven, and was so proud! This would be perfect for me and my two younger kiddos to each have a little ciabatta with dinner, and they'd totally be able to help so that's the plan for next time!
My only drawback was caused by my olive oil - it's not my fave brand and I could definitely taste that coming through, so I'll use a different one next time.
Can't wait to make it again!
Gerry says
Can it be baked in a loaf pan?
Rebecca Eisenberg says
I haven't tried it but I don't see why not! It might not fill the whole pan, but you can give it a shot.
Jennifer says
I had never made ciabatta before coming across Rebecca’s recipe. The recipe is easy to follow, the amount is perfect (in case of user error!), and the result was delicious! Looking forward to making this recipe again!
Mandy says
I make this pretty much every weekend. It sizes up beautifully. I usually make it at x2 to ensure I get at least 1 roll. Instructions are easy to follow and the rolls are absolutely delicious