• Skip to primary navigation
  • Skip to main content
  • Skip to primary sidebar
  • Skip to footer
the practical kitchen
  • Recipes
    • Recipe Index
    • Appetizers
    • Breads
      • Bagels
      • Biscuits, Scones & Loaves
      • Sourdough
    • Breakfast
      • Muffins
    • Condiments & Dips
    • Desserts
      • Bars & Brownies
      • Cakes
      • Cookies
      • Ice Cream
      • Pies & Tarts
    • Main Dishes
      • Pasta
      • Pizza
    • Salads
    • Side Dishes
    • Snacks
  • About
  • Shop
  • Newsletter
  • Tip Jar
    • Amazon
    • Facebook
    • Instagram
    • Pinterest
    • RSS
    • TikTok
    • Twitter
    • YouTube
menu icon
go to homepage
subscribe
search icon
Homepage link
  • Recipes
    • Recipe Index
    • Appetizers
    • Breads
    • Breakfast
    • Condiments & Dips
    • Desserts
    • Main Dishes
    • Salads
    • Side Dishes
    • Snacks
  • About
  • Shop
  • Newsletter
  • Tip Jar
    • Amazon
    • Facebook
    • Instagram
    • Pinterest
    • TikTok
    • Twitter
    • YouTube
  • ×
    Home » Main Dishes » Pizza

    Thick & Crispy Focaccia Pizza

    4.92 from 37 votes
    Published by Rebecca Eisenberg ⁠— April 25, 2023 (updated June 12, 2023) — 82 Comments

    3501 shares
    Jump to Recipe Jump to Video

    This post may contain affiliate links

    thick and fluffy focaccia pizza

    This homemade focaccia pizza recipe is a thick and fluffy version of my thin crust pepperoni pizza. It bakes up in a 9x13" baking dish on a baking steel for an extra crispy bottom and is topped with my simple no-cook pizza sauce, shredded mozzarella cheese, and deliciously crisp rows of pepperoni.

    Whether you're looking for a hearty weeknight meal or a fun dinner party option, this focaccia pizza is sure to impress. So grab your favorite apron and get ready to create a thick slab pizza masterpiece that will have everyone coming back for seconds!

    focaccia pizza topped with pepperoni and fresh basil in a rectangular metal pan.

    While there are plenty of iconic regional varieties of thick crust pizza out there, from Detroit style pies, grandma pizzas, Sicilian pizza (sfincione), and Chicago's deep dish pizzas, to name just a few, this is not an attempt at recreating any of them.

    This recipe is simply my favorite way of using my super easy overnight focaccia dough to make a thick, slab-style pizza. I tweaked the base recipe a bit to work better as a pizza, but if you've made that recipe, you can make this one too!

    Looking for another great thick crust pan pizza recipe? Try my chicken marsala pizza which bakes in a round cast iron pan!

    📖 Notes from Recipe Testing

    When I set out to make this focaccia pizza recipe I thought it would be as simple as adding pizza toppings to my favorite focaccia. Maybe three test batches just to figure out the topping quantities and baking time.

    I went to pastry school, how hard could a focaccia pizza it be? Very, it turns out! (Don't worry, I've made this recipe very easy for you. But it took me about 7 focaccia pizzas to get here.)

    I started by shrinking my usual focaccia dough by 25%, but it didn't fill the pan. By the fifth focaccia pizza test, I settled on shrinking the original recipe by just 6%. This might not sound like much, but it helps the focaccia cook faster and gives a much better ratio of dough to toppings.

    Early in testing, the focaccia dough kept deflating under the toppings. I added one extra quick set of folds to strengthen the gluten structure of the dough. Problem solved, easy peasy!

    close up of a slice of focaccia pizza topped with pepperoni.

    The last change I made is the one I'm most excited about. It happened after I thought I was done testing — I was actually in the middle of shooting the photos you see here when I had an epiphany.

    "What if," I wondered, "instead of dimpling the focaccia dough and then dolloping the sauce overtop, I spread the sauce on the dough and then dimple it?"

    Surely there was a reason no one else did it this way, I thought. But I took a mid-photoshoot risk and spread the sauce on the smooth surface of the dough. Then I dimpled the dough, poking my fingers right through the sauce.

    It was messy but the risk was worth it — it was my best focaccia pizza yet!

    Dimpling the sauce deep into the focaccia dough marbles pizza flavor throughout every bite. It also prevents the sauce from pooling on the surface of the dough, creating soggy pockets where the cheese slides off.

    As far as focaccia pizzas go, dimpling the sauce into the dough is a total game changer! I can't wait for you to give this a try.

    🥘 Ingredient Notes

    Here are the ingredients that you'll need to make this focaccia pizza recipe! See recipe card (at the end of the blog post) for quantities.

    all of the ingredients for focaccia pizza measured out and labeled.
    • All Purpose Flour - Regular all purpose flour is just fine here! I use King Arthur Baking Company's all purpose flour which has a relatively high protein content, much closer to a bread flour than other brands of all purpose flour. If you're using generic or grocery store brand flour, you may have a better result with bread flour.
    • Sugar - Regular plain white granulated sugar. Nothing fancy.
    • Instant Yeast - I use instant yeast which can be mixed right into the dry ingredients. Store it in the freezer and you never have to wonder if it died.
    • Salt - I use Diamond Crystal Kosher Salt which is half as salty as other brands and types of salt by volume. Measure your salt by weight for best results! For volume measurements, if you're using a different brand of salt, even a different brand of kosher salt, cut the amount of salt in half.
    • Olive Oil - Plain olive oil or extra virgin olive oil, whichever one you have. An olive oil without a strong flavor works best here.
    • 5-Minute No Cook Pizza Sauce - My favorite go-to classic red pizza sauce, made with unsalted tomato sauce, dried basil and oregano, salt, and a clove of garlic.
    • Mozzarella Cheese - Low-moisture whole milk mozzarella cheese that you grate by hand is the best melty cheese for pizza. If you can't or don't want to grate cheese by hand, pre-shredded is fine. It will brown faster than the hand-shredded stuff. Just make sure it's low-moisture AND whole milk for the best melt!
    • Pepperoni - I like using Hormel's "original" pepperoni slices or the Wegman's store brand pepperoni slices. They're a good size and don't have too much fat in them (unlike some of the more artisanal cured pepperoni slices) which means no worrying about the top of the focaccia pizza getting soupy and soggy. You could absolutely use pepperoni cups if you wanted to though.
    • Powdered Pecorino Romano or Parmesan Cheese - No pizza is complete without a dusting of finely grated cheese. My favorite finishing cheese for pizzas is Locatelli's Pecorino Romano, but any finely grated pecorino or parmesan cheese will do.
    • Fresh Basil - Thinly cut in a chiffonade. Wait until the focaccia pizza is out of the oven or in the final minute of cooking to cut the basil so it stays fresh!

    Remember: Pizza toppings should always be ready-to-eat (or pre-cooked) before adding to your pizza!

    🍕 How to Make Focaccia Pizza

    As with all good pizza recipes, we start this focaccia pizza recipe by making the dough. The focaccia pizza dough has about 30 minutes of up front work (with a few five minute rests) and then a long rise for about 7-12 hours.

    Make the dough in the morning before you leave for work and it'll be ready and waiting for toppings when you get home. (Or see the recipe notes for how to prep it the night before).

    water and oil on top of a pile of flour in a ceramic mixing bowl

    Whisk together flour, salt, and instant yeast. Then pour the warm water and olive oil on top.

    a wet, sticky focaccia dough being mixed with a dough whisk.

    Mix well until a messy, sticky dough forms.

    I like using a dough whisk for this step — it's super efficient at mixing wet, sticky doughs. A spatula, wooden spoon, or even your hands will also work.

    Gather the dough into a loose ball in the bottom of the bowl, cover and let it rise for 5 minutes.

    Over the next 20 minutes, you'll perform three sets of folds on the dough. There are two five minute rests and one ten minute rest.

    Here's what the whole process looks like in terms of timing:

    • Mix the dough. Rest 5 minutes.
    • First set of folds. Rest 5 minutes.
    • Second set of folds. Rest 10 minutes.
    • Third and final set of folds. Transfer the dough into the oiled baking pan.

    This folding process builds strength and structure into the dough. It traps air inside the dough for those lovely focaccia bubbles, while also allowing it to support the weight of the sauce and toppings later on.

    a hand folding the focaccia dough over itself in the bowl.

    Grab the top edge of dough and stretch it away from you. Then fold it down across the dough. Rotate the bowl 90° (a quarter turn) and repeat. Keep going all the way around the bowl. That's one set of folds.

    a hand stretching the focaccia dough away from itself in the bowl. this is the final fold, the dough is much smoother.

    By the time you get to the final set of folds, you'll notice that the dough looks much smoother, feels stretchier, and might even feel a little airy or bubbly inside.

    TIP: Use damp or lightly oiled hands when folding the dough — this will prevent the dough from sticking to your hands too much.

    Spray your 9x13" baking pan with non-stick spray. Make sure to get the sides, too. Then drizzle 1 tablespoon of olive oil into the center of the pan.

    Tilt the pan so the oil coats the bottom. This is a tip I picked up from King Arthur Baking — the non-stick spray prevents sticking, but the oil is what will give you that crispy bottom!

    the focaccia dough in the middle of an oiled 9x13 inch high sided baking pan.

    Gently slide the focaccia out of the mixing bowl and into the pan. Cover with saran wrap and let it rest for 7-12 hours.

    The fully risen focaccia pizza dough now filling out the whole rectangular baking pan.

    When the dough has filled out the pan and looks nice and bubbly, it's ready for dimpling and topping!

    The ideal temperature for letting this focaccia pizza dough rise is somewhere between 66°-70°F. If your kitchen is particularly warm, it will rise much faster (closer to 7 hours).

    Regardless, once it's filled out the pan and is looking nice and bubbly, it's ready for assembly and baking!

    🍕 Focaccia Pizza Toppings & Assembly

    When your focaccia dough has risen, it's time for the fun part! Dimpling and topping your focaccia pizza.

    First, you'll want to preheat your oven with a baking steel or pizza stone inside (more on that later). This preheating time gives you the perfect window for assembly and the final rise before baking.

    whisking the pizza sauce together in a bowl.

    Whisk together tomato sauce, basil, oregano, salt, and a finely grated clove of garlic. Easy peasy.

    A hand spreading pizza sauce on the focaccia dough with the back of a spoon.

    Use the back of a spoon to very gently spread the sauce across the surface of the focaccia pizza dough.

    Use a very light touch; you don't want to deflate the dough. Don't worry about getting an even coating, it's okay if it's a little splotchy.

    There's not a clean outer edge crust on a pizza like this so no need to keep a clean sauce-free border all the way around. Get the sauce all the way to the edges.

    Why do you spread pizza sauce with the back of a spoon? The curved back of the spoon glides gently over the delicate pizza dough. The edges of the spoon are curved away from the dough, so they won't catch or tear it the way a knife or spatula would!

    Two hands dimpling the focaccia pizza, fingers poking down through the sauce covered dough.

    Lightly oil your fingers and get to dimpling. Poke straight down through the dough all across the surface of the focaccia. Use this time to help spread the sauce out a little too.

    focaccia pizza topped with mozzarella cheese, pepperoni, and finely grated pecorino romano cheese.

    Then top with a layer of shredded mozzarella cheese, pepperoni slices, and finish with a dusting of finely grated Pecorino romano.

    I know, in these photos it looks like I didn't spread the sauce all the way to the edges of the pan like I just told you to do, but I actually ended up using my fingers in the the dimpling step to do that and just didn't get a photo of it.

    Make sure the cheese and pepperoni go all the way to the edges of the pan too. Cover the pan and let it rest for another 15 minutes before baking.

    ♨️ Using a Baking Steel

    For this focaccia pizza, you'll need to preheat your oven to 450°F for about 45-60 minutes with a baking steel or pizza stone on the middle or lower-third rack of your oven.

    Why do you need to use a baking steel for focaccia pizza? The heat of a baking steel is necessary for getting a crispy bottom on a focaccia pizza. The cheese and sauce on top of the dough insulate the pan too much for the bottom to get crispy otherwise.

    The high heat of the baking steel cooks the pizza dough from the bottom of the pan up while the heat of the oven browns the cheese and cooks the pizza from the top down.

    If you don't have a baking steel or pizza stone: Invert a sturdy sheet pan on the middle rack of your oven. It doesn't work quite as well as a true baking steel, but is better than using nothing at all.

    Slide the baking pan directly on to the baking steel, and bake for 17-20 minutes. To check if it's done, carefully slide a thin flexible fish turner spatula under the pizza and lift it.

    If it's golden brown around the sides and dark golden or dark brown on the bottom, it's done!

    Top with thinly sliced fresh basil, then let the focaccia pizza sit in the pan for about 5-10 minutes. Just enough for the grease to stop bubbling and for the pan to cool slightly so you don't burn yourself in the next step.

    Carefully slide the whole pizza out of the pan and onto a cooling rack. Increasing air flow around the focaccia pizza will prevent the bottom from steaming in the pan and getting soggy.

    a focaccia pizza on a sheet of parchment paper being cut lengthwise with a pair of kitchen scissors.

    The best way to slice focaccia pizza btw? Kitchen shears! This comes straight from King Arthur's Crispy Cheesy Pan Pizza recipe, so it's not just me being wacky and goofy. It's a tip endorsed by the experts!

    🍽 Suggested Equipment

    You don't need to use all of the same equipment that I do to make this recipe but these are the tools I use and recommend to make it easier!

    • 9x13" Rectangular Baking Pan - I use a 9x13" metal baking pan for this focaccia pizza recipe. Metal pans conduct heat well and help get a nice crispy bottom. But you can also use a ceramic or stoneware baking dish. I don't recommend using glass for this recipe as it can change the baking time and temperature!
    • Pizza Steel or Baking Stone - I use the Original Baking Steel  to make all of my pizzas (note: I bought my Baking Steel with my own money but love it so much I became part of their affiliate program; use code TPK10 for 10% off!). A pizza stone will also work if that's all you've got, but it may take slightly longer to cook.
    • Dough Whisk - The stiff wire coil of a dough whisk is designed to efficiently mix sticky, wet doughs like focaccia dough! You can also use a spatula or your hands.
    a stainless steel rippled rectangular high sided baking pan with sharp corners.

    9x13" Rectangular Baking Pan

    Dimensions: 9 x 13 x 2.25 inches. A high-sided rectangular metal baking pan with a durable, environmentally friendly non-stick coating. Particularly appreciated for its precise 90° corners and edges. Max temperature: 450°F.

    Amazon
    Williams Sonoma
    Walmart

    ⏲️ Storage Notes

    Wrap any leftover focaccia pizza slices in foil and store them in the fridge for about 3-4 days.

    Reheat on a foil-lined baking sheet in the oven at 350°F for 10-15 minutes or until warmed throughout.

    close up of three squares of focaccia pizza.

    👩🏻‍🍳 Practical Tips and Recipe Notes

    • Freeze the Mozzarella: If the mozzarella cheese is too soft to grate, pop it in the freezer for about 10 minutes then try again.
    • You can use other toppings — vegetables, sausage, chicken, etc! Just make sure they're already cooked before you put them on the pizza.
    • If making the dough in the morning doesn't work for you, you can make it the night before, and let it rise overnight in the fridge instead. Take it out of the fridge in the morning and let it rise at room temperature during the day (7-10 hours) to use for dinner that night.
    • To keep track of what set of folds you're on, place 3 small snack items like M&Ms, crackers, pretzels, Skittles, etc. next to the mixing bowl. Eat one each time you do a set of folds.
    • Soggy bottom? Heat a bare non-stick skillet over medium heat. Place the slices in the pan and let them crisp up that way for about 5-6 minutes or until suitably browned on the bottom.

    🌡️ A Note on Temperature and Dough Rising

    Temperature is the main factor in determining how quickly or slowly your dough rises (proofs). This includes the temperature of ingredients in your dough, as well as the ambient temperature of the room where you are leaving your dough to rise.

    Depending on how cool or warm your water was, and how cool or warm your kitchen is, your dough may rise faster or slower. Warmer temperatures increase yeast activity and cooler temperatures slow down yeast activity.

    • If your kitchen is around 65°F, use warmer water — around 90°F.
    • If your kitchen is around 70°F or warmer, use cooler water — around 75°.

    If your focaccia dough is rising slowly and your kitchen is cold, find somewhere warmer to put your dough to finish rising. If your kitchen is very warm, your dough might be ready to dimple sooner!

    In baking, "room temperature" is generally somewhere around 70°F.

    Just because the dough isn't ready right at the times given in the recipe doesn't mean it's not working — there might be other factors affecting how quickly or slowly it gets there!

    🥄 Substituting Active Dry Yeast for Instant Yeast

    Active Dry and Instant yeast are technically the same thing — meaning, they are both saccharomyces cerevisiae, a single-celled living organism used for leavening bread and doughs.

    The only difference between the two types of yeast is that Active Dry yeast granules have a little coating around them which needs to be dissolved to reveal the yeast inside.

    Because of this extra little shell around the Active Dry yeast granules, you'll need to use slightly more Active Dry yeast to get the same effect as using Instant.

    To calculate how much Active Dry yeast to use, increase the amount of Instant yeast by 25%. So for this recipe, you'd need 2.5 grams of Active Dry yeast. If you don't have a jeweler's scale to measure such a small amount precisely I recommend sticking with 2 grams of Active Dry yeast due to this recipe's long rise time.

    💭 Why is this recipe in grams? I want to use cups!

    In order to make this focaccia pizza dough successfully, you need to measure your ingredients by weight. No, unfortunately I cannot convert it to cups for you.

    A kitchen scale is more accurate than cup measurements and will give you the right ratio of water, yeast, salt, olive oil, and flour so that the focaccia dough behaves the way you want it to. Depending on how much you pack the flour in and what brand of measuring cups you’re using, you may be off by 30-50 grams of flour per cup which can make a huge difference in how your focaccia pizza turns out.

    I tested and developed this recipe using weight measurements. If I were to convert it to cups, I would be using Google — just like you would. And since there's no set standard for what "1 cup" of flour weighs, different online converters use different amounts, which means converting the recipe to cups would be very inaccurate.

    Basically, if you convert this recipe to cup measurements, do so at your own risk. It will have a higher rate of failure. I don’t recommend it!

    📖 Recipe

    focaccia pizza topped with pepperoni and fresh basil in a rectangular metal pan.

    Thick & Crispy Focaccia Pizza

    Rebecca Eisenberg
    This homemade focaccia pizza has a simple, fluffy focaccia dough base and bakes up with an ultra cheesy top and extra crispy bottom. Whether you're looking for a filling weeknight meal or a fun dinner party option, this focaccia pizza is sure to impress.
    4.92 from 37 votes
    Print Recipe Pin Recipe Save Saved! Email
    Prep Time 30 minutes mins
    Cook Time 20 minutes mins
    Resting Time (Combined) 8 hours hrs 30 minutes mins
    Total Time 9 hours hrs 20 minutes mins
    Course Bread, Main Course
    Cuisine Italian
    Servings 8 slices

    Equipment

    • 9x13-inch rectangle pan
    • Baking steel
    • Dough whisk
    • Kitchen scale

    Ingredients
      

    • 450 grams all-purpose flour
    • 11 grams sugar
    • 8 grams diamond crystal kosher salt
    • 2 grams instant yeast (⅔ teaspoon)
    • 364 grams warm water (75°F if your kitchen is hot, 90°F if your kitchen is cold)
    • 40 grams extra virgin olive oil (or regular olive oil)

    Pizza Sauce

    • 6 ounces unsalted tomato sauce
    • 1 teaspoon diamond crystal kosher salt (use half as much of any other brand)
    • ½ teaspoon dried basil
    • ½ teaspoon dried oregano
    • 1 garlic clove (finely grated)

    Pizza Toppings

    • 6 ounces low-moisture, whole milk mozzarella cheese
    • 22 slices pepperoni
    • 2 tablespoons pecorino romano (Locatelli preferred, parmesan will also work)
    • 4 leaves fresh basil
    Prevent your screen from going dark

    Instructions
     

    Make the Focaccia Pizza Dough

    • Prepare the pan. Spray a 9x13" high-sided baking pan with non-stick spray, making sure to get the sides too. Drizzle 1 tablespoon oil in the center, and tilt the pan to spread the oil out.
    • Mix the dough. In a large mixing bowl, whisk together flour, sugar, salt, and yeast. Pour the warm water and olive oil directly into the center. Mix with a dough whisk until a messy, cohesive, sticky dough forms. Gather the dough in a rough ball at the bottom of the bowl. Cover and rest 5 minutes.
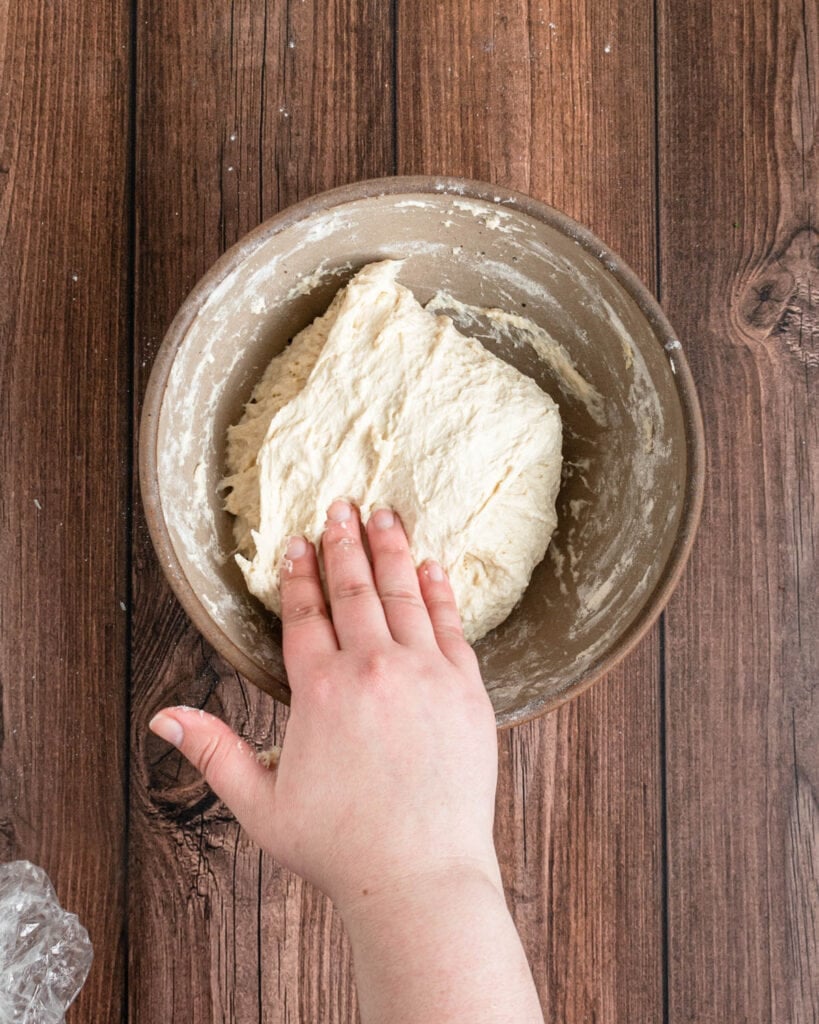
    • First set of folds. With damp hands, grab a corner of the dough and stretch and fold it over itself. Rotate the bowl a quarter turn and repeat until all the edges have been folded over the center of the dough. Cover and rest 5 minutes.
    • Second set of folds. With damp hands, repeat the stretching and folding process all the way around the bowl. Cover and rest 10 minutes this time
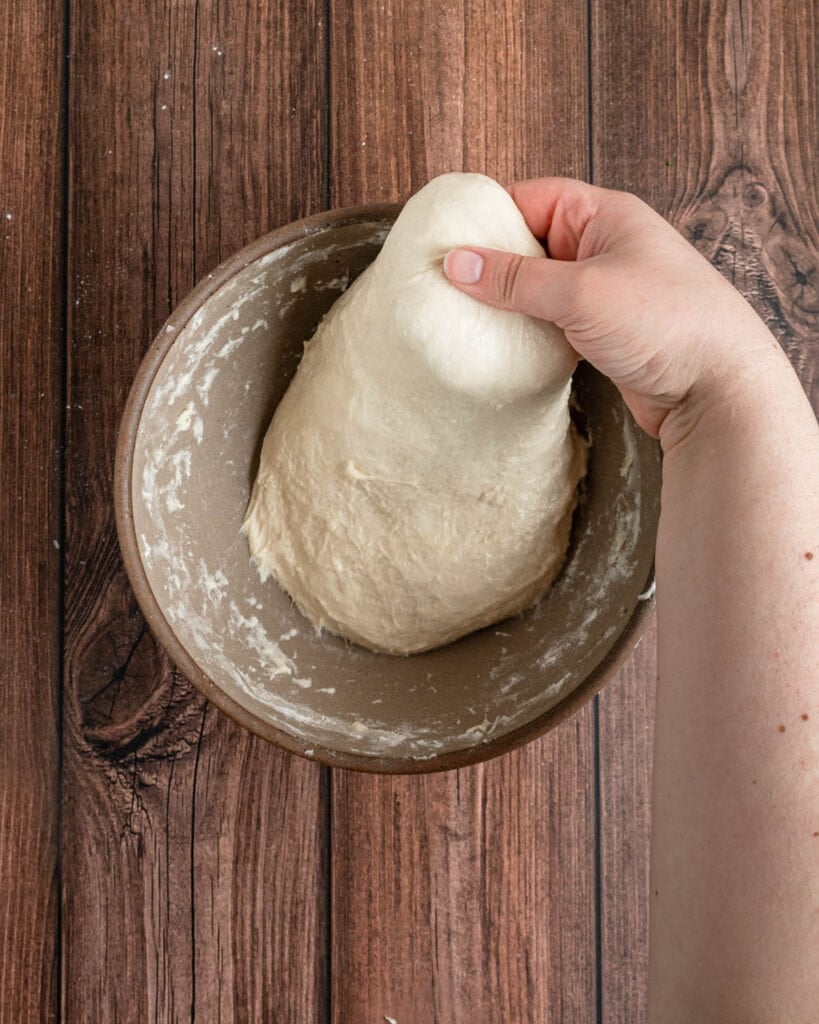
    • Third and final set of folds. Repeat the stretching folding process all the way around the dough. The dough will be much stronger and smoother. On the final fold, flip the dough over so the seam side is facing down and the smooth side is facing up.
    • Slide the dough out of the bowl and into the oiled baking pan. Cover the pan and rest 7-10 hours at room temperature.

    Pizza Sauce & Toppings

    • Combine tomato sauce, basil, oregano, salt, and finely minced garlic clove in a bowl and whisk well.
    • Grate the mozzarella cheese on the large holes of a box grater. Store in the fridge if not using immediately.

    Focaccia Pizza Assembly

    • 30 minutes before you plan to bake, preheat the oven to 450°F with a baking steel on the middle or lower third rack. The focaccia dough will have relaxed and filled out the pan and look bubbly and jiggle slightly if you shake the pan. If it hasn't completely filled out the pan, that's okay, you can use the dimpling step to push it into all the corners.
    • Sauce and dimpling. Use the back of a spoon to gently dollop and spread the pizza sauce across the surface of the focaccia all the way to the edges of the pan. Coat your fingers lightly with olive oil and poke your fingers through the dough straight down until they hit the bottom of the pan. Repeat this all over the dough.
    • Cheese and toppings. Top the focaccia pizza with a layer of grated mozzarella cheese, then arrange the pepperoni slices in alternating offset rows of 2 and 3 slices with the pepperoni slices reaching the edges of the pan. Finish with a dusting of finely pecorino romano cheese. Let the focaccia pizza rest for about 10-15 minutes before baking.
    • Bake. Slide the pan directly onto the preheated baking steel and bake for 23-25 minutes until the cheese is crispy and browned on top. If it's browning unevenly, rotate the pan after 17 minutes and bake a few minutes more. Garnish immediately with ribbons of fresh basil.
    • Slice and serve. Let cool in the pan on a cooling rack for 10-15 minutes, then carefully remove to a cooling rack so the bottom doesn't get soggy (this part is awkward no matter what, just do your best to slide it out! Cut with scissors to serve.

    RECIPE NOTES

    • To keep track of what set of folds you're on, place 3 small snack items like M&Ms, crackers, pretzels, Skittles, etc. next to the mixing bowl. Eat one each time you do a set of folds.
    • For a longer rise time, make the dough the night before and refrigerate it in the covered baking pan overnight. Take it out of the fridge in the morning and let it rise 7-12 hours during the day at room temperature (70°F). 

    YOUR NOTES

    Click here to add your own private notes. Only you can see these.
    Tried this recipe?Leave a comment and let me how it was!
    BreadsPizzaBasilNo-mixerOvernight
    « Small Batch Crusty Bread
    Soft Baked 3-Hour Ciabatta Bread »

    Reader Interactions

    Comments

      4.92 from 37 votes (11 ratings without comment)

      Leave a Reply Cancel reply

      Your email address will not be published. Required fields are marked *

      Recipe Rating


    1. David Scarpetti

      April 27, 2023 at 9:01 pm

      Why the stretch-and-folds with this prep but not used for the overnight kneedless (both 80% hydration, but the focaccia w oil).

      Reply
      • Rebecca Eisenberg

        April 27, 2023 at 9:33 pm

        The fat prevents gluten formation and the folding helps build more strength and structure into the dough to control the way the air bubbles form in the pan. If you didn’t do the folding and just plopped the mixed dough in the baking pan it wouldn’t rise evenly and would have lots of little bubbles that collapse when you dimple instead of a strong yet delicate dough that can handle the dimpling.

        Reply
        • David Scarpetti

          April 28, 2023 at 6:34 am

          Thanks so much! Can't wait to try this.

          Reply
      • Wilson

        January 13, 2025 at 1:13 pm

        Thanks for the quick reply. Aside from the saran wrap issue, mine came out looking fine, up until it was cut into, where the center still appeared to be gummy even after the allotted baking time. Trying to figure out what I did wrong, as tops & sides were definitely browned nicely; I think longer time in things would have started to burn slightly.

        Reply
        • Rebecca Eisenberg

          January 13, 2025 at 2:58 pm

          Do you have an oven thermometer? It’s very possible your oven isn’t calibrated correctly. Also, did you use a baking steel underneath or an inverted sheet pan to put the pan on while baking? I know some people have skipped that step thinking it doesn’t matter but if you skip it you’re more likely to end up with an undercooked dough! If you’re sure your oven is calibrated correctly and you did use a sheet pan or baking steel underneath the pan, then it sounds like you did just need to bake yours longer!

          Reply
          • Wilson

            January 13, 2025 at 3:20 pm

            I used a pizza stone under the oan, preheated for 30 min. Everything i read suggests that maybe I cut into it too quickly, but will test out the oven thermometer idea as well; it's a fairly new oven so it's possible it could be off a bit.

            Reply
            • Rebecca Eisenberg

              January 14, 2025 at 12:33 pm

              Most ovens are off a bit — my last oven was off by as much as 50°F! And even if they are calibrated correctly, they often alert you that the oven is preheated a bit too early, so it's always good to have an oven thermometer so you know your recipes are going in and baking at the right temp.

    2. Meg G

      April 29, 2023 at 4:22 pm

      5 stars
      Please make this recipe! It is quite delicious and while time consuming, it is well worth it.

      I may have used a bit too much yeast as my dough was really risen two hours into its rise. I put it into the fridge until an hour before I was going to bake it. I did not use the sauce recipe as I already had some frozen, but the dumpling or the crust w the sauce really for the sauce integrated into it. If you can have a helper get you out of the pan after baking, that will help. I don’t have a baking steel, so I used a baking sheet. Cannot wait to make this for friends. Leftovers are also great and got the bottom crust extra crispy.

      Reply
      • Meg G

        August 13, 2023 at 8:47 pm

        5 stars
        Replying to ask a question: do you think the dough could be prepped overnight and do a cold rise in the fridge until early evening (maybe taken out two hours prior to cooking)? Looking for an adaptation to make it more work week friendly

        Reply
        • Rebecca Eisenberg

          August 14, 2023 at 10:33 am

          Yep! Depending on the temp of your kitchen or how much it’s risen in the fridge overnight you may want to take it out in the morning rather than just a couple hours before assembling. But an overnight rise in the fridge should be fine!

          Reply
          • Meg G

            August 17, 2023 at 9:04 am

            5 stars
            I did just that and it turned out very well. I did not use any meat toppings this time, but it was still just as phenomenal.

            Reply
            • Kerri Whittemore

              October 08, 2023 at 7:50 pm

              Loved it but my bottom didn’t get crusty. Maybe my stone wasn’t warm enough. But delicious

            • Rebecca Eisenberg

              October 10, 2023 at 10:24 am

              Sounds like you might need to check your oven temperature with an oven thermometer if you don't have one yet! What kind of pan did you use?

      • Barbara

        May 01, 2024 at 2:19 pm

        5 stars
        I made this recipe it is absolutely Amazing 👏
        My hubby and I loved it . So Delicious

        Reply
        • RAJESH KUMAR

          October 02, 2024 at 4:25 pm

          What the temperature you put 160 for 20 minit

          Reply
    3. Kate

      April 29, 2023 at 7:01 pm

      5 stars
      I’m usually a thin crust pizza girl, but I decided to try a pepperoni focaccia pizza for a change. The dough was so puffy and bubbly—melt-in-your-mouth good! It’s great when you're craving focaccia and want to make a meal out of it! I’d also consider cutting it into smaller pieces and serving as finger food at a party.

      Reply
    4. Kaitlin

      April 29, 2023 at 7:42 pm

      5 stars
      This recipe is INCREDIBLE and next time I have to make two because my family (including 3 picky kids under 5) devoured it!

      As always, Rebecca’s recipe and instructions were so user friendly and easy to follow. I have made her non pizza focaccia recipes several times so I was so excited for the new variation. The bottom was super crusty and the middle was soft and fluffy. I was so amazed the texture of the bread held up so well under the sauce and cheese! Make this recipe you will not be disappointed!!

      Reply
    5. Beth

      April 29, 2023 at 9:36 pm

      5 stars
      Was a total hit! The bottom of my pizza didn't crisp as much as I was hoping, but Rebecca's trick about putting in a non stick pan was a super easy fix! Will definitely make again. One of those recipes where a little effort in the morning is a total payoff for quick dinner.

      Reply
    6. Lesleigh

      May 02, 2023 at 9:37 pm

      This was AMAZING! I love how soft the inside was while having the crispy edges too. So perfect. I’ll 100% make it again. Mine ended up rising really fast. I need to do some research and see if the high altitude had anything to do with that. I just put it in the fridge for a couple hours then pulled it out in enough time to get back to room temp.
      Thank you for the recipe and for the step by step directions, photos and video. I feel so comfortable making your recipes for the first time because your directions are so detailed.

      Reply
      • Rebecca Eisenberg

        May 02, 2023 at 9:44 pm

        Ahh yay! I’m glad you liked it. And I don’t know much about adjusting for high altitude but either way you found the perfect solution to a dough with a quick rise — pop it in the fridge for a bit!

        Reply
        • Haley Dickerson

          April 18, 2024 at 3:23 pm

          Hello! If I’m not using that exact salt do I cut the measurement in half for both the dough receipe and the sauce recipe or just the sauce?

          Reply
          • Rebecca Eisenberg

            April 19, 2024 at 10:52 am

            No, the salt should be the same in the dough as long as you're weighing it. If you're measuring by volume, then you cut it in half.

            Reply
    7. Heather

      May 05, 2023 at 3:21 pm

      5 stars
      I tried making this today...and I will admit that I did not follow the recipe to the letter (I never do!). I used my own tomato sauce, just put on baby bocconcini, and parsley because I didn't have basil. I did do the dough as written.

      I don't have a 9x13 baking pan so figured I would use a baking sheet, which was bigger and so my pizza would be thinner (a half sheet). I liked the thickness, so that wasn't a problem.

      My only issue was the I don't have cooking spray so I just used olive oil and it stuck to the baking sheet. Turned out not to be a big deal - I scraped it off with a bench scraper without a problem and should be able to clean my (new!) baking sheet without a problem. To solve this I may use parchment paper next time. I also don't know if the issue is that I left it on stove while it was heating up and maybe that gentle heat encouraged sticking.

      Anyway, it was super tasty. The bottom is still kinda crispy despite my issues! This actually reminded me more of the pizza my ex's Italian mom makes - she buys dough from the bakery and spreads it out in a baking sheet.

      Great recipe! Was fun to make.

      Reply
      • Rebecca Eisenberg

        May 05, 2023 at 4:54 pm

        I think the lack of cooking spray is what caused it to stick to the baking sheet! If you don't have it, I'd use more olive oil next time and really make sure it fully coats the bottom of the pan. You may even want to use a paper towel to really get a full coating of oil and then do a drizzle of olive oil on top of that. I'm glad you enjoyed it even with all those changes!

        Reply
      • SharonM

        March 05, 2024 at 6:23 pm

        5 stars
        A little trick I learned to prevent sticking. Use a bit of butter to coat the bottom of the pan first and then add olive oil.

        Reply
    8. Christy

      May 06, 2023 at 6:47 pm

      5 stars
      I made this and baked it all in one day…
      So easy and so good…
      Thanks again for the easy and delicious recipes !

      Reply
    9. Maria Bisceglia

      May 21, 2023 at 9:27 am

      5 stars
      Made an excellent pizza! I have always had difficulty with focaccia dough and the instructions in this recipe were so easy to understand. Came out excellent. I don't have a pizza stone, so I followed the tip to use a dark cookie sheet preheated in the oven to set my pizza pan on, and it came out perfectly.

      Reply
    10. Annie

      June 09, 2023 at 12:18 am

      I bought the pan you mentioned, but the instructions say not to heat the pan over 450 degrees.

      Will this recipe still work at 450?

      Reply
      • Rebecca Eisenberg

        June 09, 2023 at 11:36 am

        Hi Annie! Thanks for alerting me to this — I've had my pan for so long that I wasn't aware of the 450°F max recommendation. I'm making the focaccia pizza again today and will bake it at 450°F to update the blog post with accurate baking info! I stand by the pan being a great option for this pizza, and clearly I've used mine a bunch at 475°F to make it without any issue, but I'd hate for you to buy a brand new pan to make a recipe that calls for a higher baking temp than recommended (it can damage the non-stick silicone coating!). It should work just fine at 450°F but may need a slightly longer baking time — if you're looking to make it ASAP I'd recommend adding 3-5 minutes to start, and don't be afraid to add more time in 1-2 minute chunks after that if needed. You can also drape a sheet of foil over the top if the cheese seems like its browning too much! Stay tuned for an official update on the blog in the next few days though!

        Reply
        • Annie

          June 09, 2023 at 12:30 pm

          Thanks so much! I hope it still works at the lower temperature!

          Reply
          • Rebecca Eisenberg

            June 09, 2023 at 7:52 pm

            Hi Annie! It does work at the lower temperature. I added an extra 3-5 minutes to mine just to really make sure the center was cooked through. You may want to let it rest in the pan for about 10-15 minutes to take advantage of carryover cooking after baking before taking it out of the pan and onto the cooling rack, too. I’ll update the blog post shortly but wanted to make sure you had the info you needed to make this asap!

            Reply
        • Susan

          March 08, 2024 at 4:16 pm

          2 stars
          Did not care for it. Too much bread

          Reply
          • Rebecca Eisenberg

            March 11, 2024 at 10:17 am

            LOL okay. You may find you prefer my thin-crust pizza dough in that case!

            Reply
          • John

            March 19, 2025 at 10:24 am

            Maybe best not to make a bready pizza recipe. Your comment is akin to a vegetarian following a pot roast recipe saying, "Didn't care for it. Too much meat."

            Reply
    11. Cecile Glendening

      June 12, 2023 at 10:09 pm

      5 stars
      This was spectacular! Very easy, followed all the tips (I have a baking steel). Loved the dimpling after putting the sauce on, that was different than other recipes I've seen. I froze some leftovers for about 3 weeks in a zip lock bag, and just used them, did a light defrost in the microwave and then into the toaster oven and it was just as good as fresh, I was really surprised how well it reheated! Also the flavor of the sauce was perfect!

      Reply
    12. Linda Cannon

      June 18, 2023 at 12:04 am

      YUMMY! Note - that you can adjust the recipe for the desired servings - I made the 8 service recipe in the recommended 9x13" pan - it was really thick - so next time I'm going to make the 5 serving recipe in the same 9x13" pan. I also erred, my fault, in thinking that toppings were like a normal thin crust pizza, and I didn't put enough sauce, pepperoni, and cheese to balance all the bread. All things I will adjust next time for our own likings. NONETHELESS - fabulous recipe - the bread it tender and the slow rise brings out the flavor. So easy, since you don't have to knead - just fold, rest, fold rest.... follow the directions. Thank you, Rebecca.

      Reply
    13. Hannah Phillips

      June 21, 2023 at 8:32 am

      Could you convert the ingredients for those who don’t have a scale?

      Reply
      • Rebecca Eisenberg

        June 21, 2023 at 2:06 pm

        Unfortunately, no! As per my FAQ: Measuring cups are very inaccurate and there is no set standard for what one cup of flour weighs. This means different online conversion calculators use different amounts and converting from weight to cups could mean you end up with almost a whole cup more or less flour than the recipe actually calls for. Measuring by weight is the most accurate way to make any baking recipe and will give you the highest rate of success! You are more than welcome to attempt your own conversions, but I can't provide measurements I can't personally vouch for. A kitchen scale is the number one tool that will make you a better baker across the board and there are many available for less than $15! I highly recommend picking one up!

        Reply
      • Wilson Dean

        January 12, 2025 at 8:34 pm

        Do you find any issue with cover of dough sticking to the dough, resulting in dough deflating once u pull it off? Or should saran wrap be lightly sprayed or oiled as well?

        Reply
        • Rebecca Eisenberg

          January 13, 2025 at 10:57 am

          I don't find that to be an issue but if you're finding it a problem you can definitely spray or oil the saran wrap on top!

          Reply
    14. Leann

      July 01, 2023 at 8:25 am

      This pizza was great! I liked getting to make the dough in the morning (vs overnight dough), and it felt like there was less cleanup because we didn’t have to worry about shaping the dough, getting the pizza stone dirty, etc. I will absolutely make this again!

      Reply
    15. Meghan

      July 08, 2023 at 6:54 pm

      5 stars
      This was phenomenal! Time consuming but well worth the wait!

      Reply
    16. Liz

      August 21, 2023 at 7:41 pm

      So good, and as always your recipes are so thoughtful, thorough, and easy to follow. Makes for such an easy dinner that just requires a bit of prep work!

      Reply
    17. Ann

      August 22, 2023 at 4:52 pm

      If I was to half the recipe for a thinner crust, how long should I proof for?

      Thank you

      Reply
      • Rebecca Eisenberg

        August 23, 2023 at 9:57 am

        Should be about the same time, I think. I've done half batches in a smaller pan and it still needs the full time. You'll have to trial and error it a bit — it will also depend how warm your kitchen is!

        Reply
    18. Samantha

      September 17, 2023 at 4:47 pm

      5 stars
      This was absolutely delicious! I made it for lunch today and I was blown away. The crust was thick but light and crispy on the edges. I used the baking sheet method as I do not have the baking steel. I added cheese and pepperoni on my pizza. I will definitely be making this again!

      Reply
    19. Laurel

      October 22, 2023 at 7:43 pm

      Great recipe! Easy to follow! I used a large rimmed cookie sheet and the crust had a nice rise. Delicious pizza that yielded about 16 ample slices. It was a great crowd pleaser. I will definitely make this again and again! Thank you!

      Reply
    20. Sue Kuhr

      January 08, 2024 at 9:12 am

      If you doubled it and put in a larger sheet pan would you bake it the same amount of time?

      Reply
      • Rebecca Eisenberg

        January 08, 2024 at 10:45 am

        I'm not sure as I haven't tested it — it will depend a bit on how thick the dough is. I wouldn't say to double it outright as pizzas are generally thin — maybe try adding 10 minutes to start, see how it looks, check again after another 5, etc. until it looks done. You may need to tent a sheet of foil over the top to prevent the cheese from browning too much too! If you try it please let me know how it turns out!

        Reply
    21. Katie

      January 18, 2024 at 5:09 pm

      If you are using the overnight recipe, do you still do the stretch and folds? Do you put it into the pan and rest overnight in the fridge or keep it in the bowl?

      Thanks

      Reply
      • Rebecca Eisenberg

        January 18, 2024 at 7:05 pm

        Yep, still do the stretch and folds and put it in the pan. Then put the whole pan in the fridge for the overnight rise!

        Reply
        • Katie

          January 18, 2024 at 7:12 pm

          Awesome, thank you!

          Reply
          • Tracy

            February 24, 2024 at 8:31 am

            5 stars
            This re ipe is great! Instead of putting the olive oil into the sprayed pan, I sprayed the pan, put parchment paper down and then added the oil. Made it sooo much easier to get out of the pan, and the bottom was nice and crusty! Question though, why scissors instead of a pizza cutter or a pizza rocker? The rocker makes it so easy to cut in 1 motion.

            Reply
            • Rebecca Eisenberg

              February 27, 2024 at 9:49 am

              I don't have a pizza rocker and the pizza wheel gets all gunked up because of how thick the pizza is. I find the scissors are easiest!

    22. Jackie B

      January 31, 2024 at 9:42 pm

      5 stars
      I have made this recipe four or five times and it has come out perfectly every time!! I was so intimidated to make bread, but Rebecca’s recipe is so well-thought out and specific that I dare say this recipe is fool-proof. I can’t recommend this recipe and Rebecca as a creator enough!

      Reply
    23. Jennifer W

      March 03, 2024 at 1:15 pm

      I’m in love with this recipe. The crust is light crisp, and fluffy, great taste. Rises for a long time, but I’ve shortened it (5hours on counter) when I didn’t have all day and it was still perfect

      Reply
    24. Clarence E. Gary

      April 03, 2024 at 1:14 pm

      5 stars
      Restaurant quality Focaccia Pizza, but the bottom of the dough didn't crisp up.
      I followed your instructions to the "Tee," except for the following:
      - My layering was Steel, 13 by 9 inch oiled metal bkg pan, oiled parchment paper and the Focaccia Pizza (which was refrigerated over night).
      - Baked in "Electric Convection" oven @ 450 F for 28 minutes.
      Could the oven type (Convection vs. Conventional) have been the problem? Or, was it the "parchment paper" adding too many layers preventing the air circulating heat from penatrating thru to the bottom of the Focaccia?

      Reply
      • Rebecca Eisenberg

        April 03, 2024 at 2:14 pm

        Hmmm, that's very perplexing that the bottom didn't crisp up, especially if you baked it on a baking steel! I don't have a convection oven so it's hard for me to say if that may have caused it. The parchment paper shouldn't have made too much of a difference, but it might be worth testing without it! You could also try bumping the heat up to 475°F, or giving the baking steel longer to preheat before sliding the pan on to it. So glad you enjoyed it, regardless! Do let me know how it turns out if you try any other modifications to get that crispy bottom.

        Reply
        • Clarence E

          April 03, 2024 at 5:56 pm

          5 stars
          Prior to lowering the Convection (Elan) oven's temp to 450 F, I preheated it to 500 degrees F (w/ baking steel inside) for over an hour. Realizing the bottom of the Focaccia Pizza wasn't crisp, I heated a square of it in my (Cuisinart) toaster oven and it did the trick. This afternoon, the wife wrapped another square (that had been refrigered) in foil and placed it in our Wolfe oven at 350 F for 5 to 8 minutes. This procedure also did the trick.
          Mayybe, the culprit is using an Italian Convection oven vs.an American Convential oven? For the former, the Time & Temperature may have to be changed/adjusted?
          Thanks
          CEG

          Reply
          • Rebecca Eisenberg

            April 04, 2024 at 11:01 am

            Ah, yeah, unfortunately I'm not too familiar with all the differences between oven types — all I can tell you is what oven I used and how it worked in my oven. You'll have to do some googling to figure out what kind of conversions you might need for your specific oven!

            Reply
    25. Carolyn

      April 09, 2024 at 3:53 am

      Do you think this recipe would work with a gluten free flour mix such as Caputo Gluten Free Pizza flour? This flour is amazing in other bread recipes!
      https://caputoflour.com/products/caputo-gluten-free-flour

      Reply
      • Rebecca Eisenberg

        April 09, 2024 at 10:24 am

        I haven't tested it, so I'm not sure! If it works well in other bread recipes, I'd suggest giving it a try! Maybe try it with my mini focaccia first to see how it does before you go for the full size pizza version?

        Reply
    26. Chris

      April 19, 2024 at 10:26 am

      Great recipe! Am I halfing the salt in the dough recipe as well if I don’t have that brand?
      Thanks

      Reply
      • Rebecca Eisenberg

        April 19, 2024 at 10:51 am

        Yes!

        Edit: Wait, I just double checked how I wrote the recipe and no, the salt should be the same in the dough regardless of brand as long as you're weighing it. If you're measuring by volume, then you cut it in half.

        Reply
      • Kim

        November 04, 2024 at 10:47 pm

        Maybe a silly question but can you use other toppings like sausage, olives mushrooms etc. or would they mess with the hydration of the dough?

        Reply
        • Rebecca Eisenberg

          November 05, 2024 at 10:31 am

          You can absolutely use other toppings! They're not getting mixed into the dough so you'll be just fine!

          Reply
    27. Chris

      April 20, 2024 at 3:12 pm

      👍

      Reply
    28. Lisa

      June 23, 2024 at 8:40 pm

      5 stars
      Amazing!!!! Love this pizza!

      Reply
    29. Megan S

      June 23, 2024 at 10:31 pm

      5 stars
      Delicious and easy to follow, as always! I wanted a thinner crust, so I baked on a cookie sheet and let the dough spread out more - turned out perfect! I also used store bought sauce, since we had some. I grabbed it straight from the fridge, but next time, I’ll take it out earlier so it isn’t quite so cold on the dough.

      I caught my fiancé taking a pic of the leftovers cuz he wanted a reminder of how good it was 😂

      Reply
    30. Steve H.

      September 24, 2024 at 10:16 pm

      This recipe works out to be a hydration level of 80%. How in the world do you stretch a dough that wet and sticky? And will the dough completely fill the pan on its own? Thanks.

      Reply
      • Rebecca Eisenberg

        September 25, 2024 at 1:44 pm

        Stretching the dough works just like I explained in the blog post and recipe! The first set of stretches you might see a little tearing but after that it's pretty easy to stretch. You can watch the video if you want to see how the dough handles. And yes, the dough will fill the pan on its own.

        Reply
        • Steve H.

          September 25, 2024 at 5:34 pm

          Thanks for the prompt reply. Somehow I overlooked the video. Seems easy enough. I have another question, though. When I make a Sicilian pie, I put the sauce on before the rise, so not to deflate the dough by being heavy-handed with the sauce if applied later. Would that work with this dough? Thanks.

          Reply
          • Rebecca Eisenberg

            September 26, 2024 at 10:45 am

            It'll work! I would worry about the sauce absorbing into the dough during the long rise time though — you'll have to play around with it and see how it goes! You may find you want to apply more sauce after the rise too.

            Reply
            • Karin

              May 04, 2025 at 6:18 pm

              Do you use all the tomato sauce?

            • Rebecca Eisenberg

              May 05, 2025 at 11:01 am

              Yep!

    31. Josephine

      January 10, 2025 at 2:26 pm

      5 stars
      This is the best pizza. One of my family favorite recipes.

      Reply
    32. Amanda

      January 17, 2025 at 9:08 pm

      5 stars
      I just have to echo everyone. This is such a great recipe to follow! I used my scale and dough whisk for the first time and this was a foolproof way to test them out! We have a Proof setting on our oven and that worked out well for the dough to hang out while at work all day. We used a baking stone and baked for 24 min. Love the tip to cut with kitchen shears! Thank you- my kids asked if I could make it again tomorrow!!!

      Reply
    33. Rachel

      February 21, 2025 at 9:19 pm

      5 stars
      This was easy and delicious! Incredibly fluffy without being too much bread for a pizza. My whole family of six approved.

      Reply
    34. Angela

      March 07, 2025 at 1:11 pm

      5 stars
      This is the perfect pizza! I add the seasoning to the dough too! Soo good. It’s in our weekly rotation for dinner.

      Reply
      • Rebecca Eisenberg

        March 07, 2025 at 2:02 pm

        So glad you're enjoying it Angela!! Love the idea of adding the seasonings to the dough too. Genius move!

        Reply
    35. Katy

      March 20, 2025 at 4:45 pm

      5 stars
      Hello! When I made the dough it rose and fell within 4 hours - baked at 7. My kitchen is about 70-71°f usually. Should I plan to bake it before it falls next time? I still baked it and it was delicious even with a crispy bottom without a baking steel (that's on my Christmas list now!). It just didn't "behave" as I expected it to, if you know what I mean.

      Reply
      • Rebecca Eisenberg

        March 24, 2025 at 3:54 pm

        Always best to bake it before it falls! If you want to let it rise at room temp for a few hours and then pop it in the fridge once it mostly fills out the pan to slow it down so the timing is right you can always do that too.

        Reply

    Primary Sidebar

    rebecca wearing a black t-shirt with her left hand on her hip and her right hand holding a whisk upright

    Hi, I'm Rebecca! I'm a pastry chef with a home cook mentality. I'm on a mission to make spending time in the kitchen fun and accessible — that's why so many people love my beginner-friendly bread recipes. I'm always looking for new and creative ways to get the most out of my favorite ingredients and flavors!

    More about me →

    Seasonal Favorites

    • fluffy honey butter piped in a rosette in a glass jar. a honey wand is in front of it.
      15-Minute Homemade Whipped Honey Butter
    • dipping a torn piece of bread in the seasoned olive oil dip.
      Olive Oil Bread Dip
    • Arugula And Prosciutto Pizza
    • smoked turkey legs on a plate
      Better-Than-Disney Smoked Turkey Legs

    Get in touch

    Want to work with me? Just have a question? Shoot me an email!

    rebecca@thepracticalkitchen.com

    Treat Yourself

    • the best plus size aprons
      15+ Places to Buy Plus Size Aprons
    • college kitchen basics
      17+ College Kitchen Basics you Actually Need (and What You Don't)
    • 15+ best salt cellars for any kitchen.
      15+ Best Salt Cellars to Keep on Your Counter
    • flour storage containers for 5 lbs of flour
      Flour Storage Containers That Fit Five Pounds of Flour

    Footer

    About Me

    • Facebook
    • Instagram
    • Pinterest
    • Twitter

    Journalist turned pastry chef, on a mission to make cooking and baking fun and accessible. I'm always looking for new and creative ways to get the most out of my favorite ingredients and flavors! A Pittsburgh native currently calling Boston home.

    My Favorites

    gift guide: kitchen tools for clumsy people
    three cake cones with scoops of ice cream topped with pieces of cinnamon toast crunch ice cream are lined up in a row
    a dark chocolate bundt cake with white icing drips and crushed oreos around the top of it.

    Popular Bread Recipes

    • Loaf pan focaccia
    • Crusty bread
    • Ciabatta bread
    • Everything bagels
    • No knead bread
    • Brioche buns
    • Pretzel bites

    Pizza Essentials

    • Thin crust pizza dough
    • Thick focaccia pizza
    • How to stretch pizza dough
    • White pizza sauce
    • Pizza sauce recipe
    • Prosciutto arugula pizza
    • Hot honey pizza

    Scratch-Made Staples

    • Cold brew coffee
    • Homemade hot sauce
    • Chex mix seasoning
    • Everything bagel seasoning
    • Bagel chips recipe
    • Homemade butter
    • Olive oil bread dip

    Footer

    ↑ back to top

    Links

    • About
    • Recipe Search
    • Editorial Policy
    • Privacy Policy
    • FAQ

    Newsletter

    • Sign Up! for emails and updates

    Resources

    • Shop
    • Links & Resources
    • Cooking Tips
    • Web Stories

    As an Amazon Associate I earn from qualifying purchases.

    Copyright © 2025 Foodie Pro on the Foodie Pro Theme

    Rate This Recipe

    Your vote:


    A rating is required
    A name is required
    An email is required

    Recipe Ratings without Comment

    Something went wrong. Please try again.