

Loaded with a salty garlic paste, fresh herbs, and a small mountain of parmesan and mozzarella, this ultra-cheesy ciabatta garlic bread is the perfect appetizer or side dish. It's great with my homemade roasted garlic olive oil ciabatta bread, though store-bought ciabatta is also fine. It’s also ready in just 20 minutes, making it the perfect quick garlic bread side dish!

Why ciabatta bread for garlic bread? Unlike denser breads, I think ciabatta's thick floury crust and airy crumb makes the most amazing garlic bread because the sices are are crispy and light while still soaking up tons and tons of garlic flavor.
Because the inside of the ciabatta bread is so airy, it toasts and dries out slightly in the oven which makes it perfect for soaking up lots and lots of red sauce!
The spread of raw garlic paste gives an intense extra-garlicky flavor that mellows just slightly under the heat of the broiler. And that double cheesy bubbly layer on top is literally everything you want in a slice of crusty garlic bread.
To make this garlic bread recipe with ciabatta, I like using my roasted garlic olive oil ciabatta bread as a base. It's a little more time-consuming to make the bread too but so worth it, imo. The roasted garlic in the bread is so good, with even more garlic and cheese toasted on top! That's what I used in these photos; my ciabatta loaf was about 15 inches long, 6 inches wide, and 2 inches tall.

How to Make Garlic Paste
The first step is to make a garlic paste. I usually do this with a knife on my cutting board, but you can also use a mini food processor or a zester. I like making garlic paste with a knife because it gives me a chance to add salt to the garlic.

Smash the garlic flat with the flat side of the knife blade. Sprinkle with salt.

Chop roughly with the knife to break the garlic down a little more.
The salt works as an abrasive, breaking down the garlic cloves and drawing moisture out, turning the garlic into a paste.
Hold the knife at a roughly 20 degree angle and press down on the blade with your other hand. Smear the garlic in a thin layer across the cutting board. Repeat the chopping across the smeared layer of garlic. Sprinkle more salt on top, then repeat the process of gathering the garlic in a pile, smearing it across the board, and chopping... until it forms a paste-like texture.


KNIFE SAFETY TIP: Always keep the sharp knife edge facing away from the hand resting on the blade. In these photos, my husband is left-handed, so he started the garlic pile on the left side of the board. When he puts his fingers on the blade to apply pressure, the knife edge is facing away from his hand. If you're right-handed, start the garlic pile on the right side of the cutting board.
Ciabatta Garlic Bread Assembly and Baking
I tested slicing the ciabatta bread a few different ways when making this cheesy garlic bread recipe. The best way, I have decided, is to cut slices about 1-2" thick across the narrow width of the bread.
This gets better airflow in the oven so the whole piece of ciabatta garlic bread becomes really nice and crispy. I broil the slices twice: before and after adding cheese.


By first popping the plain buttered garlic bread under the broiler before adding cheese, the garlic has a chance to brown and roast, giving it a mellower and more complex garlic flavor. Then I add the cheese, and broil again which melts the cheese and prevents the garlic from burning.
For the cheese, I usually grate the Parmesan cheese by hand with a fine grater like a Microplane zester. I think it melts much nicer that way than using the pre-grated stuff.
Same with the mozzarella cheese. For this cheesy garlic bread recipe, I use low-moisture, part-skim mozzarella cheese and grate it myself for the best melt. Different types of mozzarella melt very differently, so if you want a good amount of melting + browning without it all sliding off your garlic bread, low-moisture, part-skim mozzarella cheese is where it's at. To make the soft mozzarella cheese easier to grate, pop it in the freezer for 5-10 minutes before grating

When the cheese is melted, bubbly, and slightly browned on top, I finish by sprinkling fresh herbs over top. For extra-buttery ciabatta garlic bread, brush the slices with melted butter when they come out of the oven. Then add the fresh herbs to finish.
Adjusting for Your Oven's Broiler
I did all of my recipe testing for this ciabatta garlic bread using the broiler setting on my countertop toaster oven. You may need to adjust the cooking times based on how intense your oven's broiler is. And definitely don't walk away while these are toasting!
I wrote the recipe with a range of toasting times to help with this, but my best advice to prevent burning is to check on them frequently. Broilers are very intense, direct heat, you won't be hurting anything by opening the oven door to check on them.
If you are using your home oven broiler rather than a toaster oven, position the oven rack so it is about 5-7 inches away from the broiler unit. You may also want to rotate the sheet pan to get even browning.

📖 Recipe
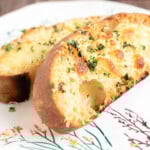
Crispy Ciabatta Garlic Bread Slices
Recipe Notes
- If using your home oven, arrange the oven rack so it is 5-7 inches below the broiler unit. Check on the slices after 1 minute to see how they're browning — they may be done or you may want to rotate the pan for even toasting!
- To freeze: As soon as the garlic bread cools to room temperature pop the sheet pan in the freezer. Then store the frozen slices in an airtight container with as much air pressed out as possible for up to 3 months. To reheat: 350°F for 8-10 minutes or until warmed throughout and the cheese melts. This works best if you freeze before adding the herbs. Add the herbs right before serving.
- If you're using older garlic cloves, you might see the garlic turn green or even blue when it roasts. Don't worry, it's still totally normal and safe to eat. It does have a stronger flavor though, so watch out for that garlic breath!
- Bonus option: Use my roasted garlic and chive compound butter in place of the garlic and butter.
- I have seen the joke about how people always triple the amount of garlic a recipe calls for and I'm going to caution you against that here. A little goes a long way when it comes to the garlic paste. I only used about ⅛ to ¼ teaspoon per slice of bread and after a few batches for recipe testing I actually found the point at which I could not handle even one more bite of garlic. It is a very intense garlic flavor! Spread a very very very thin layer or you will be sweating garlic after dinner.
Ingredients
- 1 loaf roasted garlic ciabatta bread
- 8-12 cloves garlic (about 2-3 tablespoons garlic paste)
- ½ teaspoon diamond crystal kosher salt (use half as much of any other brand)
- 6 tablespoons soft, unsalted butter (about ½ tablespoon per slice)
- 1 cup parmesan cheese (finely grated)
- 1 cup low-moisture, part-skim mozzarella cheese (finely grated)
- 1 tablespoon minced fresh herbs (oregano, basil, parsley, or a combination!)
Instructions
- Make the garlic paste. Use the flat side of of your knife under the heel of your hand to smash the garlic cloves. Tilt the blade of the knife slightly down toward the cutting board to protect your hand. Rock the knife blade back across the smashed garlic, then drag the flat of the knife (with the sharp edge tilted down toward the cutting board) across the garlic to smear it into a thin layer. Sprinkle with a pinch of salt, then cut across the garlic, gather it up into a pile, smear, and repeat until you have a very fine garlic paste.
- Preheat the broiler of your oven or toaster oven. Line a sheet pan with aluminum foil or a silicone mat.
- Assemble ciabatta garlic bread. Slice the ciabatta about 1½" thick. Spread one side with a thin layer of softened butter and about ⅛-¼ teaspoon garlic paste. NOTE: Make sure the cheese is grated and herbs are minced and ready to go before proceeding to the next step!
- Bake. Arrange the ciabatta garlic slices on the sheet pan and broil for 2 minutes. Remove from the oven, top with parmesan and a small amount of mozzarella, then broil 2 more minutes, until the cheese starts to brown slightly on top (you may need an additional minute, depending on your oven). Remove from the oven, top with fresh herbs, then broil 1 minute more. Serve immediately.
Robert I Finger says
Love the crunch this bread has with my favorite Italian dishes and a bold red wine. Thank you. The Fingers
John Collard says
I haven't tried this - yet.
But, don't you think that making it with a 2 inch thick slice of bread is rather too thick?
I would have thought that half inch to one inch thick would be plenty??? Maybe 2 cm??
Rebecca Eisenberg says
Clearly I don't think so, given this is how I wrote the recipe. But if you prefer a thinner slice, you can absolutely use a thinner slice!