

This simple rosemary parmesan bread recipe produces a rustic, fragrant loaf of crusty bread that is so perfect toasted and slathered in homemade butter, used to make a crusty grilled cheese, or torn into chunks and dipped in your favorite chicken soup. It's about 10 minutes of hands-on time to mix the dough; then it has a long, slow overnight rise before baking up with a crunchy crust in a Dutch oven.

This beginner-friendly bread is a riff on my base no-knead overnight Dutch oven bread recipe, keeping the same moderate 80% hydration level while adding tons of flavor from fresh rosemary and parmesan cheese.
As far as cheesy no-knead bread goes, think of this as a more subtle and delicate version of my higher hydration no-knead cheddar jalapeno bread, which has a looser shape and is absolutely loaded with intense cheese and hot pepper flavor.
As a recipe developer and home cook I'm always looking for ways to make ingredients I use for recipe testing work in as many recipes as possible. I never want to let anything go to waste. This recipe came about when I found myself with extra rosemary on hand. I wanted to find an easy and simple way to use it up, and I had been planning on making bread anyway... so into the dough it went.
The long overnight rise gives the oils in the rosemary and the parmesan plenty of time to infuse the whole loaf with a ton of flavor.

When making a no-knead bread I always like to use water that is cool or lukewarm to the touch. I don't use warm or hot water for this bread recipe, because it speeds up the yeast activity and the dough will rise too quickly.
I usually use one robust sprig of fresh rosemary when making this bread. If I'm using dried rosemary, I cut the amount of rosemary in half and give it a quick chop on my cutting board before adding it to the dough.
For the cheese, I find this recipe works best when I use a wedge of Parmesan cheese that I grate by hand with a coarse paddle grater or fine rasp-style Microplane zester. The super fine curly-cue shavings of Parmesan melt into the dough really nicely.
How I Make Rosemary Parmesan Bread
First I mix the dry ingredients together to disperse everything throughout the flour for more even mixing.

Then, I add the cool water and mix everything together until I have a sticky, messy, lumpy dough with no dry patches of flour.
Finally, I cover the bowl and let it rise at room temperature overnight. No-knead bread relies on time to develop a gluten network — the structure that gives bread its shape and texture. The gluten network traps the gas produced by the yeast, creating air bubbles in the dough.
Thanks to the long slow rise time, I have a pretty big window in which this rosemary parmesan bread dough will be at its peak for shaping.


Perfectly proofed no-knead bread dough will have a bubbly top that is flat or slightly domed and stretches across the mouth of the bowl.
For an even longer rise: Put the dough in the fridge immediately after mixing or after the first overnight rise. I've left it for as long as 5 days in the fridge before baking, and it turned out just fine. As a bonus, gluten tightens up in the cold, meaning cold dough is slightly easier to shape.
I shaped and baked this rosemary parmesan bread in an oval, but you can shape it however you want. If you'd rather do a round loaf, check out my base overnight no-knead bread recipe for those shaping instructions!


Cup your hands around the back of the loaf and gently drag it towards your body to create just the slightest bit of surface tension and smooth out the top of the loaf.
Immediately before baking, take a sharp knife or lame and slash the top of the loaf.

Baking in a Dutch Oven
The confined space of a pre-heated Dutch oven traps the steam released by the dough as it bakes, creating a nice moist environment which results in a nicely risen loaf with a super crunchy crust.
Transfer the bread in the Dutch oven, cover it with the lid, and place it in the oven.


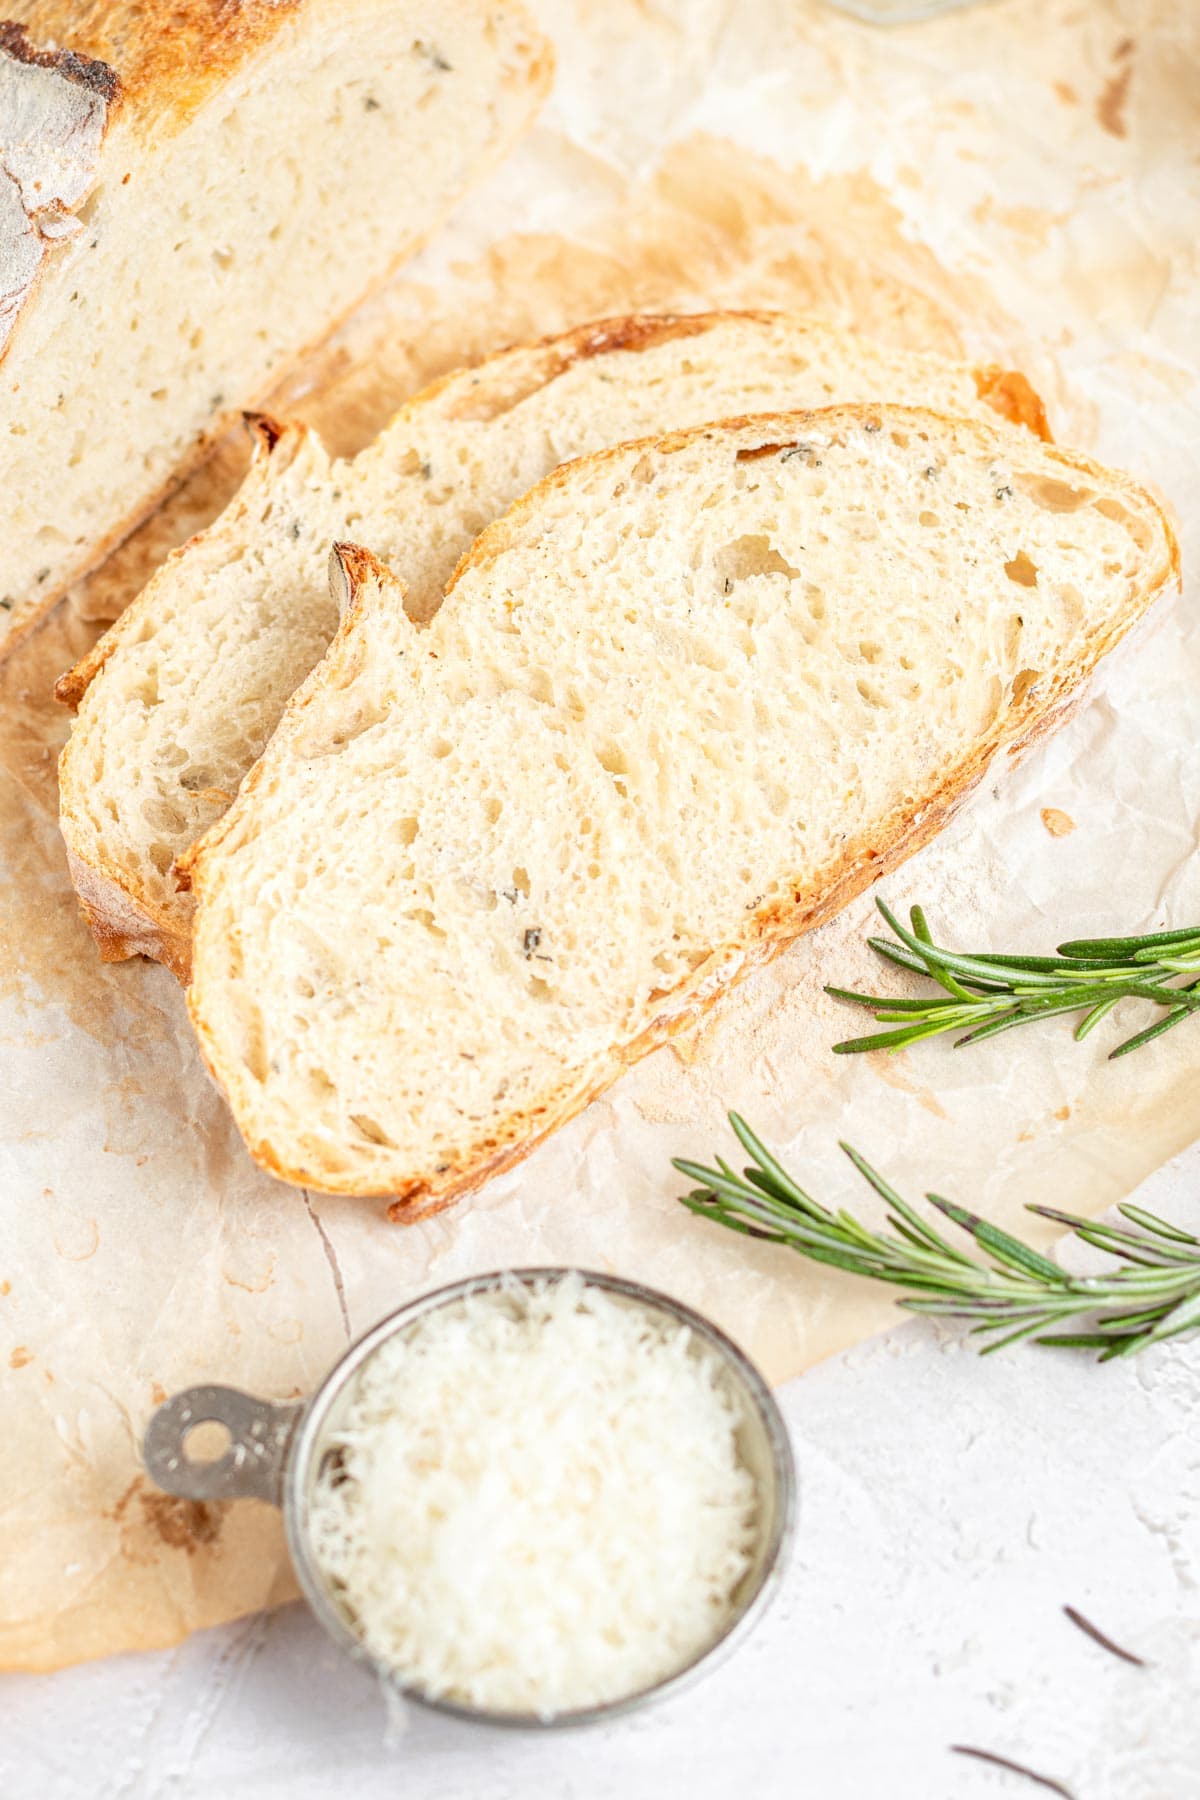
Let the rosemary parmesan no-knead bread cool completely before slicing it. If you slice it before it has cooled, the steam still trapped in the bread will turn the starches to mush.
💭 Have More Baking Questions?
I've rounded up answers to common baking questions and how-to guides, including:
- Ingredient swaps and FAQs
- Why my recipes are written in grams and not cups
- How to quickly bring eggs and butter to room temperature
- Ingredients I use (salt, flour, yeast, etc.)
- Step-by-step guides for bread and baking techniques
See my baking techniques & troubleshooting guide and ingredient swaps and FAQs for more!

TL;DR - Recipe Summary
- Mix the flour, salt, yeast, rosemary, and parmesan cheese. Add the water and mix into a sticky dough.
- Cover and rise for 18-24 hours at room temperature.
- Turn the dough onto a well floured surface. Dust lightly with flour.
- Shape the dough into an oval or round loaf. Transfer to a crumpled and flattened sheet of parchment paper.
- Dust the top with flour, cover and rest 30 minutes while the Dutch oven preheats at 450°F.
- Score the top of the dough. Then place the dough in the Dutch oven.
- Bake for 30 minutes covered, then 10-15 minutes uncovered.
- Let cool completely before slicing.
📖 Recipe

No-Knead Rosemary Parmesan Bread in a Dutch Oven
Recipe Notes
- Gluten firms up in the fridge; if you find the sticky dough is too hard to handle at room temperature, you can pop it in the fridge for up to 2 days prior to baking. It will be much easier to shape while it's cold. Let it rest at room temperature for 1 hour after shaping and before baking.
- To freeze: Slice the baked bread, then place in an airtight bag in the freezer with as much air pressed out as possible. Reheat from frozen in a toaster for 2-3 minutes.
- Getting a nice tall loaf of bread depends on proper proofing, your shaping technique, and can be affected by the size of your Dutch oven. If you used a bigger Dutch oven, if your dough was overproofed at all, or if you didn't create enough gentle surface tension when you shaped the dough, these are all things that can cause a loaf to bake up with a flatter shape.
- If using a banneton or brotform, dust the basket well with rice flour, then transfer the shaped loaf of dough smooth side down into the basket. Cover and refrigerate overnight. Then proceed with the recipe as written!
- For a long, cold rise, refrigerate the dough immediately after mixing or after at least 12 hours at room temperature. It will be fine in the fridge for up to 5 days!
- Small-Batch Bread: To make a rosemary parmesan version of my small batch crusty bread which uses just 120 grams (one cup) of flour, follow that recipe but add 4 grams of parmesan and 1 gram (rounded out to about ¼ teaspoon) minced fresh rosemary.
Ingredients
- 390 grams all-purpose flour
- 7 grams diamond crystal kosher salt (see notes for other types of salt)
- 2 grams instant yeast (use 1 gram if its warm in your kitchen)
- 15 grams parmesan cheese (finely grated)
- 2 grams fresh rosemary (1 tablespoon, finely minced)
- 312 grams cool water
Instructions
- Mix your dry ingredients (flour, salt, yeast, rosemary, parmesan cheese) together in a large mixing bowl. Make a well in the center of the dry ingredients for the water.
- Pour the cool water into the middle of the dry ingredients and mix until well combined. It will be shaggy and messy. That's okay. Cover the bowl and set it aside at room temp to rest for 18-20 hours (or in the fridge for up to 7 days). You're looking for the dough to double or triple in size with a flat or slightly domed, bubbly top.
- Preheat. During the final hour of the rise time, preheat the oven to 450°F. When the oven reaches temperature, place a Dutch oven inside, covered, and let it preheat for 30 minutes at 450°F. Crumple a piece of parchment paper into a ball. Flatten it out, then crumple and flatten it out again.
- Shape. While Dutch oven preheats, generously flour a clean countertop. Gently release the dough from the sides of the bowl and turn it out onto the counter. Dust the top lightly with flour, just enough so your hands don't stick. Gently stretch the dough into a loose square. Dust any excess flour off the top. Fold the top two corners of the dough down into a point, then fold the point down over the middle of the dough to begin rolling it up into a loose log. Continue rolling, tucking the sides in as needed, until you have a log of dough with the seam side against the counter. Cup your hands around behind it and gently drag it forward to create some slight surface tension and smooth out the loaf.
- Use the bench scraper to lift the loaf onto the flattened piece of crumpled parchment paper. Dust the surface of the dough lightly with flour, cover it with a clean dish towel, and let it sit until the Dutch oven finishes preheating.
- Score the top of the loaf to create a vent for steam to escape. Carefully remove the Dutch oven from the oven. Take the lid off and set it aside. Use the parchment paper as a sling to pick the dough up and place it inside the Dutch oven. Put the lid back on the Dutch oven.
- Bake with the lid on for 30 minutes (don't peek!), then remove the lid and bake another 10-15 minutes until deeply golden brown on top.
- Transfer the fully baked loaf to a cooling rack and let cool completely before slicing.
Mary says
This bread is over the top delicious! Perfect for toast, sandwiches, but the best way is warm from the oven with butter. Go ahead and give it a try, you will not be sorry!
Rebecca Eisenberg says
Yesss you really can't go wrong with warm and toasted + butter! 🙂 Enjoy!!
Joan S says
So I loved the flavor but it came out doughy and not crusty enough. After i took the lid off I baked it another 15 minutes. Any ideas on what I may have done wrong? I want to try it again.
Rebecca Eisenberg says
Hi Joan! Let's troubleshoot this! My first question is always: Did you use a scale to measure by weight? If you did, then my next question is: Do you have an oven thermometer to check that your oven is at the right temperature? Sometimes if your oven runs too hot the outside of the bread can bake and set faster than the inside expands, giving it a gummy texture, and if your oven is too cool the bread may be underbaked! Finally, if you're sure your oven is at the right temperature, my third question would be: Did you let the loaf cool completely before slicing it? If the bread is still warm when you cut it, the steam trapped inside will turn the starches to mush giving you a doughy, gummy bread.
Let me know if you think any of those things may have caused your issue!
Lisa Clay says
This crusty rosemary parmesan bread is amazing and SO easy! My son actually requests that I bake this bread. He loves to eat it with soups and stews. I grew rosemary specifically for this recipe!
Rebecca Eisenberg says
Rosemary is one of my FAVORITE herbs to grow! I have a bunch of other rosemary recipes here if you're looking for more ways to put it to use! Enjoy the bread!
Patty says
I’d like to try this with my sourdough starter. Any hints? thanks
Rebecca Eisenberg says
I’d still recommend using at least 1g commercial yeast, but you can replace 50g water and 50g flour with 100g fed sourdough starter or discard! I’m not sure it can be entirely leavened by sourdough starter in the time periods given, so I can’t guarantee what kind of bread dough texture and consistency you’d get for shaping. You’d have to play around with it a bit, and the dough may need a few folds during the initial bulk fermentation period. Good luck!
Maria says
How would one go about diving this into mini multiple mini loaves? I’d like to pop one in the over daily for just two people.
I have King Arthur Organic Bread flour, 00, and organic AP flour; which do you recommend for these no-knead crusty loaf recipes?
Thank you! ☺️
Rebecca Eisenberg says
As per the ingredient notes in the blog post, I use King Arthur AP flour for my no knead loaves! You could use a blend of both if you want, but I find the regular AP flour works just fine. For mini loaves just divide the dough after it rises and shape smaller rounds. You'll have to bake them individually unless you have multiple dutch ovens. Follow the shaping and baking instructions from my small batch crusty bread recipe. You may have to adjust the baking time as well.
L says
Hi! Is there a way to execute this recipe without a Dutch oven? Would any settings with a convection oven, instant pot or cast iron work?
Rebecca Eisenberg says
I answered this in the FAQ on the post! I haven't tested this with an instant pot, a convection oven may need the temperature adjusted.
L says
Hi Rebecca, I found the Faqs *after* I posted the question 🤦🏾♀️. I tried it in the small convection oven we had and it surprisingly developed the brown crust, I was not expecting that to happen. I know it was not perfect, and only my first time trying it, but I am so excited and love this recipe! Will try it again after following the information in the Faq. Thanks for responding and for this easy to use recipe with great instructions & tips.
Rachel says
I am making this for the fourth time tonight! It comes out perfect every time - soft in the middle, crusty outside, absolutely delicious!
Aleksandra says
Hi, I've measured everything by weight but after 18 hours my dough was veeeery sticky and runny. Could it be because of the climate outside (damn winter)? Do you think that proofing in the fridge or just using less water/more flour would help? It baked well and tasted good (a bit yeasty though) but it was really low/flat.
Rebecca Eisenberg says
Hmmm it sounds like you may have made a measuring error with the scale (human error, it happens!) or your yeast might not be active. Some scales also have a hard time accurately measuring the smaller amount of yeast so it may just be that you didn’t have enough. It may also be your environment, like you said! In the future maybe try a slightly lower hydration — reduce the water by 10, 15, or maybe even 20 grams and see if that helps.
Yvonne Hertel says
I made this for the first time today and it's PERFECT! I usually struggle to get bread recipes to turn out well, and I was pleasantly surprised at how easy this is and how great it turned out. This recipe will be on repeat in my kitchen now.
Rebecca Eisenberg says
Oh yay, I'm honored to have been responsible for your first bread recipe success! Wishing you many more happy loaves of bread!
Jackie says
Looking forward to trying this recipe! Can you use bread flour or does it have to be all purpose?
Rebecca Eisenberg says
Bread flour will work!
Erica says
So easy and so delicious! Thank you for the step by step directions. My loaves have turned out great the 2 times I’ve made this so far. Will be making again in the future!
Rebecca Eisenberg says
I’m so glad you like it!! Keep on enjoying!
Bill says
Well, I used K.A. Organic Bread flour. I measured out all the ingredients exactly by grams using a scale. I DID double the grams of cheese. I used Morton Kosher salt (but again, measured to the gram). It didn't rise all that much and I waited 24 hours. When I pulled it out, I couldn't even score it, so was that an indication that it had not fully risen? It was too loosy goosy. It didn't feel right but I baked it anyway. It came out kinda spongy. Doesn't taste like anything. Back to the drawing board!
Rebecca Eisenberg says
So sorry to hear it didn't quite work for you! There are a few things that could have happened here. One is that it's possible your yeast was bad — if you don't store it in the fridge or freezer, there's a chance it has expired and is not as strong as it should be. Another would be that the increase in parmesan cheese weakened the flour's ability to build a strong gluten network, which is why the dough was "loosy goosy". Using more flour on the bench for shaping would have helped you control the dough during shaping. Yes, it is possible the dough hadn't rise enough OR had overproofed at the time when you shaped it — did you let it rise for 24 hours at room temperature or in the fridge? If it was at room temperature, 24 hours may have been too long. If it was in the fridge, it may have needed some time at room temperature for the yeast to work a little faster. And finally, with it coming out spongy, that to me is an indicator that perhaps your oven isn't calibrated correctly. This is super common, unfortunately — my last oven was off by anywhere from 20-50 degrees and I often had to set the temperature on my oven much higher than the recipe called for to actually get the oven to the proper temperature. I would recommend getting an oven thermometer to make sure your oven is at the right temperature!
Bill says
Okay, I used a new yeast packet, followed the instructions to a gram (I might have been over by one gram of flour and one gram of water), let the yeast rise in my warmish kitchen for 19 hours, and yes, my oven seems to run 30 degrees cooler, so I moved it up to 480. It came out of the oven, I let it cool, cut into it, and tasted it. Meh. It was bread. But it didn’t have any taste of rosemary OR parmesan. I guess I’ll just have to settle for the Costco bread and remember how it used to be, the good times. Oh well.
Nicole R says
This bread is easy and delicious. Will recommend to all my friends.
I love that the cold won’t affect it, as my house runs cold and I tend to struggle to keep yeast happy. This recipe worked in my cool kitchen with no extra steps!
Bobby Knell says
I love Costco’s rosemary parmesan bread, but at $8 a loaf I’d rather bake my own. Theirs has durum flour in it which I like, so how much would I substitute for the AP flour? Also, theirs has, according to ingredient list, sour culture. Would that be sour dough starter you think?
Looking forward to giving this a try.
Rebecca Eisenberg says
I haven't experimented with durum flour in this recipe — you can certainly experiment with replacing some of the flour with it though! I would start with 10% and see how you like those results, then increase from there until it's how you like it. Sour culture is most likely sourdough starter but I suspect it's still leavened with commercial yeast — if you want some sourdough flavor you can try replacing equal parts flour and water with discard and see how that affects the flavor and texture. So if you use 50g discard, you'll reduce the amount of flour and water by 25g each. Good luck, happy experimenting!
Fellicia says
So I wanted to adapt a recipe that I could mix in the bread maker and then bake for my own sake. So I followed this and left out the parmesan. It did not need to prove quite as long, and that worked out perfectly Breadmaker to mix the ingrefients left to prove overnight in the bread maker and then cook the next morning, and it has come out beautifully.
nicole says
another no knead winner! we make the cheddar jalapeno all the time and have finally tried this one. happy to say its just as easy and tasty, and did not survive a full day before being divided and conquered XD i used dried rosemary but otherwise followed it to a T. i was surprised that such a small amount of rosemary and parm was still so impactful but the flavors genuinely were present, and it smelled *heavenly* while baking! we are going to make a second loaf and i know its going to make *such* a lovely grilled sandwich. these no knead breads are really approachable and feel enar impossible to mess up, i love them so much 😀
Janet says
Can I make this in my cast iron domed bread baker? and should I pre-heat the bread baker before I put the dough in to bake? Thank you!
Rebecca Eisenberg says
Yes you can and yes you should! Treat it just like a Dutch oven.
Ana says
I love how easy and straight forward this recipe is. Do you think I can add some chía seeds to this recipe?
Rebecca Eisenberg says
I don’t see why not!
Lisa Galvin says
Can you sprinkle rosemary on top of the bread for extra visual appeal? Also some parmesan? Just wondering...
Rebecca Eisenberg says
You can but it might burn/shrivel unpleasantly in the oven! Parmesan on top would be fine.
Elizabeth Kelly Bohaty says
Rebecca, this is one I have made over and over, again! It is quite marvelous! Do you think it would be safe to add chopped olives to the dough before proofing overnight?
Rebecca Eisenberg says
I'm so glad you like it! And yes, you can add them right along with the rosemary and parmesan before you add the water. Should be just fine!
Robyn says
I made the small batch version, and the bread came out perfectly, but the flavor was too subtle for our tastes. So I read the comments and then tried the full sized version, with a few changes. Subbed 45 grams of asiago cheese, grated on the big holes of a box grater, and reduced the water to 301 grams. Let it rise on the counter for 4 or 5 hours, then in the fridge til the next day. Shaped and baked as directed, and it was perfect! We've enjoyed it with butter at dinner, and toasted for a ham, egg, and cheese breakfast sandwich. And then I ordered your book. 🙂
Rebecca Eisenberg says
I love all of this!!! Those are super smart changes, I love the idea of using some Asiago in the dough! So glad you made it work for your tastes and thank you for ordering my book! 🙂