
This easy-to-make cheddar jalapeño no-knead bread relies a long overnight rise to develop gluten, strength, and flavor. It's loaded with cheddar cheese, fresh jalapeno peppers, and bakes up with a crunchy, floury crust that cracks open unpredictably inside a Dutch oven.

This is a higher hydration version of my plain no-knead dutch oven bread recipe! I love eating it sliced thin and toasted with a bit of salted homemade butter or dunked in a creamy tomato soup.
No kneading required
No-knead bread is exactly what it sounds like. Bread dough that requires no kneading to develop strength, structure, and flavor. No folding, no punching down, nothing. Just stir the ingredients together to form a shaggy dough and let it sit at room temperature for 12-18 hours.
Once it rises, you dump it out onto a floured surface, shape it as best you can, and bake it in a Dutch oven.

This recipe came about because I was desperate to find new ways to use up some of the four-dozen-plus jalapeños we grew last year.
I was also inspired by a cheesy, green pepper-y bread I had at Bobby Flay's Mesa Grill in Las Vegas, which was amaaaaazing slathered in butter.
Removing the seeds and ribs of the jalapeños and baking them in bread dough mellows their heat dramatically for a nice, mild heat and strong, fresh jalapeño flavor.

Because the cheese and the peppers add moisture to this no-knead dough, it is a wet and sticky dough (about 90% hydration). It's not completely impossible to work with, but it is sticky and produces a very rustic loaf.
If you're new to bread making, handling a sticky dough like this might be a bit of a challenge the first few times you try it. BUT!!! This is not meant to be a tightly controlled dough. Part of the fun of it is how unpredictable it can be, so that looseness and stickiness is actually just fine.
A little bit of variety is what will make your cheddar jalapeño no-knead bread crack open in so many delightful and unpredictable ways while it bakes.
Ingredient Notes
Here are the ingredients you will need to make this cheddar jalapeno no knead bread! See recipe card for quantities.

Cheddar Cheese - I like a sharp cheddar cheese for this bread, but you can use a mild or medium cheddar too. You can use pre-shredded cheese if you need to, but I recommend using a brick of cheddar cheese so you can cut some of it into cubes and shred some of it.
Jalapeños - How many jalapeños you need will depend on the size of the jalapeño you have. You want about a quarter cup of diced jalapeño pieces, seeds and ribs removed. If you want this to be a very spicy bread, leave some of the seeds in.
Bonus: If you have leftover whey from making my homemade goat cheese (which is also excellent with this bread) you can sub the whey in to this bread recipe in place of water without making any adjustments. It gives the bread a tangy, almost sourdough-like flavor.
If you can mix things together you can make this bread dough
Mix all your ingredients together in a bowl. That's it. You're basically done.
Of course, there are a few things you can do to make it just a little easier on yourself. Mix your dry ingredients together first. Then, add the cheese and peppers and toss them in the dry ingredients to help them mix in more evenly.
Then, add the water. Use a silicone spatula, dough whisk, or a plastic bowl scraper to mix the dough together until all the flour and water are incorporated.
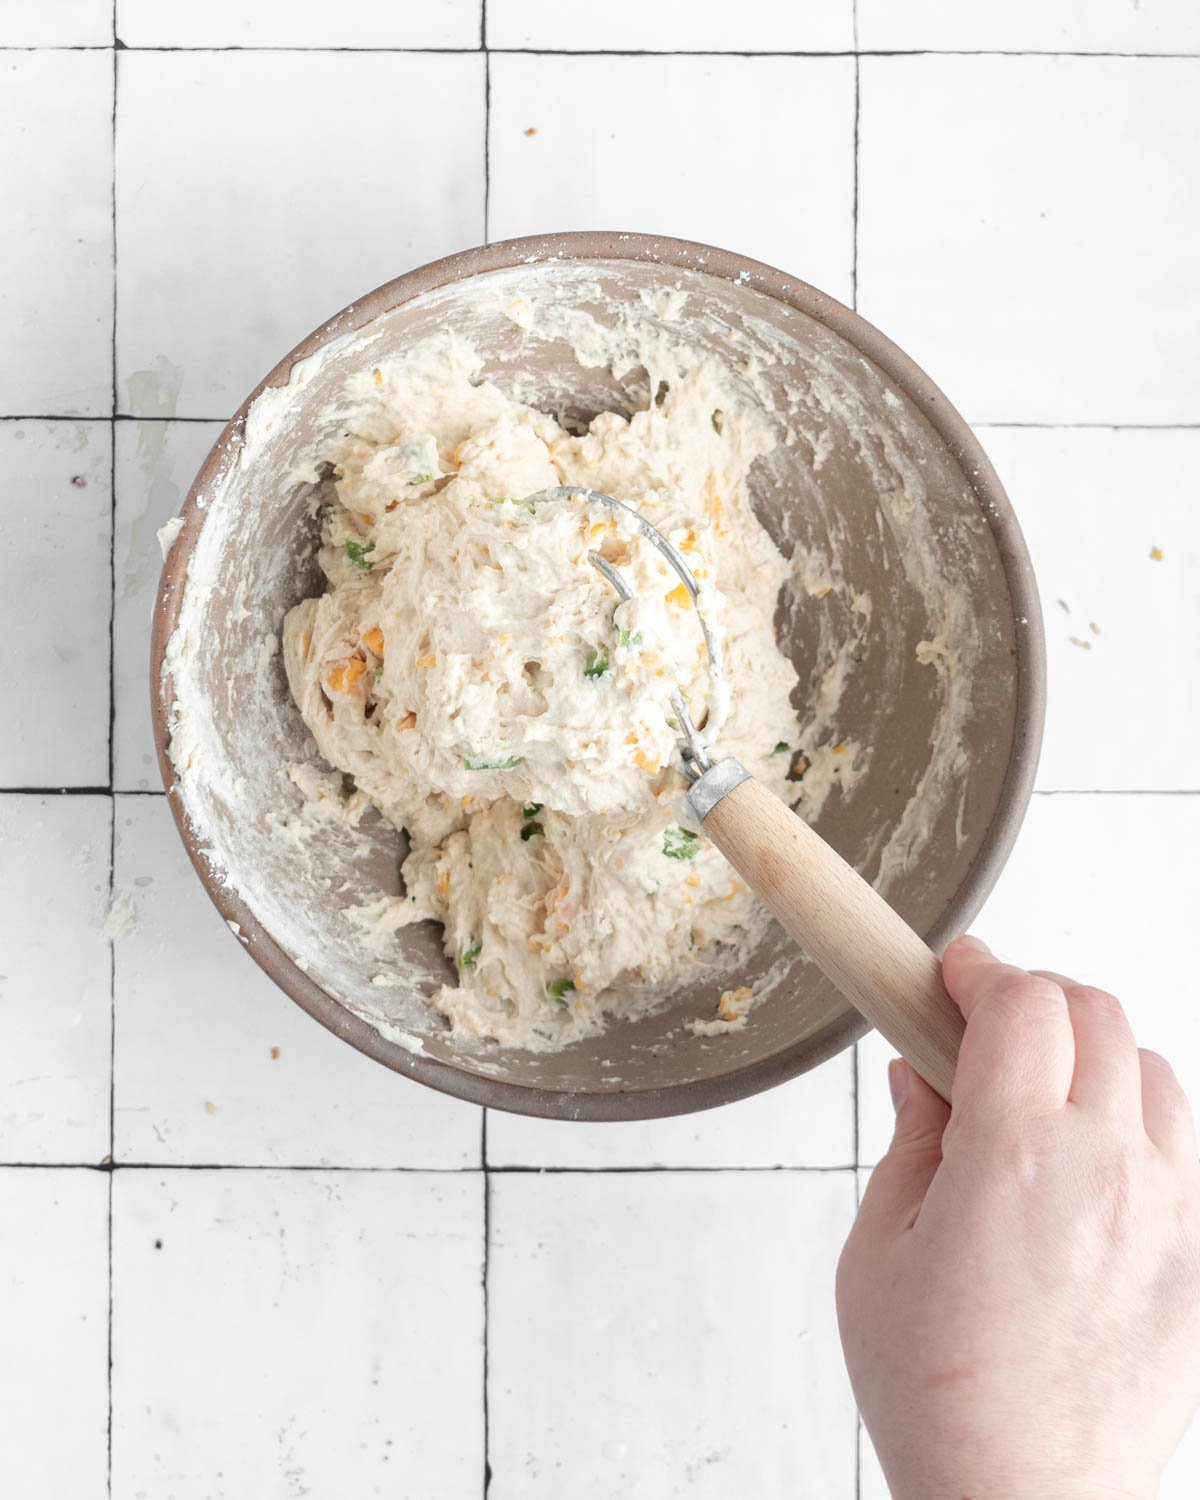
Remember, this is a 90% hydration dough. It's supposed to be a shaggy, messy dough. It should be sticky to the touch and impossible to knead (because it doesn't need kneading).
No-knead bread relies on time to develop a gluten network — the structure that gives bread its shape and texture. True to the name, there is no need to knead (lol) to develop that strength and structure in the dough.
Most no-knead recipes say you can shape and bake the dough anywhere from 12 to 18 hours after you mix it. If you let the dough rise in the fridge, it can be baked up to 5 days later.


In my experience, at 12 hours, the gluten hasn't developed enough strength for you to effectively shape the dough. If you wait the full 18 hours it will still feel like a loose wet pile, but it'll be so much easier to work with. Note that I did not say easy to work with. Just easier.
But again, the dough isn't meant to be easy to handle — that looseness and stickiness is part of the magic that makes it crack open beautifully in the oven.
This is a very slow-rising bread dough, so don't stress too much about getting to it right at 18 hours. If you're an hour early or an hour late, it will be fine.

Using Other Cheeses & Peppers
Okay, you caught me. Even though this is a cheddar jalapeño no-knead bread, you can use any pepper or cheese combination you want. Green pepper, red pepper, purple pepper, yellow pepper, hot pepper, mild pepper. Any pepper will work.
I almost always have some sort of hot pepper in the kitchen so I usually just grab whatever I have.
When it comes to cheese, I've done this with thin-sliced muenster cheese from the deli, rough-torn chunks of fresh mozzarella, finely grated asiago, shredded parmesan, cubed cotswold, and more.
Try to stick to hard cheeses (cheddar, parmesan, asiago, swiss, etc.) rather than soft cheeses (brie, goat cheese, etc.) so that the cheese doesn't add too much liquid to the dough when it melts during baking.
As for cheddar, I recommend sticking to sweet, mild, or medium sharpness. If you go sharp or extra sharp, the cheddar flavor will overpower every bite.

Practical Tips & Recipe Notes
- Use wet hands and wet your bowl scraper to gently transfer the risen dough to a floured sheet of parchment paper before shaping it. If you use flour on your hands the dough will stick to the flour.
- If you have an oval dutch oven: arrange the parchment paper so its in a diamond shape, with a corner of the paper towards your body. The oval shape of the dough should end up with the long side facing you, parallel to the edge of the counter. If you have a round dutch oven, crumple the parchment paper into a ball, smooth it out, and repeat before you put the dough on it. This will allow the paper to be just a little more flexible when you put it it into the dutch oven.
- If flour isn't keeping the dough from sticking to you during shaping, try using damp or lightly oiled hands instead.
💭 Have More Baking Questions?
I've rounded up answers to common baking questions and how-to guides, including:
- Ingredient swaps and FAQs
- Why my recipes are written in grams and not cups
- How to quickly bring eggs and butter to room temperature
- Ingredients I use (salt, flour, yeast, etc.)
- Step-by-step guides for bread and baking techniques
See my baking techniques & troubleshooting guide and ingredient swaps and FAQs for more!
📖 Recipe

Cheddar Jalapeño No-Knead Bread
Recipe Notes
- The cheese and pepper pieces will try to push themselves out of the dough as you shape it. Just push them back in. If they fall out completely, you can put them in the center of the dough and fold more dough over them. But it's okay if some pieces are hanging out of the dough.
- Use a wet paper towel or sponge to lightly dampen your counter before you put the parchment paper down. This will help keep it in place if it's curling up or if your dough is so sticky that it tries to pull the paper up with it as you fold.
- Keep a small measuring cup of flour on your counter as you work so you can easily grab pinches of it to dust your counter/the dough as you work.
- For more spiciness in your bread leave some or all of the ribs and seeds of the jalapeño intact.
- Store baked bread in a bag at room temperature for 4-5 days. This bread freezes beautifully!
Ingredients
- 390 grams all-purpose flour (3¼ scant cups)
- 10 grams diamond crystal kosher salt (~1 tablespoon)
- 3 grams instant yeast (1 teaspoon)
- 340 grams lukewarm water (1½ cups)
- 1 medium jalapeño (seeds and ribs removed)
- 113 grams cheddar cheese (half shredded, half cubed)
Instructions
- Dice cheddar cheese into ¼" cubes or smaller, and/or grate with a cheese grater on the side with the larger holes.
- Remove seeds and ribs from jalapeño, then chop into pieces as big or small as you want. You can even do half the jalapeño in a fine dice and half in thin slices or a larger dice if you want some variety. Add to dry ingredients.
- Mix your dry ingredients (flour, salt, yeast) in a large mixing bowl. Stir to combine. Add the cheddar and jalapeño pieces and mix well.
- Add lukewarm water and stir until combined. If the dough seems really dry, add a tablespoon of water and keep stirring. When you have a shaggy, sticky dough, cover the bowl and set it aside at room temp to rest for 12-18 hours (I recommend going the full 18 hours if you can).
- At the end of the 18 hours the dough should have doubled or tripled in size and have a flat, bubbly top.
- Preheat oven to 450°F. Place a Dutch oven inside, covered, and let preheat for 30 minutes at 450°F.
- While Dutch oven preheats, generously flour a piece of parchment paper on your counter and use a plastic bowl scraper to release the dough from the sides of the bowl and onto the center of the paper.
- Use floured or slightly wet hands to fold the edges of across the center of the dough to gently pull it into an oval or circle shape. This stage is messy and imprecise, that's okay. Sometimes you can fold the whole side of the dough in one move. Other times you end up zig-zagging smaller sections across the center.
- Dust the surface of the dough with flour and let it sit until the Dutch oven finishes preheating.
- Carefully remove the lid from the Dutch oven. Gather the corners of the parchment paper together to pick the dough up and transfer it into the Dutch oven. Put the lid back on the Dutch oven.
- Bake with the lid on for 45 minutes (don't peek!), then remove the lid and bake another 10-15 minutes until deeply golden brown on top.
- Transfer the fully baked loaf to a cooling rack and let cool before slicing.
Laura says
I made this when my husby and I had a friend over for dinner, certain we'd have some leftover for the next day....we did not.
SuzAnne says
Is there an alternate baking method if one does not have a Dutch Oven?
Rebecca says
I haven’t personally tested any of these but The Kitchn has a list of alternate options: https://www.thekitchn.com/noknead-bread-alternative-to-d-42145
Nicolette Blixt says
The best!! We've used 2 jalapenos with great results!
Rene says
I know you asked this question over a year ago, but I thought I would respond for others who may have the same question. A Dutch oven is used to trap the natural moisture released while cooking the bread. It is also often made of cast iron which conducts and holds heat evenly and well. If you do not have a Dutch Oven, you can use a heavy cast iron pan or heavy ceramic baking casserole dish or other 450 degree oven proof pan, and then place an inverted (domed) heavy sauce pan, lid or ceramic baking dish that is 450 degree temperature oven proof over the bottom pan. Be careful taking in an out of the oven as the 2 aren't fitted as a Dutch oven base and lid are fitted together. Heat pans, as the recipe says, prior to adding your bread dough, and bake as suggested. It may take a couple of practice attempts to adjust the cooking time for the substitution pots, but it can work. I do this. Good luck, and happy baking 🙂
Tina says
This turned out amazing! We left the ribs and seeds in the jalapeño and it was a nice kick. We even attempted the cacio e Pepe toast with it just to see how it went and unsurprisingly it wasn’t the right kind of bread however even then it was so tasty!
Rebecca says
omg i love that you tried combining it with the cacio e pepe eggs in a basket! I'm not surprised it didn't quite work, but I love that you tried it!
nicole says
the bread is AMAZING yall, do yourself and make a loaf or two (or 3). it comes together really quickly, and every time we make it the result is so good that it barely lasts 3 days between the two of us constantly stealing a piece every time we pass it XD it makes *phenomenal* sandwiches, but is honestly tasty enough that we usually just eat it as is. the smell in the house as this loaf bakes, ohhh my gosh. heaven!
so far we've made it as is, with Gouda mixed in, and tonight we are going to try it with some Gruyere we have around. i really do suggest sticking with the half cubed half grated like the recipe says, its worth the tiny bit more effort to have the varying bits of cheese in there. and if you think ahead and freeze your jalapenos, you can grate them right after the cheese and have the jalapeno flavor really permeate the whole loaf. we keep a bag of them in the freezer and its so quick! im not sure if that affects the wetness of the bread, but it turns out great for us. now excuse me while i go make a night time batch of this so tomorrow nicole can have delicious bread 😀
Lacy says
If my bread is already getting quite a bit brown before I remove the lid should I reduce the time?
Rebecca Eisenberg says
How are you seeing the bread when the lid is on?? I want to help you but I’m so confused.
Lacy says
Haha sorry when I remove the lid the bread is already browning nicely and not pale at all.
Rebecca Eisenberg says
Oh! Yes in that case you probably don’t need quite as much time baking it with the lid off. You may want to temp check it to make sure it’s fully done inside but it certainly won’t hurt the bread to go the full time unless you’re saying it’s super dark brown, almost black when you take the lid off. At a certain point the coloring is mostly aesthetic preference!
Shannon says
This was the best no knead recipe I have tried. Definitely a keeper!
Rebecca Eisenberg says
So glad you liked it!!!
Lexi Norris says
This bread was such a hit! Super easy to make. Make sure to seal the bowl/bread as it rises so it doesn’t dry out — I made that mistake before and it makes a huge difference. I already have request for more loafs! Thank you!!
Barbara Jean Parland says
Made this recipe for the second time today. Such a good recipe. Made with bread flour both times (first time was an accident out of habit because of frequently making rolls. Second time because I realized I prefer to use bread flour for bread). Turned out great both times!
Take the time to read all the recipe and notes. Rebecca is great for explaining the "why" of her recipe choices. Knowing the why will better let you to know when you should stick to the recipe and when you can think for yourself.
Jocelyn says
the change from grams to ounces (the cheese part) has me wondering if that ounces is volume vs weight?
Rebecca Eisenberg says
Nope, that's just an error on my part! It's all by weight. This is an older recipe; I just updated it so it's all in grams. I did the cheese by ounces because 4 ounces is 113 grams, which is a bit of an odd number to see. A standard small-ish sized block of cheese in America is usually about 8 ounces, so 4 ounces is a cleaner number that's easier to understand. It's half a block of cheese. But you're right, it can be confusing. So I've updated it! Enjoy the recipe!
Isha Gujrathi says
Ok.. I made this and you are making me do this and I'm now loving baking and Omg your recipes are soooo good and easy and foolproof. Thank you for unleashing the baker in me 😉. This bread was gone in minutes between 5 people. Served it with the olive oil dip.
Mimi says
Hi! Can I use active sourdough starter?
Rebecca Eisenberg says
I’m sure there’s a way to but I don’t know how to do the conversion off the top of my head, sorry!
Becky says
This is so good! My loaf was a little flatter than I wanted it to be, but still tasted fantastic. Made it to go with our salads for dinner tonight - of course I had to cut a small piece for quality assurance...LOL
Timmi says
What size is the Dutch oven?
Rebecca Eisenberg says
Check the section of the blog post labeled “equipment notes”! I gave detailed sizes and recommendations there.
Mackenzie says
Hi!
First, please let me say thank you for your wonderful bread recipes. Bread always seemed intimidating, but I’ve tried several of your recipes now and each one has been low stress asks delicious! This recipe is no exception.
I was wondering how you think this jalapeño cheese bread would freeze? I’d also love to know if you think I could mix the dough and then separate into two balls to make two smaller loaves, so that one could be frozen and one kept out. We are only two people and find we can’t quite finish a big loaf before it starts to harden. I’d really appreciate any advice you have about this!
Rebecca Eisenberg says
You can absolutely freeze this bread! Don't freeze the dough, but if you're just dividing the dough in half to bake two loaves and freezing one that will be absolutely fine. Bread freezes really well!
AS says
Fool proof recipe and it’s a family favorite.
Elizabeth says
Can I use active dry yeast instead of instant dry yeast for the jalapeño cheddar bread?
Rebecca Eisenberg says
Yes you can use active dry yeast!
Elizabeth says
Thanks so much! I love making your breads!
Jen says
I made this for the first time last weekend and it was simply incredible. The dough was much easier to handle than I expected and the resulting bread was delicious. It was indistinguishable from an expensive artisan loaf and IMO better tasting. Recipe was very easy to follow.