
Learn my method for making fresh, homemade English muffins with all-purpose flour and instant yeast! So soft, so airy! This 3-hour, same-day recipe requires no special equipment. The English muffins are hand-shaped and cooked stovetop.
Making English muffins at home is MUCH easier than you’d think. Ready? Gather your ingredients — let's do this! Overnight rise option included below.

My list of grievances when it comes to store-bought English muffins is lengthy. They're often a bit dry, taste like cardboard, and they're also expensive. High quality store-bought English muffins are oversized — too big for my beloved breakfast sandwich maker — and tend to come in packs of four, when I want six at least.
So when I set out to make my own homemade English muffin recipe I wanted them to have a ton of flavor, a tender crumb, and fit perfectly in my breakfast sandwich maker. This recipe makes eight English muffins and I've got notes in the recipe for how to properly store and freeze them so none go to waste!
There are several methods of making English muffins to choose from but, to me, the easiest and least wasteful approach is the hand-shaped method I use here. You don't need any fancy metal rings for cutting or cooking, you won't end up with excess scraps of dough, and you don't even need an oven to make them!
To get a craggy texture in your English muffins: This is less about the English muffin recipe you use and more about how you split your English muffin in half. Use a fork to poke holes all the way around the middle of the muffin until the two halves split apart. This takes a bit of patience, but is worth it for that classic English muffin texture! I usually just use a knife because I want my English muffin ready to toast ASAP, but you do you.
I love using these homemade English muffins toasted with homemade butter, paired with a perfectly fried egg, or, if I'm feeling fancy, I serve them up as Eggs Benedict using my method for making easy poached eggs.


5-star reader review
“Well done. Easy and thorough instructions. Pictures and video were a confidence booster that I was in the right direction. Incredibly easy and incredibly delicious. This was my first attempt at English Muffins and I will look no further.”
—Laura J.
Ingredient Notes
Here are the ingredients that you'll need to make this stovetop English muffin recipe! See recipe card (at the end of the blog post) for ingredient quantities.

Baking Powder - Baking powder is a leavening agent not traditionally used in breads, but for these English muffins, it gives them even more rising power and creates a softer, fluffier texture inside.
Melted Butter - Melted butter gives these English muffins an amazing flavor. I tested them with olive oil instead of butter and they were just so bland. Melted butter is so much better.
Semolina Flour - I use semolina flour to dust the outside of the English muffins. Some people use corn meal but I prefer the finer grain of the Semolina. If you're more of a corn meal kind of English muffin eater, you can absolutely use that instead.
How to Make English Muffins
Start by whisking together all of the dry ingredients in the bowl of your stand mixer. Make a well in the center, then pour in the warm water and melted butter. Attach the dough hook to your stand mixer.
Making the dough involves two steps: mixing and kneading. Each one can take several minutes, so be patient.

Mix the dough until it comes together in a shaggy, messy ball in the bowl. When mixing a dough, you are just getting the ingredients combined and incorporated into one uniform mass.

Knead the dough until it's nice and smooth with a bit of stretch to it. It might cling a bit to the bowl when you stop the mixer, but should pull away cleanly when you take the dough out of the bowl.
Once the dough has been kneaded, tuck the dough into a ball and place it in a lightly greased bowl to rise until it doubles in size, about 1 hour at room temperature. If your kitchen is cold, place it somewhere warm to rise, otherwise it may need an extra 30 minutes or so.
NOTE: You can place the dough back in your mixer bowl to rise to avoid making extra dishes, I just used this brown bowl because it looks better in photos.


Divide the dough into eight equal pieces using a kitchen scale for accuracy. Each piece should weigh about 81 grams. Then, shape each piece of dough into a tight ball.
Flatten the dough against a clean countertop. If you're combining a few pieces of dough, stack the smaller pieces on top so they get tucked inside.

Fold the edges in across the center and pinch them together.

Flip the dough over and cup your hand around it. Scoot it in a circle with your pinkie against the counter to tighten it up.
You'll know you shaped the dough balls properly if you flip them over and the seam underneath is nearly invisible. You might see some texture or a swirled pattern, but you don't want to see any deep creases or folds.

Place the dough balls on a sheet pan sprinkled generously with semolina flour. Gently press down to flatten them.

Sprinkle the top side of each English muffin with more semolina flour and gently press it into the muffin tops.
Now, the English muffins need to rise until they're quite puffy and airy looking, another hour. Again, if your kitchen is very cold, place them somewhere warm, otherwise they may need longer to rise!
This recipe uses the same trick as my brioche hamburger buns to give the English muffins their signature shape: the weight of a second sheet pan on top while they rise.

Cover the English muffins with plastic wrap, then place another sheet pan on top to weigh them down.

The sheet pan makes the English muffins spread out as they rise, so they hold that classic flat, round shape.
When the English muffins have risen and are nice and puffy looking, heat up a cast iron skillet over medium-high heat. When a droplet of water flicked onto the surface sizzles and disappears immediately, add a generous glug of oil — about 1-2 tablespoons, enough to fully coat the bottom of the pan.
Reduce the heat to medium and cook the English muffins 4-5 minutes per side, using the spatula to press down on them gently only right after flipping them.
You'll likely hear a sizzle as the English muffins first hit the pan, but after the first minute or so you may not see or hear much activity — if you want to see how they're browning on the bottom, use a spatula to carefully lift one up and take a peek.

The semolina flour soaks up the oil pretty well, so if the pan starts smoking or looks dry, add a little more oil as needed. Don't panic if they come out looking dark — even ones that are practically blackened still taste great.
The English muffins are done when they reach an internal temperature of 190°F-200°F. If they need to be flipped again and cook for another 30-60 seconds, that's just fine.

5-STAR READER REVIEW
“I made this recipe for the first time over the weekend. It worked like a dream! I was most afraid of shaping the muffins correctly, but needn't have worried. I watched the video a couple of times and then went at it. My muffins turned out beautifully! Plus, boy oh boy do they taste good. We made the most delicious bacon and egg sandwiches out of these muffins.”
—Jennifer B.
Yes, You Can Do an Overnight Rise
To do an overnight rise, pop the shaped English muffins in the fridge for anywhere from 12-24 hours. Yes, with the second sheet pan on top to weigh them down.
Because the butter in the dough firms up in the fridge, they won't rise much. But the long rise will give them a better flavor and softer texture since the gluten network has more time to relax.
An hour before you plan to cook them, take them out of the fridge, remove the sheet pan on top, and let them rise, still covered with plastic so they don't dry out. As they warm up, you'll see them get visibly bigger and airier. Then follow the rest of the recipe as written to cook them!
You know I always like to test things thoroughly so I did test cooking the overnight English muffins right out of the fridge as well as cooking them after 15 minutes, 30 minutes, and 45 minutes at room temperature to see if I could save you any time in the morning. But you really do get the best texture and size if you give them the full hour to rise at room temperature before cooking. Don't rush them!


Practical Tips and Recipe Notes
- You can also knead this dough by hand if you prefer, but I find it's a bit stickier than I like to handle. If you do knead it by hand, add about 3-5 minutes to the kneading time and try not to add too much flour — this can make your English muffins dense!
- If you prefer your English muffins to be more lightly browned on the outside, lower the temperature of your pan and cook them for 1-2 minutes longer per side. You'll know they're done when the instant-read thermometer (I use the Thermoworks ThermoPop) registers an internal temp of 190°-200°F.
- For larger English muffins, divide the dough into six or seven portions instead of eight. They may need a bit longer per side to cook through.
- For extra buttery English muffins, replace half the oil in the pan with 1 tablespoon butter.
- When shaping the dough balls for the English muffins, do not flour your countertop. You're relying on the dough sticking slightly to your work surface to build tension in the dough and tighten up that seam at the bottom. A floured work surface will prevent the dough from sticking to itself.
- No, you cannot bake these English muffins. I tested them in the oven and they totally lose their classic English muffin shape and end up evenly browned all the way around — no toasty top and bottom with the pale strip of dough around the sides.
💭 Have More Baking Questions?
I've rounded up answers to common baking questions and how-to guides, including:
- Ingredient swaps and FAQs
- Why my recipes are written in grams and not cups
- How to quickly bring eggs and butter to room temperature
- Ingredients I use (salt, flour, yeast, etc.)
- Step-by-step guides for bread and baking techniques
See my baking techniques & troubleshooting guide and ingredient swaps and FAQs for more!

Want this recipe, only smaller?
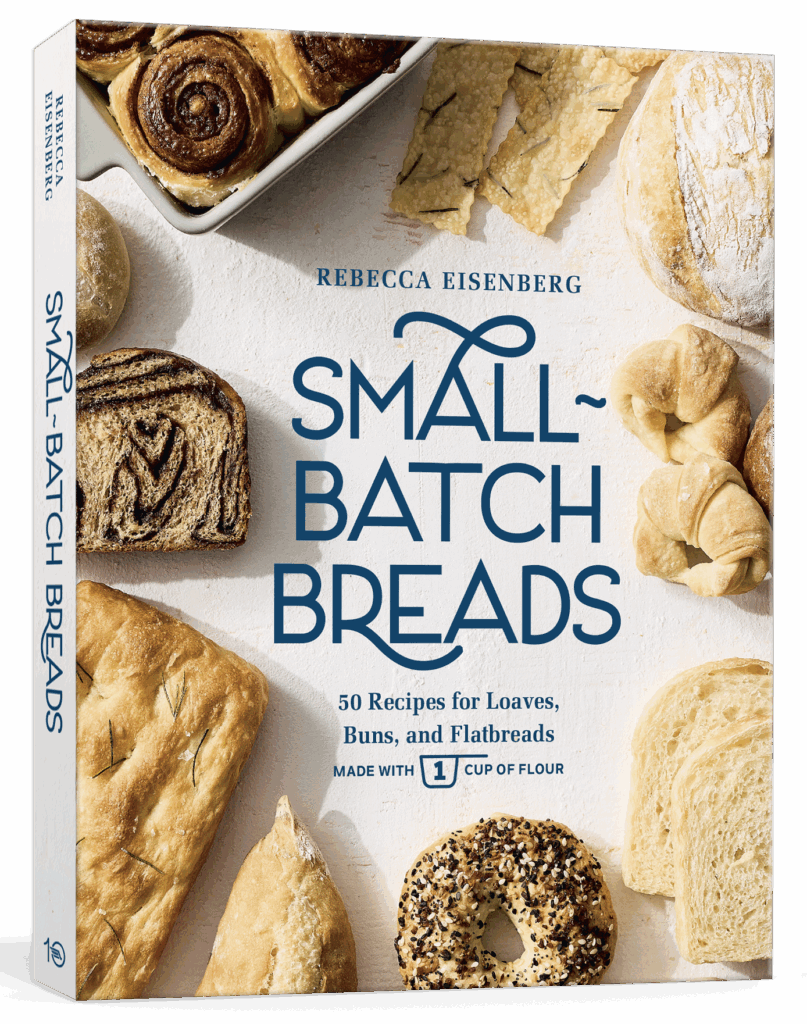
Find it in my Small-Batch Breads cookbook, available for pre-order now!
Featuring fifty easy-to-follow bread recipes made using 1 cup of flour.
📖 Recipe

Soft 3-Hour English Muffins on the Stovetop
Recipe Notes
- For craggy insides, use a fork to poke deep holes all the way around the middle of the English muffin until the two halves separate. This requires a bit of patience but is the only way to get that craggy, rough middle texture!
- If you prefer your English muffins lighter on the outside, turn the temp down and cook for 5-7 minutes per side (or until an internal temp of 190°F minimum is reached).
- OVERNIGHT RISE: Place the shaped English muffins with the sheet pan on top in the fridge overnight 12-24 hours. Remove from the fridge and let the english muffins rise, covered, but without the sheet pan on top, at room temperature for 1 hour prior to cooking.
- Store in an airtight container at room temperature for 5-6 days. They may be a little dry by the end of that window, but will perk right back up when toasted.
- To freeze: Split the English muffins in half almost all the way through, wrap each one tightly with plastic wrap, then place in a large bag in the freezer with as much air pressed out as possible. They can be defrosted on the counter and then toasted, or toasted right from frozen!
Ingredients
- 360 grams all-purpose flour
- 15 grams sugar
- 12 grams diamond crystal kosher salt
- 8 grams baking powder
- 6 grams instant yeast
- 210 grams warm water (90°F)
- 42 grams unsalted butter (melted)
- 2-4 tablespoons semolina flour (for dusting)
- 2-4 tablespoons canola oil, vegetable oil, or other neutral oil (for the pan)
Instructions
- Mix. Whisk together the dry ingredients in the bowl of your stand mixer. Make a well in the center and add the warm water and melted butter. Use the dough hook on a low speed to mix the dough, pausing to scrape down the sides as needed, until the dough combines into a shaggy, messy mass on the dough hook. This can take a few minutes, be patient.
- Knead. Increase the speed of the mixer just slightly to medium-low and knead until smooth, soft, and elastic, about 3-5 minutes. The dough will pull clear of the walls of the bowl as it kneads, but may cling a bit as you pull it out, though it should pull away cleanly.
- Rise. Tuck the dough into a ball and place in a lightly greased bowl, cover, and place in a warm spot to rise until just about doubled in size, about 1 hour. If you poke a finger into the dough, the indentation should fill back in partially, but not completely.
- Shape. Divide the dough into eight equal pieces. Shape each piece into a tight ball, with a smooth top and a neat, almost invisible seam underneath. Arrange the dough balls on a semolina-dusted sheet pan, pressing down briefly on the top of each one to flatten them slightly. Dust the top of each English muffin generously with more semolina flour. NOTE: Step-by-step shaping photos are in the blog post above, or video is below!
- Rise again. Cover the sheet pan with plastic wrap, then place another sheet pan on top to weigh the English muffins down as they rise, about 1-1½ hours. They will just about double in size and should look quite puffy and airy, especially around the edges.
- Cook. Toward the end of the rise time, heat a cast iron skillet over medium-high heat until water droplets flicked on the surface sizzle and evaporate on contact. Add 1-2 tablespoons oil, and swirl to coat the bottom of the pan. Lower the temperature to medium and place four English muffins in the pan. Cook for 4-5 minutes, rotating the muffins in place and around the pan every minute or so to help them brown evenly. Flip the English muffins over, pressing down gently on top to flatten them out, and cook for another 4-5 minutes until an internal temperature of 190°-200°F is reached. You may need to flip them one more time and give them another minute or so to reach temp. Repeat until all the English muffins are cooked. NOTE: Adjust the temp of the pan to prevent burning, especially if you see the pan starting to smoke, and add more oil to the pan if needed — the semolina soaks up a lot of oil!
- Cool. Remove the English muffins to a wire rack and let cool for at least 20 minutes before serving.
Colleen says
I will be trying this when I make my next batch of English Muffins! I, for one, and quite happy that the ingredients are listed in grams! I love using my kitchen scale and not having to use measuring cups and spoons! Thankyou so much for all your great recipes!
Rebecca Eisenberg says
I really hope you enjoy them, do let me know how they turn out for you! And thank you, as always, for being Team Kitchen Scale!
Ben says
First go at this recipe and just like the single baguette entry that I was extremely pleased with when I tried it a few weeks ago - the English muffins were outstanding!
karen marie says
I'm going to make English muffins one of these days - probably these, and probably soon. I've made crumpets with varying success. I don't know why I've been so hesitant about English muffins.
That being said - I really appreciate that you and many other posters of recipes are indicating gram measurements for dry ingredients but what I would truly love is if instead of saying "heat until water droplets flicked on the surface sizzle and evaporate on contact," you could get out your laser thermometer to get a precise temperature and tell us what that is.
Laser thermometers used to be expensive but they're not any more, and every kitchen should have one, and every cook should use one.
Thanks!
Rebecca Eisenberg says
You know, it's funny, I did almost order a laser thermometer while I was working on this recipe. But I have a pretty well equipped kitchen and I am used to choosing my priorities when it comes to making recipes accessible to beginner bakers — I figured if I don't have a laser thermometer, most other people won't either. And I didn't want that to be a barrier to entry for people interested in trying this recipe! It's a great idea, definitely something I considered, but I found using the good 'ol water droplet test worked reliably enough for me in this case. I do hope you give these a try and I hope you enjoy them when you do! Thanks as always for being part of #TeamKitchenScale!
baltimorehomecook says
I absolutely loved this no-bake English muffin recipe! As a chef, I truly appreciate the clear, detailed and well-written instructions and thoughtful explanations about ingredients and methods. It's simple enough for home bakers yet satisfying for professionally trained chefs like me. A must-try for anyone who loves making bread from scratch!"
Rebecca Eisenberg says
What a WIN! Great for home cooks but satisfying for chefs — that's the sweet spot I hope all my recipes can live in! So glad you enjoyed the English muffins and thanks for leaving such a kind review! Happy baking! ~R
Laura Jones says
Well done. Easy and thorough instructions. Pictures and video were a confidence booster that I was in the right direction. Incredibly easy and incredibly delicious. This was my first attempt at English Muffins and I will look no further. #teamkitchenscale all day every day.
Rebecca Eisenberg says
Oh I'm so glad you liked them, Laura! Thank you as always for being #TeamKitchenScale! Happy baking!
Donna S. says
I don't have a cast iron skillet. What can I use instead? Thank you.
Rebecca Eisenberg says
Any skillet you have will do, just make sure you preheat it properly and adjust the temperature as needed to prevent burning!
Samantha Franceschi says
I love this recipe! I made some yesterday as well as today. I would highly suggest giving more space on the second rise on your baking sheet. I did not the first time and they came out a bit misshapen but still delicious! You create absolutely fantastic recipes and yours have yet to lead me wrong.
Barbara Parland says
These English Muffins were delicious! As always, Rebecca's recipe post was full of good information and pictures.
I had a question or 2 in my head which were both answered as I kept reading the post. Including the comment section! If you are patient and polite, Rebecca is a wealth of knowledge and will readily answer questions.
In summary, great recipe. Read the ENTIRE post people! Rebecca obviously puts a ton of love and hard work into these recipes. Do her the courtesy of reading post and trying the recipes before being negative.
Rebecca Eisenberg says
I'm so glad you enjoyed the English muffins and that all the details of the blog post were so helpful! Keep up the great baking!
Martha says
These turned out sooooo good. Perfect with both butter and jam and with sausage and egg for a breakfast sandwich. They turned out a little darker than I wanted, so next time (and there will be a next time) I'll start with a lower pan temperature. Super tasty though and the inside texture is perfect!
Jennifer Bodenhoefer says
I made this recipe for the first time over the weekend. It worked like a dream! I was most afraid of shaping the muffins correctly, but needn't have worried. I watched the video a couple of times and then went at it. My muffins turned out beautifully! Plus, boy oh boy do they taste good. We made the most delicious bacon and egg sandwiches out of these muffins.
Note that I used the tool (when you go to print the recipe) that let me set the desired quantity to 4, so the math was all done for me to make this smaller batch. Now that I know how easy they are and how delicious, I will next make a full batch of 8 and just freeze the extras so as to have them on hand. Thanks, Rebecca, for another winning recipe!
Kay says
Hi Rebecca, I love your recipes and in a few of them you have given option of using sourdough discard, do you think I could use my discard for this English muffin recipe too? I saw couple of other recipes with discard but didn't feel confident, and thought of trying yours with the discard. Thank you!!
Rebecca Eisenberg says
I haven't tested it but the general rule of thumb is that you can replace equal portions of flour and water with discard starter — so if you reduce the flour and water in this recipe by 20g each, you can replace that with 40g discard. It'll add some sourdough flavor but it won't be enough to leaven the english muffins; you'll still need yeast to make them rise! It might also make the dough a bit wetter to work with, so you may need to make some other small adjustments but it should work! Let me know how it turns out if you give it a try.
Kay says
Thank you for your quick response! Will definitely give it a try! 🙂
Reet says
The most perfect recipe! Thank you!
Rebecca Eisenberg says
So glad you enjoyed the english muffins! Happy baking!
Jenny says
I never knew that I could make English Muffins, but this recipe was so easy to follow and the results were sooo great.
Alicia says
I make these literally EVERY. WEEK. I have the ingredients up taped on the back of the cabinet door that is above where I place my stand mixer, because my brain hasn’t retained the specific measurements accurately. I make them every week because the first time I made them, they ruined all other store bought English muffins for my breakfast sandwich eating husband. I do have him convinced the recipe only makes 7 - the one I eat hot from the pan slathered in butter is my tithe as cook. These have remained steady and reliable as seasons and humidity changed, and I love them so much. (I just finally sat down and wrote out this love letter to the !)
Gabi says
These English Muffins were AMAZING! The recipe was so detailed and simple to follow. Will definitely be making these in the future.
Komal says
Can I make these on a non-stick pan? I don’t own a cast iron skillet
Rebecca Eisenberg says
Yes, you just don't want to heat the non-stick surface too high. Keep it at a nice medium heat!
Lynn Esposito says
Made the 3 Hour English Muffins today and used the cast iron griddle on top of the gas grill. Worked out pretty good. A bit dark but we like that anyway. Toasted one on bagel setting and so yummy. We are now spoiled for homemade verses store bought. Can’t wait for the cookbook release!