
Behold — a same-day recipe for homemade kaiser rolls that I have obsessively tested until absolutely perfect! These are soft, fresh kaiser buns that are so perfect for breakfast or deli sandwiches and burgers. My recipe is great for both beginner and seasoned bread bakers, with three different roll-shaping methods included for making knotted, scored or stamped rolls. Yield: 6 rolls.

5-STAR READER REVIEW
“These were great!! Totally doable even without a stand mixer, and I took the easy route of making balls and scoring them for my first try. Next time I'll do the fun knots!”
—Isabelle
Kaiser rolls originated in Austria, likely at some point in the late 1700s, but I know them mostly for being some of the best-ever rolls for breakfast sandwiches (a bacon egg and cheese on a Kaiser roll is an elite sandwich combo imo) and for making all sorts of deli sandwiches (you must try hot pastrami with melty Swiss cheese on a Kaiser roll).
Kaiser rolls are generally an oversized roll with a soft, dense, uniform crumb inside and a slightly flaky, slightly crusty outside thanks to a milk wash before baking. I like a softer, paler golden brown crust on my Kaiser rolls, but if you like yours darker or with a crisper, harder crust you can add 3-5 minutes to the bake time.
There are many different ways to shape Kaiser rolls: knotting, scoring, and stamping are the three I've included here so you can choose which method works best for you. Some people use a folding technique to create the signature curved petal shape on top but since I haven't personally been able to make that work I didn't include it here.

Want this recipe, only smaller?
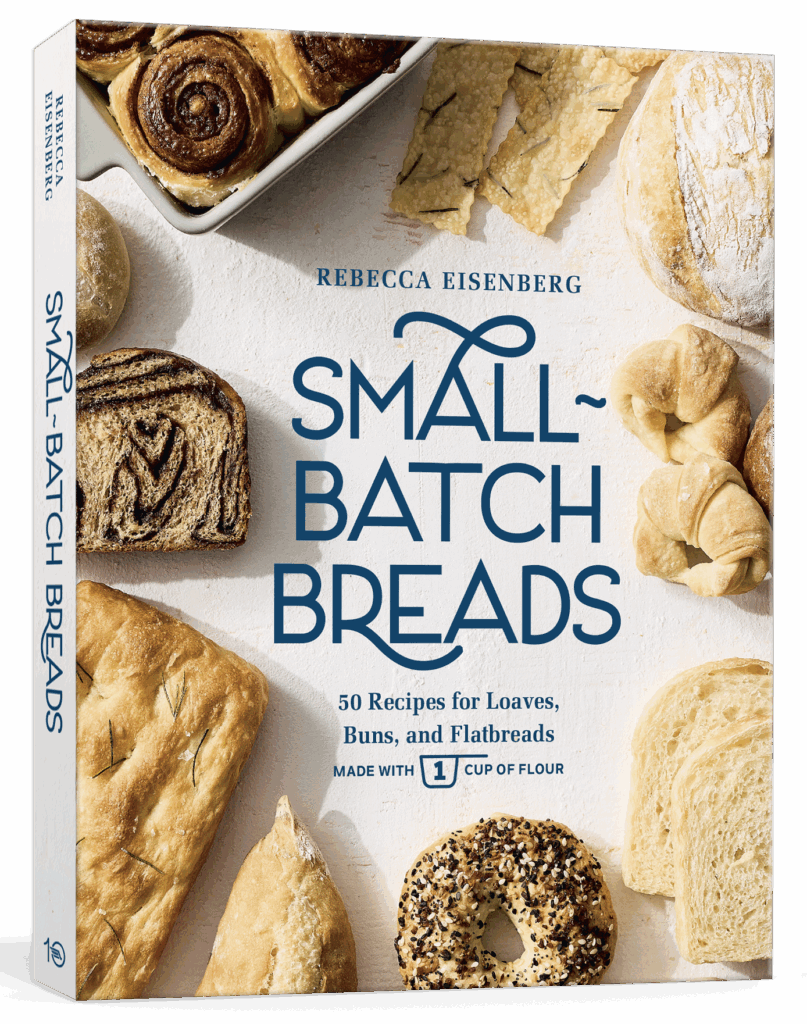
Find it in my Small-Batch Breads cookbook, available for pre-order now!
Featuring fifty easy-to-follow bread recipes made using 1 cup of flour.
Ingredient Notes
Here are the ingredients that you'll need to make this recipe! See recipe card (at the end of the blog post) for ingredient quantities.

Kaiser Rolls are often topped with dried minced onion (that's what I use) but you can also use sesame seeds, poppy seeds, or even my simple everything bagel seasoning if you prefer!
How to Make Kaiser Roll Dough
To make this Kaiser roll recipe, start by whisking together all of the dry ingredients in the bowl of your stand mixer. Make a well in the center, then pour in the warm water and olive oil. Attach the dough hook to your stand mixer. First you will mix the dough, then you will knead it.

Mix the dough just until it comes together in one shaggy mass on the dough hook.

Knead the dough to develop a strong, smooth texture and gluten network.
Tuck the dough into a ball and place it in a lightly greased bowl, covered, and set it aside to rise until it doubles in size.


NOTE: You can place the dough back in your mixer bowl to rise to avoid making extra dishes, I used a wider metal bowl because it photographed better.
Shaping Knotted Kaiser Rolls
Work on an unfloured surface and refrain from dusting the dough with flour while you're rolling it out — flour will make the rope slide around on the counter instead of elongating.

On an unfloured surface, roll the dough into a long rope. Avoid tapering the ends so the rope is an even thickness.

Once the rope is long enough, dust your hands with flour and give the rope one more roll. This keeps the dough from sticking to itself as you knot it.

Create a loose single knot, leaving some extra space in the loop. You'll now have two "tail" ends of dough, one of which pokes through the middle.

Take the tail end of the knot that's poking through the middle of the loop and wrap it around the loop one more time so it pokes through the middle again.
Wrap the tail end of the dough that's sticking out from underneath the loop around to the front and join it together with the tail sticking through the middle of the loop.


If this sounds confusing, I do recommend watching the video at the end of this blog post to see how it's done! It was tricky to photograph and hard to describe but it's a pretty simple process once you get the hang of it, I swear.

Let the Kaiser rolls rise at room temperature until quite puffy and almost doubled in size. Immediately before baking, brush the rolls with milk and sprinkle generously with the dried minced onion.
Shaping Scored or Stamped Kaiser Rolls
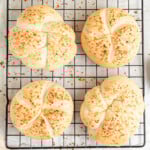
If you don't want to fuss with knotting your Kaiser rolls, you can shape the dough into balls instead and score them before baking. Wait to score them until right before they go into the oven!
To create the traditional Kaiser roll design, score 5-6 arc-shaped lines from the center out. Cut at least ¼" to ½" deep — these deep cuts will allow the rolls to expand properly in the oven.


You can also use a Kaiser roll stamp, which is exactly what it sounds like: It's a plastic stamp that creates the signature curved design on the top of the rolls.
To use a Kaiser roll stamp, first brush the rolls with the milk wash, then press the stamp down firmly into the top of the dough. You don't want to cut all the way through, but you do want the stamp to make a significant impression. Finally, sprinkle them with the dried minced onion and pop them in the oven.

Ateco Kaiser Roll Stamp
Made of dishwasher safe, high-impact plastic. Dimensions: 3.5 inches diameter.


💭 Have More Baking Questions?
I've rounded up answers to common baking questions and how-to guides, including:
- Ingredient swaps and FAQs
- Why my recipes are written in grams and not cups
- How to quickly bring eggs and butter to room temperature
- Ingredients I use (salt, flour, yeast, etc.)
- Step-by-step guides for bread and baking techniques
See my baking techniques & troubleshooting guide and ingredient swaps and FAQs for more!
📖 Recipe
Easy Kaiser Rolls for Beginners (and 3 Ways to Shape Them!)
Recipe Notes
- If the round rolls have puffed up into round, domed tops in the oven, you can place a sheet pan on top of them immediately after removing them from the oven to deflate them slightly into a flatter burger bun shape. Don't press down on the sheet pan, the weight of the pan alone is enough.
- If using a Kaiser roll stamp, brush the rolls with milk, then stamp the tops, then sprinkle with onion topping. If the stamp is sticking or not pulling away cleanly from the dough, spray it with non-stick spray before each use.
- For a darker or crisper, harder Kaiser roll add 3-5 minutes to the bake time.
- You can knead this Kaiser roll dough by hand, but I find it's a little stickier than I like to handle. Add about 3-5 mins to the kneading time and try not to add too much flour as you work. Just enough to prevent sticking.
- Store in an airtight container at room temperature for 6-7 days. They may be a little dry by the end of that window, but will bounce back when toasted.
- To freeze: Slice them in half almost all the way through, wrap each one tightly with plastic wrap, then place in a large bag in the freezer with as much air pressed out as possible. They can go right in the toaster oven from frozen or you can defrost on the counter at room temperature, then pop in the oven at 350°F for 5-7 mins to perk them back up.
- If you prefer smaller Kaiser rolls, divide the dough into seven (~144g each) or even eight (~126g each) portions instead of six.
Ingredients
DOUGH
- 600 grams all-purpose flour (plus more for dusting)
- 15 grams diamond crystal kosher salt
- 10 grams sugar
- 6 grams instant yeast
- 360 grams water (90°F)
- 30 grams olive oil
TOPPINGS
- 1-2 teaspoons milk
- 1-2 teaspoons dried minced onion (poppy seeds, sesame seeds, or everything bagel seasoning will also work)
Instructions
- Mix. In the bowl of your stand mixer, whisk together flour, salt, sugar, and yeast. Make a well in the center and pour in the warm water and olive oil. Mix on low speed with the dough hook until the dough comes together in one shaggy, messy mass on the dough hook. This can take a few minutes, be patient. Pause and scrape down the sides of the bowl if you need to.
- Knead. On low speed, knead for 5 minutes until the dough smooths out but is still a little sticky to the touch. Scrape down the dough hook, flip the dough over in the bowl, and knead 3-5 minutes more. The dough will still be a little sticky but should look smoother.
- First Rise. Tuck the dough into a ball and place it in a lightly greased bowl (you can use your mixer bowl). If the dough sticks to your hands too much, you can lightly grease them to make it easier to handle. Cover and let rise at room temperature until doubled in size, about 1-1½ hours.If your kitchen is cold, place it somewhere nice and warm to rise, otherwise it may need an extra 30 mins or so.
- Divide. Gently deflate the dough and turn it out onto a clean, lightly floured work surface. Divide into 6 equal pieces (about 168g each).
- Shape a knot. Roll a 20" rope of dough (no fancy pre-shaping required). Do not taper the ends. Dust your hands lightly with flour and give the rope a quick roll — the flour will keep it from sticking to itself while you shape it. Create a loop in the middle of the rope, crossing the two ends over each other. Thread one end of the rope through the middle of the loop, leaving some space in the loop. Take the end of the rope that is poking through the middle and wrap it around the loop again so it pokes back through the middle. Then, take the other end of the rope and wrap it around the front of the loop, pushing it through the middle to pinch it together with the other end of the rope so the joined ends are tucked inside. (See video below if this is confusing!)If shaping rolls to score or stamp, knead or shape each piece of dough into a tight ball with the seam tucked underneath. Score or stamp the rolls immediately before baking, after brushing with milk and sprinkling with minced onion.
- Second Rise. Spray the tops of the rolls lightly with non-stick spray. Cover with plastic wrap, and place a sheet pan on top to weigh them down as they rise until doubled in size and quite puffy, 1-1½ hours. The weight of the sheet pan will force them to rise outward rather than upward.
- Preheat to 400°F. Toward the end of the rise time, preheat the oven to 400°F.
- Toppings. Immediately before baking, brush the Kaiser rolls all over with milk, then sprinkle with dried minced onion. If doing round rolls, use a sharp knife or lame to score 5-6 lines arcing out from the center of each roll, about ½" deep. If stamping your Kaiser buns, do so now.
- Bake. Bake the Kaiser rolls for 18-20 minutes until pale golden brown on top. Remove from the oven and let cool on the sheet pan 5 minutes before transferring to a wire rack to cool completely.
Shiny says
Under “Shaping” it says each roll should weigh “TK grams”. What weight is that supposed to be?
Rebecca Eisenberg says
Ooops! That should be 168 grams! Just went in an updated it. Thanks for catching!
Arty says
10/10. So quick and easy, and SUPER light and fluffy bread. I used the knot method and they’re like single serve pull apart loaves.
A lot quicker to rise than the recipe said, it’s 75°F/24°C in my kitchen and the rises were done in 35/40mins each. I split the dough into 9 rolls (roughly 110g of dough) instead of 6 and they’re still huge, not sure if my yeast is just particularly active. I’ll definitely be making these again.
Barbara Parland says
Another hit recipe from Rebecca! Detailed post- check
Easy to follow recipe- check
Super helpful shaping video- check check! (Seriously though, watch the video for the knots. I practiced with yarn because I'm a visual/tactical learner)
My scored rolls looked ugly due to my no so sharp knife. Next time (and there will be a next time) I will use a lame!
I added dried minced onion directly to the dough...highly recommend!
Sue says
Halved the recipe and made 4 rolls, still big rolls, turned out fabulous. I added Everything Bagel sprinkles to the top and made hamburgers for tea. Thanks Rebecca
Leanne Elnicki says
These kaiser rolls were delicious and super easy to make!
- A stand mixer is a great investment because it really does all the work!
- When flattening with the second baking sheet, make sure there's a little weight on top to it to achieve the desired effect. My topper sheet was too light.
- They held up really well to pulled pork, but I did give them a little toast first.
I'd also just like to thank Rebecca for being available to lend a helping hand via social media. She reads her DMs and replies, which is so refreshing! Thank you, Fairy Breadmother!
Rebecca Eisenberg says
🙂 Thanks so much for leaving such a lovely review, I'm thrilled you liked the Kaiser rolls!
MAS says
I made this! Pleasing results. Don't be daunted by the rolling and creative twisting. It makes sense once you start doing it. And, fortunately, rising dough is very forgiving. I bake bread 2 or 3 times a week and I prefer rolls versus loaves. This kaiser roll shaping option is a welcome change to my routine. Using a baking sheet during the second rise is something I have been experimenting with without success. No-stick cooking spray and plastic wrap were the elements I was missing. This secret makes me happy and I have used it with my other bakes.
Isabelle says
These were great!! Totally doable even without a stand mixer, and I took the easy route of making balls and scoring them for my first try. Next time I'll do the fun knots!
Jenbowd says
After success with several other recipes from Rebecca, I gave these Kaiser rolls a try. What fun! The dough was stickier than I expected after the first rise, but I survived thanks to my bowl scraper. My husband is not a fan of onions (or anything spicy, sadly) so I topped my rolls with plain sesame seeds. It was a good choice as it added "a little something".
The only really tricky part was making the knots. I watched the video several times, and then dove in. Were my knots perfect on the first try? No! But did those rolls still taste delicious? You bet!
Thanks to Rebecca for another winning recipe!
#teamkitchenscale
Rebecca Eisenberg says
Hooray for #TeamKitchenScale! So glad you enjoyed the kaiser rolls and perservered through the knots — definitely a technique that gets easier with practice. Happy baking!
Katrina says
I made these today and they were a hit with everyone. I topped a few with dried onion and the rest with sesame seeds.
Very easy to follow directions and I cannot wait to make them again for sandwiches.
Vicki Potter says
These rolls are fantastic. The recipe was easy to follow. I will definitely be making these again!
Karen S says
I made this recipe today — delicious! I agree with the other bakers that they are HUGE. I’ll try halving as another baker did since it’s just me and my hubbie in the house. I even wondered about formulating this as a ”small batch” recipe. The knot tying video was a great help, and I liked the way they looked. One issue — in the printed instructions, it does not say to divide into six pieces at the end of Step 3 or beginning of Step 4. I used white sesame seeds. Next time I may try an egg wash to make them stick tighter.
Keep up the great work, Rebecca, your bread recipes are phenomenal!!
William A says
Great recipe and Instructions. Will make this over and over again. Will make my NY style HARD EGG sandwich that I haven't had for over 20 years.
Rebecca Eisenberg says
So glad you enjoyed the rolls! I hope the hard egg sandwich lives up to your memory of it! Happy baking!
William A says
Yup, the NY HARD EGG Sandwich was greaf!
Star says
Can you do this recipes in cups and tablespoons/teaspoons?
Rebecca Eisenberg says
No, sorry. I explain why I don’t provide recipes in cups in my website FAQ. Unfortunately it’s just not an accurate way to measure and I want you to succeed when you make my recipes!
Star says
I'll just do it myself then. As a pastry chef I dont use grams. Thx anyway
Jill says
These are so easy to make & taste amazing! I had a small amount of leftover fried halibut which I turned into fish sandwiches the next day with these rolls!
I've made lots of Rebecca's recipes & she's become my go to when wanting to try something new. Yes the recipes are measured in weight; buy a scale & move on! 🤣
Helle says
These are fantastic and I just made them for a second time.
But I was wondering if it is possible to freeze the doughballs before baking them or is it just best do to it after baking and the cooldown?
Rebecca Eisenberg says
So glad you’re liking them! Definitely best to freeze after baking. Enjoy!
Connie A says
Hello, i finally made these rolls. Super easy; you have written down 168g of dough per roll at six rolls. I thought this was excessive and a heavy bun but obviously everyone likes a different size:) I made nine rolls at 110g each. They turned out really well, although i am wondering now if i should try 8 rolls with more grams per each since they seemed smaller in size? Maybe try 120g per cut? And when I was rolling into logs at 20”, they were a tad thinner because i reduced the grams per dough. Im going to try again LOL I am also going to ask if this dough needs a window pane test prior to first rise? The dough was sticky and smooth but after 10 minutes of kneading it didnt pass that test and i stopped anyway. Thanks!
Rebecca Eisenberg says
So glad you liked them and glad you were able to scale them to the size you wanted! And no, this dough doesn't need to pass the windowpane test prior to the first rise. You can just knead it until smooth and it will be fine. Enjoy!
Josefine says
Made these today and they were soooo good and easy to make.
Thank you for an excellent recipe and easy Instructions to follow.
Mackenzie says
I just made these, and they were perfect for chicken burgers! I did split the batch into 8 rolls instead of 6, and they were plenty large.
Heather says
I was a little worried that I messed up the hydration on this recipe, (mine was kind of sticky like the brioche hot dog buns), but they came out Perfect!
10/10 will make again and again and again!
Ewa says
These are absolutely fantastic! Thank you soooo much for the recipe and for the video. Super helpful. Thanks again!! 🙂
Veronica Wineinger says
I made this recipe for the first time yesterday and for my safety, I'm making it again. I got one roll before wild animals devoured the rest! One!!
◇◇◇I made two changes, because of course. Milk in place of water and one egg counted as part of the liquids. They add extra richness, elasticity, finer crumb, etc. Now I'm thinking about malted barley bridging the gap between rolls and bagels 🥯
Rose H says
Made these today and they came out great EXCEPT they are crusty, more of a soft kaiser. Any suggestion? I'd attach a photo but doesn't seem possible. Looking forward to hearing from you.
Rebecca Eisenberg says
I’m confused are they too crusty or too soft? It might be your oven temp. I usually think of Kaiser rolls as having a nice crust but still being soft so if that’s what yours were like I’d say they were spot on…
Rose says
I tried to edit my comment, sorry. They didn't have that crusty crunch on top. Totally edible but was hoping for thatcrust. The oven temp is fine. I wonder ifi should place a pan of hot water for steam as I do with my baguette recipe?
Rebecca Eisenberg says
I would definitely give that a try! You could also try spritzing them with water instead of brushing with milk before baking. Let me know how it turns out!
Rose says
Thank you very much, will try that and let you know how they turned out 😊