• Skip to primary navigation
  • Skip to main content
  • Skip to primary sidebar
  • Skip to footer
the practical kitchen
  • Recipes
    • Recipe Index
    • Appetizers
    • Breads
      • Bagels
      • Biscuits, Scones & Loaves
      • Sourdough
    • Breakfast
      • Muffins
    • Condiments & Dips
    • Desserts
      • Bars & Brownies
      • Cakes
      • Cookies
      • Ice Cream
      • Pies & Tarts
    • Main Dishes
      • Pasta
      • Pizza
    • Salads
    • Side Dishes
    • Snacks
  • About
  • Shop
  • Newsletter
  • Tip Jar
    • Amazon
    • Facebook
    • Instagram
    • Pinterest
    • RSS
    • TikTok
    • Twitter
    • YouTube
menu icon
go to homepage
subscribe
search icon
Homepage link
  • Recipes
    • Recipe Index
    • Appetizers
    • Breads
    • Breakfast
    • Condiments & Dips
    • Desserts
    • Main Dishes
    • Salads
    • Side Dishes
    • Snacks
  • About
  • Shop
  • Newsletter
  • Tip Jar
    • Amazon
    • Facebook
    • Instagram
    • Pinterest
    • TikTok
    • Twitter
    • YouTube
  • ×
    Home » Breads

    Easy Soft Sandwich Bread in a Loaf Pan (For Beginners)

    4.85 from 58 votes
    Published by Rebecca Eisenberg ⁠— February 27, 2024 — 123 Comments

    2196 shares
    Jump to Recipe Jump to Video

    This post may contain affiliate links

    homemade soft sandwich bread (dairy-free, egg-free)

    Making a homemade loaf of soft white sandwich bread is so easy, and this foolproof recipe makes a single loaf of bread using just six easy-to-find ingredients. It's a simple dairy-free and egg-free dough that comes together quickly whether you knead it in your mixer or knead it by hand. I've included instructions for both kneading options in my step-by-step instructions below!

    a cross-section of a loaf of white sandwich bread.

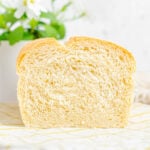
    This classic white sandwich bread is a taste of nostalgia, reminiscent of childhood lunches and cozy mornings; made with love at home in your kitchen. The finished loaf is wonderfully soft inside with a thin, light golden brown crust, perfect for slicing and sandwiches.

    Try serving this soft white sandwich bread with my deli tuna salad or creamy yellow smashed egg salad. Like my soft rye sandwich bread, it's also great toasted with some fresh homemade butter!

    Jump to:
    • About This Recipe
    • Ingredient Notes
    • Instructions
    • Kneading By Hand
    • Equipment Notes
    • Storage Notes & Freezing
    • Practical Tips and Recipe Notes
    • If your sandwich bread deflated during baking...
    • Why is this recipe in grams? I want to use cups!
    • TL;DR — Recipe Summary
    • 📖 Recipe
    • 💬 Comments

    About This Recipe

    I am so, so excited to be sharing this recipe for a classic soft homemade sandwich bread with you. I've got lots of homemade bread recipes on my site (including the airy, floury soft-baked ciabatta recipe that this sandwich bread dough is based on), but most of them are higher hydration doughs that don't use a mixer or aren't kneaded by hand.

    With this recipe, I wanted to give you the kind of bread-making experience most people think of when picturing making bread from scratch. You're kneading the dough, you're dusting it with flour, you're shaping it by hand, and you're baking it in a loaf pan. And it's a foolproof beginner-friendly bread recipe too!

    This soft sandwich bread is a classic medium-low hydration dough that can be kneaded in a mixer or by hand. It's easy to handle, not too sticky, and fun to work with. It's also a versatile base white bread dough that can be used to make everything from cinnamon swirl bread to cheesy pizza pinwheels!

    a loaf of sandwich bread on a linen bread bag with two slices cut off the front of the loaf.

    Where other sandwich bread recipes use the fat from milk or eggs to give the bread a super soft texture, my recipe uses olive oil instead. Not only is olive oil a shelf-stable ingredient that's easier to keep on hand, but it also means this sandwich bread is dairy and egg-free, if that matters to you.

    Earlier versions of this recipe were much lower hydration and used smaller amounts of oil — in the end, I pushed both amounts as high as I could go while keeping the dough easy to handle. I wanted the sliced bread to be flexible the way store-bought sandwich bread is.

    I'm really pleased with how the final version of this foolproof soft sandwich bread turned out and I think you will be too!

    5 STAR READER REVIEW

    “I've tried a few different beginner sandwich bread recipes and somehow can never get them to come out but I've made this one three times now and it's come out so delicious each time! I also love how simple it is”

    —Nicole
    Add your review →

    Ingredient Notes

    Here are the ingredients that you'll need to make this foolproof sandwich bread recipe! See recipe card (at the end of the blog post) for quantities.

    all of the ingredients for sandwich bread measured out and labeled.
    • Flour - You don't need any fancy specialty flours to make this basic soft sandwich bread! I use King Arthur Baking's all-purpose flour which has a slightly higher protein content (closer to a bread flour) than other brands of all-purpose flour. If you're using generic or store-brand flour, you may see better results with their bread flour.
    • Instant Yeast - I use instant yeast because it's designed to be added directly to your dry ingredients without having to be proofed in water first. Instant yeast is sometimes also called "rapid rise" or "quick" yeast. I designed this recipe to use 1 packet of yeast. If you're using active dry yeast, use the same amount of yeast, just mix it with the warm water and let it sit for 5 minutes to become foamy before adding to the dough.
    • Salt - I use Diamond Crystal Kosher Salt which is half as salty as other brands. If measuring by weight, it doesn't matter what brand of salt you use. But if you're measuring by volume and using a different brand of salt, even a different brand of kosher salt, cut the amount of salt in half.
    • Olive Oil - Whatever olive oil or extra virgin olive oil you have on hand is just fine here. The olive oil adds fat to the dough, giving it a super soft texture.
    • Honey - I use honey to add a bit of sweetness to this sandwich bread. If you don't have honey and would rather use sugar, increase the amount called for by 20%.
    • Water - Warm water is crucial for helping this sandwich bread dough rise, soft texture and just slightly open crumb. Aim for around 90°-95°F. It should be decidedly warm but not hot, since truly hot water will kill the yeast.

    Instructions

    This is your standard bread dough process. Start by whisking the dry ingredients together in the bowl of your stand mixer to disperse them evenly.

    water, honey, and olive oil in the middle of the dry ingredients in a metal mixer bowl.

    Add the water, olive oil, and honey to the center of the dry ingredients.

    the bread dough after mixing in a stand mixer bowl with a dough hook. the dough is shaggy and rough looking.

    Mix on low speed until the dough just comes together.

    You may need to pause the mixer early on to push flour from the edges into the liquids in the center. But if you just let it run on low-medium speed it will eventually come together.

    The goal of mixing is just to get all of the ingredients to combine so there's no dry bits of flour or water in the bottom of the bowl. The dough will still have a rough, shaggy, slightly torn look to it.

    Once the dough comes together, it's time to knead. Kneading is when we actually develop the strength and structure of the dough so that it can be shaped and trap the gasses released by the yeast when the dough rises.

    The dough after kneading with the dough hook is smooth and elastic, pulling clean from the side of the bowl.

    Continue with the dough hook on medium-low speed for about 3-5 minutes until the dough is smooth, elastic, and slightly tacky to the touch.

    the dough shaped into a ball, coated with oil, it takes up about half of a metal mixing bowl.

    Shape the dough into a ball by tucking all the edges under so you have a nice smooth top. Place it in a lightly oiled bowl, turning the dough once to coat it in oil.

    Cover the bowl (I use these plastic hair processing caps as bowl covers) and leave it to rise somewhere warm for an hour.

    after rising, the dough now fills most of the metal mixing bowl.

    When the dough has doubled in size, gently deflate it and turn it out onto a clean, lightly floured work surface.

    the dough has been turned out onto a counter. the top two corners are folded in to a point and the sides are folded in slightly. a hand holds the dough in place.

    Fold the top two corners into make a point, then fold the edges in slightly to even them out.

    Roll the point at the top toward your body, and continue rolling in that direction, tucking the sides in as needed to form a nice neat log of dough.

    a hand folding the top point of the dough down to begin rolling the folded dough forward.
    a hand rolling the dough into a log with the seam underneath.

    Transfer the log of dough to a lightly greased 9x5" loaf pan. Cover the loaf pan, place it back in that nice warm spot, and let it rise for another 50-60 minutes.

    During the end of the rise time, begin preheating the oven to 350°F.

    When the dough is ready, it will have doubled in size, crowning just slightly over the top edge of the pan. When you press a lightly floured fingertip into it, the indentation should fill back in slowly and remain visible.

    the shaped dough in a metal loaf pan. it doesn't fill out the whole pan.
    after rising the dough fills out the whole pan. there is a long score mark down the middle with a bread lame nearby.

    Use a sharp knife or a bread lame (pronounced: LAHM) to cut one long slash down the top of the loaf to help it expand in the oven.

    Bake the sandwich bread for 30 minutes until golden brown on top. You're looking for an internal temperature of 195°-200°F.

    a baked loaf of sandwich bread in a loaf pan. a bread lame sits next to it.

    Remove the sandwich bread from the oven and carefully turn it out of the pan and onto a cooling rack. This allows steam to escape and air to circulate around the loaf so that the crust doesn't get soggy.

    I know it's super tempting to cut a slice of freshly baked sandwich bread while it's still warm, but resist that urge! If you slice the bread before it's cooled and the starches haven't set yet, the steam still inside the bread will turn the starches to mush. No one wants mushy bread!

    Kneading By Hand

    To knead this soft sandwich dough by hand, use a dough whisk or a spatula (heck, even your hands) to mix the dough ingredients in a bowl until a sticky, cohesive dough forms.

    Then turn the dough out onto a lightly floured work surface or countertop and knead by hand, folding the dough over itself and rocking it forward, then rotating and repeating that motion, until the dough is smooth, elastic, and slightly tacky to the touch. Kneading by hand can take 8-10 minutes, be patient! Set a timer!

    Dust in additional flour lightly only as needed to keep it from sticking to you and the counter. A little clinging is fine, but it should pull away cleanly at the end.

    Equipment Notes

    This recipe is scaled to bake in a 9x5" loaf pan, which is a 1.25 lb loaf pan. If you have a smaller loaf pan, I recommend scaling the recipe down by about 20%.

    a silver rectangular loaf pan.

    USA Pan Bakeware Aluminized Steel Loaf Pan, 1.25 Pound

    Dimensions: 9 x 5 x 2.75. Durable construction with corrugated surface for optimal airflow. Non-stick finish is PTFE, PFOA and BPA free.

    Amazon
    Crate & Barrel
    Sur La Table

    As always, I recommend using a metal pan rather than glass, ceramic, silicone, or stoneware. If you're using a glass pan, you may need to adjust the baking time and temperature!

    To score the top of the bread loaf, you'll need a sharp knife or a bread lame (pronounced: LAME). Lame is French for blade.

    A lame is basically a razor blade with a handle, used to create functional and decorative slashes on top of bread before baking.

    a black bread lame with a retractable razor blade.
    Retractable Bread Lame
    a round wooden lame with a razor blade sticking out one side.
    Wiremonkey UFO Lame
    a long wooden lame with a razor blade tucked into one end and a metal finger protector.
    Black Walnut Lame

    Lames come in a variety of sizes and styles at a range of price points. Use whichever one is most comfortable to you!

    Storage Notes & Freezing

    This soft sandwich bread is best eaten within the first 4-5 days after baking, though you can store it in an airtight bag or bread bag at room temperature for up to a week. I usually store it in a large resealable plastic bag with as much air pressed out as possible.

    Do not refrigerate bread; the cold temperature will make it go stale even faster.

    This sandwich bread freezes beautifully. You can freeze the whole loaf, defrost it at room temperature, then pop it in a 325°F oven for 20-30 minutes.

    You can also slice the loaf and place the slices in a plastic bag with as much air pressed out as possible and freeze it that way. Simply break off a slice of frozen sandwich bread, pop it in a toaster oven, and it'll be ready to eat.

    close up of a slice of soft sandwich bread.

    Practical Tips and Recipe Notes

    • If it's very humid where you live, I recommend holding back about 25 grams of water to start. If it looks or feels like the dough needs it, drizzle it in 1 teaspoon at a time during the mixing stage.
    • If it's very cold where you live, your dough may rise more slowly; it's okay if it needs an extra 15-45 minutes. I've been using a seed starting heat mat (less than $15!) to keep my bread doughs nice and cozy while they rise and it works really well.
    • For a shiny top to your sandwich bread, brush it all over with a lightly beaten egg before scoring and baking.
    • If you're using active dry yeast, no need to adjust the amount of yeast, just mix the yeast with the warm water and let it sit for 5 minutes to become foamy before adding to the dough.

    If your sandwich bread deflated during baking...

    There are a few things that could have caused this but the two most likely culprits are:

    1. The dough overproofed during the second rise. Dough overproofs when the yeast has eaten all of the available sugars in the dough and doesn't have enough energy left to support the dough during baking. Your dough was ready to bake before the final hour rise was done — check it using the fingerprint test (see above).
    2. Your oven temperature is off! If your oven temperature runs cool, the bread won't rise as much as it should during baking and will be dense and sunken. Get an oven thermometer!

    Why is this recipe in grams? I want to use cups!

    A kitchen scale is more accurate than cup measurements and will give you the right ratio of dry and liquid ingredients so that the bread dough behaves the way we want it to. I tested and developed this recipe using weight measurements. If I were to convert it to volume measurements, I would be using Google — just like you would. And there's no set standard for how much "1 cup" of flour weighs (I use 120 grams, like King Arthur Baking does, but other recipe developers use as much as 150 grams as "1 cup"), which means I wouldn't be able to promise you'd get the same delicious results!

    TL;DR — Recipe Summary

    • Mix the dough ingredients together until a sticky, cohesive dough forms.
    • Knead the dough until it is smooth, elastic, and slightly tacky.
    • Shape the dough into a ball, place in a lightly greased bowl, cover and rest until doubled in size.
    • Deflate the dough, shape into a log, then place in a lightly greased loaf pan. Cover and let rest until doubled in size.
    • Score the top of the loaf and bake for 30 minutes at 350°F.
    • Turn the loaf onto a cooling rack to cool completely before slicing.

    📖 Recipe

    a cross-section of a loaf of white sandwich bread

    Easy Soft Sandwich Bread in a Loaf Pan (For Beginners)

    Rebecca Eisenberg
    This foolproof recipe for a single loaf of homemade soft sandwich bread uses just six easy-to-find ingredients. It's a classic white sandwich bread baked in a loaf pan, reminiscent of childhood lunches and cozy mornings; made with love at home in your kitchen. The finished loaf is wonderfully soft inside with a thin, light golden brown crust, perfect for slicing and sandwiches.
    4.85 from 58 votes
    Print Recipe Pin Recipe Save Saved! Email
    Prep Time 15 minutes mins
    Cook Time 30 minutes mins
    Rising Time (Divided) 2 hours hrs
    Total Time 2 hours hrs 45 minutes mins
    Course Bread
    Cuisine American
    Servings 1 loaf

    Equipment

    • 1.25 pound loaf pan (9x5")
    • Kitchen scale

    Ingredients
      

    • 400 grams all-purpose flour
    • 8 grams salt
    • 7 grams instant yeast (see notes for active dry yeast)
    • 236 grams warm water (90°F)
    • 20 grams olive oil
    • 8 grams honey
    Prevent your screen from going dark

    Instructions
     

    • Mix. Mix the flour, salt, and yeast together in the bowl of your stand mixer. Add warm water, honey, and olive oil. Mix with the dough hook, pausing to scrape down the sides of the bowl as needed, until the dough comes together in a shaggy mass on the dough hook and clears the sides of the bowl.
    • Knead. Increase the speed to low-medium and knead for 3-5 minutes until the dough is soft, smooth, and elastic. The dough may cling slightly to the walls of the bowl but should pull away cleanly.
    • Rise. Tuck the edges of the dough under to create a ball of dough with a smooth top. Place in a lightly greased bowl and let rise somewhere warm for 1 hour or until doubled in size.
    • Shape. Gently deflate the dough, then turn it out onto a lightly floured work surface. Loosely arrange it into a rough rectangle shape. Fold the top two corners in to make a point, then roll the point forward as you tuck the sides in to create a nice smooth rolled-up log of dough with the seam on the bottom.
    • Rise again. Place the log of dough in a lightly greased 9x5" loaf pan. Cover the pan loosely with plastic wrap and let rise somewhere warm for 1 hour until the dough fills out the pan and crowns over the top rim of the pan by about an inch.

    During the final 30 minutes of the rise time, preheat the oven to 350°F.

    • Score. Right before baking, use a sharp knife or lame to score a line down the center length of the sandwich bread.
    • Bake. Bake the sandwich bread in the center of a 350°F oven for 30-35 minutes, or until an internal temperature of 195°-200°F for doneness.
    • Cool. Carefully turn the baked loaf out of the pan and onto a wire rack to cool completely before slicing.

    RECIPE NOTES

    • If you're using active dry yeast, mix it with the warm water and let it sit for 5 minutes to become foamy before adding the water to the dough.
    • If it's very humid where you live, I recommend holding back about 25 grams of water to start. If it looks or feels like the dough needs it, drizzle it in 1 teaspoon at a time during the mixing stage.
    • If it's very cold where you live, your dough may rise more slowly; it's okay if it needs an extra 15-45 minutes to rise.
    • For a shiny top, brush the loaf with a lightly beaten egg before scoring and baking.
    • If you have a smaller loaf pan (8x4"), I recommend scaling the recipe down by about 20%.

    YOUR NOTES

    Click here to add your own private notes. Only you can see these.
    Tried this recipe?Leave a comment and let me how it was!
    Biscuits, Scones & LoavesBreads
    « How to Make Foolproof Fried Donut Holes
    Gooey, Soft Brioche Cinnamon Rolls »

    Reader Interactions

    Comments

      4.85 from 58 votes (9 ratings without comment)

      Leave a Reply Cancel reply

      Your email address will not be published. Required fields are marked *

      Recipe Rating


    1. Margaret Wiebe

      February 27, 2024 at 5:29 pm

      Do you have a bread recipe for whole wheat?

      Reply
      • Rebecca Eisenberg

        February 27, 2024 at 6:04 pm

        I do not!

        Reply
        • Nicole

          May 18, 2024 at 5:21 pm

          5 stars
          I've tried a few different beginner sandwich bread recipes and somehow can never get them to come out but I've made this one three times now and it's come out so delicious each time! I also love how simple it is

          Reply
          • Rebecca Eisenberg

            May 20, 2024 at 9:57 am

            Yayyy, I'm so glad you found success here! Keep on baking!

            Reply
        • Josephine

          December 30, 2024 at 3:33 pm

          5 stars
          This is a great recipe! The bread always turns out amazing and I love that the recipe is in grams!

          Reply
      • Nandini

        August 01, 2024 at 2:01 am

        5 stars
        So so easy to bake thus white soft bread loaf! I made double the amount and just stunned at how wonderful it turned out and how easy the recipe was to follow! Thank you so much for sharing these incredibly simple recipes!!

        Reply
      • Katelyn

        August 07, 2024 at 10:34 am

        5 stars
        I tested and used the ratios from her OVERNIGHT NO-KNEAD WHOLE WHEAT BREAD IN A DUTCH OVEN: 42% wheat/white wheat flour and 58% all-purpose flour. So for this recipe 58% of 400g is 232g of all purpose flour and 42% of 400g is 168g of wheat/white wheat flour. I then followed the recipe as instructed, it turned out amazing. Yum! Definitely recommend doing it this way or using the dutch oven depending on what you are wanting it for.

        Reply
      • Rebecca Eisenberg

        August 07, 2024 at 12:46 pm

        Update: I now have a whole wheat bread recipe!

        Reply
    2. Mel

      February 28, 2024 at 2:21 pm

      5 stars
      Hi, love you recipes. That's 236 *grams*'water, correct? I love that you post weights!

      Reply
      • Rebecca Eisenberg

        February 29, 2024 at 10:57 am

        Oops, correct! 236 grams of water. I'll go update that right now. Thanks!

        Reply
    3. Vanessa

      March 01, 2024 at 11:29 am

      5 stars
      This recipe was so easy to follow and produced a delicious loaf of bread!!

      Reply
    4. Midge

      March 01, 2024 at 6:50 pm

      5 stars
      WOW…this was as easy and as yummy as you said it was. It will be my go too and I will be passing it along. My scale does not measure micro grams but managed to figure out how many teaspoons I needed and it worked.

      Thank you.

      A fan from Oakville, Ontario Canada

      Reply
    5. Rebecca

      March 02, 2024 at 6:41 pm

      5 stars
      Accidentally grabbed the bread flour canister instead of AP. Took a little more kneading but seems to have turned out pretty good! Can’t wait to try it with AP. As always another great recipe.

      Reply
      • Roxanne

        October 17, 2024 at 10:03 pm

        Is there a way to use sourdough starter instead?

        Reply
        • Rebecca Eisenberg

          October 22, 2024 at 9:42 am

          I'm sure there is but I haven't tested it, it would dramatically change the timing of the recipe. I would recommend looking for a sourdough specific sandwich bread recipe if that's what you want.

          Reply
    6. mmh

      March 05, 2024 at 2:02 pm

      5 stars
      My loaf was perfect, one of the prettiest things I've done in the kitchen. Delicious and easy- getting used to weighing ingredients.
      thanks for this great recipe and keep them coming.

      Reply
      • Rebecca Eisenberg

        March 05, 2024 at 2:03 pm

        I'm so glad you liked it, and welcome to #teamkitchenscale! 🙂 Happy baking!

        Reply
    7. Bettina Howell

      March 08, 2024 at 11:15 am

      Hi! Has anyone tried this with gluten free flour?

      Reply
      • Rebecca Eisenberg

        March 08, 2024 at 12:57 pm

        Not yet! I've heard certain brands of 1-for-1 GF flour work okay with bread recipes, but I haven't personally tested any. If you give it a try, please report back and let us know how it went so other people can know what GF flours do/don't work!

        Reply
    8. Chea

      March 10, 2024 at 8:17 pm

      Can you substitute olive oil with other types of oil? Canola, for instance?

      Reply
      • Rebecca Eisenberg

        March 10, 2024 at 9:30 pm

        Yep!

        Reply
    9. Molly

      March 12, 2024 at 5:08 pm

      Help! I have tried this 2 times, and both times my bread failed to rise well on the second rise and then baked up to be a brick… I weighed my ingredients and followed all of the instructions. Any tips on what could have gone wrong?

      Reply
      • Rebecca Eisenberg

        March 12, 2024 at 6:03 pm

        Hi! Happy to help, so sorry it didn’t quite turn out right. Thanks for clarifying that you measured the ingredients by weight. My next guess would be that either your yeast isn’t active enough…are you sure it’s new/fresh? And did you use Instant, not Active Dry yeast? And if you’re sure your yeast is fresh and you used instant yeast, then my next guess would be that your kitchen runs a bit cold (let me know if not). You may need to place it somewhere warmer to rise!

        Reply
        • Molly

          March 12, 2024 at 8:02 pm

          My yeast is brand new. I am so sad and frustrated. I live in Michigan, so my house is cold. I have put it in a barely warm oven, in a warm sunny spot in my house and I just tried it a third time with a heating pad and it failed again. I have had success with other recipes of yours, so I am just at a loss

          Reply
          • Rebecca Eisenberg

            March 13, 2024 at 10:53 am

            Hmmm, this is incredibly confounding! I'm so sorry it's not working. And I'm very surprised the heating pad didn't work. My other suggestion would be to just let it rise until it does double — maybe it just needs more time? Try giving it up to another hour or so to rise in the pan.

            The only other thing I can think is if your water was too hot it would have killed the yeast, but I think it's pretty unlikely that happened multiple times!

            Reply
          • Brittany Lopez

            April 30, 2024 at 10:30 pm

            5 stars
            My house is cold as well, I turn on the oven to 325-350
            And place like a pan on the oven top and then my dough and cover it and it rises

            Reply
          • Dawn

            June 09, 2024 at 1:20 am

            Maybe a strange question but what type of water are you using? When I started my sourdough bread journey I was using Reverse Osmosis but found after failure & much reading I needed to use just filtered water (we have well water).

            Reply
      • Donna

        May 08, 2024 at 4:29 pm

        Can I make this bread in a Pullman pan and using its lid??

        Reply
        • Rebecca Eisenberg

          May 09, 2024 at 11:42 am

          I haven't tried that, tbh! You could give it a go but I do think it could work in a small pullman pan (9x4"). You'll want to grease the lid well and slide it on before the dough reaches the top rim of the pan. If you try it let me know how it goes!

          Reply
    10. Sandra Bishop

      March 13, 2024 at 10:33 am

      Do you have the recipe in cups, teaspoons, etc? The recipe looks so good. Thanks

      Reply
      • Rebecca Eisenberg

        March 13, 2024 at 10:51 am

        Nope! I explained why in the FAQ.

        Reply
    11. Elle

      March 29, 2024 at 4:47 pm

      5 stars
      This was so easy to make and turned out some great sandwich bread! Very excited to make this one again.

      Reply
      • Rebecca Eisenberg

        April 01, 2024 at 10:05 am

        Hooray, happy baking! Keep on enjoying the bread!

        Reply
    12. Nick

      April 09, 2024 at 3:38 pm

      2 stars
      Not fool proof! Everything was perfect until it went in the oven. The rise was right on target just as in the directions. Then, it sank while baking. ☹

      Reply
      • Rebecca Eisenberg

        April 12, 2024 at 3:07 pm

        Sounds like it overproofed on you! When dough overproofs the yeast doesn't have any more food to eat to give it the power to do one more rise in the oven and it collapses. Next time try using cooler water, slightly less yeast, or just baking it sooner. Happy baking!

        Reply
    13. Bonnie

      April 22, 2024 at 7:13 pm

      It's not fool proof if you do not tell us how much water to add to our dry active yeast

      Reply
      • Rebecca Eisenberg

        April 22, 2024 at 9:26 pm

        Hi Bonnie! As I wrote in the ingredient notes: “If you're using active dry yeast, use the same amount of yeast, just mix it with the warm water and let it sit for 5 minutes to become foamy before adding to the dough.”

        That’s the total amount of warm water used in the recipe. Literally could not be easier. Happy baking.

        Note: I’ve removed your one star review as it’s pretty rude to show up hostile in the comments because you didn’t understand the recipe and then give it a low rating when you clearly didn’t make it.

        Reply
      • Renèe

        June 24, 2024 at 4:03 pm

        5 stars
        She literally says in the notes, comprehension is half of reading. You literally let your active dry yeast bloom in the 236 grams of water for 5 minutes🙄 Stop attacking her for your incompetence and incapablilty to bake 🫶

        Reply
    14. Lisa Marie

      April 28, 2024 at 8:32 pm

      5 stars
      This recipe was honestly so easy and so good! Maybe 10 mins of actual work time, a little waiting, and I had my first ever loaf of sandwich bread. I haven't had a bad recipe from this site yet, and now I have another one to add to the rotation😁

      Reply
      • Rebecca Eisenberg

        April 29, 2024 at 10:38 am

        I'm so glad you enjoyed it!! Happy baking!

        Reply
    15. Karina

      May 01, 2024 at 7:15 am

      5 stars
      Can milk be substituted instead of water?

      Reply
      • Rebecca Eisenberg

        May 01, 2024 at 10:17 am

        Yes!

        Reply
      • Renée

        June 24, 2024 at 5:28 pm

        5 stars
        I made this recipe today and it turned out perfectly! The only thing I did differently was add a Lil extra honey, and instead of egg wash I mixed buttermilk and honey together ❤️ 😋 this will be my go to recipe

        Reply
    16. Wendy

      May 20, 2024 at 9:07 am

      What difference will substituting milk make? I'm trying out this recipe and wanted to know if this is something I should try?

      Reply
      • Rebecca Eisenberg

        May 20, 2024 at 9:54 am

        You can absolutely substitute milk here! It will make the bread even softer.

        Reply
    17. Lorilai11

      May 21, 2024 at 7:40 pm

      5 stars
      Outstanding! I have tried MANY sandwich bread recipes and this is the easiest, fastest, and most importantly best tasting one. We ate 3/4 of it immediately (and there are only 2 of us).

      Reply
      • Rebecca Eisenberg

        May 21, 2024 at 7:55 pm

        I’m honored and so happy you love the recipe! Keep on enjoying it and happy baking!

        Reply
    18. Hannah

      May 30, 2024 at 10:33 am

      5 stars
      I love a recipe that only needs what I already have stocked in the pantry! This bread was so, so good. We used it for deli meat sandwiches, regular old PB&Js, and breakfast toast with preserves. I was so impressed with how soft and fresh it was days after being cut into!

      Reply
    19. Traci Jay

      May 31, 2024 at 4:18 pm

      3 stars
      All was going well until I made my slash. Deflated the loaf. I stuck it in the oven anyway and it looks like I’m baking a brick with a sunken middle.

      Reply
      • Rebecca Eisenberg

        May 31, 2024 at 5:11 pm

        That's a sure sign that your loaf overproofed! Bake it a bit earlier next time or let it do the second rise half in the fridge.

        Reply
    20. Lea

      June 04, 2024 at 8:50 pm

      4 stars
      I'm going to give it five stars because it's really easy to make and the texture and flavors are really nice. However, I have 2 doubts/questions and I would be very thankful if I could be advise on them. The first one is that the bottom part of my breath didn't bake well. Even though if I put it in the toaster is fine you can still feel that is not really as cooked as the top half: the crumb is thicker and it feels more mushy and less dry. Should I extend the time the bread is in the oven or should I raise the temperature and keep the same time? My second question how many changes ( temperature/time wise) would I have to make If instead of using a tin mold I'm using a glass mold??

      Reply
      • Rebecca Eisenberg

        June 05, 2024 at 2:16 pm

        If you’re using glass pans you definitely need to bake longer and at a lower temperature — reduce the temp by 25 degrees F and extend the baking time by at least 10 mins! That should solve the issue.

        Reply
        • Shubhangi

          July 26, 2024 at 4:33 am

          5 stars
          Hello,

          I tried this recipe. But my bread pan was 8'*4' so I reduced the recipe by 20% as you mentioned. But somehow looks like the bread did not proof enough. I have used measurements as per weight mentioned. I even live in an area where its not hot and was raining most of the time this week. Any suggestions what might have gone wrong and how to correct it?

          Reply
          • Rebecca Eisenberg

            July 26, 2024 at 11:14 am

            Given that it's not hot where you live, I would let it proof even longer before baking or find a warm spot to place the loaf in while it rises!

            Reply
    21. Sarah

      June 12, 2024 at 12:59 am

      Came out absolutely perfect! Best part: it sliced nice and thin!

      Reply
    22. Josephine

      July 07, 2024 at 5:27 pm

      5 stars
      Fantastic recipe. Made a loaf this morning and as soon as I tasted it I immediately started making another loaf.

      Reply
    23. Manasi

      August 04, 2024 at 10:34 pm

      I’d line to give a half loaf to my mom who lives alone. Can I divide the dough into two and proof bake two halves in the same 9x5 loaf tin?

      Reply
      • Rebecca Eisenberg

        August 05, 2024 at 10:32 am

        Yes, actually! Shape each half into a round ball or a tight roll, let them proof together in the same pan, and once it bakes you'll be able to pull them apart down the middle where the two are touching.

        Reply
        • Sophia

          June 22, 2025 at 1:37 pm

          5 stars
          Hi, so they have to proof in the same loaf pan, not separately?

          Reply
      • Sophia

        June 22, 2025 at 1:46 pm

        Just curious how this turned out for you!

        Reply
    24. Casey

      August 30, 2024 at 8:57 am

      5 stars
      I just made this and it was delicious! I was trying to find calories on the recipe but couldn’t. Do you know how many calories there are per slice?

      Reply
      • Rebecca Eisenberg

        August 30, 2024 at 11:23 am

        So glad you liked the bread! Regarding calories, this is a diet talk-free zone, I don't provide calorie counts or nutritional information as it can be triggering to those trying to break free from harmful diet and disordered eating habits. You'll have to calculate those on your own!

        Reply
    25. S B

      September 05, 2024 at 8:20 pm

      5 stars
      This was exactly what I was looking for when I set out to make bread today. Have you tried this with bread flour ever, out of curiosity? Also, have you used the dough for buns?

      I'm going to be playing around with doing this in a steam combi oven. Well, I should amend that. I'm going to try to iron out the way I want to do it on the regular (timings and such). The first loaf was amazing. I used an egg-cream wash on the top.

      Reply
      • Rebecca Eisenberg

        September 06, 2024 at 1:18 pm

        I haven't tested this particular loaf with bread flour but you could absolutely give it a try — you may find it needs just a bit more water since bread flour is more absorbent than AP flour! And yes, you could definitely use this to make buns — this is the same dough I use for my pizza pinwheels recipe, it's very versatile!

        Reply
    26. Tammy

      September 16, 2024 at 3:18 am

      5 stars
      Love this recipe! I've made it at least 3 times already with much success.

      Could I sub butter for the olive oil? Would it give it a creamy buttery fragrance?

      Reply
      • Rebecca Eisenberg

        September 16, 2024 at 2:26 pm

        I'm so glad you like it! I haven't personally tested it with butter but I don't see why it wouldn't work — it might change the texture just slightly. Use melted butter. A clarified butter like ghee would be closest to olive oil in terms of keeping the recipe the same but adding some buttery flavor.

        Reply
    27. Mo

      September 16, 2024 at 7:26 pm

      5 stars
      Do you have nutritional information for this?

      Reply
      • Rebecca Eisenberg

        September 17, 2024 at 10:07 am

        Nope! I don't provide nutritional information for my recipes. I've explained why in my FAQ.

        Reply
    28. Katie

      September 21, 2024 at 7:24 pm

      5 stars
      I love this recipe! It’s so simple and the taste is great! I’ve made it twice and I do have difficulty getting it to rise properly. I keep it in a warm spot and it seems to rise well but then deflates in the oven. I saw in other comments you said that it’s a sign of overproofed dough, but my dough never reaches the top of the pan in the second proof. Any tips?

      Reply
      • Rebecca Eisenberg

        September 23, 2024 at 12:15 pm

        In that case I would reduce the yeast by 1-2 grams and don't worry so much about the loaf reaching the top of the pan!

        Reply
    29. DPN

      September 26, 2024 at 7:02 pm

      5 stars
      This was such an easy bread to make. I decided to measure everything out individually to ensure accuracy. I love how I was able to bake a loaf of bread in no time at all! Thank you so much for sharing this recipe.

      Reply
    30. Cameron

      September 28, 2024 at 10:38 pm

      I made this today completely by hand, using Kirkland AP flour. It came out so soft and tasty! I’m very pleased with it. I may scale it up some to make larger slices for sandwiches, but that’s easy work.

      I’m also considering experimenting with making this in a bread maker. I can program the rise times, but I’ll lose the final shaping, of course. Other than adjusting for 2lb loaves, can you think of anything you’d change for a bread maker? I planned to run it exactly as-is. It’s a pretty straightforward bread.

      Reply
      • Rebecca Eisenberg

        September 30, 2024 at 11:41 am

        I'm so so glad you enjoyed it!! I don't have a bread maker so I'm not quite sure how to adjust it — my only thought is it may not need 2x the amount of yeast since this recipe already has quite a lot of yeast in it. You may need to experiment to find exactly the right amount but given that a bread maker provides optimal kneading and temperatures for rising I wouldn't increase the amount of yeast at all for your first attempt at a scaled up version! If it seems like it needs more yeast after that, increase gradually until you find the right amount. Please do report back and let me know how it turns out in the bread maker! I'm so curious!

        Reply
        • Cameron

          September 30, 2024 at 1:48 pm

          I made it in the bread maker yesterday. I think your idea of not increasing the yeast is the right one. I increased everything by 1.6 to account for a 2lb loaf, then matched the original times (knead, rise 1 hr, omitted the shaping because I wanted this to be hands off, then second rise 1 hr). During the first rise, the dough almost overflowed the pan. I had to punch it down about 45 mins into the first rise. It grew back to a good size on the second rise. Omitting the shaping didn't seem to cause any issues, The result was super soft and very good. Not quite as good as the handmade loaf according to my kids and wife, but still very good.

          My next attempt will be to use all the same measurements but leave the yeast at 1 rather than 1.6x. I may also switch to bread flour to see if it makes any difference over the generic AP I used for the first two. Overall, I would call this attempt a success.

          Reply
    31. JJ

      October 21, 2024 at 9:44 pm

      5 stars
      Hi! I've been trying your bread recipes one by one, thank you for sharing! 🙂
      For this sandwich bread, mine came out a bit dense. The loaf itself was heavy after baking. Would you be able to advise how I can fix this to make the bread soft and light? I weighed all my ingredients.
      Thank you!

      Reply
      • Rebecca Eisenberg

        October 22, 2024 at 11:06 am

        It sounds like yours may have underproofed or overproofed slightly! If its cold in your kitchen it might need more time to rise, if its warm in your kitchen it might need to go in the oven sooner!

        Reply
        • Bridget

          November 19, 2024 at 8:54 am

          Is there a way to substitute sugar or something else for the honey? If so how much? I want to be able to serve to my 8 month old (no honey before 1)

          Reply
          • Rebecca Eisenberg

            November 19, 2024 at 11:22 am

            Yes, you can substitute sugar! I would increase it by about 25% — so in this recipe that would be 10 grams of sugar. Happy baking!

            Reply
    32. Don

      November 13, 2024 at 2:47 pm

      5 stars
      Do you see any issue replacing the oil with butter using the same weight?

      Reply
      • Rebecca Eisenberg

        November 13, 2024 at 3:20 pm

        You could do that — it might change the texture just slightly but it will work! Clarified butter would be the best alternative since it doesn't have any milk solids in it, but honestly regular melted butter would be just fine here too.

        Reply
    33. Alice

      November 19, 2024 at 11:24 pm

      5 stars
      It's a great recipe and the bread comes out delicious and beautiful. However, oncein a while it is a little "weak"? As in, it breaks when I slice it and doesn't hold well enough to make a sandwich or even butter it. What am I doing wrong?

      Reply
      • Rebecca Eisenberg

        November 20, 2024 at 10:50 am

        It sounds like on those occasions it is overproofing! Keep an eye on it before baking, it may just need to go into the oven a bit sooner!

        Reply
    34. Rachel Brown

      December 06, 2024 at 2:50 pm

      5 stars
      Full transparency - I’ve never made a loaf of bread before not in a bread machine. I tried this and it was edible (and actually good) in the first round?!?! That’s a miracle right there. My husband even ate a sandwich with it and gave me a thumbs up. I’m winning today thanks to this recipe. 😂

      Reply
      • Rebecca Eisenberg

        December 09, 2024 at 2:17 pm

        Keep on baking, keep on winning!!! So glad you and your husband enjoyed the bread!

        Reply
    35. Kelli W.

      December 11, 2024 at 5:53 pm

      5 stars
      I’ve been baking bread for over 50 years and this is by far the best loaf of bread I’ve ever made!

      Reply
      • Rebecca Eisenberg

        December 12, 2024 at 9:16 am

        I'm honored! So glad you enjoyed the bread. Happy baking! ~Rebecca

        Reply
    36. Bob

      December 19, 2024 at 12:08 am

      5 stars
      I've made many different sandwich bread recipes in the past, including some same day, but decided to give this a try as I needed something quick for lunch sandwiches. turned out great and was the most replicable on the first try.

      Reply
    37. Lilith

      December 21, 2024 at 6:16 am

      5 stars
      Best sandwich bread that I've ever made! Thank you!

      Reply
    38. beverly

      December 25, 2024 at 10:36 pm

      I have tried so many breads and they all taste good but it seems like they all have a hard crust on top. how do you keep your bread soft ? I love baking breads so if you could give me any help it would reall be appreciated. i wont leave a rating yet but will if I bake it and tell you what I think

      Reply
      • Rebecca Eisenberg

        December 30, 2024 at 5:17 pm

        Are you saying that you tried this recipe and the crust was too hard? If so, it sounds like your oven might be running too hot. I'd recommend getting an oven thermometer to make sure you're baking at the right temperature!

        Reply
    39. Bonnie O'Neill

      December 28, 2024 at 12:17 pm

      5 stars
      Just pulled this out of the oven after a family Christmas discussion about my m-i-l’s homemade bread! I did it in a Pullman pan because I like the more narrow slices better. It smells amazing!

      Reply
    40. Tina VanTassel

      December 28, 2024 at 5:05 pm

      Just made this. Turned out great!
      Out of curiosity, do you ever publish the nutritional facts along with the recipe?
      Thank you for all your hard work.

      Reply
      • Rebecca Eisenberg

        December 28, 2024 at 6:28 pm

        So glad you enjoyed the bread! And no, I have no plans or desire to include nutritional information. I’m not qualified to calculate it, plus a lot of people make their own modifications or use different brand ingredients than I do which can affect those numbers, and, more importantly, I consciously keep this space free of diet talk and triggering information like calorie counts. If you need the nutritional information you are more than welcome to calculate it on your own!

        Reply
    41. Christin Lynch

      December 29, 2024 at 8:10 pm

      5 stars
      Would leaving out the honey/sugar make a huge difference? I can't stand sweetish break lol, I would use sugar instead I mean I dont have honey anyway, but does it make or break it to add sweet to the recipe? I'm so curious to try my own sandwich bread for healthier options for sams and such 🙂

      Reply
      • Rebecca Eisenberg

        December 29, 2024 at 9:48 pm

        You can use sugar instead of honey for sure — cut the amount down by about 25%. It won’t totally break the recipe to leave it out but it’s such a small amount this really isn’t a “sweet” bread. The sugar also helps feed the yeast so if you leave it out it may affect the timing of the recipe slightly, it may need longer to rise. But it will still produce a loaf of bread so if you want to give it a try without any sugar you can.

        Ps just a reminder this is a diet talk free zone — I don’t use words like “healthy” to describe food because health is relative, different people have different health needs! We can enjoy making bread from scratch without making it seem like it’s “bad” to buy store bought! 🙂

        Reply
    42. Rebecca Ann Scavello

      December 30, 2024 at 3:03 pm

      How can I adjust this to use a 12x4.5 loaf pan? I bought them but can never find a recipe that uses that size pan only smaller.

      Reply
      • Rebecca Eisenberg

        December 30, 2024 at 5:09 pm

        That is a very unusual pan size! I looked it up and I do think this loaf could work in it — you’ll just need to roll it longer and narrower than the recipe calls for so it better fills the length of the pan. It may not need to rise fully to the top rim, you can check it after about 45 mins rising and if it springs back when you poke it it’s ready to bake. If it still seems a bit small, then you’ll need to scale the recipe up maybe by 10-20%! Let me know how it goes for you!

        Reply
    43. Sarah

      January 12, 2025 at 10:08 am

      5 stars
      This is the recipe that finally convinced my picky family to prefer homemade bread over the sandwich bread in the store. Even my 5 year old loves it.

      I sometimes use sugar instead of honey: it’s great every time!

      Reply
    44. Hari

      January 21, 2025 at 8:27 am

      5 stars
      Thank you for this recipe and the detailed explanation on the how. Was very helpful to a beginner in bread making like me. The loaf came out looking exactly as your pictures and hopefully tasted the same. We liked it. I was wondering if there was a way to make the bread airier ….in any recipe? I don’t have a bread mixer so kneaded and folded using my hands - will that have any impact on the airiness of the loaf?

      Thank you again for the wonderful recipes especially the small batch ones.

      Reply
      • Rebecca Eisenberg

        January 21, 2025 at 12:56 pm

        Oh I'm so glad to hear that you loved it! There are a lot of ways to make airier bread, but generally more water = bigger air bubbles, less kneading = bigger air bubbles, less yeast + longer rise time = bigger bubbles. If you wanted to try making this one airier you could reduce the yeast and let it rise longer after shaping; I haven't tested it but I think that would work! If you try it let me know how it goes. Happy baking!

        Reply
    45. Tahnee

      January 22, 2025 at 11:36 am

      Can I use whole wheat flour to make this wheat bread instead of white?
      Thank you.

      Reply
      • Rebecca Eisenberg

        January 22, 2025 at 1:08 pm

        Nope! This recipe is designed to use white flour. Whole wheat flour does not develop gluten or absorb water in the same way, you will not get great results. I recommend looking for a recipe specifically designed to use whole wheat flour.

        Reply
    46. McJanine

      February 02, 2025 at 9:03 am

      3 stars
      I think this would do better in a regular loaf pan. Which is kind of sad, because I bought a 9X5 pan to try this recipe. I got a good rise, the overall amount of dough seemed to be the issue. It would have been over-proofed if I let it go any longer, but it didn't get close to your picture. Even though I weighed everything, the wheat itself may have been heavier that what you used, requiring less to get those grams. IDK. Hubby liked it though, so there will probably be a smaller loaf pan version sometime.

      Reply
      • Rebecca Eisenberg

        February 03, 2025 at 10:11 am

        I'm sorry it didn't quite work for you — but are you saying you used whole wheat flour instead of all-purpose flour? Because that would definitely make a huge difference in the overall volume of the loaf!

        Reply
    47. Stacy Donati

      February 02, 2025 at 7:02 pm

      5 stars
      Excellent recipe, only thing I will do differently is not score the top. My loaf was gorgeous and I think the scoring brought it down a bit. But great recipe!!

      Reply
    48. Melanie

      February 03, 2025 at 12:17 pm

      Can you make this recipe without a stand mixer? I do not own one.

      Reply
      • Rebecca Eisenberg

        February 03, 2025 at 1:14 pm

        Hi Melanie! There is a whole section in the blog post about how to knead the dough by hand. I hope this helps! ~Rebecca

        Reply
    49. McJanine

      February 08, 2025 at 11:38 am

      No, Canadian wheat has more protein, so it tends to weight more. This may have resulted in less total amount since I went by grams. I'll play around with it. Enjoying your website.

      Reply
    50. Pauline Morton

      February 14, 2025 at 3:09 pm

      5 stars
      I made this soft sandwich loaf last night, my neighbor and I ate half right away. I'm now in the process of making another loaf. Thank you for all the work you do to making bread and other items so easy for us older home bakers. Your smaller recipes are perfect now that we are alone. Keep up the great job.

      Reply
    51. Casey Black

      March 02, 2025 at 10:44 am

      I love this bread so much. I make it weekly. Do you happen to have a wheat bread that is simple like this one? Thanks

      Reply
      • Rebecca Eisenberg

        March 03, 2025 at 11:15 am

        This is a wheat bread, all-purpose flour is made from wheat. If you're asking about whole wheat bread, the only whole wheat bread recipe I have is my no-knead dutch oven whole wheat bread which is also very easy to make!

        Reply
    52. Corrie

      March 05, 2025 at 1:40 pm

      5 stars
      I just came here to say THANK YOU! I have never tried to make bread before and my family was so impressed with how great it tastes and how perfect it looks! I used King Arthur unbleached bread flour and I'm on my third time making it and it turns out perfect every time. Thank you for sharing this recipe!!

      Reply
    53. Ray

      March 14, 2025 at 2:10 am

      Hi. Is this 350f fan forced or conventional oven?

      Reply
      • Rebecca Eisenberg

        March 14, 2025 at 9:54 am

        Regular oven, not convection!

        Reply
    54. Asha Shaji

      April 11, 2025 at 1:35 pm

      5 stars
      Thank you for this recipe. Very simple with basic ingredients. My husband ate a full loaf by himself in a day 😁 he loved it.

      Reply
    55. April

      April 12, 2025 at 6:56 pm

      4 stars
      I’ve tried this one twice now and gotten a rock both times. It seems so simple and I can’t figure out what I’m doing wrong. 🙁
      I’m sad. I was so hopeful because it seems so easy and has such simple ingredients. I have always wanted to make my own bread.

      Reply
      • Rebecca Eisenberg

        April 21, 2025 at 1:56 pm

        Hmmmm if I had to guess what happened here, it's possible your yeast went bad. Are you sure it was new and fresh?

        And did you measure the ingredients by weight or did you convert it to cups? That's the other thing that can often go wrong with this recipe. You definitely want to measure by weight for best results!

        Reply
        • April

          April 21, 2025 at 6:02 pm

          I used my kitchen scale to measure. The yeast was just purchased from the store. The first time, it didn’t rise, the second time it did but then it still cooked into a brick. I just cannot figure out what I’m doing wrong. The recipe seems fantastic, but I’m messing up somewhere. I’ll have to try again…..

          Reply
    56. Sharon

      May 04, 2025 at 1:22 pm

      I don't have a stand mixer. Can I knead by hand. Do I need to change anything in the recipe? Thanks

      Reply
      • Rebecca Eisenberg

        May 05, 2025 at 11:01 am

        You can knead by hand! It will take a bit longer and you may need to dust in more flour but it will work. Nothing else needs to change. Happy baking!

        Reply
    57. Maggie

      May 10, 2025 at 5:29 am

      5 stars
      I started making bread in November, 2024. I make (6) loaves every week. Two each for our children and their families, and two for us. One of our loaves is eaten up by our grandchildren as their after school snack. This is the second recipe I’ve tried. Although the first recipe is good, it just didn’t make good sandwiches without toasting it first. My husband wanted “soft” bread he didn’t have to toast. After a crazy amount of research for “soft” homemade sandwich bread, I decided on your recipe. THANK YOU! My husband made himself a sandwich when he got home from work to test it out, and he loved it! AND, thank you for your step by step video, it was extremely helpful. Now I understand how the dough should look, and act.
      Wishing you the very best!

      Reply
    58. Megan

      June 05, 2025 at 8:34 pm

      5 stars
      Love this recipe! So easy and delicious

      Reply
    59. Sophia

      June 19, 2025 at 11:18 am

      5 stars
      For a brand new bread maker this recipe is so unbelievably simple and as titled “fool proof” if I’m being honest I didn’t check the water temp I just made sure it wasn’t too hot. Both my loaves came out perfect. I’m so happy I stumbled upon it this site and excited and eager to try more recipes !

      Reply

    Primary Sidebar

    rebecca wearing a black t-shirt with her left hand on her hip and her right hand holding a whisk upright

    Hi, I'm Rebecca! I'm a pastry chef with a home cook mentality. I'm on a mission to make spending time in the kitchen fun and accessible — that's why so many people love my beginner-friendly bread recipes. I'm always looking for new and creative ways to get the most out of my favorite ingredients and flavors!

    More about me →

    Seasonal Favorites

    • cross section of a cranberry orange mini muffin
      Cranberry Orange Mini Muffins
    • a close up of a log of garlic chive compound butter on a sheet of parchment paper with a butter knife nearby
      Roasted Garlic and Chive Compound Butter for Poultry
    • a hand drizzles honey on a pizza slice with a honey wand.
      Hot Honey Pizza with Goat Cheese
    • smoked turkey legs on a plate
      Better-Than-Disney Smoked Turkey Legs

    Get in touch

    Want to work with me? Just have a question? Shoot me an email!

    rebecca@thepracticalkitchen.com

    Treat Yourself

    • the best plus size aprons
      15+ Places to Buy Plus Size Aprons
    • college kitchen basics
      17+ College Kitchen Basics you Actually Need (and What You Don't)
    • 15+ best salt cellars for any kitchen.
      15+ Best Salt Cellars to Keep on Your Counter
    • flour storage containers for 5 lbs of flour
      Flour Storage Containers That Fit Five Pounds of Flour

    Footer

    About Me

    • Facebook
    • Instagram
    • Pinterest
    • Twitter

    Journalist turned pastry chef, on a mission to make cooking and baking fun and accessible. I'm always looking for new and creative ways to get the most out of my favorite ingredients and flavors! A Pittsburgh native currently calling Boston home.

    My Favorites

    chicken and ham paella
    an overhead shot of 8 pizza bagels surrounded by basil, parmesan, and tomato sauce
    scallion cream cheese in a shallow white bowl with a wooden handled spreader in it.

    Popular Bread Recipes

    • Loaf pan focaccia
    • Crusty bread
    • Ciabatta bread
    • Everything bagels
    • No knead bread
    • Brioche buns
    • Pretzel bites

    Pizza Essentials

    • Thin crust pizza dough
    • Thick focaccia pizza
    • How to stretch pizza dough
    • White pizza sauce
    • Pizza sauce recipe
    • Prosciutto arugula pizza
    • Hot honey pizza

    Scratch-Made Staples

    • Cold brew coffee
    • Homemade hot sauce
    • Chex mix seasoning
    • Everything bagel seasoning
    • Bagel chips recipe
    • Homemade butter
    • Olive oil bread dip

    Footer

    ↑ back to top

    Links

    • About
    • Recipe Search
    • Editorial Policy
    • Privacy Policy
    • FAQ

    Newsletter

    • Sign Up! for emails and updates

    Resources

    • Shop
    • Links & Resources
    • Cooking Tips
    • Web Stories

    As an Amazon Associate I earn from qualifying purchases.

    Copyright © 2025 Foodie Pro on the Foodie Pro Theme

    Rate This Recipe

    Your vote:


    A rating is required
    A name is required
    An email is required

    Recipe Ratings without Comment

    Something went wrong. Please try again.