

Learn how to make a mini baguette at home with this beginner friendly small batch recipe. This mini baguette recipe uses four simple ingredients — flour, water, salt, and yeast — and can be made in just a few hours. It has a thick, crunchy crust, an airy yet soft interior, and that iconic long, tapered shape. It's everything you love about a full-size baguette, just a whole lot shorter!
It's a great personal-sized loaf if you want a baguette big enough for a couple sandwiches or for snacking!

5 star reader review
“Perfect! Great instructions! I'm a baker of everything except bread! But now... I can bake bread! Thanks!”
—Sharon
This is a great personal-sized bread. It's a baguette big enough to make one or two sandwiches or to enjoy as a snack! The small size is a nice way to practice how to shape a baguette and it's just nice to make a great loaf of bread without using up all your baking ingredients.
One mini baguette bakes up about 10 to 11 inches long and is perfect for slathering with homemade butter or tearing and dunking in your favorite soups.
All About This Small Batch Baguette
My small batch baguette recipe uses a very similar dough to my small batch no-knead crusty bread recipe with a few key differences. It's got a slightly lower hydration and uses slightly more yeast to speed up the process so you can make it in just a few hours. No overnight rise; my small batch baguette clocks in at just about 3 hours total, with plenty of hands-off resting time between steps.
To provide the structure needed for the mini baguette to hold its shape, I added two sets of folds during the first hour of the dough's rise time. This also helps speed things up.

Initially, I planned to develop a full-size baguette recipe that would make 3 full-size baguettes. But I quickly realized that the average home kitchen and oven really aren't built to easily make high-quality full-sized baguettes.
"...baguettes are also one of the hardest breads for the home baker to learn to make, mostly thanks to the many complicated shaping steps involved. Practice makes perfect in all things, especially when it comes to baguettes, and it's hard for a home baker to notch enough of them for the skill to become second nature. My best advice to anyone wanting to nail the baguette? Land a job at a bakery and make several hundred of them a week for a few years. Barring that, find a good recipe and just practice, practice, practice."
Andrew Janjigian, SeriousEats.com
Quite frankly, a full-size multiple-baguette recipe just didn't feel practical to me for the time and effort required to get them right. If it's full-size baguettes I'm looking for, I'd rather just buy them.
But a mini baguette? A small-batch baguette I could definitely make at home. Scaling the recipe down to make just one baguette turned a baking chore into a fun little baking project. The smaller size also made the shaping easier and gave me more control over the baking environment.
I developed this mini baguette recipe to be simple and accessible. It works best when baked in a large oval Dutch oven, but I've included plenty of other baking options (including a toaster oven option!) below as well.
Don't sweat it if it takes you a few tries to get the hang of baguette shaping; even I don't get it just right every time. Every baguette comes out a little bit different. But the baguettes that come out imperfectly are still delicious! And that's what matters.
You only need four ingredients to make this mini baguette recipe! See recipe card (at the end of the post) for quantities.

How to Make a Small Batch Baguette
We're following the standard dough mixing process here. Mix your dry ingredients together first, then, add the water. Mix everything together to make a sticky, messy, lumpy dough.
I let my small-batch baguette dough rise for about two hours after mixing. It needs just a bit of attention during the first hour, but during the second hour it'll rise on its own.
During the first hour, I do two sets of folds to build strength into the dough — those folds are what make it possible to shape the baguette later.
One fold involves stretching the dough out and then folding it over itself. You'll repeat this 4-5 times all the way around the dough to do a "set" of folds.

Grab the top edge of dough with a damp hand and stretch it away from you.

Fold the dough down over the center and press to secure it in place.
Rotate the bowl 90° (a quarter turn) and repeat until you've gone all the way around the bowl to finish the set of folds. I like to flip the dough over so the seam side is facing down while the dough rests after I finish each set, but you don't have to do this.
After the second set of folds, I let the dough rise at room temperature for 1 hour. It will double in size and become very airy.
How To Shape A Baguette
There's a sort of magic to the way baguette shaping works — rather than rolling the dough like a log of clay, it's shaped through a series of folds that gradually elongate the dough into a tube. Then all you have to do is taper the ends.
Don't beat yourself up if handling the dough doesn't come naturally to you — it will become easier with practice. I've got step-by-step photos to walk you through it and you can also check out the video at the end of this post if you want more visual guidance!
Dust the top of the dough in the bowl with flour before you turn it out onto a lightly floured countertop to prevent it from sticking to the sides of the bowl as you turn it out onto the counter.

Loosely stretch the dough into a rectangle.

Fold the top third of the dough down and press down along the edge to seal it.
The dough may stick to your hands slightly. That's okay. Use a light, quick, confident touch. The goal is to stick the folded flap shut without pressing all the air bubbles out of the dough.
Lift and rotate the dough (a bench scraper can help you lift it) so the folded flap is now at the bottom. You are not flipping the dough over, the seam should still be visible on top. You're simply rotating the dough so the folded edge is now closer to your body.

Fold the top third of the dough down and again press along the edge of the seam to seal it shut.

Finally, fold the dough in half lengthwise. Seal the edges together by pressing them firmly against the counter.
Instead of trying to fold the dough in half all at once and then seal the bottom, it helps to move from one side to the other as you fold the top edge of dough down with one hand and press to seal with the heel of the other.
Fold, seal, move over an inch, fold, seal, move over an inch, fold, seal, etc.
Rolling the baguette dough at this point isn't about elongating the dough — it's about tucking the seam underneath, evening out the thickness, and tapering the ends.

Roll the dough so the seam is underneath. Then roll it gently once from the center out to even out the log of dough.

Taper the ends to points by rolling the ends with your hands angled up so your pinkies are against the counter.
Watch the length! It's very easy to accidentally make your mini baguette too long. Remember, it has to fit in your Dutch oven or in some other sort of covered baking dish — make sure it can still fit!
During the shaping process, quite a bit of air is knocked out of the baguette dough. So I like to give it one final rise to relax, expand, and develop some new air bubbles.

Dust a clean dish towel with flour and place the baguette on it. Pinch the towel so it stands up on either side of the baguette, supporting the shape.

I use binder clips at either end to hold the towel in place, but this is optional. Cover the baguette with plastic wrap so it doesn't dry out.
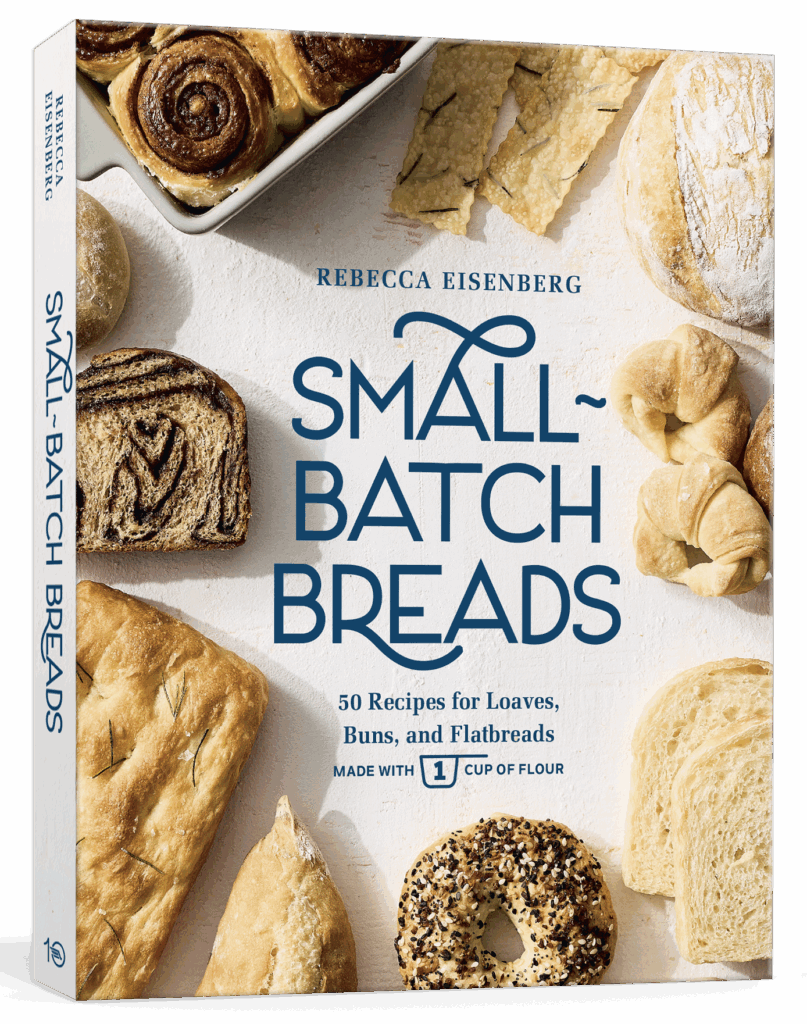
Want more small-batch recipes?
My Small-Batch Breads cookbook is now available!
Featuring fifty easy-to-follow bread recipes made using 1 cup of flour.
Scoring and Baking Baguette
Scoring creates a vent in the top of the baguette through which steam can escape. Without scoring, the steam will try to escape through any weak points in the dough and might even blow out at the bottom.
You can score your baguette with one long slash down the center or three vertical lines slightly offset from one another down the length.
Before you score your baguette, fill a small misting spray bottle with water and have it ready to go. Once the baguette is scored, you'll spray it with water and want to get it in the Dutch oven as quickly as possible.

Score at least half an inch deep.

Spray the baguette all over with water.
The confined space of a pre-heated Dutch oven traps the steam released by the dough as it bakes, creating a moist environment that results in a super crunchy crust. It's the best option for baking this small-batch baguette (I have other options listed below if you keep scrolling).

After the first 10 minutes, the baguette will look quite pale.

The final 10-minute uncovered bake time is when it will brown.
5 star reader review
“Just finished this recipe! I was nervous with how my baguette looked before going into the oven but it turned out perfect. A great crunch on the outside, and a light, soft inside. This might be my best attempt at homemade bread yet, and there have been quite a few!”
—Emilie
Baking Without a Dutch Oven
While a large oval Dutch oven is the best option for baking your mini baguette bread, it's not the only option available to you.
If you don't have a 7-quart oval Dutch oven that can handle the length of a mini baguette, have no fear. There are other options. Just know you may not get quite the same crunchy crust or rise on your baguette.
Here are some other baguette baking options I've tested and how you can expect them to change your baguette:
- Challenger Bread Pan - The cast iron challenger bread pan is essentially an inverted Dutch oven with a shallow base and domed top. It has a rectangular shape which can easily handle the length of a mini baguette while still creating a moist, steamy environment for the baguette crust to form.
- Toaster Oven - A toaster oven is a small space already, so baking your mini baguette in a toaster oven is a great way to create an enclosed steamy environment for your baguette crust to form! I suspect most toaster ovens have a vent for letting steam out and the doors on them don't always seal shut, so it's not quite as good as using the tightly closed space of a Dutch oven but it will work. Preheat the toaster oven with the sheet pan inside for at least 10 minutes, and you can even toss a small ice cube on the sheet pan with the baguette to create even more steam inside.
- Sheet Pan with Inverted Roasting Pan - This is one step more advanced than baking your baguette uncovered on a sheet pan. If you have a roasting pan or 9x13" cake pan with sides at least 3 inches high, you can create a makeshift Dutch oven-like space by placing it upside down over the baguette on your regular baking sheet pan to bake. Just be careful when you lift the pan off — the pan will be hot and may not have handles! Use good oven mitts and consider using a spatula to lift the inverted pan enough to grab the edge and lift it off.
- Just A Regular Sheet Pan - This will work, but will give you the least "perfect" baguette results. To bake your mini baguette on a plain baking sheet or cookie sheet pan without covering it, preheat the pan in the oven for about 20-30 minutes before using the parchment paper to lift the baguette onto it. The baguette won't have as thick of a crust and may be a little flatter than if you bake it in a more enclosed environment. Because it's not covered it will brown faster — check it after 15 minutes, but you can bake for up to 20 minutes if needed. Just like the toaster oven, you can toss a small ice cube or two onto the sheet pan to create even more steam in the oven while it bakes.

👩🏻🍳 Practical Tips and Recipe Notes
- If you're struggling with the dough in the shaping stages, try using a metal bench scraper! Sliding it under the dough to help stretch or lift the baguette between folds can make things easier and less sticky.
- Some people find that working on a damp or lightly oiled surface is easier when shaping baguettes. I work on a wood surface which is porous so I've found that the floured surface works best. If you have a quartz, granite, stone, or metal counter, you may find that a lightly oiled or damp surface works better for you.
- A rookie mistake people make when attempting to score the three slashes on top of the baguette is to cut them at a slight angle because they appear as a diagonal on the baked baguette. But they're not actually cut on a diagonal. To get them to open properly, cut the lines vertically down the length of the baguette. They should be slightly offset from each other.
- Once the baguette is shaped, resist lifting it as much as possible. If you pick it up from both ends, it will sag and stretch out. Lift it once to get it onto the floured towel. To move it after that, roll it off the towel and onto the parchment paper, and then lift it using the parchment paper sling to support the full length of the baguette.
- I don't have a spray bottle, what can I use instead? Brush the surface of the dough all over with water using a pastry brush. It's harder to do this quickly and to get an even coating of water but it will work in a pinch!
💭 Have More Baking Questions?
I've rounded up answers to common baking questions and how-to guides, including:
- Ingredient swaps and FAQs
- Why my recipes are written in grams and not cups
- How to quickly bring eggs and butter to room temperature
- Ingredients I use (salt, flour, yeast, etc.)
- Step-by-step guides for bread and baking techniques
See my baking techniques & troubleshooting guide and ingredient swaps and FAQs for more!
TL;DR — Recipe Summary
- Mix the flour, salt, and yeast. Add the water and mix into a sticky dough.
- Cover and rest (bulk ferment) for 2 hours. Do a set of folds every 30 minutes for the first hour of bulk fermentation.
- Turn the dough onto a floured surface. Dust lightly with flour.
- Shape the baguette, using your fingertips or the heel of your hand to seal the seams shut. Roll it briefly on the counter, then taper the ends.
- Let the shaped baguette rest for 30 minutes supported by a flour-dusted towel while the Dutch oven preheats at 450°F.
- Roll the baguette onto parchment paper, score the top and spray the surface generously with water. Then place the dough in the Dutch oven.
- Bake for 10 minutes covered, then 10 minutes uncovered. For more color, finish by baking the baguette directly on the oven rack for 2-3 minutes more.
📖 Recipe

Small Batch Baguette Bread Recipe (Made with 1 CUP of Flour)
Recipe Notes
-
- How to measure properly: If you are measuring with cups, it is super important that you measure the ingredients properly. See my guide to measuring as accurately as possible by volume for how to do this. If you measure with cups/teaspoons and the recipe did not turn out right, that is likely why. Try again!
- A Cold Rise: Gluten firms up in the fridge. If you find the sticky dough is too hard to handle at room temperature, you can pop it in the fridge after the last set of folds for anywhere from 4 hours to 3 days prior to shaping and baking. It will be much easier to shape. Let the dough rest at room temperature in the floured towel for 1 hour after shaping and before scoring and baking.
- Climate: If your kitchen is particularly warm (75°F+), you may want to let the baguette do the final rise in the fridge so it doesn't overproof.
- Dutch oven alternatives: For other baking vessel options, refer back to the blog post. If using another covered baking vessel or inverted baking dish on top of a sheet pan, you'll still want to preheat them before baking the baguette.
- How to freeze: Place baked baguette in an airtight bag in the freezer with as much air pressed out as possible. Reheat from frozen in a 350°F oven for 7-10 minutes.
Ingredients
- 120 grams all-purpose flour (1 cup, aerated and loosely scooped, plus more for dusting)
- 3 grams diamond crystal kosher salt (1 teaspoon)
- 3 grams instant yeast (1 teaspoon)
- 96 grams warm water 90°F (⅓ cup + 1 Tablespoon)
Instructions
- Mix. In a large mixing bowl, combine the flour, salt, and yeast. Make a well in the center, add the warm water, and mix with a dough whisk or fork until a sticky dough forms. Gather the dough into a messy ball in the bottom of the bowl. Cover the bowl and let the dough rest for 30 minutes.
- First fold. With a damp hand, grab the top edge of the dough and stretch it away from the bowl. Then fold it down over the center of the dough. Rotate the bowl a quarter turn and repeat. Repeat two more times until you've gone all the way around the dough. Flip the dough over so the seam side faces down. Cover the dough and let it rest for 30 minutes.
- Second fold. Repeat the same folding process as before, going all the way around the bowl. Flip the dough so the seam side is down. Cover the dough and let it rest until it doubles or triples in size, becoming quite bubbly and airy, about 1 hour.
- Preheat. Toward the end of the rise time, preheat the oven to 450°F with a rack in the center position and a covered Dutch oven inside.
- Shape. Dust the top of the dough in the bowl with flour, then turn it out onto a lightly floured surface. Dust the now top side of the dough lightly with flour, just enough to keep it from sticking. Loosely stretch the dough into a rectangle with the long side facing you.Fold the top third of the dough down and use the heel of your hand or your fingertips to seal the edge. Lift the dough and rotate it so the folded edge is now the side closest to you. Again, fold the top third of the dough down and seal the edge. Finally, fold the top edge of the dough down to fold the dough in half, sealing the two edges together against the counter.
- Taper. Roll the dough forward so the seam is underneath. Give the dough one quick roll from the center out to even it out, then taper the ends by rolling the ends with your hands angled so your pinkies are against the counter.
- Final rest. Dust a clean kitchen towel with flour and gently lift the baguette onto it. Pinch the towel so that it stands up on either side of the length of the baguette to hold it in shape. Cover the baguette with plastic wrap or place it inside a large plastic bag to prevent it from drying out. Let the baguette rise for 30 minutes while the oven preheats.
- Preheat the oven to 450°F with a covered Dutch oven inside. Fill a small spray bottle with water, get out your lame, and clear a space to put the Dutch oven when you take it out to put the baguette inside.
- Score. Fill a small spray bottle with water and get out a sharp paring knife or lame. Use the dish towel to gently roll the baguette onto a half sheet of parchment paper so it lies diagonally corner-to-corner. Use the knife or lame to score the dough vertically down the length of the baguette. Quickly spray the baguette all over with water and use the parchment paper sling to transfer it into the hot Dutch oven. Spray with more water and cover immediately.
- Bake. Bake for 10 minutes covered (don't peek!), then remove the lid and bake until the internal temperature reaches 195℉, about10 minutes more. If your baguette needs a bit more color, remove it from the Dutch oven, place it directly on the rack, and bake it for an additional 2-3 minutes.
- Cool. Transfer the fully baked baguette to a wire rack and let cool completely before slicing.
Larry says
Rebecca
I have made artisan bread using a Dutch Oven pot. Unfortunately, I broke the lid. And that is why I appreciate that you mentioned using a baking pan upside down as a lid on a baking pan. I have been using my toaster oven to make my bread.
I am glad I found your recipe since I was trying to make small baguettes instead of a roll of Artisan bread. I will try your recipe today in fact. BTW I appreciate that you were able to stand for yourself. I know you are not bothered by the "Seasoned Bread maker". She is just jealous period. Look all the positive reviews you got vs. on sour one, dugh
Rebecca Eisenberg says
Thank you, Larry!! I hope you enjoy your mini baguette, do let me know how it turns out!
Eli says
I don’t understand step 11. Makes no sense at all lol.
Otherwise this looks great. I have made a lot of bread in my time but have never been that happy with my baguettes. I picked up some good tips here that I look forward to trying.
Rebecca Eisenberg says
Hahahah I know it’s hard to resist but letting it cool before slicing will prevent it from getting gummy inside!
Laurie says
It’s a nor’easter and took your advice and made your French bread recipe. While my technique was not as graceful as your video, the bread is delish both in taste & texture. It really was easy and your recipe is so forgiving. Can’t wait to do your other small batch yeast breads. Good job and thank you for all of the tips and tricks in making this bread. It is perfect size and qty for a household of now one.
Rebecca Eisenberg says
Such a great recipe for baking during a snowstorm! So glad you liked it 🙂 I'm sure your technique will get better with practice!
Carol says
I made this bread last weekend! So easy, and the flavor is really good! I did have an issue because I didn’t have an oval Dutch oven to accommodate the size of the loaves. So I shaped them to fit into my baguette pan, and baked as I always do. I baked at 450 degrees with ice cubes in a pan below, for about 25 minutes. They never got brown. Why? Thank you for a great easy recipe. Flavor was still great-just looked a little pale!
Rebecca Eisenberg says
That sounds like a perfect solution if you don't have a Dutch oven! If they were looking a little pale, I would have just baked them a little longer to get more color.
Katya says
This recipe is fabulous! It's easy, very fast and makes just enough bread for two people. The recipe is easy to follow and the baguettes are amazing. On par with those from my favorite local bakery. I use french t55 flour and i feel like this does make a difference but it works with regular flour as well. In the future I will be trying to mod it to use my sourdough starter as well. 🙂
Chicago Dad says
I never comment on the web but I had to here. My two kids and I made this today. Despite having to go suddenly in the middle and thus having to pop the dough in the fridge during shaping, it came out amazing! We barely let it cool before ravenously tearing into it. A++++ recipe and perfect for can’t skill level. I don’t even have a picture because it was gone so fast.
Rebecca Eisenberg says
I’m so glad you liked it!!
Austin says
Hi! I’m an experienced baker, but an inexperienced bread maker. This turned out beautifully in terms of appearance, but it came out overly salty despite my measuring by weight. I’m definitely going to have to try again with your Kosher Salt recommendation. BUT, what I’m really wondering about is what would cause the bread to smell/taste like rye bread? It has that very strong caraway taste and smell which is so bizarre! I was wondering if you knew what that might be? Lol ☺️ Thank you so much for these fun recipes to try!
Rebecca Eisenberg says
I'm so glad this turned out looking right — I would definitely try again with the correct salt! And I really have no idea what might be causing that caraway smell. That's so wild! I wish I had an answer for you, but it may just be a mystery. Did you maybe cook something with caraway in the same pot recently? Curious to know if it happens again next time you make it!
Austin says
Lol it was so funny! I actually hate caraway, so I have never had it in the house. It’s so weird! I thought maybe it was a normal smell and me being a novice was just uninformed to this magical mystery. Thank you for replying! I’ll let you know how it goes on the second try! Also going to give your crusty bread a try! ☺️
Linda says
Thank you thank you! I made bread! Followed recipe exactly. I was skeptical, did it rise, should it look like this, is it too sticky, not sticky, too much flour on my counter…all the reasons I’ve never attempted bread. But it’s lovely! Perfect crust, airy inside. I see more small bread making in my future.
Rebecca Eisenberg says
Welcome to the world of breadmaking! So glad you liked the recipe, wishing you luck with all your future bread endeavors!
Emilie says
I adore this recipe. As others have said; I’ve been wanting to make bread for years and was always too intimidated to do it! I had to trust the process the first time cause it didn’t look smooth or mixed at first and I really didn’t know if it would work but it did! And it was delicious!! I’ve made it 6 more times since I tried it for the first time exactly one week ago.
Rebecca Eisenberg says
You should feel SO proud of yourself!! Keep enjoying the bread — what a lovely new skill to have!
Ann Marie Michaels says
I just made this and although I haven't tasted yet (saving it for dinner tonight -- reheated beef stew,) I want to tell you that it came out PERFECT!
I really want to thank you for this recipe. I actually prayed to find it and it came right up. I used to bake a lot and I have been a food blogger for 16 years -- but I went through a divorce 2 years ago, and then had to move twice because I lost my home and with allt he stress from the divorce and moving, I couldn't bring myself to bake anything.
So I prayed and asked God for a simple recipe that works. And yours was perfect! I could make one small loaf just for me to eat alone.
Thank you! You made my week. And I'm sorry you have to deal with nasty people like that first comment. I know how it goes -- I deal with it, too. But I just wanted to write this message to let you know that I appreciate you!
Rebecca Eisenberg says
I'm so glad it turned out so wonderfully for you! 🙂 And I'm glad to hear you're finding joy in baking again!
Cat says
I absolutely love this recipe. Mine tends to end up more batard shaped but that's a me problem. I really appreciate the level of detail in the directions as I struggle with vague terms. Thank you!
Melinda says
I have made 2 of these jow and love them! Recently became fascinated with sourdough starter and made my own. If I were to use the starter instead of active or dry yeast, do you know how I should adjust the recipe?
Rebecca Eisenberg says
I would still recommend using the yeast — sourdough is a much slower process so you'd have to adjust the recipe a lot more to build strength into the dough in such a short time period. But you can reduce the flour and water by 10g each and add 20g of active, fed starter or sourdough discard to add some sourdough flavor to the baguette! But again, you'll still want to use the yeast.
Brooke says
If I wanted to make two baguettes, I’d just double the recipe and divide the dough in half after the second rise, shape, and bake? I’m VERY rusty at making bread and not an experienced baker. I appreciate your carefully-written and explained instructions. I need that step-by-step handholding!?
Rebecca Eisenberg says
Divide the dough in half after the first rise, during the step when you shape it! Also, only increase the yeast by 1 gram, don't double it. It'll work beautifully!
Burl Mikesell says
I made this earlier this week in our rv oven, it’s a real challenge in something that size (about 15X15) I used an aluminum pan and covered with foil. I added a few drops of water for steam..
The loaf turned out great, crackly crust and tender crumb. I tried the breadsticks but failed miserably because of the way our oven heats. I added a pizza stone as a deflector and it works really well. I’m gonna try the breadsticks again in the near future.
Burl
Rebecca Eisenberg says
I'm glad the baguette worked in your RV oven! That's so great. The pizza stone will definitely help with the breadsticks, I think! You can probably even slide them right onto the pizza stone instead of using a sheet pan as long as you have a pizza peel or way of removing them easily!
Susan says
Have you ever used ! Romertoff clay pot to cook in? Just wondering cause they are soaked in water ..not sure if they can be pre heated? Just curious...I do recall vaguely making bread in one years ago...but I luckily have a oval Dutch oven....love the idea of a baguette for one so will try..with French flour.
Rebecca Eisenberg says
I haven’t tried one of those pots, no! Sounds like an interesting experiment though!
susan says
Imight try it once I master this recipe! Thanks for the reply...
Susan says
Well I have to work on my crumb...but this was so well exolained..and with the 55 flour it worked and I am eating some really good bread and it made enough to last me 4 days! It does freeze beautifully..so happy and many thanks for all the tips and tricks...and I used the measurements....don't have a scale...it was lovely and not too intimidating! Gonna make it again this weekend.
Maya says
Hi Rebecca! I love this recipe, and I planned to make it today, but my oven broke 🙁 to bake in the toaster oven, do I also need to cover it and uncover, or just bake it uncovered the whole time?
Rebecca Eisenberg says
I’m sorry about your oven! Just bake it uncovered the whole time if you’re doing the toaster oven. Happy baking!
Maya Malka says
I seem to have done anything right and the dough was beautiful up until I tried to cut it, then it completely deflated and now it's baking and not rising :/ what could have I done wrong?
Rebecca Eisenberg says
It sounds like you might not have created enough tension during shaping or your dough overproofed! If it’s very warm in your kitchen, let it do the final rise in the fridge.
Nancy McFadden says
Could I use traditional yeast rather than instant?
Rebecca Eisenberg says
When you say traditional yeast do you mean active dry yeast or fresh yeast (aka cake yeast)?
Nancy McFadden says
Active dry, not instant
Landyn says
This was sooo yummy, thank you for the recipe!! I am relatively new to baking, and this is the second 1 Cup recipe from you I have tried (made focaccia yesterday) . Both were delicious! I do not have a scale yet, I intend to buy one when money permits, and it still turned out pretty good I think? I also used gluten free flour, and it was one of the best breads i’ve ever eaten! (Unfortunately, gluten free breads are often disappointing, but this was lovely!) Thank you again for sharing the recipe!!
Rebecca Eisenberg says
I'm so glad it worked for you without a scale AND using gluten free flour! Incredible! Thank you so much for sharing. 🙂 Happy baking!
Molly says
I love to make this at home, but am attempting to adapt it to make with my high school foods class. Is there a point in the process that it could be refrigerated for about 24 hours? Ideally we would start it one day and finish it the next. I love the idea that each of my students can make their own small loaf 🙂
Susan says
Bread really takes practice..but I am loving this recipe and my crumb is getting better and better. I've started making this Sundays and it freezes beautifully like you sa8d. So happy thank you again
Cristina says
I just made the BEST sandwich ever using your bread recipe. Absolutely amazing. Thank you. For anyone reading, I used pesto, tomato confit, burrata, prosciutto, and grated parmesan.
It is so good we are going to make a 'fancy sandwich day' in my house.
Rebecca Eisenberg says
I LOVE THE IDEA OF A FANCY SANDWICH DAY!!! That is so fun, thank you for sharing! I'm thrilled you love the recipe, keep on baking and enjoying those sandwiches!
Maya Malka says
I tries to make this a couple of times, but after taking the dough out of the towel, it immediately goes flat, and it doesn't really rise in the oven that much, so it comes out more as a flat bread. Is there anything I can do to fix this?
Rebecca Eisenberg says
There are two things I can think of that may cause this: 1) You aren't building enough tension during the shaping stage or 2) The baguette is overproofing during that final rest. Try putting it in the fridge for the final rest and see if that helps!
Julie says
I rate this a 5-star recipe if you're a newbie and wanting to try and make bread for the first time. I've tried to make bread before but this was the first recipe that was successful. Bonus, it was a small batch so if I screwed up, I wouldn't be wasting ingredients.
I did find the bread to be too salty to my liking. The first bite was a hint of 'this is salty', but eating multiple bites was too much. I did weigh my ingredients and used Kosher salt. I assume that either it's just my personal salt-taste or maybe the measurement is specific to a certain brand of Kosher salt. Either way, that's easy to adjust. I did find the bread a little chewy, but as a 1st time bread-maker, I assume this is my technique. Now I'm interested to figure out what I can do better to get that chewy-but not dense-still light texture. I wonder what part of the process impacts texture -- the stretching or the very limited folding or something else.
Rebecca Eisenberg says
If you used morton's kosher salt, that would definitely be the culprit for the saltiness — usually by weight you can sub in any type of salt, but morton's is especially potent and in a recipe this small will definitely be more noticable. I'd reduce the salt by a gram next time if you prefer a less salty baguette!
Natasha says
I made this for my family and they loved it! The kiddos devoured it. It was easy to follow and fun to make, thank you!
Bonnie O'Neill says
Just out of the oven and looks gorgeous! I stirred about a tablespoon of olives in before the last fold. One small change I made was to do the final rest on parchment bolstered by the tea towel so I could just lift it into the Dutch oven. Your recipes are a lifesaver for couples and small families!
Rebecca Eisenberg says
Oh that's so smart to put the parchment on top of the towel for the final rise! I'm so glad you liked it. 🙂