
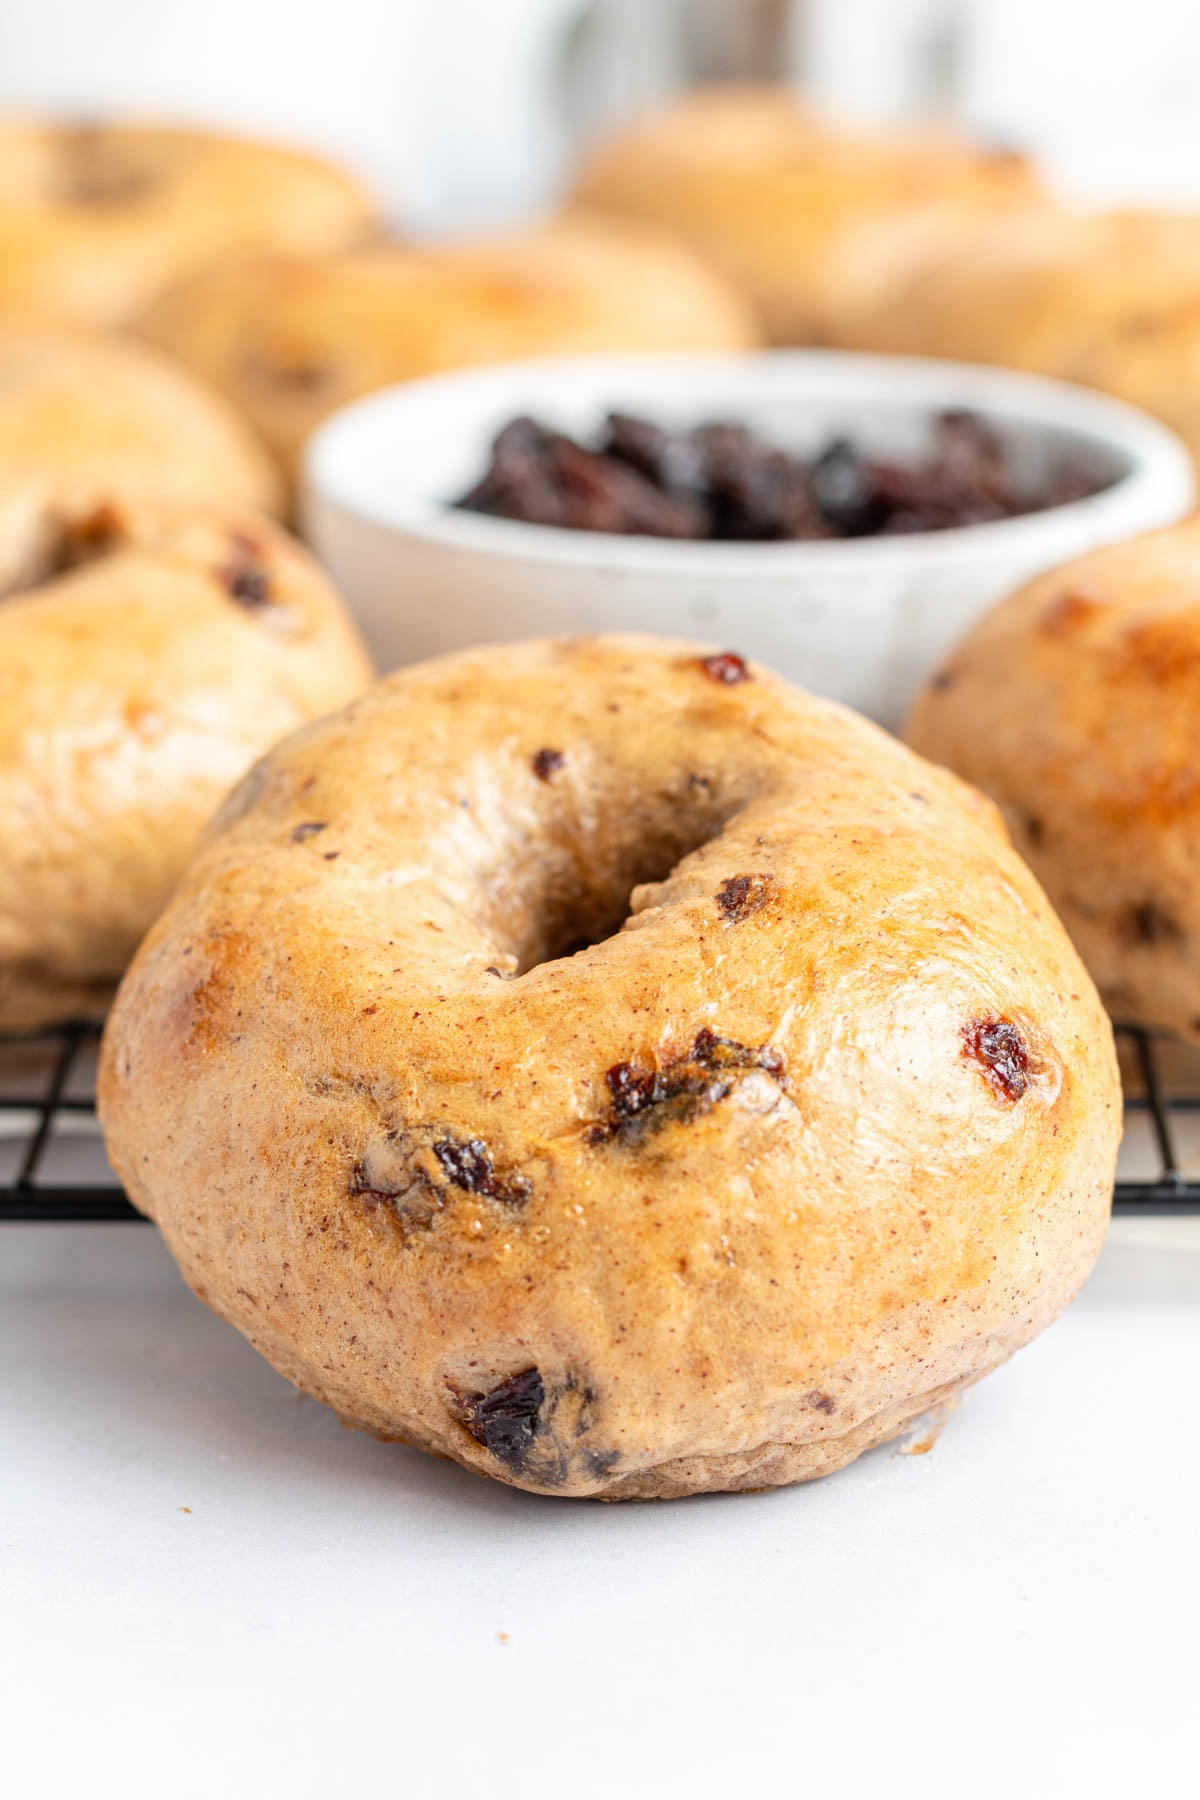
Cinnamon raisin bagels are the perfect combination of warm cinnamon spice and sweet, slightly tart raisin flavor. This recipe makes eight bagels in just a few hours and is a great bagel recipe for beginners since it uses all-purpose flour and other basic ingredients. I truly can't believe it's taken me this long to add such a classic bagel flavor to my collection of easy bagel recipes, I am so excited for you give this bagel recipe a try.
I am so thrilled to finally share this cinnamon raisin bagel recipe with you. I've done so many bagel recipes over the years, but I've definitely missed some of the most classic flavors... cinnamon raisin was long overdue.
This is an easy beginner-friendly cinnamon raisin bagel recipe that can be made in just a couple of hours with no fancy equipment needed. Soaking the raisins in water before adding them to the dough gets them to incorporate smoothly for the best chewy bagel texture!
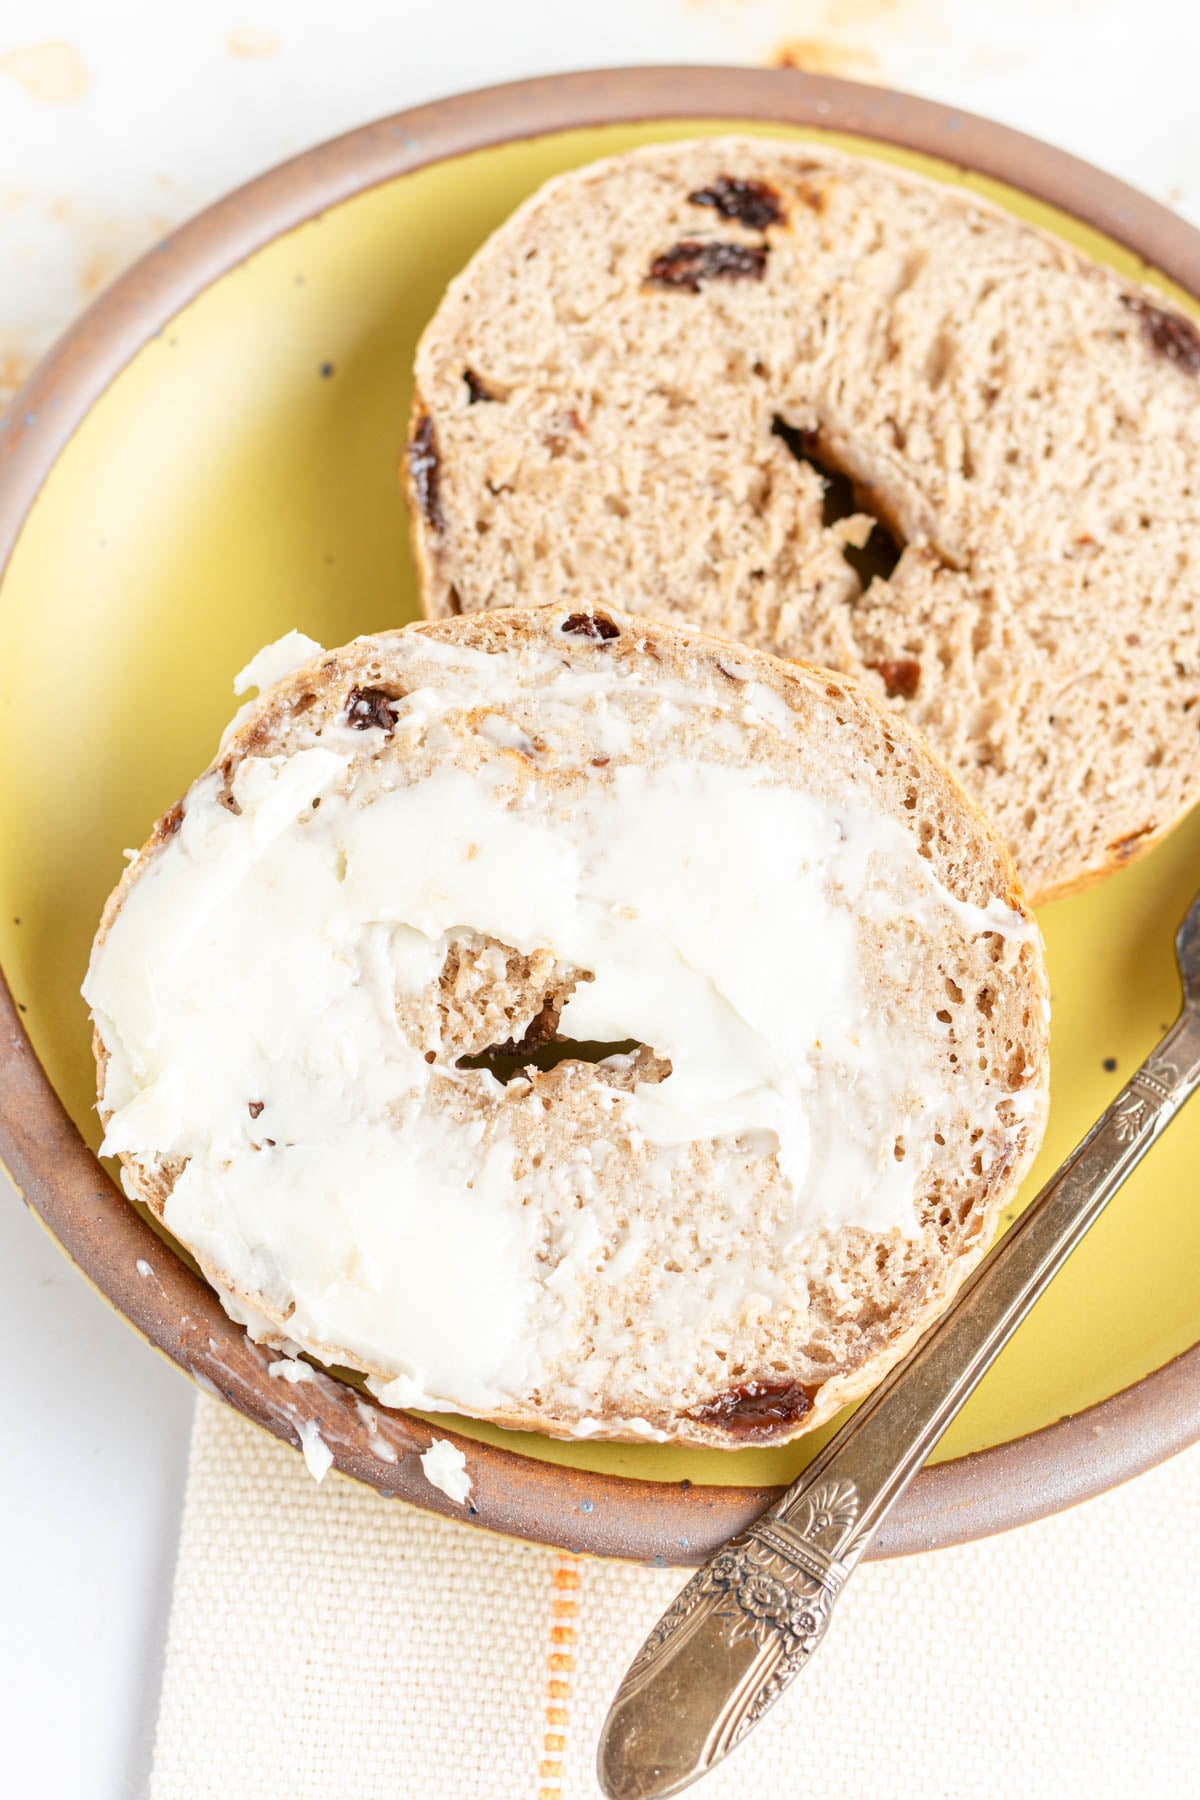
These are my personal ideal cinnamon raisin bagels. The cinnamon is pronounced in every bite, and they have just the right amount of raisins for my liking. If you like more raisins in your bagels, you can add more, and if you prefer smaller raisin pieces, you can run them through a food processor or chop them up before soaking them in the water.
Just like all my bagel recipes, these cinnamon raisin bagels freeze beautifully. If you're not going to eat them all right away (bagels are best within the first 24 hours), I do recommend freezing them!
Special Ingredient Notes
Here are the ingredients you'll need to make these homemade cinnamon raisin bagels! See recipe card for ingredient quantities.
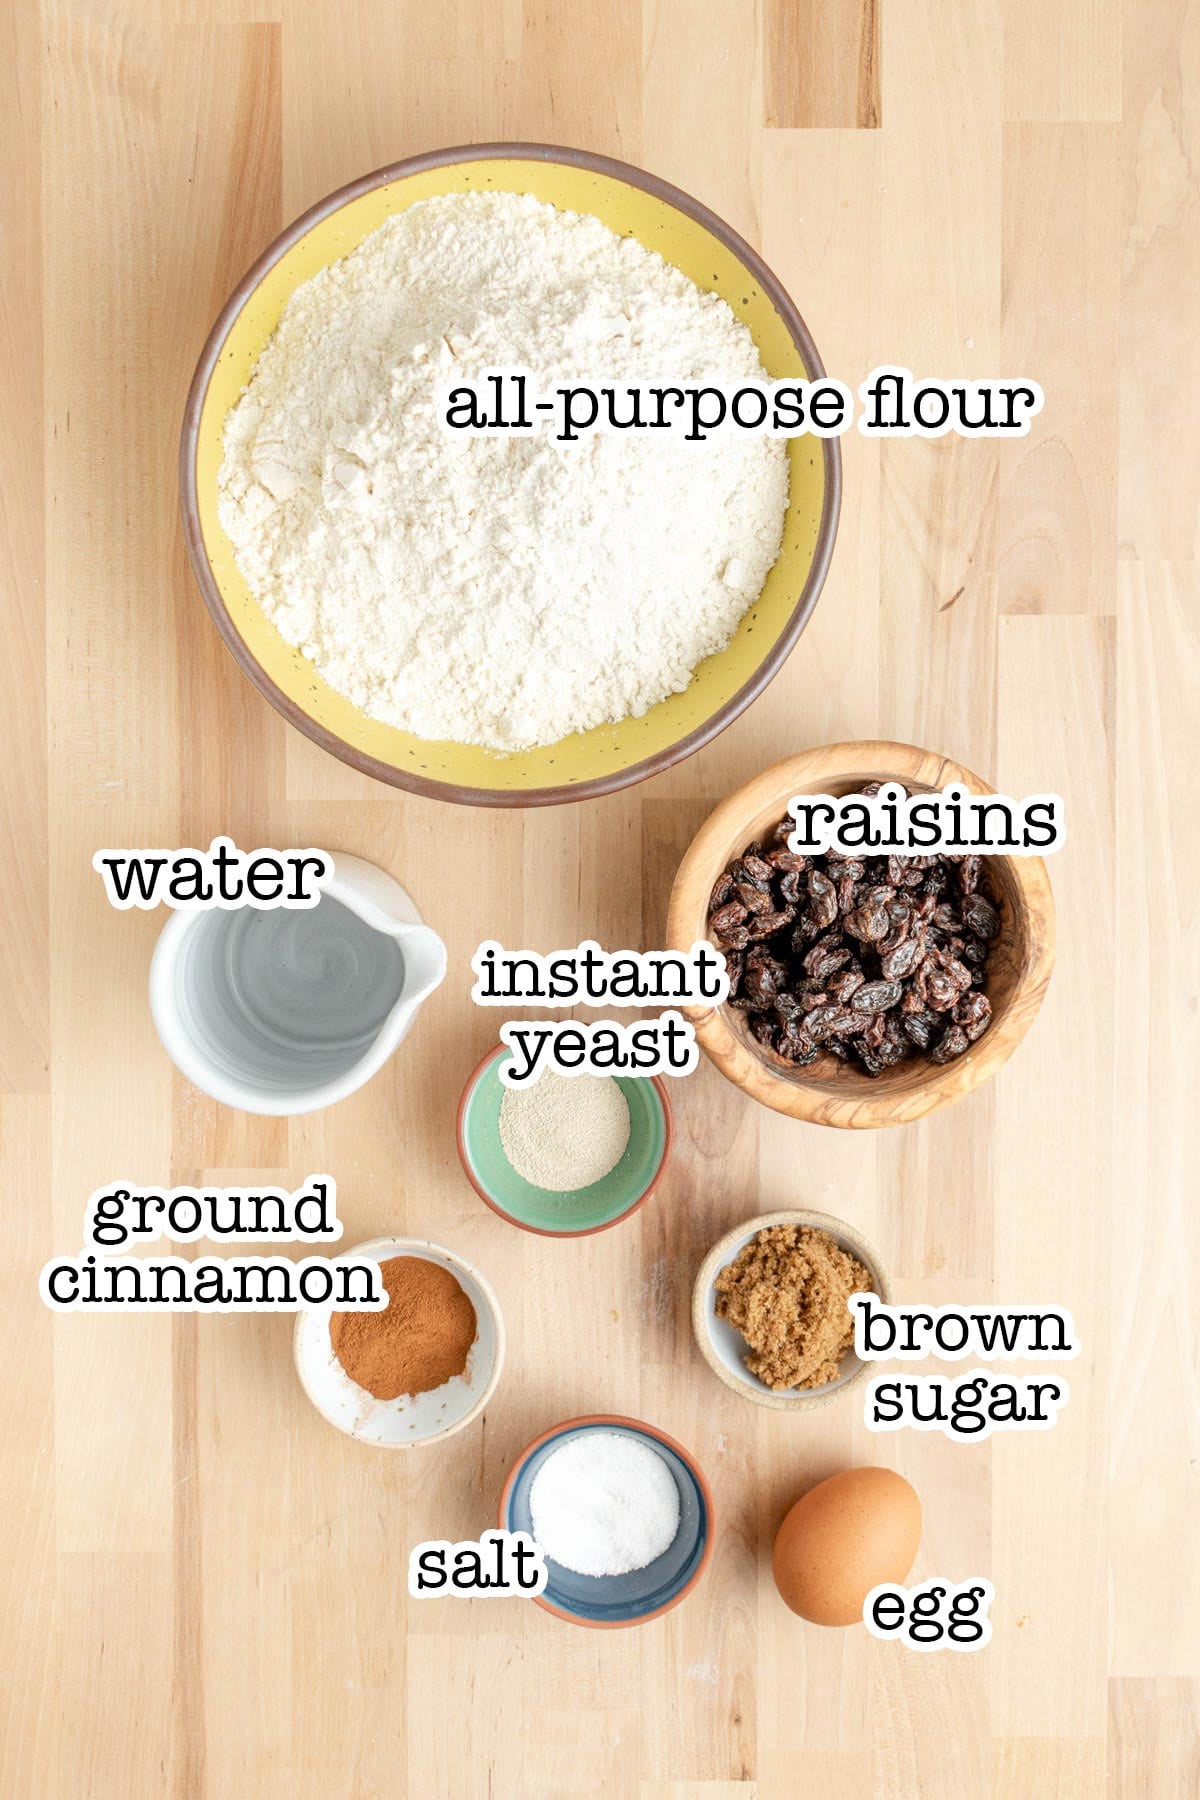
All-Purpose Flour - Bagels are traditionally made with a higher protein (high gluten) bread flour for extra chewy texture, but I use all-purpose flour in most of my bagel recipes. You can use bread flour, just know the dough might need a bit more water to reach the right texture since bread flour absorbs more water than all-purpose flour does.
Brown Sugar - Brown sugar is white sugar with molasses in it. The molasses adds extra sweetness and a more complex flavor that is so good with the warm cinnamon spices and sweet raisins. That said, if you don't have brown sugar, white sugar will work just fine!
Soak The Raisins for Best Results
Raisins are dry. Like really, really dry. And really, really chewy. And they can be pretty hard, too! When you try to knead hard, dry raisins into a dense bagel dough, they struggle to incorporate. The dough might even try to push the raisins back out as it rests. And you don't want hard, dry raisins in your cinnamon raisin bagels!
The solution? Soak the raisins in warm water for about 10 minutes before adding them to the dough. This rehydrates the raisins, making them softer and more pliable. They stay whole but are more prone to bursting open, streaking through the dough and adding lots more raisin flavor.

The rest of this cinnamon raisin bagel recipe follows my usual bagel-making process. I've written the recipe to use a stand mixer with a dough hook, but you can mix and knead this cinnamon raisin bagel dough by hand if you don't have a mixer (see recipe notes).
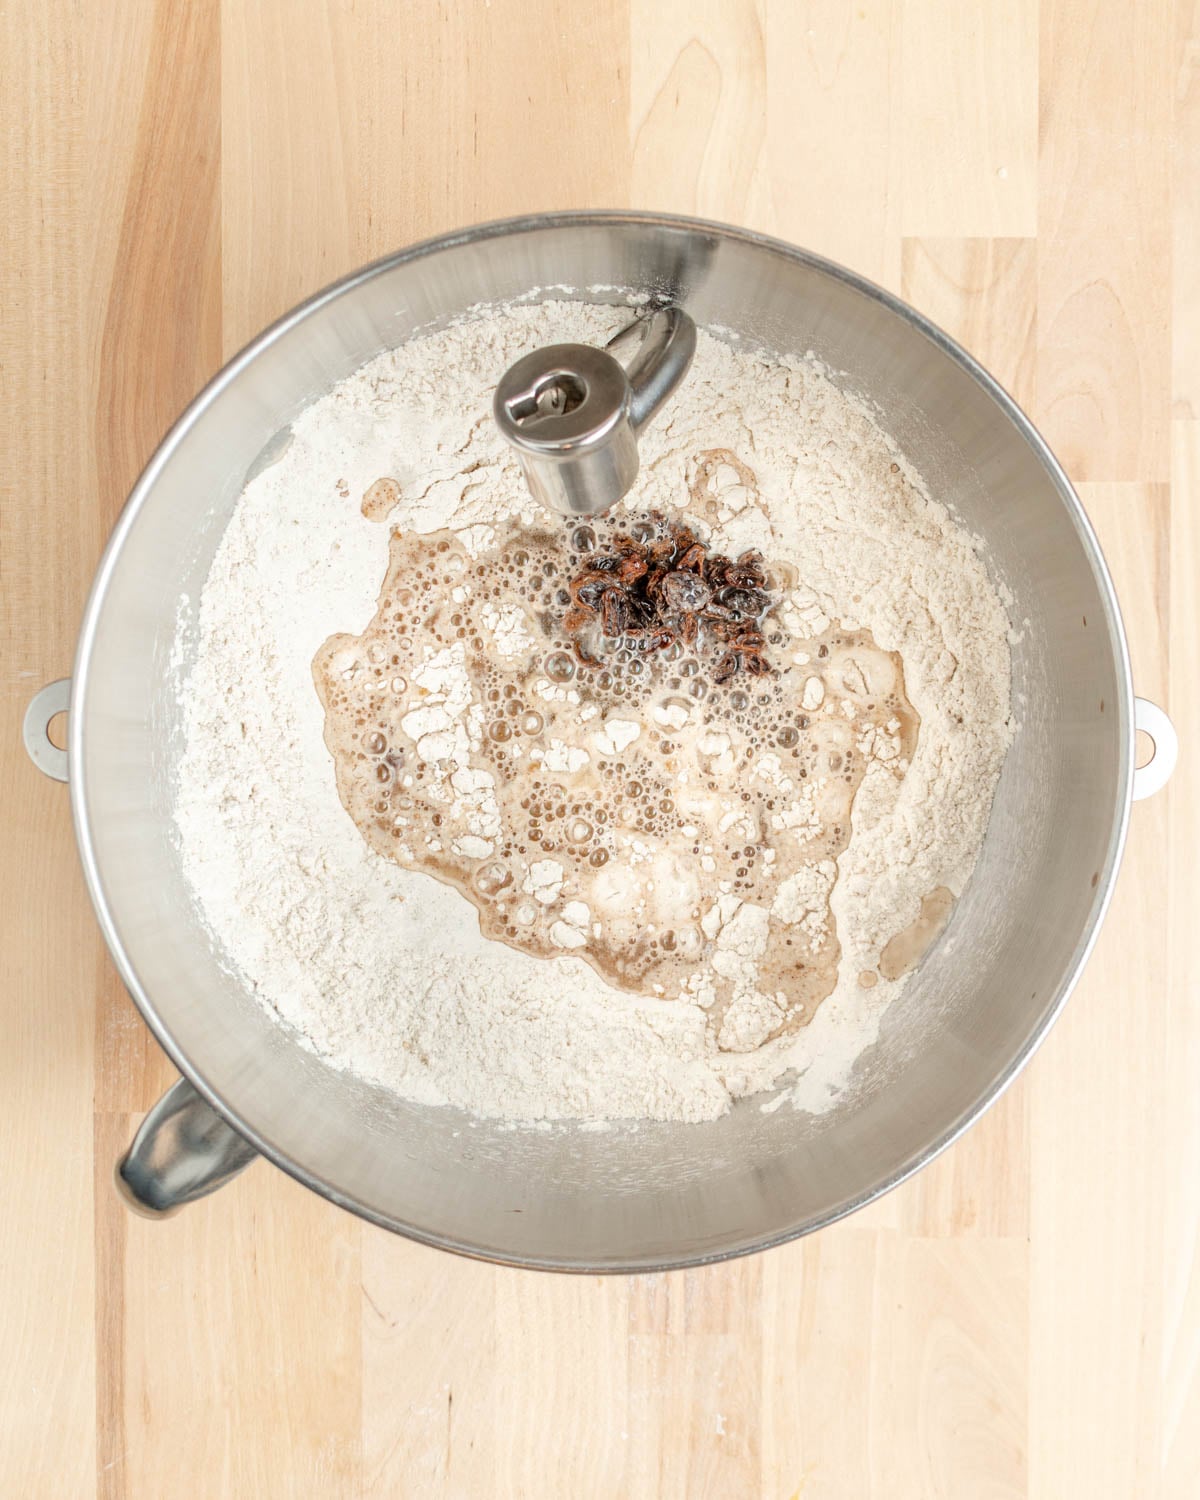
Add the warm water and raisins to the middle of the dry ingredients.
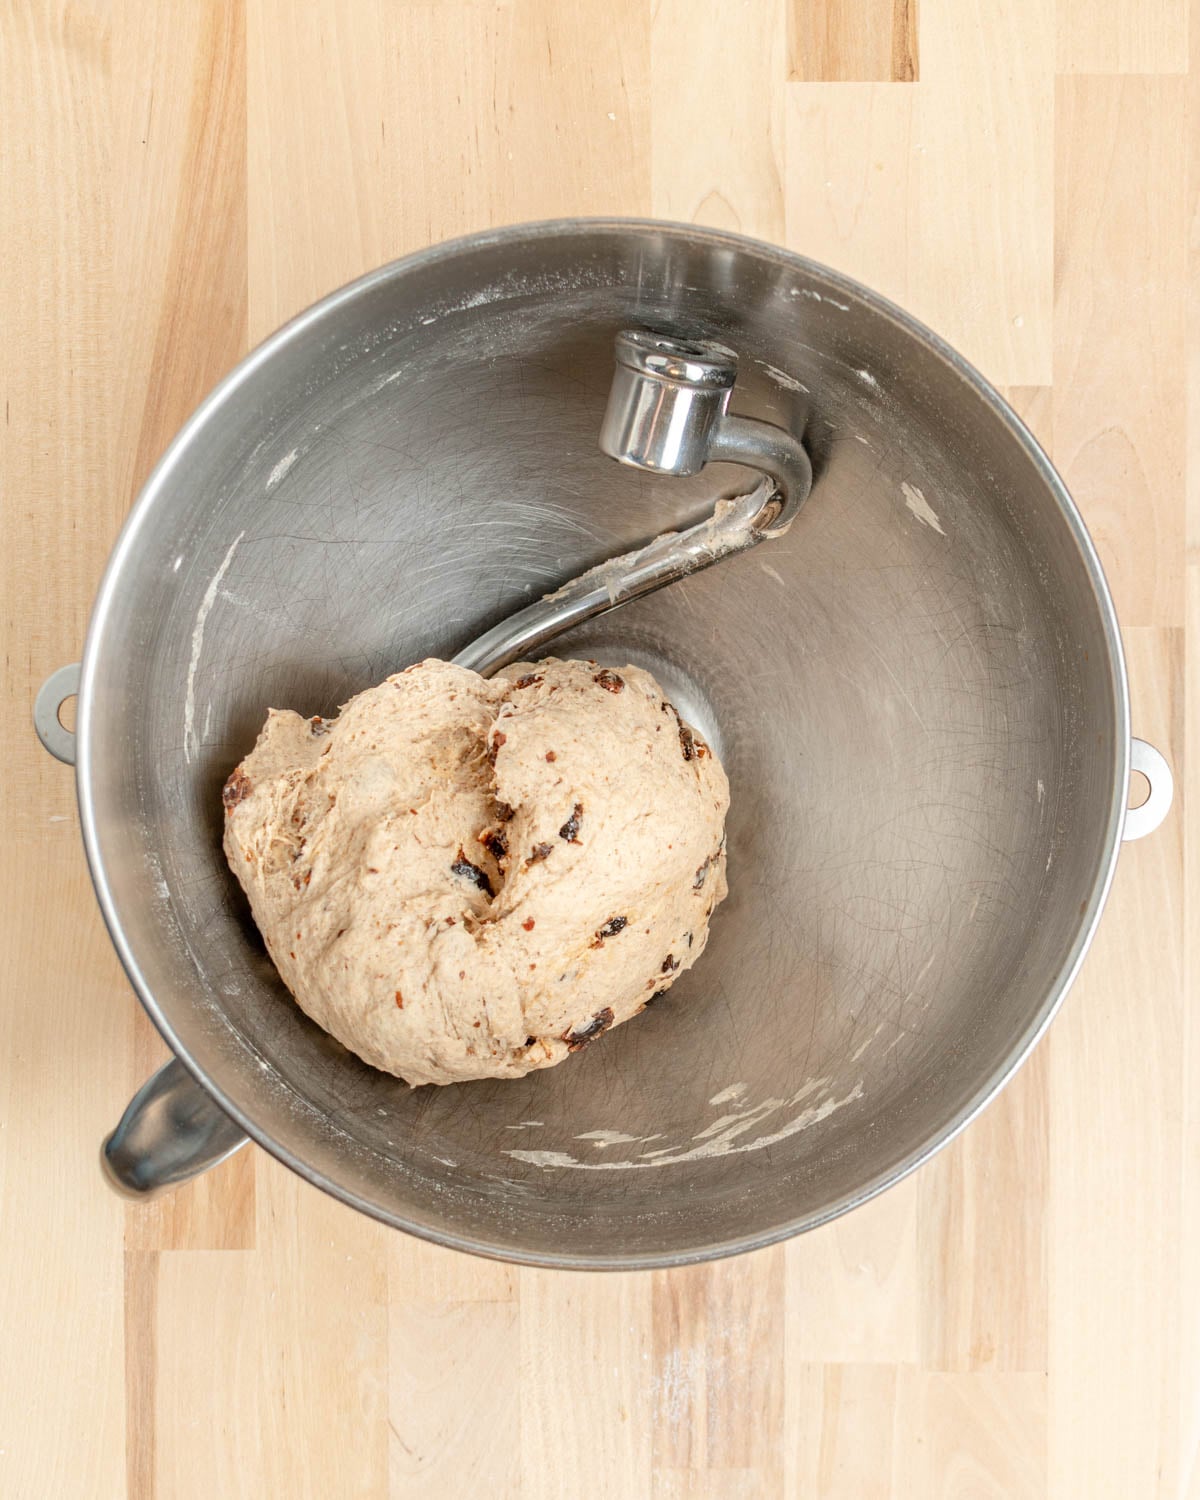
Knead until the dough is smooth, soft, and slightly tacky to the touch.
If the dough doesn't clear the sides of the bowl completely while kneading, dust in a more flour as needed. The dough should be smooth, soft, stretchy, and just slightly tacky to the touch. If you've made my plain bagel recipe, it's maybe a little stickier than that dough just because of the raisins.
Once the dough has been kneaded, tuck the edges under to shape it into a ball. Cover the dough and let it rise in a warm spot until just about doubled in size or until it passes the fingerprint test, about an hour.
How to Shape a Bagel
Divide the dough into equal portions using a kitchen scale. In this case, each piece should weigh around 106 grams. If you're combining a few pieces together, stack the smaller pieces on top of the bigger pieces so they end up inside.
On an unfloured surface, tuck the edges up so the dough is smooth against the counter with the seam pinched together on top. Repeat until the dough ball feels nice and tight. Be gentle but firm with the dough — you're stretching the dough, not tearing it.
Flip the dough over so the seam side is down against the counter. Cup your hand around the dough and slide it toward you. The dough will take on an oval shape. Rotate it 90 degrees and repeat the slide to turn the oval into a round ball.
You can also cup your hand around the dough with your pinkie flush against the counter and your thumb and forefinger making an O- or C-like shape above the dough. Move your hand in quick circles without picking your pinkie off the counter, and the dough will quickly shape itself into a nice ball of dough with a smooth top.


![[gif] a thumb pokes a hole through the bottom of a round ball of dough](https://thepracticalkitchen.com/wp-content/uploads/2019/08/How-to-Shape-a-Bagel-4.gif)
![[gif] two thumbs through the hole in the bagel dough rotating it and gentle stretching it](https://thepracticalkitchen.com/wp-content/uploads/2019/08/How-to-Shape-a-Bagel-5.gif)
![[gif] a fully stretched out round of bagel dough](https://thepracticalkitchen.com/wp-content/uploads/2019/08/How-to-Shape-a-Bagel-6.gif)
Shape all the portions of dough into balls, then go back to poke the holes through, starting with the first dough ball you shaped. This gives them a chance to rest and get used to the round shape before you stretch them into bagels.
To poke the hole at the bottom, dust the bottom of the bagel with flour and stick a thumb through the bottom seam of the dough to push any loose edges through.
Slide your other thumb in and gently squeeze and stretch, rotating the dough through your hands until the bagel hole is at least twice as wide as the sides of the bagel.
You *Must* Boil Your Bagels
Boiling gives bagels their characteristic shiny, chewy crusts and is a step that cannot be skipped. Boiling is crucial to making bagels. The hot water gets the yeast moving, allowing the bagels to begin expanding while also gelatinizing the starches in the crust to set them in place so the bagels don't expand too much.
If they're not boiled, they're not bagels!
I boil these cinnamon raisin bagels for one minute per side, using a wire spider to flip the bagels and transfer them out of the boiling water to avoid splashing.
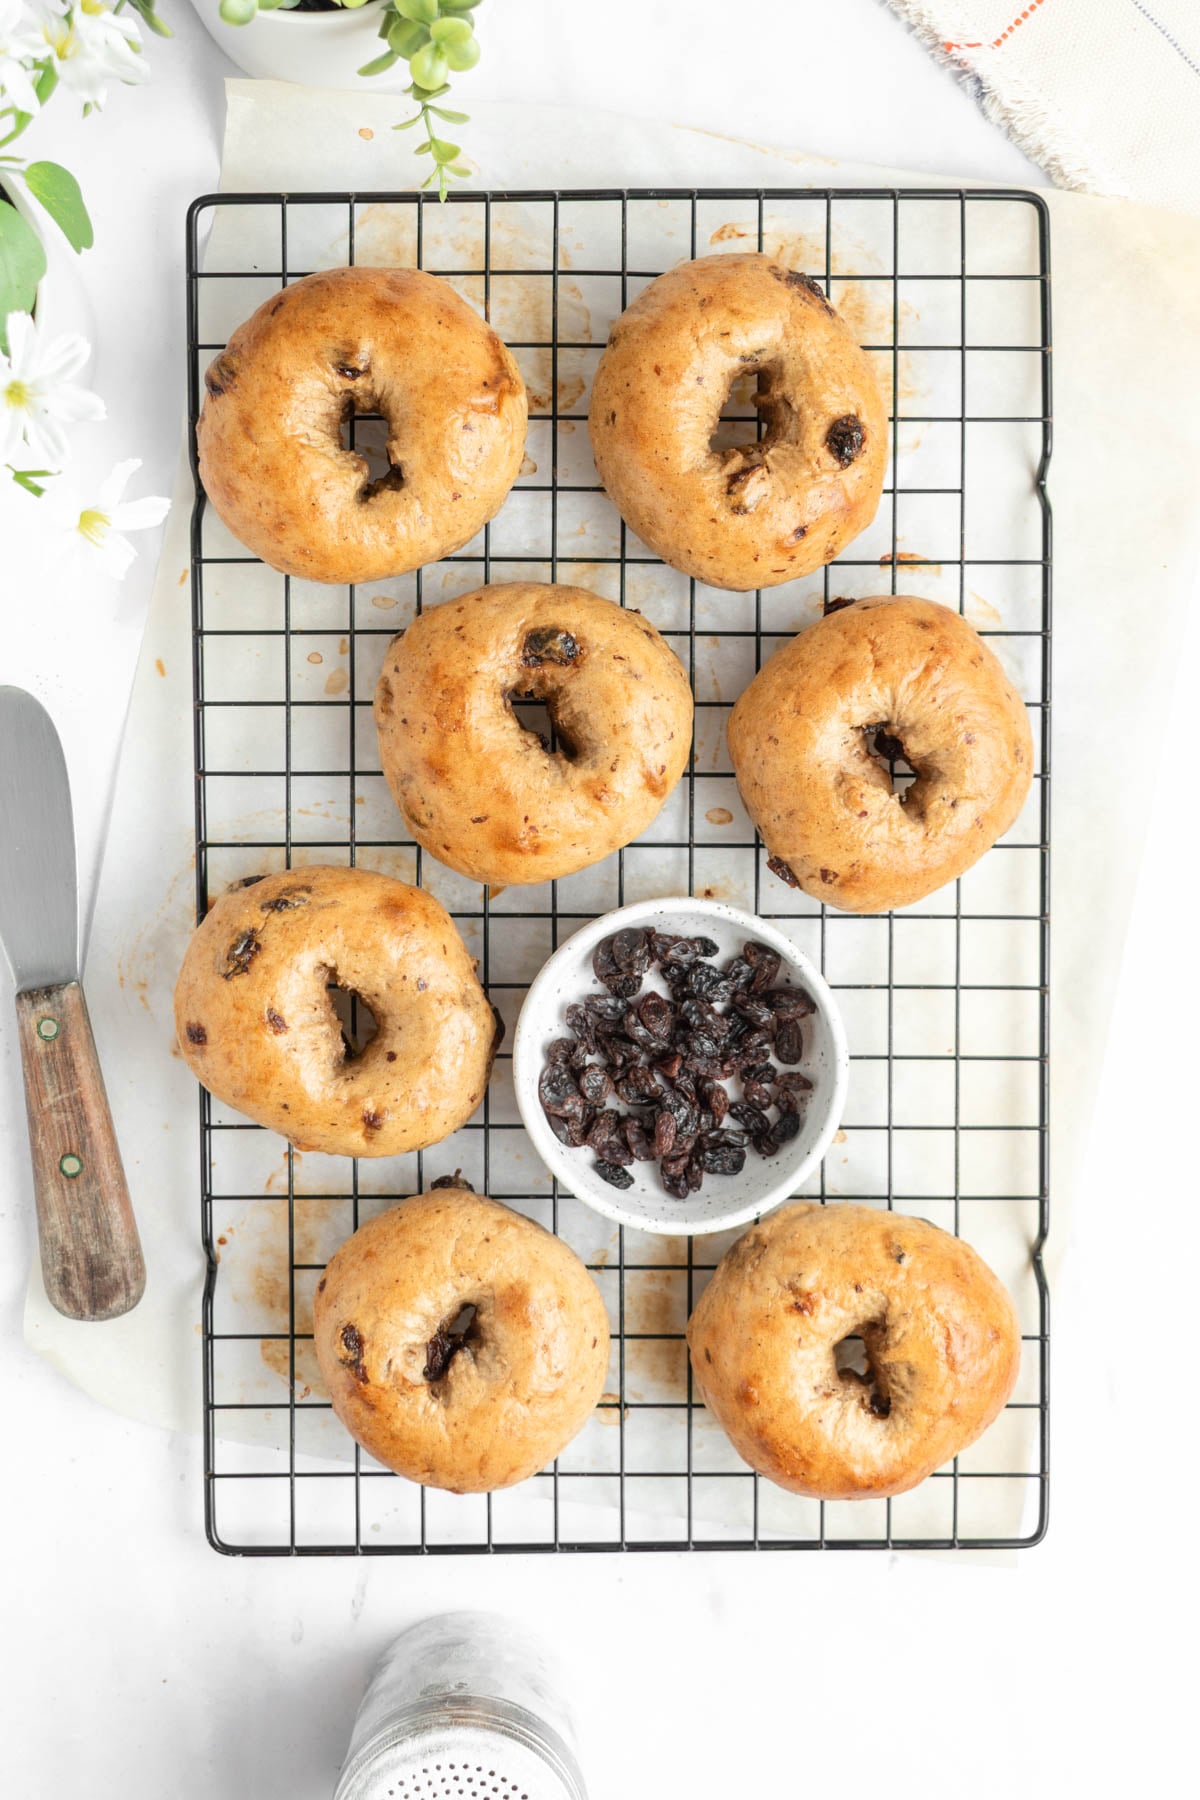
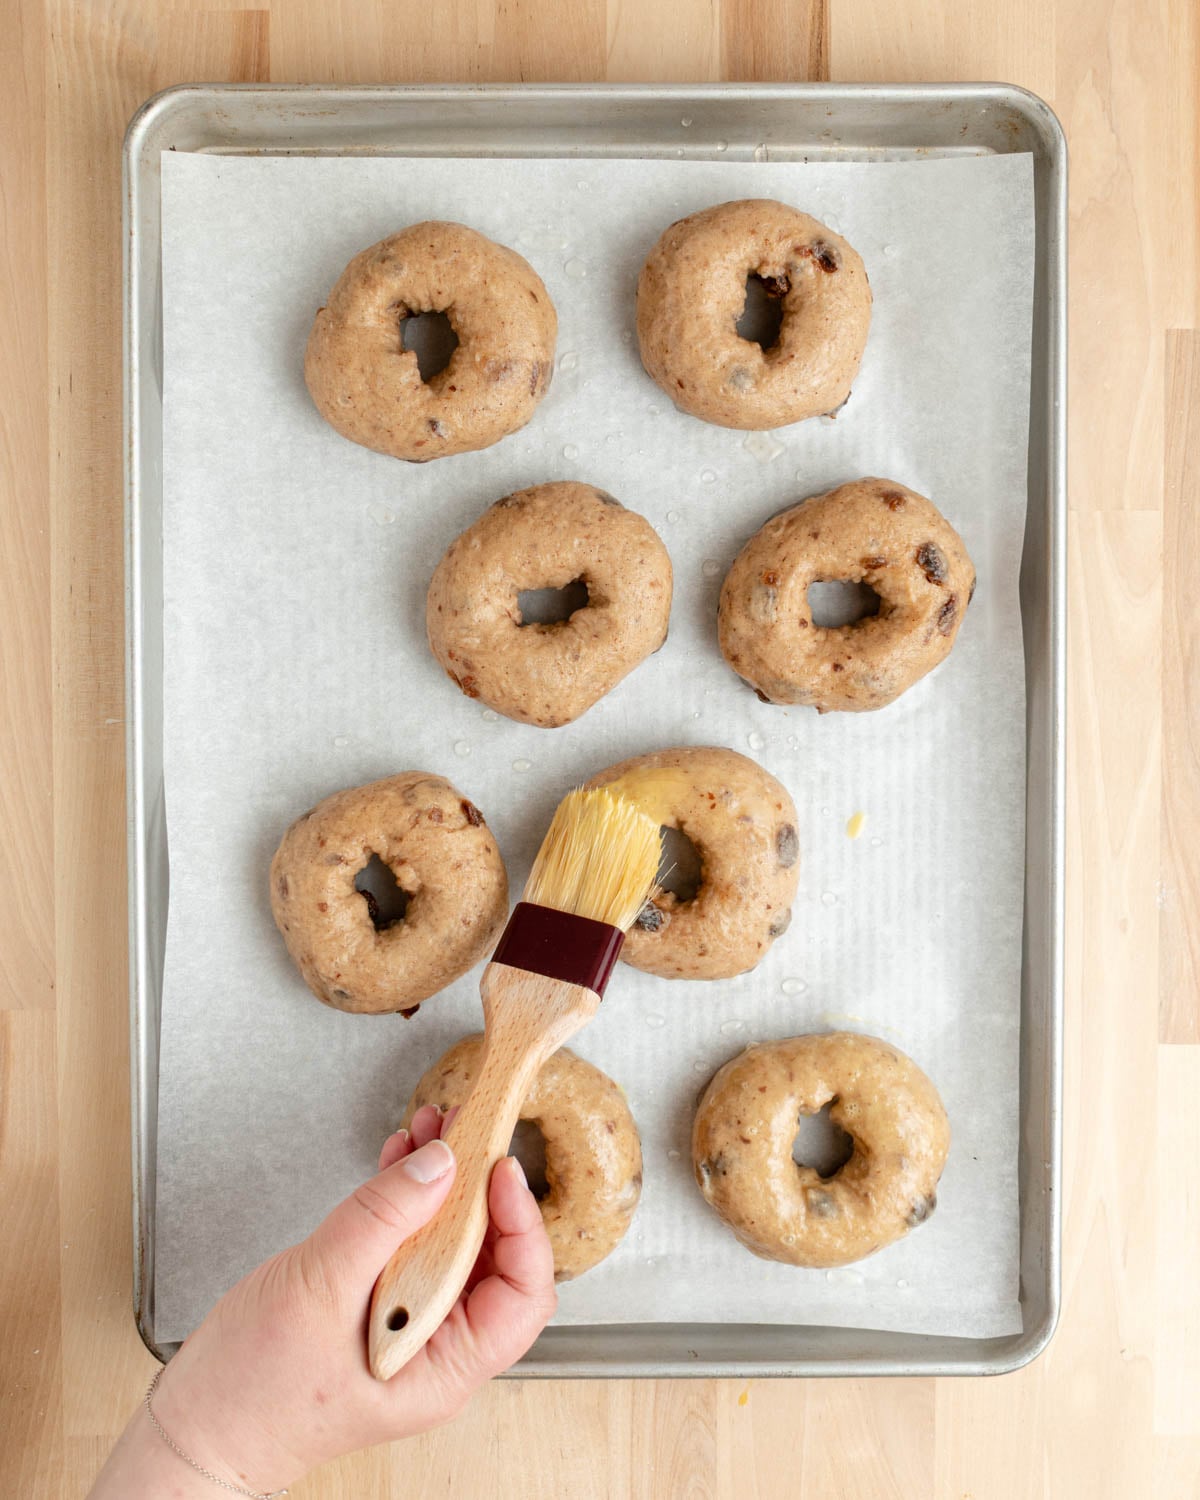
After the cinnamon raisin bagels have been boiled, arrange them on a lined sheet pan slightly offset in rows of two to give them room to expand in the oven without bumping into each other.
After baking, let the cinnamon raisin bagels cool completely on a wire rack before slicing. If you slice in too early, the steam inside the bagels will turn the starches into mush. If you can't wait for them to cool completely however, I can't blame you. Give them at least 10 minutes on the rack. Warm, fresh-baked bagels are great.
Practical Tips & Recipe Notes
- If your kitchen is cold, the bagel dough may take longer to rise. If your kitchen is very warm, it may rise faster.
- Bagels should float almost immediately when you add them to the boiling water but I find the added weight of the raisins makes them sink at first. It takes about 30 seconds for them to bob to the top; sometimes it helps to use the edge of the wire spider to give them a little nudge in the pan to get them floating!
- I prefer using a pastry brush with real bristles for the most even egg wash coverage, though a silicone basting brush will also work.
- This method will also work with dried blueberries, cranberries, etc!
- If you like extra sweetness on your cinnamon raisin bagels, sprinkle them with cinnamon sugar after the egg wash but before baking.
💭 Have More Bagel Questions?
I've rounded up answers to common bagel questions and how-to guides, including:
- How to knead bagel dough by hand and what it should feel like
- Why bagels are always boiled
- Step-by-step guides for bagel shaping and baking techniques
See my bagel-making 101 guide for more!
📖 Recipe

Quick & Easy Cinnamon Raisin Bagel Recipe (Same-Day Recipe!)
Recipe Notes
- To knead by hand, mix the dough with a wooden spoon or dough whisk, then knead by hand on a lightly floured work surface. Double the kneading time (about 8-10 minutes) and dust in more flour as needed just to prevent sticking. The rest of the recipe follows as written.
- Bagels should float almost immediately when you add them to the boiling water but the added weight of the raisins makes these babies sink at first. It can take about 30 seconds for them to bob up to the top; sometimes it helps to use the edge of the wire spider to give them a little nudge in the pan to get them floating!
- Store in an airtight bag with a paper towel to absorb moisture. Bagels are best within 24 hours. Stored properly, they will stay good for 2-3 days at room temperature. For best results, freeze any bagels you know you won't eat immediately as soon as they are cool.
Ingredients
Cinnamon Raisin Bagel Dough
- 300 grams warm water (100°F)
- 100 grams raisins
- 500 grams all-purpose flour (plus more for dusting)
- 18 grams brown sugar
- 8 grams diamond crystal kosher salt
- 6 grams instant yeast
- 6 grams ground cinnamon
Egg Wash
- 1 egg (for egg wash)
Instructions
- Soak. In a bowl or liquid measuring cup, soak the raisins in the warm water for 10 minutes.
- Mix. In the bowl of your stand mixer, whisk together flour, salt, brown sugar, cinnamon, and yeast. Make a well in the middle and pour the warm water and raisins into the center. Attach the dough hook and mix on low speed until the dough comes together and the water is absorbed. Pause and scrape down the sides of the bowl as needed to help everything combine. This may take 3-5 minutes.
- Knead. Increase the speed to low-medium and let the mixer run for another 3-5 minutes, dusting in more flour if the dough is sticking to the bowl. You’re looking for a dough that is a little firm and stiff, nice and smooth, and just slightly tacky to the touch. It shouldn’t cling to your hands or the bowl.
- First rise. Remove the dough from the mixing bowl and tuck it into a smooth round ball. Lightly spray the mixing bowl with nonstick spray and return the dough to the bowl. Cover and let it rise for an hour at room temperature until just about doubled in size.
- Preheat. Toward the end of the rise time, preheat your oven to 425°F and fill a wide, deep pan or wide pot with at least 3 inches of water. Bring it to a low boil on the stove. Line a sheet pan with parchment or a silicone mat and set aside.
- Pre-shape. Deflate the dough and divide it into eight equal pieces (use a kitchen scale for precision) and shape them into balls. Gently flatten the piece of dough against a lightly floured surface, then tuck the edges up into the middle, pinching them together to form a smooth surface on the underside of the dough. Then flip the dough over, cup your hand around it, pinkie against the counter, and drag your hand towards your body. Rotate the dough 90 degrees and repeat as needed until you have a smooth taught surface on top and a seam underneath.
- Shape. Starting with the first dough ball you shaped, coat your thumb in flour and poke it through the seam-side of the dough, pushing any extra edges into the middle. Slide your other thumb in and gently stretch the dough out until the hole in the middle is at least the same width as the sides. The hole will close as the dough rests and will close again as it boils and bakes, so don’t be stingy here.
- Boil. Reduce the water to an active simmer. Briefly stretch each bagel one more time before gently placing into the water, top-side facing down. Work in batches as needed (I can usually fit 4 at a time in my pot). The bagels will expand as they boil, so don’t overcrowd them. Boil bagels for 30-60 seconds per side, using a wire spider to flip them.
- Remove the shaped bagels from the water and put them on the prepared sheet pan at least 2 inches apart from each other.
- Brush each bagel with egg wash, making sure to get the sides and centers. Optional: Sprinkle with cinnamon sugar.
- Bake the cinnamon raisin bagels for 20-23 minutes, until nicely golden brown.
- Let the bagels cool for a few minutes on the sheet pan, then transfer to a wire rack. Bagels are best enjoyed freshly baked, but try to wait at least 15-20 minutes before cutting them open so the starches can set.
Isis says
Can I freeze the bagel dough before I boil them? Also if I am using bread flour how much water would you estimate that I would need?
Rebecca Eisenberg says
I would freeze the baked bagels, not the dough! And if you’re using bread flour I would just add more water a couple teaspoons at a time until the dough is smooth, elastic, and tacky to the touch. Hard to say exactly how much you’d need since different brands absorb differently, etc.
Harris says
I do not have a scale to weigh ingredients. Do you have measurements in cups and tablespoons for this recipe?
Rebecca Eisenberg says
Unfortunately no, they are very inaccurate and it's not possible to convert accurately and have the recipe still turn out reliably well. I explain this in more detail in my Baking FAQ. A kitchen scale is very affordable and the single best piece of equipment you can add to your kitchen that will immediately make you a better and more consistent baker.
Giacomo says
Fantastic recipe! Made the cinnamon raisin yesterday and made plain (everything topping) using exact same measurements with inclusion of a little sea salt... maybe 5g...today. No overnight proof needed! Any tips to elevate higher...add malt, longer rest, etc?? Thanks!
Rebecca Eisenberg says
Hi Giacomo! So glad you like them! If you want to take this to the next level, I'd try using the same raisin soaking technique and adding the same amount of cinnamon to my overnight New York-style bagels. You may need to increase the yeast just slightly in that recipe because cinnamon can inhibit yeast activity, but it should work! Please let me know if you give it a try! Happy baking!
Leann says
This recipe was super easy to follow (as always), and the bagels came out great! I think that they were maybe a little more chewy than I normally would like, but that's on me for boiling them a bit too long. I will definitely be making these again!