

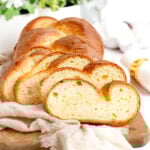
Get ready to learn how to make a delicious single loaf of homemade braided challah bread. My soft challah recipe uses an extra egg yolk, a generous pour of honey, and the richness of olive oil for the perfect golden-brown challah with a soft, slightly airy interior texture. It is so good paired with homemade butter.
In this post I'll show you my best tips for braiding a three-strand challah, but you can absolutely use this base challah dough to make any type of challah braid or shape your heart desires.
Looking for an even smaller challah recipe? Check out my small-batch challah bread which uses just 1 cup of flour!

Challah is a specific type of enriched bread usually made to celebrate Ashkenazi Jewish ritual holidays like Shabbat as well as other major Jewish holidays (though not Passover, during which no leavened bread is eaten).
While other classic enriched doughs like my simple brioche bread use milk and butter for a soft and fluffy texture, challah bread is typically dairy-free.
Why is challah dairy-free? When you keep kosher, you aren't supposed to mix dairy and meat. Since challah is traditionally served at mealtime, it is instead enriched with eggs and olive oil. That way it is considered "parve" (Yiddish for "neutral") and can be served with meals containing dairy or meat products.
Traditionally, homemade braided challah is shaped as a three-strand braided loaf (which is what I'll show you how to do in this post). It's also perfectly acceptable to shape a four, six, eight, or even 12-strand braided challah loaf. The sky's the limit, really. If you can braid it, go for it! There are a lot of really creative challah braiders out there.
On Rosh Hashanah, the Jewish New Year, challah is baked in a round spiral or braid to honor the cyclical nature of the calendar year. My round apples and honey babka is shaped in a twisted spiral for that reason (though it uses a brioche dough).

There are a lot of great challah recipes out there, so when I decided to develop my own homemade braided challah recipe, I decided to prioritize a few things:
- I wanted a recipe that would make just one loaf of challah. A lot of popular challah recipes make two, if not three loaves of challah. According to Jewish tradition, you're supposed to have two challahs on Shabbat, but this is The Practical Kitchen and I'm personally not very religious — I just don't need two challahs!
- I wanted a challah braiding technique that would avoid the "pulling" texture you sometimes get between the ropes of dough when it bakes. A lot of recipes don't mention how to avoid that, and I was determined to figure out the trick (and I did!).
- I didn't want any ingredients to go to waste. Challah recipes often use extra egg yolks or use only egg yolks in the dough, and I wanted to develop my homemade braided challah recipe so that no parts of the egg would go unused.

My challah recipe uses two large eggs and one egg yolk, but the extra egg white is reserved to use as the egg wash on the final loaf.
One of the trickiest things about developing a challah recipe is creating a dough that is hydrated enough to shape so that the braids fuse into one solid loaf as it bakes, but that will also hold the braided shape and definition.
Too little water and the ropes won't fuse together during the final rise. Too much water and they'll fuse together so much that you lose the pretty braided shape.
I started with a very low-hydration dough and increased the amount of water by almost double over the course of recipe testing! The final version of my challah dough is soft and supple, easy to roll into long ropes for braiding.

In addition to the fat from the egg yolks, I added a bit of olive oil to the dough. Olive oil adds flavor and helps give the challah a soft, tight crumb. It also adds elasticity to the dough, making it easier to roll and braid.
How to Make Challah Dough (Stand Mixer)
I follow the basic dough mixing process when making the dough for my homemade braided challah loaf. I start by mixing the dry ingredients together in my mixer bowl. Then, in a separate bowl, I whisk together the liquid ingredients just enough to break up the egg yolks and get the honey to start dissolving.


A lot of the liquid ingredients in this challah dough take longer to absorb into the flour than water does, so the dough might seem dry during the initial mixing stage. As you knead the dough and leave it to rise, the flour will have plenty of time to finish absorbing them.
Shape the dough into a ball, then place the dough ball back in the mixing bowl and lightly coat the outside of the dough with olive oil. Cover the bowl and set aside somewhere warm to rise until doubled in size.


How I Braid a Challah Loaf
Okay, I usually avoid talking about hair and food at the same time but, when it comes to challah, if you can braid hair you can braid challah. And if you can't braid hair, the good news is braiding challah is much easier (no frizz or flyaways to manage, yay!).
Don't be too hard on yourself if braiding challah doesn't come naturally to you on your first go. It will become easier with practice. I've got step-by-step photos to walk you through it and you can also check out the video at the end of this post if you want more visual guidance!
First, I divide and pre-shape the dough into logs. This helps the dough relax into this new shape before I roll it into longer ropes.


Then, I gently flatten each piece into a long-ish rectangle and roll it up into a tight log, using my fingertips to seal the seam together at the bottom. I set each pre-shaped log aside while I work on the next one.
Starting with the first log of dough I pre-shaped, I roll each log of dough to about 20 inches long, starting with my hands in the middle of the rope and moving them to the ends of the rope as I roll, trying to maintain an even thickness.
I finish by tapering the ends of each rope by tilting my hands so my pinkies are flush against the counter and my thumbs are angled up as I roll.


As you braid your challah, there are two things to keep in mind:
- Keep the braid a little bit loose to avoid that "pulling" texture when the loaf bakes. You aren't braiding hair for a cheerleading competition. Once the loaf is braided, it will rise again; the challah dough ropes need room to expand without pulling on each other.
- As you cross the dough ropes over each other, think of it like you're folding them at a crease over each other, rather than always keeping the top side of the dough rope facing up.

Pinch the three ropes together at the top. The middle rope should be on top.

Take one of the side ropes and loosely cross it over the middle rope.

Take the other side rope and cross it over the new middle rope. Repeat to the end.

Pinch the ends together at the bottom firmly so they don't come undone.
Once my challah is braided, I gently lift and tuck the pinched-together ends under the loaf. This prevents the narrow ends from burning and gives the challah nice rounded ends. Then I transfer the whole challah loaf to a parchment-lined sheet pan.

Before rising.

After rising.
The final step is to brush the challah all over with the reserved egg white and bake it.

Kneading Challah Dough By Hand (No Mixer)
No mixer, no problem! You can absolutely make the dough for this homemade braided challah by hand. Follow the recipe as stated, except use a dough whisk or spatula to mix the wet ingredients into the dry ingredients until a shaggy dough forms.
Then turn the dough out onto a clean countertop and knead by hand for about 10-15 minutes until the dough is smooth and slightly elastic. This is a dense dough and will definitely put your arm and shoulder strength to the test.
Stretch your shoulders well before (and after) kneading and make sure to set a timer — it always takes longer than you think it will!
You may need to dust down a little additional flour while kneading just to prevent the dough from sticking to you and the counter, but a little sticking is normal. Use a light hand when dusting the flour — you don't want to incorporate too much flour into the dough.
The rest of the homemade braided challah recipe will follow as written!

👩🏻🍳 Practical Tips and Recipe Notes
- You can use this dough to make a round challah, a four-strand woven round challah, etc. The baking time shouldn't change too much, but you're always looking for that 195°-200°F internal temperature for doneness.
- Pre-shape the dough logs and roll the ropes on an unfloured surface. You want the friction of the dough against the counter to help shape it; if you put flour down, the dough will have trouble sticking to itself and will slide all over the place and be much harder to roll.
- I was testing this recipe at the height of winter when it was like 65°F in my kitchen. I used a seed-starting heat mat that I put my mixing bowl and sheet pan on to provide warmth to the challah dough while it rises, and it works great.
💭 Have More Baking Questions?
I've rounded up answers to common baking questions and how-to guides, including:
- Ingredient swaps and FAQs
- Why my recipes are written in grams and not cups
- How to quickly bring eggs and butter to room temperature
- Ingredients I use (salt, flour, yeast, etc.)
- Step-by-step guides for bread and baking techniques
See my baking techniques & troubleshooting guide and ingredient swaps and FAQs for more!
TL;DR — Recipe Summary
- Mix the dry ingredients in the bowl of a stand mixer. In a separate bowl, mix together the liquid ingredients.
- Add the liquid ingredients to the dry ingredients and mix with the dough hook until it comes together in a shaggy mass on the hook.
- Knead for 5-7 minutes until the dough is soft, smooth and elastic.
- Cover and rest (bulk ferment) for 1-2 hours in a warm spot.
- Divide the dough into three equal pieces, and roll them into tapered ropes about 20 inches long. Braid the ropes loosely, leaving space to expand as the challah rises. Tuck the ends under.
- Cover the challah with plastic wrap and let rise for 1 hour in a warm spot until almost doubled in size.
- Brush the challah lightly all over with egg white wash.
- Bake for 30-35 minutes at 350°F until an internal temp of 195°-200°F is reached.
- Let cool completely before serving.
📖 Recipe
Homemade Braided Challah Bread Recipe
Recipe Notes
- If you live somewhere very dry, you may find the dough needs a bit more water during the mixing stage; if you live somewhere very humid, hold back about 10-15 grams of water to start, and add it in gradually only if the dough needs it.
- Bread flour works well in this recipe. If you use bread flour, you can use three whole eggs instead of two eggs and one egg yolk.
- For a darker challah, you'll want a true egg wash made with a whole egg instead of just the egg white — the fat from the yolk helps give the crust a darker color.
- This challah is best eaten within the first 2 days after baking. You can store it at room temperature for 4-6 days, though it will begin to dry out after a couple days. Storing it in an airtight container like a large resealable bag works well.
- You can freeze challah whole or slice and then freeze it. Store the frozen challah in an airtight plastic bag in the freezer with as much air pressed out of the bag as possible. Reheat the whole loaf from frozen at 350°F for about 10-15 minutes in an oven or toast up the frozen slices in a toaster oven.
Ingredients
- 400 grams all-purpose flour
- 8 grams diamond crystal kosher salt
- 7 grams instant yeast
- 85 grams warm water (80°F)
- 30 grams olive oil
- 28 grams honey
- 2 large eggs (room temperature)
- 1 large egg yolk (room temperature, save the egg white)
Egg Wash
- 1 large egg white (reserved from the egg yolk in the dough)
- ¼ teaspoon water
- ⅛ teaspoon salt (optional)
Instructions
- Prep. In the bowl of your stand mixer, whisk together bread flour, salt, and instant yeast. In another, whisk together warm water, room temperature eggs, egg yolk, honey, and olive oil.
- Mix. Pour the wet ingredients into the center of the dry ingredients and let the dough hook mix everything together on low-medium speed, pausing to incorporate flour from the sides of the bowl as needed until the dough comes together in a shaggy mass on the dough hook without any dry bits left in the bottom of the bowl. Be patient, this can take 5-8 minutes, if not more depending on the size of your mixer bowl.
- Knead. Increase the speed slightly and knead the challah dough for another 5-8 minutes until it is smooth and slightly elastic. It will be slightly tacky, but not sticky to the touch.
- Rise. Shape the challah dough into a ball, coat lightly with olive oil, and place back in the mixing bowl. Cover the bowl and rest in a warm spot for 1-2 hours. until doubled in size. NOTE: Mine usually takes around an hour and 15 minutes, though sometimes it needs closer to two hours if it's very cold in my kitchen.
- Pre-Shape. Divide the dough into 3 equal pieces using your kitchen scale (each piece should be about 226 grams). Gently flatten each piece against the counter, stacking any smaller pieces on top of larger ones. Working with one piece at a time, roll the dough into a thick log, pinching the edge to seal the seam at the bottom.
- Roll Ropes. Starting with the first log of dough, roll each one into a tapered rope about 20 inches long. Try to keep the "seam" of the dough against the counter so that it seals shut. The dough ropes will relax and shrink back slightly as they rest, so I like to measure them after rolling all three. If they've shrunk back, I roll them again quickly to reach 20 inches. If you don't have a long ruler and are just eyeballing the length, just make sure they're all equal length once relaxed.
- Braid. Join the ends of the three ropes of dough together at one end with the middle rope on top of the other two. Pinch to seal and use the heel of a bench scraper to hold them in place. Braid the challah loosely, leaving room for the ropes to expand and fill in during the final rise. Pinch the other end shut, then tuck the each of the two pinched together ends under the loaf and place it on a parchment lined sheet pan.
- Rise. Lightly spritz the top of the challah with non-stick spray or brush with olive oil, then cover with plastic wrap and let rise in a warm spot for 1 hour. During this rise, the challah will double in size and should spring back slightly when you poke it.
During the final 30 minutes of the rise time, preheat the oven to 350°F with a rack in the middle of the oven.
- Egg Wash. In a small bowl whisk the reserved egg white with water and a pinch of salt. Brush a thin layer of egg white all over the surface of the mini challah, making sure to get the sides, around near the bottom, and into the creases.
- Bake. Bake in the center of a 350°F oven for 30-35 minutes until golden brown. You're looking for an internal temperature of 195°-200°F.
- Cool. Remove from the oven and let the braided challah cool before slicing or serving.
Holly says
Is there a way to make this with a sourdough starter? Thanks!
Rebecca Eisenberg says
I'm sure there is but I haven't tested it and can't tell you what adjustments you'd have to make. Feel free to experiment on your own! If you find a method that works for you, please do share it here for anyone else who might want to try. Thanks!
Temple DaSilva says
LOVED IT! We’ve never even had challah bread before but given every other recipe of yours I’ve tried has come out amazing, I figured it was worth a try. It worked out just like the recipe said it would (love the proofing poke!) and the taste and texture are fabulous! Thank you for another quick, easy, and small scale recipe… that tastes incredible.
Suzanneno. says
If you do not have a stand mixer what do you recommend doing in order to mix, and knead the dough to make thidchallah
Rebecca Eisenberg says
Good question! See the section: "Kneading Challah Dough by Hand (No Mixer)" for details on how to make this challah dough without a mixer.
Agnes Khaw says
Thank you so much Rebecca for your challah recipe. I tried it out today n it came out so nicely. It's for a birthday gift so I will not b able to see the crumb....sigh
Sharon Bernhaut says
Any suggestions how to get my dough smoother? I used a stand mixer for about8 then another 8 minutes .it rose nicely but wasn’t smooth.
Rebecca Eisenberg says
If you're talking about the smoothness in the final loaf that is more about how you shape your ropes rather than about kneading it. Try pre-shaping the dough into nice smooth logs before you roll it out and the dough should be smoother in the final bake!
Alison M says
Have you ever done a cold rise overnight in the fridge with a challah? If so, how long should I wait after I take it out to shape it and move on to second rise?
Erik says
So I just made this for the first time. I've made the small batch recipe quite a few times, but my wife wanted a larger one this week.
Even though this was the first time making it, I did a few changes that have turned out well with the small batch version
- bread flour but with 25% 00 flour substituted
- 20% extra water
I also used active dry yeast so I
- use 110F water
- mix flour and salt in mixer bowl
- in second bowl, add water and 6g of sugar, mix, add yeast and bloom for 5-10 minutes.
- add oil, honey, eggs and mix well
- pour into well in dry ingredients and follow the rest of the recipe.
These changes make the texture exquisite. My wife, being Jewish, has had many a challah and absolutely swooned over this.