

With just four ingredients and minimal hands-on work time, this small-batch crusty bread is the perfect low-effort personal-sized bread-making project. It uses one cup (120 grams) of flour and fits in just about any size Dutch oven, too!
Once you get the hang of this small-batch bread, you'll have no problem treating yourself to my recipes for small-batch challah and small-batch ciabatta next!

This small crusty loaf bakes up about the size of a large grapefruit and is perfect for slathering with homemade butter or dipping in my best 5-minute olive oil bread dip.
This mini loaf has become a successful favorite of The Practical Kitchen readers of all ages, particularly those who are new to bread-making or find it intimidating.
5 star reader review
“Just made two of these guys this morning and I just want to say thank you so much for this recipe! I’ve never made any kind of bread before because it seemed daunting but with your help it was super easy AND I love the mini recipes for my small household. Also this was so easy and so good, make the cutest baby bread ever, you won’t be sad!”
—Megan
This small-batch crusty bread recipe is a scaled-down version of my full-sized no-knead Dutch oven bread recipe with a few small tweaks. I've written lots more about the science of no-knead crusty breads in that blog post, so head over there if you want more detail!
The biggest difference between the two recipes is how much water is in the dough. My full-size recipe is an 80% hydration dough. For this small-batch recipe, I pushed the hydration as high as I could (83%) while keeping the dough easy to shape and work with. A 3% increase (a mere 4 grams of water!) might not seem like much, but in a loaf this small it does make a significant difference in the size of the final loaf.


My mini crusty bread recipe also has a slightly higher ratio of yeast-to-flour. Where the larger loaf calls for 2 grams of yeast, this recipe uses just 1 gram. If I shrunk the amount of yeast proportionally, I'd be trying to measure a fraction of a gram, and I didn't want to do that to you. That does mean the dough can be ready to shape a bit sooner than its full-size counterpart, though it does still needs the overnight rise.
Want more small-batch recipes?
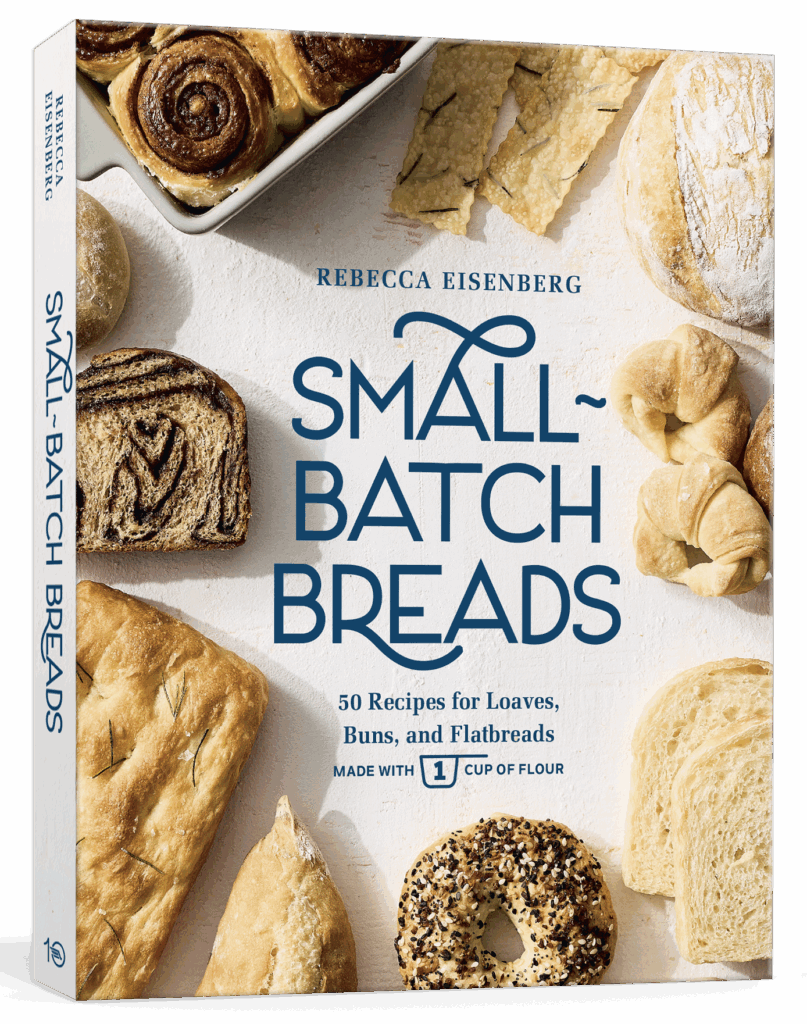
My Small-Batch Breads cookbook is now available!
Featuring fifty easy-to-follow bread recipes made using 1 cup of flour.
You only need four ingredients to make this adorable crusty bread.

I use cool water when making overnight breads because the cooler water allows the yeast to move more slowly. Warm water makes yeast move faster, so the cooler the water is, the longer I have before the dough needs to be shaped. Since I'm not building strength into the dough by kneading, I want the yeast and gluten network to have as much time as possible to work on that on their own before I shape it.
Making no-knead bread dough is so fast
All you have to do is mix everything together until you have a messy, shaggy dough. It literally takes five minutes. Then you cover the bowl and let it rise.
No-knead bread relies on time instead of kneading to develop a strong gluten network (aka the structure that gives bread its shape and texture). The gluten network traps the gas produced by the yeast, creating air bubbles in the dough.
While you can let this dough rise for as long as 18 or even 20 hours before shaping it, its small size means it's often at its peak and ready to be shaped around the 12-hour mark.

This is a sticky dough
This no-knead dough is relatively easy to handle once you dust the dough and your hands with flour. But if you're not used to working with sticky doughs, it may still be a bit of a challenge the first time you try it.
I usually dust the top of the dough lightly with flour while it's still in the bowl. This keeps it from sticking to the bowl as I tip it onto the counter. Then, once it's on the counter, I dust the now-sticky top side very lightly with flour, too.


When all the edges have been tucked in, I flip the dough over so the nice smooth top is facing up.
Then, I cup my hands around the dough and gently lift and rotate it in short, quick movements to create surface tension on the top as I tuck the sides of the dough underneath. I finish by transferring the dough onto a crumpled and flattened piece of parchment paper and covering it for its final rise.


Right before baking, I score the loaf. Scoring bread creates a vent through which steam can escape. Without scoring, the steam will escape through any weak points it can find in the loaf—it might even blow out at the bottom.


You can even cut designs into your mini bread. But you do need at least one big, deep slash.
For Best Results, Bake in a Dutch Oven
I tested a bunch of baking options and the confined space of a pre-heated Dutch oven is the absolute best way to bake this mini bread. The Dutch oven traps the steam released by the dough as it bakes on the surface of the dough, which results in a super crunchy crust.
When you first take the lid off, the small batch crusty bread will look quite pale. That's normal. The final 10-minute uncovered bake time is when the loaf will take on that gorgeous brown color.

Let the small batch crusty bread cool completely before slicing it. If you slice it before it has cooled, the steam still trapped in the bread will turn the starches to mush.


TL;DR — Recipe Summary
- Mix the flour, salt, and yeast. Add the water and mix into a sticky dough.
- Cover and rise for 12-18 hours at room temperature.
- Turn the dough onto a well floured surface. Dust lightly with flour.
- Tuck the edges of the dough up to form a ball. Flip so the seam side is down. Transfer to a crumpled and flattened sheet of parchment paper.
- Dust the top with flour, cover and rest 30 minutes while the Dutch oven preheats at 450°F.
- Score the top of the dough. Then place the dough in the Dutch oven.
- Bake for 20 minutes covered, then 10-15 minutes uncovered.
- Let cool completely before slicing.
💭 Have More Baking Questions?
I've rounded up answers to common baking questions and how-to guides, including:
- Ingredient swaps and FAQs
- Why my recipes are written in grams and not cups
- How to quickly bring eggs and butter to room temperature
- Ingredients I use (salt, flour, yeast, etc.)
- Step-by-step guides for bread and baking techniques
See my baking techniques & troubleshooting guide and ingredient swaps and FAQs for more!
📖 Recipe
Small Batch Crusty Bread (Made with 1 CUP of Flour)
Recipe Notes
- How to measure ingredients: If you are measuring with cups, it is super important that you measure the ingredients properly. See my guide to measuring as accurately as possible by volume for how to do this. If you measure with cups/teaspoons and the recipe did not turn out right, that is likely why. Try again!
- For a longer cold rise: Put this no-knead dough in the fridge immediately after mixing. I've left it for as long as 5 days in the fridge before baking and it works just fine. As a bonus, gluten tightens up in the cold, meaning refrigerated dough is slightly easier to shape.
- For a same-day bake: Increase the yeast to 3 grams and follow the mixing and stretch-and-fold instructions from my small batch baguette recipe. Then come back here for the shaping and baking instructions. You'll have a small loaf of crusty bread in just about 3 hours!
- Adding flavors: This is a great base recipe for adding lots of fun spices, herbs, cheese, seeds, and more. If you add anything wet like peppers, raw onions, olives, etc. it will add moisture to the dough. And if you add too many dry ingredients, it also can affect the dough's hydration. I recommend adding no more than 24 grams of additional flavorings/ingredients to this dough.
Ingredients
- 120 grams all-purpose flour (1 cup, aerated and loosely scooped, plus more for dusting)
- 3 grams diamond crystal kosher salt (1 teaspoon, use half as much of any other brand of salt)
- 1 gram instant yeast (heaping ¼ teaspoon)
- 100 grams cool water 70°F (¼ cup + 3 Tablespoons)
Instructions
- Mix. In a medium mixing bowl, combine the flour, salt, and yeast. Make a well in the center, add the cool water, and mix until well combined. It will be shaggy and messy. That's okay.
- First rise. Cover the bowl and let the dough rest at room temperature for 12-18 hours (or in the fridge for up to 5 days) until the dough has doubled or tripled in size with a flat, bubbly top.
- Preheat. During the final hour of the rise time, preheat the oven to 450°F with a rack in the center position. When the oven reaches temperature, place a Dutch oven inside, covered, and let it preheat for 30 minutes. Crumple a piece of parchment paper into a ball. Flatten it out, then crumple and flatten it out again and set it aside. Shape the dough while the oven preheats.
- Shape. While the Dutch oven preheats, generously flour a clean work surface. Release the dough from the sides of the bowl and onto the surface. Dust the top lightly with flour, just enough so your hands don't stick. Gently stretch the dough into a loose square. Use a pastry brush or your fingers to dust any excess flour off the top. Fold the corners of the dough up and across itself to pull it into a round shape with the edges pinched together on top. Flip the loaf over so the seam side is underneath. Cup your hands around it and lightly lift and rotate the ball of dough against the counter, tucking the dough underneath itself as you go to create surface tension on top.
- Second rise. Use a bench scraper to lift the ball of dough onto the flattened piece of crumpled parchment paper. Dust the surface of the dough lightly with flour, cover it with a clean dish towel, and let it rest until the Dutch oven finishes preheating, about 30-60 minutes. It may not double in size, but this gives the dough time to relax into its new shape and start developing more air bubbles inside.
- Score. Immediately before baking, use a sharp knife or lame to score the top of the loaf to create a vent for steam to escape. Carefully remove the Dutch oven from the oven. Take the lid off and set it aside. Gather the corners of the parchment paper together, pick the dough up and place it inside the Dutch oven. Put the lid back on the Dutch oven.
- Bake. Bake for 20 minutes, covered (don't peek!), then remove the lid and bake until deeply golden brown on top or until the internal temperature reaches 195℉, about 10 minutes more.
- Cool. Use the parchment paper like a sling to lift and transfer the fully baked bread to a wire rack, and let cool completely before slicing.
Helene Montini says
My first attempt is in the oven right now. I just can’t believe that this might turn out the way it looks in the video, but fingers crossed.
Millie says
Rebecca, you are a life saver! I’m a beginner in the baking department and I love your mini breads. It’s just my husband and I so I don’t need a big loaf. Thank you for all of the information you included, it helped me understand bread baking better! Please continue to share. I wish I could include a picture of my bread.
Millie
Bobbie says
Can you use wheat flour?
Rebecca Eisenberg says
All flour is wheat flour. If you’re asking about whole wheat flour please see the FAQ for a detailed answer!
Bobbie Newbury says
Yes, sorry I meant whole wheat.
Bobbie Newbury says
👍🏼
Marilyn Flottman says
Just ate one of the ends of my mini boule and it was very good! I didn’t even butter it, just dipped it in a bowl of soup. This is perfect size for me. I would have liked it to rise just a bit more but it may be a bit cool in my house so next time I’ll try and find a warmer spot. Thank you for sharing.
Rebecca Eisenberg says
I'm so glad you liked it! It really is such a good bread for dunking in soup. The temperature definitely may have affected the rise, but a flatter loaf can sometimes also be due to not creating enough tension during shaping. Definitely try a warmer spot, but also make sure you're really tucking those edges under and tightening the seam under the bread to help encourage it to rise upwards when it bakes instead of outward! Enjoy!
Pam says
I am having trouble with the grams. I do not have a sensitive enough scale. 3 grams = .6 of a tsp? How do I do .6 of a tsp for the salt or .2 of a tsp for the yeast? I see 100 grams of water = 6 2/3 Tablespoons. I have tried reading through to see if discussed but only have so much time and would love to try making this. Can you help? thank you
Rebecca Eisenberg says
3 grams should be approximately 1 teaspoon of yeast! 100 grams of water you should measure by weight, your scale should be able to handle that just fine. Converting to cup measurements isn't super accurate so I don't recommend doing so for all of the ingredients.
Angela says
A great small bread for two people. It was easy to make. I used a covered Pyrex dish and it worked well.
Thanks for sharing your recipe.
Sue Rounds says
When I let the bread rise for 12-20 hours, the top of the dough dries out. It's crusty. I covered with a towel and set out at room temp. What am I doing wrong?
Rebecca Eisenberg says
cover it with plastic wrap instead of a towel!
Maria ansari says
Hello
How do you bake in a Dutch oven?
Can I bake this in a conventional oven? If so, can you pls guide me?
Thank you and regards
Rebecca Eisenberg says
Instructions for baking in a Dutch oven are in the blog post! The Dutch oven is a kind of pot, it goes inside your conventional oven for baking.
Tara says
This loaf is perfect! I usually have to quarter bread recipes to avoid food waste so having it already done and tested is wonderful.
Is it possible to freeze the dough after the rise or maybe partially bake the loaf and freeze it? The 12-20 hour proof was worth it but if like to try having one that's ready to go when the craving hits.
Rebecca Eisenberg says
I don’t recommend freezing this dough. If you want a faster version use my small batch baguette dough and just shape it into a round — you can bake it in a Dutch oven just fine!
MELODEE BAINES says
Love this recipe. It was so easy. I can barely wait for the bread to cool so I can eat it.
Rebecca Eisenberg says
I'm so glad you liked it!! enjoy your bread!
Cynthia says
I haven’t tried this yet because I’m not sure if this cook time for a Dutch oven be the same for a small ceramic bread cloche?
Rebecca Eisenberg says
The cook time should be the same, just make sure the ceramic cloche can handle the temperature!
Marie says
Could you clarify something for me regarding the overnight bulk fermentation in the refrigerator? In the morning when I remove the dough from the refrigerator, do I immediately shape it cold and then let it rest an hour before baking or do I let the dough rest the hour first to warm up and then shape it? Thanks!
Rebecca Eisenberg says
Good question! I usually shape it cold and then let it rest for an hour before baking!
Marie says
Thank you for the quick reply! I will bake this tonight! 👍🏻
MK says
I’ve never made bread before, but I’m dying to try this recipe! Would using a super small 0.5qrt dutch oven be flirting with disaster?
Rebecca Eisenberg says
I have a feeling that will be too small! You’d have better luck baking it uncovered on a regular sheet pan. But if you shape the loaf and it seems like it would fit in the Dutch oven with about an inch around on all sides, go for it!
Saanchi Shah says
For the first time my bread was edible 😭 Either it’s dense or too hard on the outside and I’m just glad to have succeeded in making this baby boule. I’ll keep making it to perfect it. Thank you!!!!
Rebecca Eisenberg says
I'm so glad you finally had an edible bread loaf! It's a good place to start; you'll get better with practice!
Kelly Clyde says
I made this today and it turned out beautiful and tasty. This is definitely going to be a regular at our house. I'm wondering how to get the bottom crust a bit softer. it was pretty hard and tough to cut through. Any tips or hints are appreciated, Thank You!
Rebecca Eisenberg says
Oh I’m so glad you liked it! Try putting a sheet pan under the Dutch oven — sometimes the extra layer of insulation helps give you a softer bottom.
Linda Wells says
I do not understand "grams" in a recipe. How can you convert it to cups or teaspoons?
Rebecca Eisenberg says
Hi Linda! I clearly explained why I use grams in the blog post, and even included a section titled ""BONUS: Weight to Volume (Cups) Conversion" in the blog post. I hope that helps!
Joyce N says
What a great little recipe! I was going to make 2, so I doubled the recipe but ended up making 1 larger boule. I added a few minutes of baking time, and it came out beautifully. Eating it with clam chowder (the red one!) this evening. Thanks so much
Rebecca Eisenberg says
I love this so much! Can’t go wrong with clam chowder and fresh baked bread <3. Enjoy!
Judy says
I've been baking bread for 60 years (yikes!) and this particular technique for at least a decade, but I wanted to try your small-batch loaf. I added some parmesan and chopped rosemary, and it turned out great. I always weigh my ingredients and use grams, if possible, because it's way more accurate. I also use a Cambro bucket for proofing because you can watch and measure the rise and the lid is a plus. I will definitely be trying more of your recipes! Thanks!
Rebecca Eisenberg says
To have such an experienced baker endorse one of my recipes is such an honor! Thank you for trying it, and I really hope you enjoy my other recipes just as much!
Conor O'Neill says
If I needed to bake, say, 8 of these guys at once, that's obviously too much for a Dutch oven. Would it help simulate the effect to put a cast iron pan in the oven during pre-heat, then add water during the bake to make steam?
Rebecca Eisenberg says
Yeah, that's the best way to go about it. I can't promise you won't have any that blow out at the bottom or whatever from baking them in a more open space, but it will work!
Sara says
This bread recipe is amazing! And so easy. I’ve made it with the cup measurements and it’s turned out perfectly the three times in the last two weeks I’ve made it. Highly recommend. I’m getting a food scale just so I I can try it that way.
Rebecca Eisenberg says
I love this so much!! Welcome to Team Kitchen Scale!
Adele Doran says
By any chance do you know what the raw dough ball weighs? I have a 2 quart Dutch oven that I thought might work for this little beauty. Msybe the raw dough weighs about a pound?
Rebecca Eisenberg says
I haven't actually weighed the dough ball, but if you add up all the ingredients it's 224 grams which is around 7 ounces — just slightly less than half a pound. A 2 quart dutch oven should work just fine!
Cindy says
Mine was risen and bubbly after a couple of hours, Australian summer is hot! Turned out perfect and crusty. The next day it wasn't crusty anymore but toasted it and....sooo good!
Keith says
I measured everything correctly and followed the directions. My bread looked just like the pictures. I was quite proud. Until I tasted it. There was an overwhelming smell and taste of yeast. Is that by design? The texture was on point and it was crusty. Just really disappointed in the flavor. My yeast was freshly purchased.
Rebecca Eisenberg says
I'm not quite sure why that happened — I've never had that issue! It may be that your scale had trouble measuring such a small amount of yeast that you ended up with more of it than you needed, but in that case you would have seen the loaf rise much faster than expected. What type of yeast did you use?
Lisa says
I’m a little confused about the active yeast, do you use the same amount as the instant yeast as you mention 1 gram of instant or 3 grams of active but further up you mention using the same amount, can you clarify thanks!!
Rebecca Eisenberg says
You can really do it either way! It’s such a small amount. Technically you “need” a tiny bit more active dry than instant but since it’s such a long rise time the active dry yeast has plenty of time to work so it doesn’t really matter one way or another. When I do it, if I have active dry, I just use the same amount as instant yeast and use it the exact same way. Don’t stress about it too much!
andrew says
Really great recipe and so easy to make. What are the bake times for doubling or tripling the recipe? Thanks
Rebecca Eisenberg says
For tripling, I recommend following my full size dutch oven bread recipe — yeast doesn't increase at the same rate as other ingredients when scaling bread recipes up. For doubling, you may need to add 5-10 minutes, but again, don't double the yeast.
andrew says
Why wouldn't I double the yeast if I'm doubling the rest of the ingredients? Thanks again.
Rebecca Eisenberg says
For a recipe like this where you’re relying on a long rise time to develop gluten you really don’t need a lot of yeast even as the recipe scales up. The more yeast you have the faster the dough will rise; with this type of recipe you want a slow rise. So you don’t need to increase the yeast at the same rate as the rest of the ingredients. That’s why I recommend just using a recipe already designed to be bigger — it will have the ratios already balanced! That said, no knead recipes are pretty forgiving, you have a lot of wiggle room before things start going noticeably wrong. If you double everything you probably won’t notice too much of a difference, but the dough may rise faster than the recipe says. That’s all!
Shermaine says
Thank you for sharing such a wonderful recipe. May I check what is the alternative if I do not own a Dutch oven? Please advise.🙏
Rebecca Eisenberg says
Check out my mini baguette recipe post for some other baking methods!