

Learn how to make a mini baguette at home with this beginner friendly small batch recipe. This mini baguette recipe uses four simple ingredients — flour, water, salt, and yeast — and can be made in just a few hours. It has a thick, crunchy crust, an airy yet soft interior, and that iconic long, tapered shape. It's everything you love about a full-size baguette, just a whole lot shorter!
It's a great personal-sized loaf if you want a baguette big enough for a couple sandwiches or for snacking!

5 star reader review
“Perfect! Great instructions! I'm a baker of everything except bread! But now... I can bake bread! Thanks!”
—Sharon
This is a great personal-sized bread. It's a baguette big enough to make one or two sandwiches or to enjoy as a snack! The small size is a nice way to practice how to shape a baguette and it's just nice to make a great loaf of bread without using up all your baking ingredients.
One mini baguette bakes up about 10 to 11 inches long and is perfect for slathering with homemade butter or tearing and dunking in your favorite soups.
All About This Small Batch Baguette
My small batch baguette recipe uses a very similar dough to my small batch no-knead crusty bread recipe with a few key differences. It's got a slightly lower hydration and uses slightly more yeast to speed up the process so you can make it in just a few hours. No overnight rise; my small batch baguette clocks in at just about 3 hours total, with plenty of hands-off resting time between steps.
To provide the structure needed for the mini baguette to hold its shape, I added two sets of folds during the first hour of the dough's rise time. This also helps speed things up.

Initially, I planned to develop a full-size baguette recipe that would make 3 full-size baguettes. But I quickly realized that the average home kitchen and oven really aren't built to easily make high-quality full-sized baguettes.
"...baguettes are also one of the hardest breads for the home baker to learn to make, mostly thanks to the many complicated shaping steps involved. Practice makes perfect in all things, especially when it comes to baguettes, and it's hard for a home baker to notch enough of them for the skill to become second nature. My best advice to anyone wanting to nail the baguette? Land a job at a bakery and make several hundred of them a week for a few years. Barring that, find a good recipe and just practice, practice, practice."
Andrew Janjigian, SeriousEats.com
Quite frankly, a full-size multiple-baguette recipe just didn't feel practical to me for the time and effort required to get them right. If it's full-size baguettes I'm looking for, I'd rather just buy them.
But a mini baguette? A small-batch baguette I could definitely make at home. Scaling the recipe down to make just one baguette turned a baking chore into a fun little baking project. The smaller size also made the shaping easier and gave me more control over the baking environment.
I developed this mini baguette recipe to be simple and accessible. It works best when baked in a large oval Dutch oven, but I've included plenty of other baking options (including a toaster oven option!) below as well.
Don't sweat it if it takes you a few tries to get the hang of baguette shaping; even I don't get it just right every time. Every baguette comes out a little bit different. But the baguettes that come out imperfectly are still delicious! And that's what matters.
You only need four ingredients to make this mini baguette recipe! See recipe card (at the end of the post) for quantities.

How to Make a Small Batch Baguette
We're following the standard dough mixing process here. Mix your dry ingredients together first, then, add the water. Mix everything together to make a sticky, messy, lumpy dough.
I let my small-batch baguette dough rise for about two hours after mixing. It needs just a bit of attention during the first hour, but during the second hour it'll rise on its own.
During the first hour, I do two sets of folds to build strength into the dough — those folds are what make it possible to shape the baguette later.
One fold involves stretching the dough out and then folding it over itself. You'll repeat this 4-5 times all the way around the dough to do a "set" of folds.

Grab the top edge of dough with a damp hand and stretch it away from you.

Fold the dough down over the center and press to secure it in place.
Rotate the bowl 90° (a quarter turn) and repeat until you've gone all the way around the bowl to finish the set of folds. I like to flip the dough over so the seam side is facing down while the dough rests after I finish each set, but you don't have to do this.
After the second set of folds, I let the dough rise at room temperature for 1 hour. It will double in size and become very airy.
How To Shape A Baguette
There's a sort of magic to the way baguette shaping works — rather than rolling the dough like a log of clay, it's shaped through a series of folds that gradually elongate the dough into a tube. Then all you have to do is taper the ends.
Don't beat yourself up if handling the dough doesn't come naturally to you — it will become easier with practice. I've got step-by-step photos to walk you through it and you can also check out the video at the end of this post if you want more visual guidance!
Dust the top of the dough in the bowl with flour before you turn it out onto a lightly floured countertop to prevent it from sticking to the sides of the bowl as you turn it out onto the counter.

Loosely stretch the dough into a rectangle.

Fold the top third of the dough down and press down along the edge to seal it.
The dough may stick to your hands slightly. That's okay. Use a light, quick, confident touch. The goal is to stick the folded flap shut without pressing all the air bubbles out of the dough.
Lift and rotate the dough (a bench scraper can help you lift it) so the folded flap is now at the bottom. You are not flipping the dough over, the seam should still be visible on top. You're simply rotating the dough so the folded edge is now closer to your body.

Fold the top third of the dough down and again press along the edge of the seam to seal it shut.

Finally, fold the dough in half lengthwise. Seal the edges together by pressing them firmly against the counter.
Instead of trying to fold the dough in half all at once and then seal the bottom, it helps to move from one side to the other as you fold the top edge of dough down with one hand and press to seal with the heel of the other.
Fold, seal, move over an inch, fold, seal, move over an inch, fold, seal, etc.
Rolling the baguette dough at this point isn't about elongating the dough — it's about tucking the seam underneath, evening out the thickness, and tapering the ends.

Roll the dough so the seam is underneath. Then roll it gently once from the center out to even out the log of dough.

Taper the ends to points by rolling the ends with your hands angled up so your pinkies are against the counter.
Watch the length! It's very easy to accidentally make your mini baguette too long. Remember, it has to fit in your Dutch oven or in some other sort of covered baking dish — make sure it can still fit!
During the shaping process, quite a bit of air is knocked out of the baguette dough. So I like to give it one final rise to relax, expand, and develop some new air bubbles.

Dust a clean dish towel with flour and place the baguette on it. Pinch the towel so it stands up on either side of the baguette, supporting the shape.

I use binder clips at either end to hold the towel in place, but this is optional. Cover the baguette with plastic wrap so it doesn't dry out.
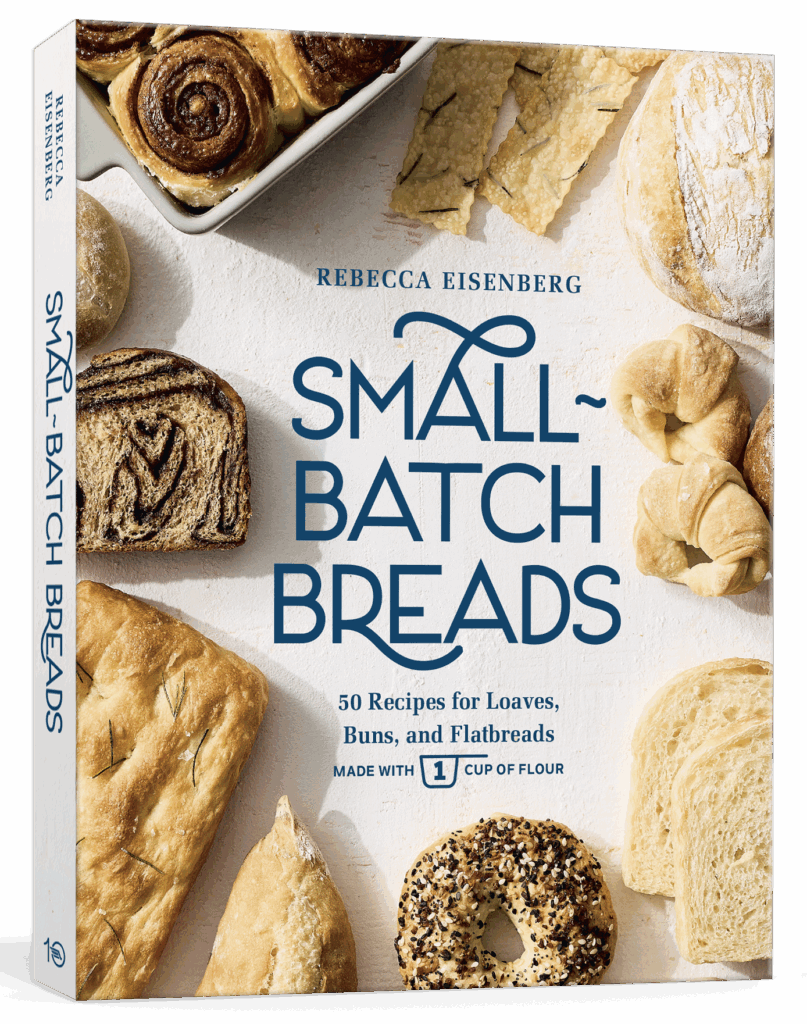
Want more small-batch recipes?
My Small-Batch Breads cookbook is now available!
Featuring fifty easy-to-follow bread recipes made using 1 cup of flour.
Scoring and Baking Baguette
Scoring creates a vent in the top of the baguette through which steam can escape. Without scoring, the steam will try to escape through any weak points in the dough and might even blow out at the bottom.
You can score your baguette with one long slash down the center or three vertical lines slightly offset from one another down the length.
Before you score your baguette, fill a small misting spray bottle with water and have it ready to go. Once the baguette is scored, you'll spray it with water and want to get it in the Dutch oven as quickly as possible.

Score at least half an inch deep.

Spray the baguette all over with water.
The confined space of a pre-heated Dutch oven traps the steam released by the dough as it bakes, creating a moist environment that results in a super crunchy crust. It's the best option for baking this small-batch baguette (I have other options listed below if you keep scrolling).

After the first 10 minutes, the baguette will look quite pale.

The final 10-minute uncovered bake time is when it will brown.
5 star reader review
“Just finished this recipe! I was nervous with how my baguette looked before going into the oven but it turned out perfect. A great crunch on the outside, and a light, soft inside. This might be my best attempt at homemade bread yet, and there have been quite a few!”
—Emilie
Baking Without a Dutch Oven
While a large oval Dutch oven is the best option for baking your mini baguette bread, it's not the only option available to you.
If you don't have a 7-quart oval Dutch oven that can handle the length of a mini baguette, have no fear. There are other options. Just know you may not get quite the same crunchy crust or rise on your baguette.
Here are some other baguette baking options I've tested and how you can expect them to change your baguette:
- Challenger Bread Pan - The cast iron challenger bread pan is essentially an inverted Dutch oven with a shallow base and domed top. It has a rectangular shape which can easily handle the length of a mini baguette while still creating a moist, steamy environment for the baguette crust to form.
- Toaster Oven - A toaster oven is a small space already, so baking your mini baguette in a toaster oven is a great way to create an enclosed steamy environment for your baguette crust to form! I suspect most toaster ovens have a vent for letting steam out and the doors on them don't always seal shut, so it's not quite as good as using the tightly closed space of a Dutch oven but it will work. Preheat the toaster oven with the sheet pan inside for at least 10 minutes, and you can even toss a small ice cube on the sheet pan with the baguette to create even more steam inside.
- Sheet Pan with Inverted Roasting Pan - This is one step more advanced than baking your baguette uncovered on a sheet pan. If you have a roasting pan or 9x13" cake pan with sides at least 3 inches high, you can create a makeshift Dutch oven-like space by placing it upside down over the baguette on your regular baking sheet pan to bake. Just be careful when you lift the pan off — the pan will be hot and may not have handles! Use good oven mitts and consider using a spatula to lift the inverted pan enough to grab the edge and lift it off.
- Just A Regular Sheet Pan - This will work, but will give you the least "perfect" baguette results. To bake your mini baguette on a plain baking sheet or cookie sheet pan without covering it, preheat the pan in the oven for about 20-30 minutes before using the parchment paper to lift the baguette onto it. The baguette won't have as thick of a crust and may be a little flatter than if you bake it in a more enclosed environment. Because it's not covered it will brown faster — check it after 15 minutes, but you can bake for up to 20 minutes if needed. Just like the toaster oven, you can toss a small ice cube or two onto the sheet pan to create even more steam in the oven while it bakes.

👩🏻🍳 Practical Tips and Recipe Notes
- If you're struggling with the dough in the shaping stages, try using a metal bench scraper! Sliding it under the dough to help stretch or lift the baguette between folds can make things easier and less sticky.
- Some people find that working on a damp or lightly oiled surface is easier when shaping baguettes. I work on a wood surface which is porous so I've found that the floured surface works best. If you have a quartz, granite, stone, or metal counter, you may find that a lightly oiled or damp surface works better for you.
- A rookie mistake people make when attempting to score the three slashes on top of the baguette is to cut them at a slight angle because they appear as a diagonal on the baked baguette. But they're not actually cut on a diagonal. To get them to open properly, cut the lines vertically down the length of the baguette. They should be slightly offset from each other.
- Once the baguette is shaped, resist lifting it as much as possible. If you pick it up from both ends, it will sag and stretch out. Lift it once to get it onto the floured towel. To move it after that, roll it off the towel and onto the parchment paper, and then lift it using the parchment paper sling to support the full length of the baguette.
- I don't have a spray bottle, what can I use instead? Brush the surface of the dough all over with water using a pastry brush. It's harder to do this quickly and to get an even coating of water but it will work in a pinch!
💭 Have More Baking Questions?
I've rounded up answers to common baking questions and how-to guides, including:
- Ingredient swaps and FAQs
- Why my recipes are written in grams and not cups
- How to quickly bring eggs and butter to room temperature
- Ingredients I use (salt, flour, yeast, etc.)
- Step-by-step guides for bread and baking techniques
See my baking techniques & troubleshooting guide and ingredient swaps and FAQs for more!
TL;DR — Recipe Summary
- Mix the flour, salt, and yeast. Add the water and mix into a sticky dough.
- Cover and rest (bulk ferment) for 2 hours. Do a set of folds every 30 minutes for the first hour of bulk fermentation.
- Turn the dough onto a floured surface. Dust lightly with flour.
- Shape the baguette, using your fingertips or the heel of your hand to seal the seams shut. Roll it briefly on the counter, then taper the ends.
- Let the shaped baguette rest for 30 minutes supported by a flour-dusted towel while the Dutch oven preheats at 450°F.
- Roll the baguette onto parchment paper, score the top and spray the surface generously with water. Then place the dough in the Dutch oven.
- Bake for 10 minutes covered, then 10 minutes uncovered. For more color, finish by baking the baguette directly on the oven rack for 2-3 minutes more.
📖 Recipe

Small Batch Baguette Bread Recipe (Made with 1 CUP of Flour)
Recipe Notes
-
- How to measure properly: If you are measuring with cups, it is super important that you measure the ingredients properly. See my guide to measuring as accurately as possible by volume for how to do this. If you measure with cups/teaspoons and the recipe did not turn out right, that is likely why. Try again!
- A Cold Rise: Gluten firms up in the fridge. If you find the sticky dough is too hard to handle at room temperature, you can pop it in the fridge after the last set of folds for anywhere from 4 hours to 3 days prior to shaping and baking. It will be much easier to shape. Let the dough rest at room temperature in the floured towel for 1 hour after shaping and before scoring and baking.
- Climate: If your kitchen is particularly warm (75°F+), you may want to let the baguette do the final rise in the fridge so it doesn't overproof.
- Dutch oven alternatives: For other baking vessel options, refer back to the blog post. If using another covered baking vessel or inverted baking dish on top of a sheet pan, you'll still want to preheat them before baking the baguette.
- How to freeze: Place baked baguette in an airtight bag in the freezer with as much air pressed out as possible. Reheat from frozen in a 350°F oven for 7-10 minutes.
Ingredients
- 120 grams all-purpose flour (1 cup, aerated and loosely scooped, plus more for dusting)
- 3 grams diamond crystal kosher salt (1 teaspoon)
- 3 grams instant yeast (1 teaspoon)
- 96 grams warm water 90°F (⅓ cup + 1 Tablespoon)
Instructions
- Mix. In a large mixing bowl, combine the flour, salt, and yeast. Make a well in the center, add the warm water, and mix with a dough whisk or fork until a sticky dough forms. Gather the dough into a messy ball in the bottom of the bowl. Cover the bowl and let the dough rest for 30 minutes.
- First fold. With a damp hand, grab the top edge of the dough and stretch it away from the bowl. Then fold it down over the center of the dough. Rotate the bowl a quarter turn and repeat. Repeat two more times until you've gone all the way around the dough. Flip the dough over so the seam side faces down. Cover the dough and let it rest for 30 minutes.
- Second fold. Repeat the same folding process as before, going all the way around the bowl. Flip the dough so the seam side is down. Cover the dough and let it rest until it doubles or triples in size, becoming quite bubbly and airy, about 1 hour.
- Preheat. Toward the end of the rise time, preheat the oven to 450°F with a rack in the center position and a covered Dutch oven inside.
- Shape. Dust the top of the dough in the bowl with flour, then turn it out onto a lightly floured surface. Dust the now top side of the dough lightly with flour, just enough to keep it from sticking. Loosely stretch the dough into a rectangle with the long side facing you.Fold the top third of the dough down and use the heel of your hand or your fingertips to seal the edge. Lift the dough and rotate it so the folded edge is now the side closest to you. Again, fold the top third of the dough down and seal the edge. Finally, fold the top edge of the dough down to fold the dough in half, sealing the two edges together against the counter.
- Taper. Roll the dough forward so the seam is underneath. Give the dough one quick roll from the center out to even it out, then taper the ends by rolling the ends with your hands angled so your pinkies are against the counter.
- Final rest. Dust a clean kitchen towel with flour and gently lift the baguette onto it. Pinch the towel so that it stands up on either side of the length of the baguette to hold it in shape. Cover the baguette with plastic wrap or place it inside a large plastic bag to prevent it from drying out. Let the baguette rise for 30 minutes while the oven preheats.
- Preheat the oven to 450°F with a covered Dutch oven inside. Fill a small spray bottle with water, get out your lame, and clear a space to put the Dutch oven when you take it out to put the baguette inside.
- Score. Fill a small spray bottle with water and get out a sharp paring knife or lame. Use the dish towel to gently roll the baguette onto a half sheet of parchment paper so it lies diagonally corner-to-corner. Use the knife or lame to score the dough vertically down the length of the baguette. Quickly spray the baguette all over with water and use the parchment paper sling to transfer it into the hot Dutch oven. Spray with more water and cover immediately.
- Bake. Bake for 10 minutes covered (don't peek!), then remove the lid and bake until the internal temperature reaches 195℉, about10 minutes more. If your baguette needs a bit more color, remove it from the Dutch oven, place it directly on the rack, and bake it for an additional 2-3 minutes.
- Cool. Transfer the fully baked baguette to a wire rack and let cool completely before slicing.
Mary says
Looks like I’m a day late on Ava’s comment but do agree with others on your site. I just found this and am interested in making this loaf tomorrow. I also found the comment about the pizza dough and will now need to find your ciabatta recipe. I do read recipes and enjoy all the information that is given and sometimes someone else’s tips are golden. I have baked bread with my mother and now by myself for over 60 years but there is always something new to learn from someone else. So thank you for this recipe and probably more as I go through your “recipe box”.
eli says
So looking forward to this. Real bakers weigh…and I am a novice and have done so for a decade. Never tried a baguette yet…wtw?! So excited. People have real problems these days just moving on…Glad to see you not taking it personally. Your gifts are appreciated~Thank you for sharing.
John says
I always use King Arthur flour and I have regular and bread flour is it any better to use bread flour or should I stay with the all purpose flour and I appreciate anybody that puts weights on their recipes instead of just cups you never know how they’re measuring it and the hydration is what makes it great everybody that thinks they’re a so-called Baker and do not put weights down. I do not even read. Thank you for that.
Rebecca Eisenberg says
I use king Arthur’s all purpose but you can definitely give it a try with bread flour! It may need a bit more water to get the dough to the right consistency.
Komal Mehta says
Hello Rebecca,
I plan on making this in my toaster oven today. Do I bake it at 450F for 10-12 minutes or does the temperature and time differ because I am using a toaster oven?
Rebecca Eisenberg says
No difference in a toaster oven! Enjoy the bread!
lk says
This was actually insane!! so good, just got confused when i had to flip the dough and stuff, but the video was helpful for that!! 10/10
Tim says
Pretty sure that we don’t have All purpose flour in the UK, would there be any issues using bread flour??
Rebecca Eisenberg says
If I understand correctly AP flour in the UK is "plain" flour and bread flour is "strong" flour. Bread flour will work here but you may find the dough needs just a bit more water!
Cheryl says
I am an old lady who lives alone, cooks for herself and loves bread. THANK YOU for this recipe, you are now my new best friend whether you know it or not! Your video is SO helpful and easy to follow, especially for visual learners. Making this baguette to have with some good Brie and a nice glass of wine. Cheers!!
Rebecca Eisenberg says
I am SO thrilled you can now enjoy your own personal baguette! Happy baking! <3
Danny Pearce says
Do you have to use a Dutch oven when making this bread?
Rebecca Eisenberg says
Check out the blog post section "baking without a dutch oven" for other options!
Kelly Revenaugh says
Thank you very much for the thorough recipe and instructions!! I love all of the commentary and it really does help when troubleshooting.
Sibylle moggi says
Tried a couple times, the last rise is not high enough and the dough is way sticky.
But it makes really good bread.
Edward Sevensky says
Thank you, Rebecca for a job well-done. All parts of this post are helpful and I referred to them several times while making the recipe. So nice to have a single serve recipe as it’s just my wife and me.
Kate is an experienced baker and always finds gram weights to be the most accurate approach. She has watched me experience some spectacular failures when it comes to making bread and this recipe resulted in a very satisfying loaf.
Compliments to the Chef!
Ansley says
Hi! I totally must have messed this recipe up 😂My dough was more like a thick syrup than a dough. I tried doing the conversions from grams to cups/teaspoons. Is that not possible? I am new to baking bread so any advice would be much appreciated! Thank you!
Rebecca Eisenberg says
Hi! So sorry it's not working for you. Unfortunately, it's not possible to 100% accurately convert a recipe from weight to cups! Depending on the brand of cups, how loosely or tightly you scoop the flour into them, etc. can dramatically affect how much flour actually ends up in your recipe. I did provide volume measurements with detailed instructions for how to measure as accurately as you can (but again, it's not a 100% perfect conversion) in the blog post section titled "BONUS: Weight to Volume (Cups) Conversion + Instructions" so I would use those measurements and measuring instructions instead of trying to do them yourself. But the best way to do it is to get a kitchen scale and measure by weight — you'll get the most consistent results that way!
Kathy Dillon says
Please put recipe in metric terms not grams
Rebecca Eisenberg says
Hi Kathy! I've removed your 1-star rating because you didn't make the recipe. Grams are metric. If you're asking for the measurements in cups and teaspoons, those are in the blog post above the recipe in a very clearly labeled section if you scroll up just a bit. Hope that helps!
Ramona says
Well despite too much multi-tasking while I was making the bread, I let the second rise sit for 50 minutes instead of 30 minutes, the bread still turned out perfectly despite my imperfection! Thank you for all the effort that you put into the instructions and video for those of us who are still humble enough to admit that we need detailed instructions, unlike those arrogant souls who just know everything and want the world to know. 🙂
Albert Balogh says
Loved the recipe.....i just wish they were in US measurements. The grams is a bit tricky ( even google it i came up with different answers for the same question)with fluids vs solids , which i guess is the same problem regardless , but us everyday bakers like myself doesn't have a weight scale
Rebecca Eisenberg says
Hi Albert! I provided volume measurements in the blog post in the section titled "BONUS: Weight to Volume (Cups) Conversion + Instructions". Just remember, volume measurements are terribly inaccurate and can make a big difference in how well your bread turns out, especially when you're working with such small amounts!
Angela L. says
This recipe has been my gateway into baking bread and I'm so thrilled and grateful!! Thank you, Rebecca, your recipes are absolute perfection -- I've always been intimidated by bread, but your detailed instruction and video were all I needed to bake the most delicious bread. And it's so fun to do! I'm still in shock! I've been baking baguettes several times a week since that first loaf; now I'm doubling the recipe to do two at a time, buying a lame and couche, better flour... I can't wait to bake my way through all of your recipes! Thank you so much for sharing your gifts.
Rebecca Eisenberg says
Reviews like this are for real the best part of my job and I am SO glad that you gave my recipe a try and found a new hobby you love. Keep it up and happy baking!
Melanie says
I'm a newer baker so I'm still finding my groove as a basket. That being saif, I like this recipe better than one in my baking book. I found it easy to follow and it's delicious! I've made it twice and it's been great both times!
Diane says
Wow! I doubled the recipe and baked them in my two oval dutch ovens. They are a thing of beauty! The recipe and instructions were fantastic and I did measure by weight, using Red Star Platinum yeast. I cannot wait to taste them with dinner tonight.
Steve says
I have a question rather than a comment and I'm very inexperienced. I've a round dutch oven, how critical is the shape of this 'baguette' to how well it will bake? I love the simplicity of this recipe re ingredients and process, and the final shape is of less than no importance to my taste buds.
Rebecca Eisenberg says
You can absolutely shape this as a round loaf instead!
Anna M says
Great recipe. I think the "wet dough" really is the secret for the really crispy crust. I love how small this recipe is. I can throw the dough together and easily have a small loaf by dinner for just me and my partner. Also, I've noticed if my stretch-and-fold times are not exact, the bread still comes out great. It's a very "forgiving" dough. 10/10 love this recipe. Thank you! I think I'm going to try and double the recipe but make 4 super mini loaves for sandwiches!
S says
Tried this recipe this past Saturday. Ate the whole baguette immediately and promptly regretted not making more (I should know better by now to make a double or triple batch of any small bread from this site). Fast forward to Tuesday evening, I made a double batch and have been happy since. The instructions are super clear and handy. The only thing I have to learn is to use a bit less flour on the kitchen towel during the final rise so that my baguettes are not snow white on the bottom (I don't have a pastry brush at the moment). I fully appreciated the instructions on baking without an oval dutch oven (something I don't have and don't plan on acquiring).
Try it, eat it, and you will be making it again for sure!
Norma Whisman says
How long of a loaf does this make? My Dutch oven isn't an oval it's round. I can't wait to try this...I love French bread!!
Rebecca Eisenberg says
It's about 11-ish inches long! You can always shape it as a round loaf instead if you want or follow the instructions in the blog post for baking without a dutch oven. Good luck!
Norma Whisman says
I appreciate and thank you for getting back to me so quickly
Yecora Daniels says
Thank you for this recipe and for all the instructions, directions, videos, and everything this girl who has had not had success with any kind of bread before needed. First try was successful with the outside crunch and inside softness. My hubby and besties said if I can make a delicious baguette then anyone can. (They know my historical failures). Can’t wait to venture into some of your other recipes!
Laurie M says
This was my first EVER foray into baking bread from scratch and this recipe is IT. I love that ingredients are measured by weight to reduce margin of error (a simple food scale does the trick). While mine didn't look as great as yours (definitely user error on my part) they were delicious! I doubled the recipe. My Dutch oven isn't ideal (round and only 5 quarts), so I'm going to try a baguette pan with inverted cake pan over it (unless you have tips for a baguette pan that might be better?) Loving these small-batch recipes!!!
Mary Ann Rondinellaella says
Great recipe! I used the volume conversions because my kitchen scale is at the barn to measure out rations for my horse. The baguette came out delicious!
Rebecca Eisenberg says
lololol probably shouldn't use the same scale to measure horse food and human food. so glad the volume measurements worked for you! happy baking!