
Learn how to make these chewy, airy homemade bialys with a soft-yet-sturdy crust and a classic onion, garlic, and poppy seed filling.
In this blog post I'll walk you through how to make a simple bialy dough with a step-by-step photo guide to shaping bialys. This is a quick and easy bialy recipe for beginners — you can do the whole process start to finish in just about 2 hours!

If you're new to making bialys, I do recommend reading or skimming through this whole post first, particularly the section on how to shape bialys. But if you want to jump straight to the recipe, click the JUMP TO RECIPE button above or the RECIPE button in the table of contents below.
Bialys are a cousin of the bagel and, like the bagel, originated in Jewish communities in Poland. This homemade bialy dough is a riff on my simple 3-hour plain bagel dough. It's almost exactly the same, only I took out the sugar and added a touch more water to give the dough extra elasticity for stretching. It's super easy to make using a mixer with a dough hook or kneading by hand.

While bialys are very similar to bagels, they also — and this is one of those things I feel like I'm probably not supposed to say as a trained pastry chef — have a lot in common with pizza.
Yes, really! Shaping homemade bialys is a lot like how you hand stretch a pizza. The dough is pre-shaped into balls, then you flatten the center and stretch it until it's thin and almost translucent.
Once baked, bialys have a chewy texture that I love in a pizza crust, albeit a bit denser; you won't get giant air bubbles in bialys. Unlike shaping a pizza, when shaping bialys you stop when the dough is about 5 inches wide, and when they bake, the center tightens around the filling rather than baking up flat.
Ingredient Notes
Here are the ingredients that you'll need to make these easy homemade bialys! Please refer to the recipe card (at the end of the post) for specific quantities.

Bialy Filling - Traditional bialy filling is made of onions, garlic, and poppy seeds and is very quick and easy to make. You'll need olive oil or butter, minced yellow onion, garlic powder or a minced clove of garlic, poppy seeds, and a pinch each of salt and pepper.
I also like to include a little bit of garlic powder in my bialy dough to help carry some of the garlic flavor from the filling through every bite, but optional if you'd rather leave it out.
Other bialy filling ideas: Substitute everything bagel seasoning instead of poppy seeds, add a couple crumbles of feta cheese or other shredded cheeses like gruyere or cheddar, or even add other savory additions like minced sun dried tomatoes, pepperoni, sesame seeds, scallions, or fresh herbs like thyme or rosemary.
Making My Easy Bialy Dough
Making the dough for homemade bialys is very straightforward. You're following the same process as my easy plain bagel dough, minus the sugar plus a bit of garlic powder, so if you want more details or troubleshooting tips head over to that recipe! I've also got instructions for how to knead the dough by hand in that recipe if you don't have a mixer.
Start by whisking the dry ingredients together in the bowl of your mixer. Make a well in the center and pour in the warm water.
Mix the dough with the dough hook until the dough comes together in a shaggy, messy ball. It will clear the sides of the bowl but won't look smooth at all. Knead for 5 minutes on low-medium speed until the bialy dough is smooth, soft, and elastic. It will cling just slightly to the bowl when you pause the mixer.


Shape the dough into a smooth ball by tucking all the ends under. Place in a mixing bowl, cover, and let rise somewhere warm for about an hour. The dough should double in size easily and look quite airy.


My Simple Bialy Filling
You can either make this onion and poppy seed bialy filling while the dough rises the first time or after dividing the dough into balls and letting it rise for the second time.
Either way, you want the filling to cool before you use it, to lessen the risk of the onions burning in the oven.

Heat the oil until shimmering, then add the minced onions, salt, pepper, and garlic powder. Cook over medium-low, stirring frequently about 5-7 minutes.

When the onions are soft and translucent but not browned, stir in the poppyseeds and cook 30 seconds more. Remove from the heat and set aside.
How I Shape Bialys
Shaping homemade bialys happens in two stages. First, you'll divide and pre-shape the dough into eight equal balls of dough. This process is exactly the same way you pre-shape a dough ball for making bagels, so head over to my bagel recipe post for more details on how to do that.
- Gently flatten the dough, stacking any smaller pieces on top so they get tucked into the middle.
- Fold and tuck all the edges in all the way around and pinch them together so the dough has one smooth round side and a pinched together seam on top.
- Flip the dough ball over, cup your hand around it, and scoot it in circles to tighten the seam and create surface tension on top to smooth out the shape of the ball.
Dust the pre-shaped balls of dough well with flour, cover with a clean kitchen towel, and let them rest for 30 minutes. This allows the gluten in the dough time to relax so that they're easier to stretch.

After 30 minutes, you'll notice the dough balls looking and feeling much airier. They may not double in size, but they'll be noticeably larger. If your kitchen is quite cold, they may need an extra 10-15 minutes.
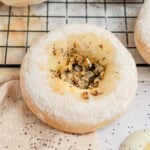
The second stage of shaping bialys is creating the divot for the filling. I like to flip them over so I can press my thumbs on the seam side, sealing any wrinkles or loose edges as I stretch the dough.

Use the pads of your thumbs to gently press down in the center of the ball of dough until you can feel your fingers on the other side. Do not poke through the middle.

Stretch the center by rotating the dough through your hands as you bring your thumbs together, then slide them away from each other about an inch or so, tugging lightly on the center of the dough.
TIP: If at any point the bialy dough is fighting you, feels like it's tearing, or doesn't want to stretch, place it back down and let it rest for a few minutes. This will let the gluten relax so you can you can resume stretching.

The outer rim of the dough should remain thick, keep your fingers curled around it so you don't press the air out of the rim. The outer edge will naturally expand as you stretch the center.

Keep stretching until the dough is about 5-6 inches across with a nice flat center about 3-4 inches wide. If you hold it up to the light, you should be able to see light through the center.
The dough will shrink back as it rests and will fill in as it bakes, so the center needs to be nice and flat before you add the filling.
Once you've done an initial stretch on each bialy, give each one another quick stretch now that the gluten has relaxed into this new stretched-out shape.

You can bake your bialys just like this, or you can brush or spritz the outsides of the bialys with water and sprinkle them with additional poppy seeds, sesame seeds, etc. It's up to you! If you do spritz the outsides with water to add seeds, they'll bake up a little darker in color than if you bake them without.
When you first take the bialys out of the oven, they will be hard and firm to the touch. Don't worry; they'll soften as they cool.

My Best Practical Tips and Recipe Notes
- Stretching a bialy is a lot like stretching pizza dough. Bialy dough is a lower hydration dough with a shorter resting period, so it's a little less stretchy than pizza dough. You can't rely quite so much on gravity to help stretch them, but it's a very similar process. Check out my guide to hand-stretching pizza dough for more tips and visuals!
- If you accidentally tear the center of any of your bialys, just pinch the dough back together. Let it rest for 1-2 minutes, then try stretching it again.
- For garlic powder and poppy seeds, I've been really liking Burlap & Barrel's Purple Stripe Garlic. It has a really nice, buttery, complex garlic flavor, perfect for garlic fiends like me.
- Serving homemade bialys: Personally, I enjoy eating bialys plain, still warm from the oven, or at least freshly toasted. But you can also eat them topped with cream cheese, smoked lox, butter, capers, etc. Some people do slice their bialys like bagels and put the filling in the middle, but I find I lose too much of the onion filling that way so if I add any toppings I usually put them on top or inside the divot in the middle.
💭 Have More Baking Questions?
I've rounded up answers to common baking questions and how-to guides, including:
- Ingredient swaps and FAQs
- Why my recipes are written in grams and not cups
- How to quickly bring eggs and butter to room temperature
- Ingredients I use (salt, flour, yeast, etc.)
- Step-by-step guides for bread and baking techniques
See my baking techniques & troubleshooting guide and ingredient swaps and FAQs for more!

Want this recipe, only smaller?
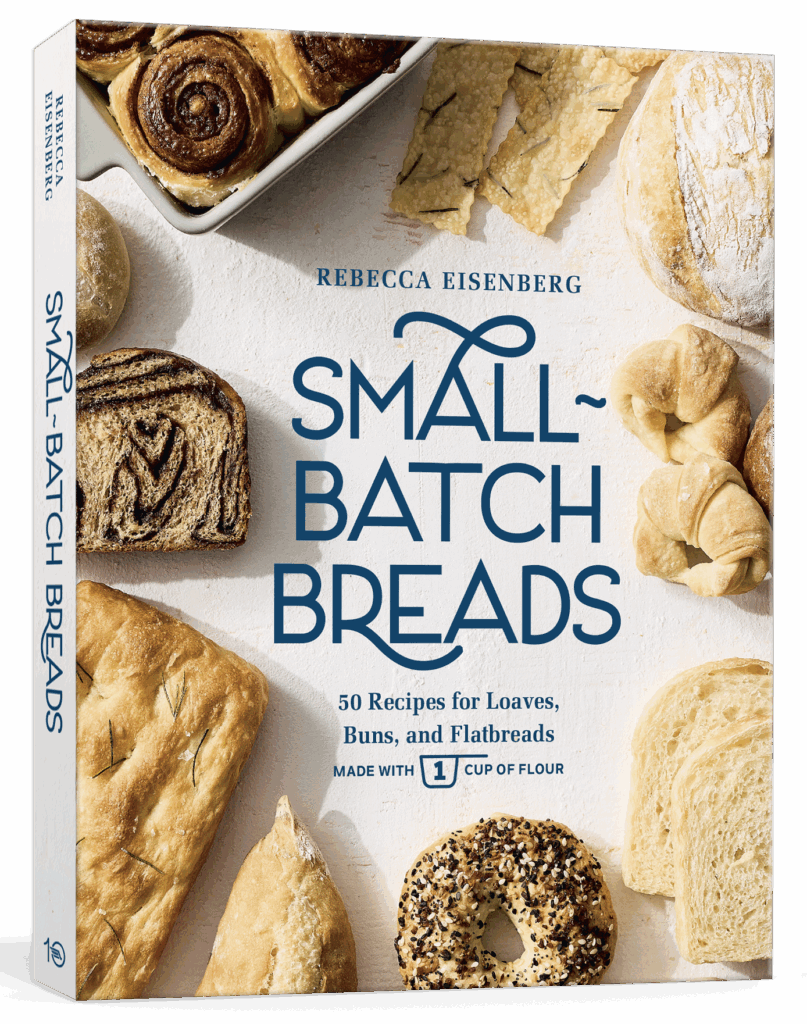
Find it in my Small-Batch Breads cookbook, available for pre-order now!
Featuring fifty easy-to-follow bread recipes made using 1 cup of flour.
📖 Recipe
2-Hour Bialys From Scratch
Recipe Notes
- To test if your dough is ready after it rests for an hour, gently press into it with one finger. If it immediately fills in the indentation when you remove your finger, your dough needs more time to rise. If the indentation fills in very slowly, your dough is ready. If it doesn’t fill in at all or the dough seems to collapse, your dough has overproofed.
- If your kitchen is quite cold, the pre-shaped dough balls may need an extra 10-15 minutes to rise before you shape them.
- Store bialys in an airtight bag in the fridge with a paper towel to absorb moisture. Stored properly, they will stay good for 3-4 days. The best way to store bialys is in the freezer; reheat from the fridge or freezer in a toaster oven at 350°F for 5-10 minutes.
- Optional: Spritz or brush the outsides of the bialys with water and sprinkle with additional poppy seeds, sesame seeds, etc before baking.
- These are best eaten fresh, within 8-12 hours of baking. You can store them in the fridge for 24-48 hours, but you'll want to toast them before eating as the fridge temperature dries out the dough. If you aren't going to eat them within a day or two, I recommend freezing them as soon as possible. You don't want to let the onion filling sit out at room temperature too long, refrigeration makes the bread go stale faster. Bialys are super easy to reheat from frozen. Just pop the frozen bialy in a preheated 350°F oven for 5-10 minutes!
Ingredients
Bialy Dough
- 500 grams all-purpose flour
- 10 grams diamond crystal kosher salt
- 7 grams instant yeast
- 2 grams garlic powder (optional, about ½ teaspoon)
- 316 grams warm water
Onion and Poppy Seed Bialy Filling
- 2 teaspoons olive oil
- 80 grams onion (minced)
- ¼ teaspoon diamond crystal kosher salt (a pinch)
- ⅛ teaspoon black pepper (a pinch)
- ¾ teaspoons garlic powder (or 1 clove garlic, minced)
- 2 teaspoons poppy seeds
Instructions
- Mix flour, salt, garlic powder, and yeast together in the bowl of your stand mixer. Make a well in the middle and pour the water into the center. Mix on low speed until the dough comes together in a messy ball on the dough hook. You may need to pause to push flour from the sides into the middle a few times.If the dough feels dry, add up to an additional water ½ teaspoon at a time, mixing or kneading well between additions to give the water time to absorb. It’s a lot easier to add additional water to dry dough than it is to add flour to wet dough.
- Knead. Knead the dough on low-medium speed for 5 minutes until the dough is smooth and slightly tacky to the touch. You’re looking for a dough that is smooth and elastic and clings just slightly to the bowl or your hands as you lift it out. If the dough is really sticky, dust in more flour and keep kneading.
- Rise. Tuck the dough into a smooth round ball, and place it in a lightly oiled bowl. Cover and let it rise for an hour in a warm spot until it's just about doubled in size.
- Make the filling. While the dough rises, heat oil in a small skillet over medium heat. Add minced onions, salt, pepper, and garlic powder, stirring frequently until the onions are soft and translucent, about 5 minutes. Stir in the poppy seeds, cooking 30 seconds more, then remove from heat and set aside to cool.
- Pre-shape. Divide the dough into 8 equal portions and shape them into round balls with smooth tops and tight seams underneath. Dust the tops with flour, cover with a clean dish towel, and let rest for 30 minutes.
- Preheat your oven to 450°F. Line a sheet pan with parchment paper and set it aside.
- Shape and add filling. Working one at a time, dust a boule well with flour on both sides. Press the center flat, picking it up and using the pads of your thumbs and your first two fingers to gently rotate and stretch the center of the dough until it's thin enough to see light through it. Allow the dough to slip through your fingers as you stretch it so it doesn’t tear. Keep stretching until it is about 5” inches across. The thick rim should be about 1 inch wide, with the thin center about 3 inches across. Set the bialy down while you shape the others. The dough will shrink back slightly as they rest; repeat the stretching process once more on each bialy. Arrange the shaped bialys on the parchment-lined sheet pan. Split the filling between the bialys, spreading it up the sides of the crater you’ve made in the dough.
- Bake. Bake the bialys immediately for 20 minutes.
- Cool. Remove the bialys from the oven and transfer immediately to cool on a wire rack. They will have hard crusts when they first come out of the oven but will soften as they cool.
Jane says
Made these yesterday, my 89 year old NY City born mother approved.
Rebecca Eisenberg says
Truly you can't ask for higher praise than that! So glad you both enjoyed them!
Lu B. says
I have made a lot of bread, bagels, focaccia over the years, but have never made a bialy. This recipe is clearly written and the results are spectacular. Will be on regular rotation i my kitchen. Delicious!
Mary says
Really tasty and simple! I put extra filling in because I can't get enough onion. I used a mix of bread flour and AP because that's what I had, and I think it worked really well. I'll definitely be making these again.
Ter says
I made bialys for the first time today and they came out great! I want to thank you for such an amazing recipe and for the written and video instructions. Very helpful. I grew up eating bagels and bialys and thanks to you,I can now make my favorite myself instead of paying 20 dollars a dozen. That and homemade is just better in every way! A great big thank you!!!