

Making a homemade loaf of soft white sandwich bread is so easy, and this foolproof recipe makes a single loaf of bread using just six easy-to-find ingredients. It's a simple dairy-free and egg-free dough that comes together quickly whether you knead it in your mixer or knead it by hand. I've included instructions for both kneading options in my step-by-step instructions below!
This classic white sandwich bread is a taste of nostalgia, like childhood lunches and cozy mornings. The finished loaf is wonderfully soft inside with a thin, light golden brown crust, perfect for slicing for toast and sandwiches.
Try serving this soft white sandwich bread with crisp lettuce and my deli tuna salad or creamy yellow smashed egg salad.

5 STAR READER REVIEW
“I've tried a few different beginner sandwich bread recipes and somehow can never get them to come out but I've made this one three times now and it's come out so delicious each time! I also love how simple it is”
—Nicole
This is My Best Easy Soft Sandwich Bread
I am so, so excited to be sharing my recipe for a classic soft homemade sandwich bread with you. I've got lots of homemade bread recipes on my site, but most of them are higher-hydration doughs that use longer, slower rise times to come together.
With this bread recipe, I wanted to give you the kind of bread-making experience most people think of when picturing making bread from scratch. Simple ingredients, kneading the dough, dusting it with flour, shaping it by hand, and baking it in a loaf pan. And it's a great beginner-friendly bread recipe too!
This dough can be kneaded in a mixer or by hand. It's easy to handle, not too sticky, and fun to work with. It's also a versatile base dough; I've used it to make everything from foolproof cinnamon swirl bread to cheesy pizza pinwheels!

Where other white sandwich bread recipes use milk or eggs to create that soft texture, I use olive oil instead. Not only is olive oil a shelf-stable ingredient that's easier to keep on hand, but it also means my sandwich bread recipe is dairy-free and egg-free, if that matters to you.

Honey - I use honey to add a bit of sweetness to this sandwich bread and help with browning. If you don't have honey or would rather use sugar, you can use the same amount of sugar without making any adjustments.
Water - Warm water is crucial for helping this sandwich bread dough rise on time and give it its soft texture and just slightly open crumb. Aim for a temperature of around 90°-95°F. It should be decidedly warm but not hot, since truly hot water will kill the yeast.
A simple bread dough process

Add the liquid ingredients to the middle of the dry ingredients.

Mix on low speed until the dough just comes together.

Knead on medium-low speed until the dough is smooth and elastic.

Shape the dough into a ball and place it in a lightly oiled bowl to rise.
Cover the bowl (I use these plastic hair processing caps as bowl covers) and leave it to rise somewhere warm until it doubles in size...about an hour.

When the dough has doubled in size, gently deflate it and turn it out onto a clean, lightly floured work surface.

Fold the top two corners into make a point, then fold the edges in slightly to even them out.
Roll the point at the top toward your body, and continue rolling in that direction, tucking the sides in as needed to form a nice neat log of dough.


When the dough is ready, it will be crowning just slightly over the top edge of the pan. When you press a lightly floured fingertip into it, the indentation should fill back in slowly and remain visible.


When the bread is done, carefully turn it out of the pan and onto a cooling rack. This allows air to circulate around the loaf so that the crust doesn't get soggy.
I know it's super tempting to cut a slice of freshly baked sandwich bread while it's still warm, but resist that urge! If you slice the bread before it's cooled and the starches haven't set yet, the steam still inside the bread will turn the starches to mush. No one wants mushy bread!
Yes, You Can Knead This Dough By Hand
Use a dough whisk or a spatula (heck, even your hands) to mix the dough ingredients in a bowl until a sticky, messy dough forms.
Then turn the dough out onto a lightly floured work surface or countertop and knead by hand, folding the dough over itself and rocking it forward, then rotating and repeating that motion, until the dough is smooth, elastic, and slightly tacky to the touch. Kneading by hand can take 8-10 minutes, be patient! Set a timer!
Dust in additional flour lightly only as needed to keep it from sticking to you and the counter. A little clinging is fine, but it should pull away cleanly from you and the work surface at the end.
I use a 9x5" Loaf Pan
This recipe is scaled to bake in a 9x5" loaf pan, which is a 1.25 lb loaf pan. If you have a smaller loaf pan, I recommend scaling the recipe down by about 20%.

USA Pan Bakeware Aluminized Steel Loaf Pan, 1.25 Pound
Dimensions: 9 x 5 x 2.75. Durable construction with corrugated surface for optimal airflow. Non-stick finish is PTFE, PFOA and BPA free.
As always, I recommend using a metal pan rather than glass, ceramic, silicone, or stoneware. If you're using a glass pan, you may need to adjust the baking time and temperature!

If your sandwich bread deflated during baking...
There are a few things that could have caused this but the two most likely culprits are:
- The dough overproofed during the second rise. Dough overproofs when the yeast has eaten all of the available sugars in the dough and doesn't have enough energy left to support the dough during baking. Your dough was ready to bake before the final hour rise was done — check it using the fingerprint test (see above).
- Your oven temperature is off! If your oven temperature runs cool, the bread won't rise as much as it should during baking and will be dense and sunken. Get an oven thermometer!
💭 Have More Baking Questions?
I've rounded up answers to common baking questions and how-to guides, including:
- Ingredient swaps and FAQs
- Why my recipes are written in grams and not cups
- How to quickly bring eggs and butter to room temperature
- Ingredients I use (salt, flour, yeast, etc.)
- Step-by-step guides for bread and baking techniques
See my baking techniques & troubleshooting guide and ingredient swaps and FAQs for more!
Want this recipe, only smaller?
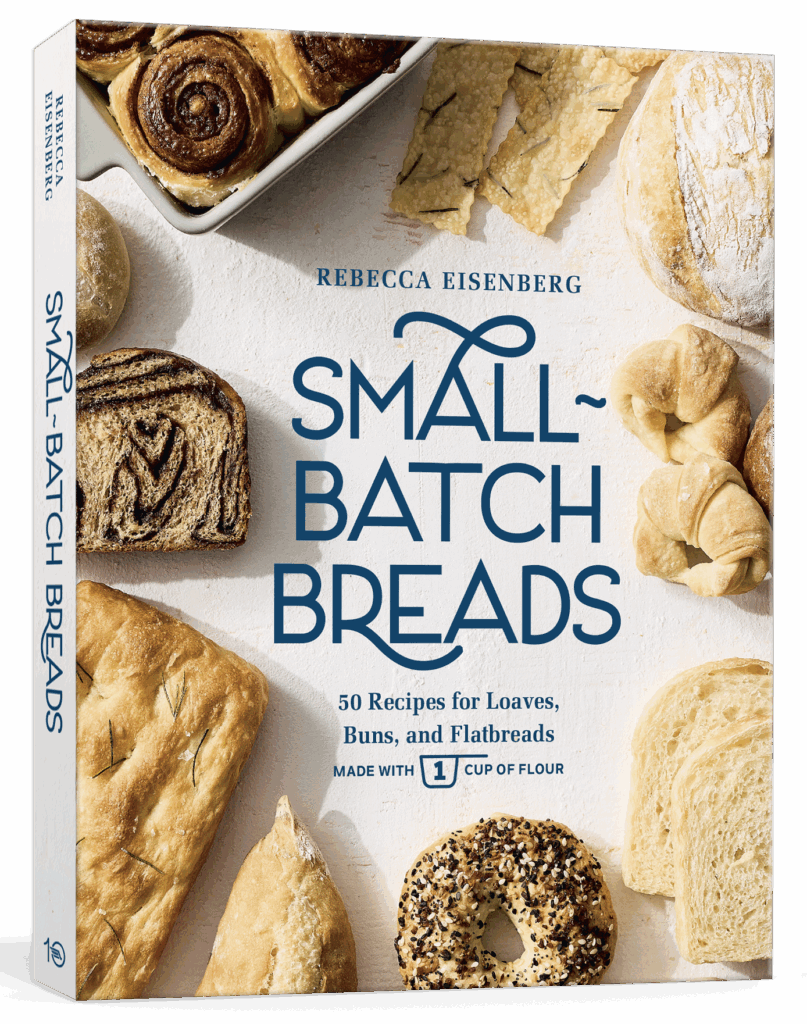
Find it in my Small-Batch Breads cookbook available now wherever books are sold!
Featuring fifty easy-to-follow bread recipes made using 1 cup of flour.
TL;DR — Recipe Summary
- Mix the dough ingredients together until a sticky, cohesive dough forms.
- Knead the dough until it is smooth, elastic, and slightly tacky.
- Shape the dough into a ball, place in a lightly greased bowl, cover and rest until doubled in size.
- Deflate the dough, shape into a log, then place in a lightly greased loaf pan. Cover and let rest until doubled in size.
- Score the top of the loaf and bake for 30 minutes at 350°F.
- Turn the loaf onto a cooling rack to cool completely before slicing.
📖 Recipe
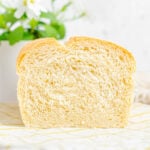
Easy Soft Sandwich Bread in a Loaf Pan (For Beginners)
Recipe Notes
- Climate: If it's very humid where you live, hold back about 25 grams of water to start. If it looks or feels like the dough needs it, drizzle it in 1 teaspoon at a time during the mixing stage. If it's very cold where you live, your dough may rise more slowly; it's okay if it needs an extra 15-45 minutes to rise.
- Ingredient substitutions: Yes, you can use sugar instead of honey — no adjustments needed.
- How to store: Sandwich bread is best eaten within the first 4-5 days after baking, though you can store it in an airtight bag or bread bag at room temperature for up to a week. I usually store it in a large resealable plastic bag with as much air pressed out as possible.
- How to freeze: You can freeze the whole loaf, defrost it at room temperature, then pop it in a 325°F oven for 20-30 minutes. Or you can slice the loaf first and break off a slice for the toaster whenever you want some. Bonus: Slide a piece of wax paper or parchment between each slice to make them easier to separate while frozen.
Ingredients
- 400 grams all-purpose flour (plus more for dusting)
- 8 grams salt
- 7 grams instant yeast
- 236 grams warm water (90°F)
- 20 grams olive oil
- 8 grams honey
Instructions
- Mix. In the bowl of a stand mixer fitted with the dough hook, combine the flour, salt, and yeast. Add the warm water, honey, and olive oil and mix on low-medium speed with the dough hook, pausing to scrape down the sides of the bowl as needed, until the dough comes together in a shaggy mass on the dough hook and clears the sides of the bowl.
- Knead. Increase the speed to low-medium and knead for 3-5 minutes until the dough is soft, smooth, and elastic. The dough may cling slightly to the walls of the bowl but should pull away cleanly.
- First rise. Tuck the edges of the dough under to create a ball of dough with a smooth top. Place in a lightly greased bowl, cover, and let rise somewhere warm for 1 hour or until doubled in size.
- Shape. Gently deflate the dough (a gentle punch to the middle will do the trick), then turn it out onto a lightly floured work surface. Loosely shape it into a rough rectangle shape. Fold the top two corners in to make a point, then roll the point forward as you tuck the sides in to create a nice smooth rolled-up log of dough with the edges tucked in and the seam on the bottom.
- Second rise. Place the log of dough in a lightly greased 9x5" loaf pan. Cover the pan loosely with plastic wrap and let rise somewhere warm until the dough fills out the pan and just barely crowns over the top rim of the pan, about 1 hour.
- Preheat. During the final 30 minutes of the rise time, preheat the oven to 350°F with a rack in the center position.
- Score. Immediately before baking, use a sharp knife or lame to score a line down the center length of the dough.
- Bake. Bake the sandwich bread in the center of a 350°F oven for 30-35 minutes or until the internal temperature reaches 195℉.
- Cool. Let the pan cool on a wire rack for about 10-15 minutes, then carefully turn the baked loaf out of the pan let cool completely on the wire rack before slicing.
Margaret Wiebe says
Do you have a bread recipe for whole wheat?
Rebecca Eisenberg says
I do not!
Nicole says
I've tried a few different beginner sandwich bread recipes and somehow can never get them to come out but I've made this one three times now and it's come out so delicious each time! I also love how simple it is
Rebecca Eisenberg says
Yayyy, I'm so glad you found success here! Keep on baking!
Shweetz says
Could you replace the honey with sugar?
Rebecca Eisenberg says
Yes! I actually just tested this. Use 6 grams of sugar instead of 8 grams of honey and it works beautifully!
Josephine says
This is a great recipe! The bread always turns out amazing and I love that the recipe is in grams!
Kathy says
Can I get this recipe in cip and teaspoons I stead of grams please?
Rebecca Eisenberg says
No, sorry!
Nandini says
So so easy to bake thus white soft bread loaf! I made double the amount and just stunned at how wonderful it turned out and how easy the recipe was to follow! Thank you so much for sharing these incredibly simple recipes!!
Katelyn says
I tested and used the ratios from her OVERNIGHT NO-KNEAD WHOLE WHEAT BREAD IN A DUTCH OVEN: 42% wheat/white wheat flour and 58% all-purpose flour. So for this recipe 58% of 400g is 232g of all purpose flour and 42% of 400g is 168g of wheat/white wheat flour. I then followed the recipe as instructed, it turned out amazing. Yum! Definitely recommend doing it this way or using the dutch oven depending on what you are wanting it for.
Rebecca Eisenberg says
Update: I now have a whole wheat bread recipe!
Mel says
Hi, love you recipes. That's 236 *grams*'water, correct? I love that you post weights!
Rebecca Eisenberg says
Oops, correct! 236 grams of water. I'll go update that right now. Thanks!
Vanessa says
This recipe was so easy to follow and produced a delicious loaf of bread!!
Midge says
WOW…this was as easy and as yummy as you said it was. It will be my go too and I will be passing it along. My scale does not measure micro grams but managed to figure out how many teaspoons I needed and it worked.
Thank you.
A fan from Oakville, Ontario Canada
Rebecca says
Accidentally grabbed the bread flour canister instead of AP. Took a little more kneading but seems to have turned out pretty good! Can’t wait to try it with AP. As always another great recipe.
Roxanne says
Is there a way to use sourdough starter instead?
Rebecca Eisenberg says
I'm sure there is but I haven't tested it, it would dramatically change the timing of the recipe. I would recommend looking for a sourdough specific sandwich bread recipe if that's what you want.
Kristen Hamilton says
Havw you ever made this into raisin bread?
Rebecca Eisenberg says
I haven't! You can try soaking raisins in the water for the recipe for about 10 minutes and then kneading them into the dough with the water if you want to try it. Let me know how it goes for you!
mmh says
My loaf was perfect, one of the prettiest things I've done in the kitchen. Delicious and easy- getting used to weighing ingredients.
thanks for this great recipe and keep them coming.
Rebecca Eisenberg says
I'm so glad you liked it, and welcome to #teamkitchenscale! 🙂 Happy baking!
Julie says
This bread was amazing!! Thank you!! Can I use this recipe with bread flour? Not sure how much more water to use?
Rebecca Eisenberg says
Yes, you can use bread flour! You will need to use more water but I haven't tested it so can't say quite how much. Consider adding 5-15 grams to start and see what happens. Please let me know how it turns out. Happy baking!
Bettina Howell says
Hi! Has anyone tried this with gluten free flour?
Rebecca Eisenberg says
Not yet! I've heard certain brands of 1-for-1 GF flour work okay with bread recipes, but I haven't personally tested any. If you give it a try, please report back and let us know how it went so other people can know what GF flours do/don't work!
Chea says
Can you substitute olive oil with other types of oil? Canola, for instance?
Rebecca Eisenberg says
Yep!
Cecily Jacobi says
What about butter?
Rebecca Eisenberg says
If you want to substitute butter you'll have the best results using a clarified butter like ghee!
Molly says
Help! I have tried this 2 times, and both times my bread failed to rise well on the second rise and then baked up to be a brick… I weighed my ingredients and followed all of the instructions. Any tips on what could have gone wrong?
Rebecca Eisenberg says
Hi! Happy to help, so sorry it didn’t quite turn out right. Thanks for clarifying that you measured the ingredients by weight. My next guess would be that either your yeast isn’t active enough…are you sure it’s new/fresh? And did you use Instant, not Active Dry yeast? And if you’re sure your yeast is fresh and you used instant yeast, then my next guess would be that your kitchen runs a bit cold (let me know if not). You may need to place it somewhere warmer to rise!
Molly says
My yeast is brand new. I am so sad and frustrated. I live in Michigan, so my house is cold. I have put it in a barely warm oven, in a warm sunny spot in my house and I just tried it a third time with a heating pad and it failed again. I have had success with other recipes of yours, so I am just at a loss
Rebecca Eisenberg says
Hmmm, this is incredibly confounding! I'm so sorry it's not working. And I'm very surprised the heating pad didn't work. My other suggestion would be to just let it rise until it does double — maybe it just needs more time? Try giving it up to another hour or so to rise in the pan.
The only other thing I can think is if your water was too hot it would have killed the yeast, but I think it's pretty unlikely that happened multiple times!
Brittany Lopez says
My house is cold as well, I turn on the oven to 325-350
And place like a pan on the oven top and then my dough and cover it and it rises
Marlene Olson says
I put mine in the oven and turn on oven light. Works every time - and quick, too!
Dawn says
Maybe a strange question but what type of water are you using? When I started my sourdough bread journey I was using Reverse Osmosis but found after failure & much reading I needed to use just filtered water (we have well water).
Donna says
Can I make this bread in a Pullman pan and using its lid??
Rebecca Eisenberg says
I haven't tried that, tbh! You could give it a go but I do think it could work in a small pullman pan (9x4"). You'll want to grease the lid well and slide it on before the dough reaches the top rim of the pan. If you try it let me know how it goes!
Sandra Bishop says
Do you have the recipe in cups, teaspoons, etc? The recipe looks so good. Thanks
Rebecca Eisenberg says
Nope! I explained why in the FAQ.
Elle says
This was so easy to make and turned out some great sandwich bread! Very excited to make this one again.
Rebecca Eisenberg says
Hooray, happy baking! Keep on enjoying the bread!
Nick says
Not fool proof! Everything was perfect until it went in the oven. The rise was right on target just as in the directions. Then, it sank while baking. ☹
Rebecca Eisenberg says
Sounds like it overproofed on you! When dough overproofs the yeast doesn't have any more food to eat to give it the power to do one more rise in the oven and it collapses. Next time try using cooler water, slightly less yeast, or just baking it sooner. Happy baking!
Michelle says
I add some garlic, Italian seasoning, parmesan to my loaf. It was delicious!
Rebecca Eisenberg says
Sounds delicious!! So glad you liked it!
Bonnie says
It's not fool proof if you do not tell us how much water to add to our dry active yeast
Rebecca Eisenberg says
Hi Bonnie! As I wrote in the ingredient notes: “If you're using active dry yeast, use the same amount of yeast, just mix it with the warm water and let it sit for 5 minutes to become foamy before adding to the dough.”
That’s the total amount of warm water used in the recipe. Literally could not be easier. Happy baking.
Note: I’ve removed your one star review as it’s pretty rude to show up hostile in the comments because you didn’t understand the recipe and then give it a low rating when you clearly didn’t make it.
Renèe says
She literally says in the notes, comprehension is half of reading. You literally let your active dry yeast bloom in the 236 grams of water for 5 minutes🙄 Stop attacking her for your incompetence and incapablilty to bake 🫶
Tiffany Gallagher says
Can this be done in a bread maker?
Rebecca Eisenberg says
I don’t have a bread maker so haven’t tested it but I don’t see why not!
Lisa Marie says
This recipe was honestly so easy and so good! Maybe 10 mins of actual work time, a little waiting, and I had my first ever loaf of sandwich bread. I haven't had a bad recipe from this site yet, and now I have another one to add to the rotation😁
Rebecca Eisenberg says
I'm so glad you enjoyed it!! Happy baking!
Karina says
Can milk be substituted instead of water?
Rebecca Eisenberg says
Yes!
Abigail says
I actually have two questions before I make this recipe, I don't have a stand mixer and have arthritis in the hands so cannot work the dough but I have a bread machine that has a dough cycle, would that suffice and be okay to work the dough?
Can we talk about flour, there are so many changes in flour lately, some just have wheat and that's it some are adding malted barley flour and that's it some are adding enriched wheat with just an enzyme and no malted barley flour. Some are still using bleached flour. You get the idea, can I ask what's in your flour? I do find there is a taste difference and also the density when it doesn't have the enzyme or the malted barley flour added. Because of various health issues I always choose the flour with just the wheat and no additives. I always strike out when trying to make a soft squishy sandwich bread and get so frustrated I just give up. I feel so many recipes spend so much intricacy on the weight of the ingredients or the type of yeast or such but nobody's talking about flour and what they use and I feel the more expensive flour need more water and tend to make the dough dense.
Thank you for your help!
Rebecca Eisenberg says
Yep, the bread machine for kneading and rising will work just fine! I can't speak to how flour affects any of the health issues you're mentioning, but I use King Arthur Unbleached all-purpose flour. Hope that helps!
Renée says
I made this recipe today and it turned out perfectly! The only thing I did differently was add a Lil extra honey, and instead of egg wash I mixed buttermilk and honey together ❤️ 😋 this will be my go to recipe
Wendy says
What difference will substituting milk make? I'm trying out this recipe and wanted to know if this is something I should try?
Rebecca Eisenberg says
You can absolutely substitute milk here! It will make the bread even softer.
Lorilai11 says
Outstanding! I have tried MANY sandwich bread recipes and this is the easiest, fastest, and most importantly best tasting one. We ate 3/4 of it immediately (and there are only 2 of us).
Rebecca Eisenberg says
I’m honored and so happy you love the recipe! Keep on enjoying it and happy baking!
Kaylee says
Can I substitute the honey for sugar? I would love to be able to let my baby who is not yet 1 try a little of it!
Rebecca Eisenberg says
Yes! You can substitute sugar for honey. I usually do 6g but even if you just swap exactly 8g sugar it will be fine! Hope your little one enjoys it!
Hannah says
I love a recipe that only needs what I already have stocked in the pantry! This bread was so, so good. We used it for deli meat sandwiches, regular old PB&Js, and breakfast toast with preserves. I was so impressed with how soft and fresh it was days after being cut into!
Traci Jay says
All was going well until I made my slash. Deflated the loaf. I stuck it in the oven anyway and it looks like I’m baking a brick with a sunken middle.
Rebecca Eisenberg says
That's a sure sign that your loaf overproofed! Bake it a bit earlier next time or let it do the second rise half in the fridge.
Lea says
I'm going to give it five stars because it's really easy to make and the texture and flavors are really nice. However, I have 2 doubts/questions and I would be very thankful if I could be advise on them. The first one is that the bottom part of my breath didn't bake well. Even though if I put it in the toaster is fine you can still feel that is not really as cooked as the top half: the crumb is thicker and it feels more mushy and less dry. Should I extend the time the bread is in the oven or should I raise the temperature and keep the same time? My second question how many changes ( temperature/time wise) would I have to make If instead of using a tin mold I'm using a glass mold??
Rebecca Eisenberg says
If you’re using glass pans you definitely need to bake longer and at a lower temperature — reduce the temp by 25 degrees F and extend the baking time by at least 10 mins! That should solve the issue.
Shubhangi says
Hello,
I tried this recipe. But my bread pan was 8'*4' so I reduced the recipe by 20% as you mentioned. But somehow looks like the bread did not proof enough. I have used measurements as per weight mentioned. I even live in an area where its not hot and was raining most of the time this week. Any suggestions what might have gone wrong and how to correct it?
Rebecca Eisenberg says
Given that it's not hot where you live, I would let it proof even longer before baking or find a warm spot to place the loaf in while it rises!
Sarah says
Came out absolutely perfect! Best part: it sliced nice and thin!
Josephine says
Fantastic recipe. Made a loaf this morning and as soon as I tasted it I immediately started making another loaf.
Manasi says
I’d line to give a half loaf to my mom who lives alone. Can I divide the dough into two and proof bake two halves in the same 9x5 loaf tin?
Rebecca Eisenberg says
Yes, actually! Shape each half into a round ball or a tight roll, let them proof together in the same pan, and once it bakes you'll be able to pull them apart down the middle where the two are touching.
Sophia says
Hi, so they have to proof in the same loaf pan, not separately?
Sophia says
Just curious how this turned out for you!
Casey says
I just made this and it was delicious! I was trying to find calories on the recipe but couldn’t. Do you know how many calories there are per slice?
Rebecca Eisenberg says
So glad you liked the bread! Regarding calories, this is a diet talk-free zone, I don't provide calorie counts or nutritional information as it can be triggering to those trying to break free from harmful diet and disordered eating habits. You'll have to calculate those on your own!
S B says
This was exactly what I was looking for when I set out to make bread today. Have you tried this with bread flour ever, out of curiosity? Also, have you used the dough for buns?
I'm going to be playing around with doing this in a steam combi oven. Well, I should amend that. I'm going to try to iron out the way I want to do it on the regular (timings and such). The first loaf was amazing. I used an egg-cream wash on the top.
Rebecca Eisenberg says
I haven't tested this particular loaf with bread flour but you could absolutely give it a try — you may find it needs just a bit more water since bread flour is more absorbent than AP flour! And yes, you could definitely use this to make buns — this is the same dough I use for my pizza pinwheels recipe, it's very versatile!