

This small-batch ciabatta recipe uses just one cup (120 grams) of flour to make a mini loaf of ciabatta bread with a gorgeous, flour-dusted crust and soft, airy interior.
One loaf of mini ciabatta is the perfect size for one or two people to share, and is small enough to make in a toaster oven. Bake it as one whole loaf or portion it into two long sandwich loaves or four dinner rolls!

Once you get the hang of this mini ciabatta recipe, check out the rest of my popular small-batch recipes. You'll be making your very own small-batch baguette in no time!
5 star reader review
“As someone who’s new to bread making, this recipe is extremely easy to follow and makes absolutely delicious bread. My husband and I were thoroughly impressed with the results and I’ve been looking for a way to make them every day since.”
—Hannah
Small-Batch Ciabatta Bread
For this small-batch ciabatta recipe, I scaled down my full-size soft ciabatta recipe, which takes 3 hours, and made some adjustments to speed up the timing to just about 2 hours. That way, you don't have to work so long to make just one small loaf!


This is a very hands-off bread recipe that is meant to have a rustic, imperfect shape. After you mix the dough together, there's a few short resting periods with less than 5 minutes of work between them, so the amount of active work time is minimal. This is a great baking project for a lazy weekend.
Because ciabatta is a very free-form bread, you don't need a special pan to bake it. Just plop it onto a parchment lined sheet pan, and you can bake this mini ciabatta in your oven or in a toaster oven if that's all you've got!
Small-Batch Ciabatta Ingredient Notes

My ciabatta recipe uses regular all-purpose flour! I use King Arthur Baking Company's all-purpose flour, which has a slightly higher protein content (closer to bread flour) than other brands of all-purpose flour, so if you're using a different brand of flour, you may have better results with their bread flour.
Mixing Small Batch Ciabatta Bread Dough
If you're new to baking or bread making this is a great place to start. You can do this!


I like using a dough whisk for mixing sticky, wet doughs like this. If you don't have a dough whisk, a spatula or your hands will work just fine.
Resting and Folding (Bulk Fermentation)
During this one-hour rest (called "bulk fermentation"), you're going to periodically build strength and structure into the dough using a technique called folding.
By letting the ciabatta dough rest between these sets of folds, air bubbles and gas (produced by the yeast) are trapped inside the dough's gluten network, which gives the ciabatta an open, soft, and airy crumb.
Basically, it's a one-hour rest, with folds every 20 minutes. That's three sets of folds total.
After the initial 20 minute rest, you'll do the first set of folds. Gently grab the top edge of dough with a damp hand and stretch it away from you. Then fold it down over the center of the dough, like you're folding it in half. Rotate the bowl a quarter turn and repeat all the way around, tucking all the edges up across the center.
On the first set of folds the dough might feel very weak or even tear slightly. That's okay. Just keep going. It will continue to strengthen as you keep folding.

Stretch the dough away from you. Then fold it down over the middle.

On the last stretch and fold, flip the dough over so the seam side is facing down.
On the first fold in the set, the dough is fully relaxed and will be easier to stretch. By the final fold in the set, you'll notice you can't stretch it quite as much. That's because the gluten network is getting stronger.
Each time you do a set of folds you'll notice the dough feeling airier, smoother, and stronger. The dough will relax into the bottom of the bowl between sets of folds, then tighten up as you fold it.

Learning what the dough "should" feel like takes practice. Pay attention as you do the folds — when it looks smooth and doesn't want to stretch much anymore, stop folding. Cover the dough and let it rest.
After the final set of folds, flip the dough so the seam side of the dough is underneath, cover the bowl, and let the dough rest for 30 minutes. This is the end of the bulk fermentation period.
There Are Lots of Ways to Cut Ciabatta
You don't have to cut this small-batch ciabatta into pieces before baking, you can absolutely just bake it whole. I tested a bunch of other ways to cut it to see if this mini dough makes enough and these are the ones I think worked best:
- Cut in half: Each half is perfect for a sausage sandwich, hoagie, etc.
- Cut in quarters: Soft dinner rolls, mini sliders, etc.
- Cut into breadsticks: Follow the instructions for shaping these twisted ciabatta breadsticks.
Use a sharp knife or bench scraper in a clean up-and-down motion to make your cuts, and leave the cut edges facing open. Don't tuck them under or try to hide them. Ciabatta is a very loose bread — no fancy shaping required.


Ciabatta is a very freeform loaf — you can try to gently stretch or shape it into a square or an oval or a circle, but ultimately it's going to be a bit unpredictable.
When you take the ciabatta out of the oven, it will feel hard and very crusty but it will soften as it cools.
5 star reader review
“This is the first time that a recipe from the internet actually worked as advertised for me. Now I don't have to drive several miles every few days to have great ciabatta rolls.”
—Jim T.


I feel like I'm not getting the hang of the folding. Help!
First of all, take a deep breath. It will be okay. If you find it easier to just do stretch and folds, stick to those the whole time. If you find the gentle slap and fold is easier for you, do that the whole time. You can also use a plastic bench scraper or a spatula to help fold the dough over itself in the bowl.
There are a lot of different folding techniques out there — coil folds, etc. Pick the one that you're comfortable with and do about 8 of them total. It doesn't matter that you do them perfectly. It just matters that the gluten network in the dough is getting folded at all. If there's a different method or technique that works better for you — use it!
💭 Have More Baking Questions?
I've rounded up answers to common baking questions and how-to guides, including:
- Ingredient swaps and FAQs
- Why my recipes are written in grams and not cups
- How to quickly bring eggs and butter to room temperature
- Ingredients I use (salt, flour, yeast, etc.)
- Step-by-step guides for bread and baking techniques
See my baking techniques & troubleshooting guide and ingredient swaps and FAQs for more!

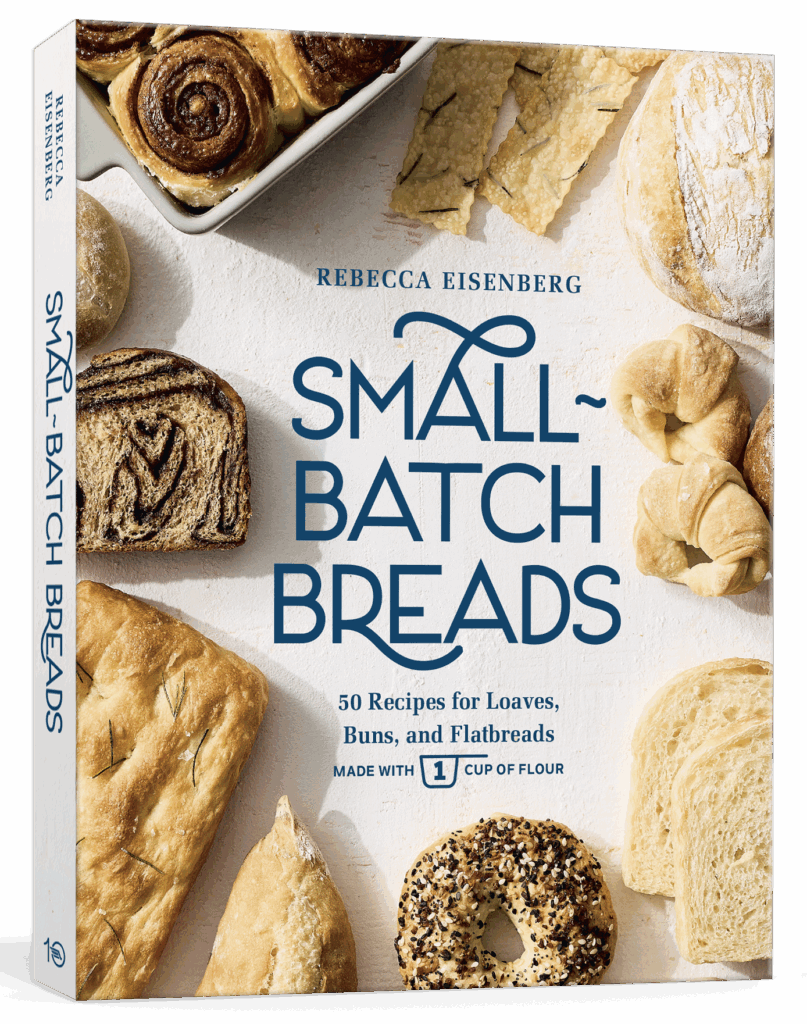
Want more small-batch recipes?
My Small-Batch Breads cookbook is now available!
Featuring fifty easy-to-follow bread recipes made using 1 cup of flour.
TL;DR - Recipe Summary
- Mix the dry ingredients together. Make a well in the center and add the water and olive oil. Mix to form a shaggy dough.
- Cover and bulk ferment for 1 hour with folds every 20 minutes (a total of 3 sets of folds).
- After the final set of folds, cover and rest for 30 minutes.
- Turn the dough out onto a well floured counter and dust the top with flour too. Cover and rest for 5-30 minutes.
- Immediately before baking, lift or flip the dough onto a parchment-lined sheet pan to reveal the floury stripes.
- Bake for 20-22 minutes at 450°F. Let cool before slicing.
📖 Recipe
Small Batch Mini Ciabatta (Made with 1 CUP of Flour)
Recipe Notes
- If you are measuring with cups, it is super important that you measure the ingredients properly. See my guide to measuring as accurately as possible by volume for how to do this. If you measure with cups/teaspoons and the recipe did not turn out right, that is likely why. Try again!
- Resist adding flour to the dough during the folding stages. This is a wet, sticky dough by design — use damp or lightly oiled hands to keep it from sticking to you instead.
- If you cut the dough into smaller rolls, reduce the bake time by 2-3 minutes.
- Baking at high altitude: Increase the water to 110 grams. You can add up to an additional 2-3 grams of water beyond that if it still seems very dry. Use wet hands for the folding stages. You may also find that a higher protein bread flour works better for you!
- Keeping Track of Timing: To keep track of your timing with the folds, set a 20-minute timer and a 1 hour timer when you finish mixing the dough. Reset the 20-minute timer when you do the first set of folds. When you do the second set of folds, there should be about 20 minutes left on the 1 hour timer (it may be off by a minute or two given the time it takes to do the folds themselves!).
- Be gentle. The folding process is as much about incorporating air as it is about building strength into the dough. You don't want to knock all the air out of it. Once it's in the final rest, handle it as little as possible to preserve the air inside the dough. This doesn't mean you can't gently stretch it into a long rectangle shape or cut it into rolls — just use "fingertip light" pressure.
Ingredients
- 120 grams all purpose flour (1 cup, aerated and loosely scooped, plus more for dusting)
- 3 grams diamond crystal kosher salt (1 teaspoon; use half as much of any other brand)
- 3 grams instant yeast (1 teaspoon)
- 105 grams warm water (⅓ cup + 5 teaspoons, 90°F)
- 5 grams extra virgin olive oil (1¼ teaspoons)
Instructions
- In a medium bowl, whisk together flour, salt, and instant yeast. Make a well in the middle of the bowl; pour the warm water and olive oil into it.
- Mix with a dough whisk until the dough comes together in a messy ball in the bowl. Scrape down the sides of the bowl, make sure there's no sneaky lumps of flour hiding inside. Cover the bowl and let the dough rest for 20 minutes.
- First set of folds: Use a damp hand to gently grab the top edge of the dough, stretching it away from you, then down over the center of the dough. Then rotate the bowl a quarter turn and repeat, grabbing the new top edge, stretching it away from you, then folding it down over the center. Repeat two more times for a total of four folds. On the last fold, flip the dough over and do a gentle slap and fold in the bowl by scooping the dough up in one hand, "slapping" the side closest to you it down in the bowl and folding the dough over itself and away from you as you slide your hand out from under it. Rotate the dough or the bowl a quarter turn between each set of folds, so you're always sliding your hand under the tucked under edge of dough facing away from you. Cover the bowl and let the dough rest for 20 minutes.
- Second set of folds: Use a damp hand to repeat the 4 stretch-and-folds followed by 4-5 slap and folds in the bowl. Cover the bowl and let the dough rest for 20 minutes.
- Third set of folds: Perform one final set of stretch-and-folds and slap-and-folds in the bowl. Do your best to get all edges tucked underneath with nice smooth surface tension on top of the dough. The dough should feel much more bubbly and airy at this stage and won't stretch as far as it did on the earlier sets of folds. Cover the bowl and let the dough rest at room temperature for 30 minutes.The dough will spread out and rise slightly in the bowl during this final rest, but may not double in size.
- Preheat the oven (or toaster oven) to 450°F while the dough rests.
- Dust the top of the dough in the bowl with flour, then gently tip it out of the bowl and on to a well-floured clean countertop so that the un-floured side is now facing up. Be patient and gentle with the dough so it doesn't deflate.
- Dust the sticky top side of the dough lightly with flour. If you're cutting it into smaller rolls, do so now using a sharp bench scraper in clean up and down movements. Cover with a clean dish towel and let the dough rest for about 5-30 minutes. If you need to let it keep resting for another 5-10 minutes while the oven gets to temp that's okay — just cover it with a clean dish towel so it doesn't dry out. It's better to get it in the oven at the right temperature than to rush it!
- Line a sheet pan with parchment paper. Dust any excess flour off the top of the dough, then slide a bench scraper under the ciabatta loaf in one quick movement. Lift and gently flip it over onto the sheet pan so the underside is now facing up. For a less floury ciabatta, gently dust any excess flour off the top. If you don't have a bench scraper, use your hands to flip it.
- Bake for 20-22 minutes until puffed up and browned on top. If you want to be precise, you're looking for an internal temperature of at least 190F. For a softer ciabatta, bake for 18 minutes. Ciabatta will seem very hard and crusty when it first comes out of the oven, but will soften as it cools. Let cool before slicing!
Tasi says
Such a tasty tiny loaf! I do admit I struggled with this a lot even having been successful with more complicated breads. I had to completely discard my first attempt since it came out resembling slime more than dough even after after all of the proofing and stretching and folding. My second attempt I added what was probably almost 1/3 cup more flour than what was called for and it came out perfect. I'm still not sure what I'm doing wrong for the original measurements not to work, but I'll keep trying to work it out. I love how the finished product tastes and will definitely be using this recipe frequently!
Rebecca Eisenberg says
I'm so glad you liked it! It sounds like you used the volume measurements rather than the weight measurements — that's what lead to the first loaf texture being off and requiring a 1/3 cup more flour! If you did use the weight measurements then it's likely you missed hitting the "tare" button between weighing some ingredients and the measurements may have been off. But I'm glad you were able to save it and give it another try! Enjoy!
M.H. says
After months of staring at this recipe I decided to just go for it and make bread for the first time ever. I didn’t have any equipment, so I measured by volume and used my hands for mixing, scraping, dusting, etc. After the folds I left it in the fridge overnight since I had started around 9pm. Then in the morning I realized my countertop oven/microwave only presets to 210C or 250C, but 450F is 233C (oh no!). I baked it at 210C for 23 minutes and reader, I successfully made bread. I’m sure it’s not perfect, but it sounded hollow when I knocked it, the outside is crispy and the inside is soft. It looks and tastes and feels like bread! I wish I could post some pictures because I’m so proud.
This recipe being small really helped with the “just try it” motivation, because I knew I wouldn’t be wasting a ton of ingredients if I spectacularly failed. It sounded like a pretty forgiving recipe from the comments, too.
I also really appreciate Rebecca writing about how people have been baking without fancy equipments and measurements for thousands of years. Yes baking can be super technical with weights, times, and temperatures but also a “technically”imperfect bread is still perfectly fine for eating. So I wanted to leave a comment echoing that! You can make this bread with nothing more than your hands, a bowl, and an oven.
Happy baking ~
Rebecca Eisenberg says
Yessss oh this makes me SO happy!!! I’m so glad you decided to try it and I’m thrilled it worked for you! As a recipe writer it’s always a fine line for me trying to give very precise instructions so that people can accurately replicate my results while also knowing that there’s huge room for error and that even when a recipe goes “wrong” or isn’t followed exactly it can still turn out right even if not “technically” perfect. Using weight measurements will give you the highest rate of success but that doesn’t mean you can’t succeed using volume measurements and some smart decision making along the way. I’m so happy for you and you should feel really proud of yourself too! Congrats on your ciabatta bread! 🙂
Angelien says
Hi, can i just dubble the ingrediënts to make a bigger bread?
Regards
Angelien from Nederland
Rebecca Eisenberg says
Yes, but you shouldn't need to double the yeast — 1 more gram of yeast is enough!
A Brouwer says
Thank you
Kathy says
I have always said I am a cook not a baker. I made this small batch of ciabatta tonight and it was amazing. My only regret is that it was a small batch. Best of all my husband actually said “I think you are a baker now.” Later this week. I’m going to try a small crusty bread. Thank you for making it easy and not scary.
Rebecca Eisenberg says
Your husband is right — you ARE a baker now! You should feel really proud of yourself. Welcome to the world of baked goods, there are so many new recipes awaiting you!
Rorie says
This recipe is excellent. I’m a bread novice, and this is the first loaf I’ve made of genuinely great bread after so many mediocre loaves.
I’m also amazed that this came out so good with regular flour. I was always told I had to use bread flour.
Beatrix says
Just finished baking this at 4:30 this afternoon.
Just finished devouring the entire loaf, all by myself, at 9:20 this evening.
I'm Me D says
Let's talk freezing these. Any recommendations? I do meal prep and my DH only likes when the bread is hot and fresh. Lol. I'd love to put it together and freeze for future use! But not sure when to do this on this type of airy bread. 😬
Rebecca Eisenberg says
These are so small I don’t think you’ll have enough to freeze but ciabatta freezes well, I do it with my full size ciabatta recipe all the time. Just pop in a bag in the freezer with as much air removed as possible. Reheat from frozen in a 300-350F oven for about 10-15 mins!
Pat Long says
This little loaf was everything you want a bread to be. A little resilience to the crust, beautiful crumb with perfect hole structure, and great flavor. Thanks for sharing.
Molly says
This recipe is PERFECT for making a single sized bread bowl for soup! 10/10 would recommend!!!!
Rebecca Eisenberg says
I'm so glad you liked it and I'm thrilled to know it worked as a bread bowl!
Brie says
Making this for the second time this week. So easy and quick. Thanks for the fantastic recipe!
Melissa says
This was so amazing! It turned out perfect first try. Will make again and sending to my co-workers as well so they can enjoy too.
alessia says
I SO love your collection of "small batches" stuff... I have always promoted myself on my blog a small-sized approach to some recipes - no need of keading a load of stuff all the time, not always we have to feed an army! 😀
Thanks for sharing!!
alessia
Rebecca Eisenberg says
So glad you like them!!
Anika says
making this for the 5th time now! this recipe never disappoints for a college girl who just wants to make some fresh ciabatta for pesto bread
Rebecca Eisenberg says
Mmmm pesto bread sounds delicious!
Temple DaSilva says
I tried this with the addition of a few slices of Portuguese chouriço. My very discerning Portuguese husband said it was the best crusty roll recipe I’ve baked yet… And there have been plenty! Plus, it’s nice not to have so many go stale with just two of us to eat them up. Totally perfect and practical!
Rebecca Eisenberg says
Yum!! That sounds so good!
Elisabeth says
I was worried I’d added too much water but trusted the recipe and it came out great. Easy, quick (for a yeasted dough), pillowy soft.
Cindy says
So, so glad to see a bread recipe for one! I’ve been widowed since 2019, and finding decent recipes for one (or two) is hard.
I’m also glad to see King Arthur flour used - I used to live a couple of miles from their store, and worked even closer! It’s well worth a visit to Vermont, but be forewarned, it’s one of those stores you can’t leave without something, or a lot of something’s!
Rebecca Eisenberg says
I'm so glad this recipe works for you! I love King Arthur HQ — I've taken many classes there and you're right, the store is impossible to leave empty handed!
Lou says
This bread has a wonderful flavour! So delicious.
Kristine says
Great recipe and instructions!
I know some people complain about the long blog posts with all the details and not just a recipe, but as a beginner I really appreciate it!
I never thought I’d be able to master ciabatta but it’s amazing! I’ve made this three times and it’s perfect - as good as any I have bought from a bakery!!
Especially thanks for doing the videos - I’m just learning the stretch and fold stuff and it’s very helpful.
Kaye says
I’m on a low-iodine diet and wanted to try making my own bread. And then, I saw a post of yours on IG about mini focaccia. Talk about great timing! Decided to make ciabatta tonight, and for my first time making bread, it turned out quite well. So thankful to have found your recipes and can’t wait to try your other mini breads.
Dee says
I've made ciabatta twice (!) using this recipe and i am blown away how easy it is to follow! I did have my doubts the first time around because the dough (to my inexperienced eye) seemed super wet and sticky. But i followed through step for step and i had the best little loaf!
Rebecca Eisenberg says
Thank you so much for trusting the recipe — you’ll be an expert in no time!
Sam says
Thanks for this! But why are you using metric for measuring but imperial for baking? Is there a way to change the measurements?
Rebecca Eisenberg says
I'm not sure what you're talking about. Which imperial measurements are you seeing?
Sam says
The temperature for baking is in Fahrenheit for me, but the measurements are grams!
Rebecca Eisenberg says
Ah yes, that's because I'm an annoying American. I measure in grams because it's more accurate. But if you use Celcius for temperature, you'll have to just look up the temperature conversion yourself! Sorry!
Sam says
Oh haha omg no, I thought it was my computer! Thank you so much :)!
Susan says
Mine turned out great using the standard measurements we use in USA. Thank you for this recipe. It is good.
Rebecca Eisenberg says
So glad you liked it! I'm in the USA too and I use weight measurements. 🙂
Gino says
Hi Rebecca.
I have a little experience with no-knead bread, but your recipe was my first attempt at bread I had to "put some work in to it." It was a fun process. Your animated videos help me understand the stretching/folding. Thank you.
The bread came out a little tall, and hard, more like a biscuit than a ciabatta. It was tasty, and the inside was airy and pretty, but I didn't get the form/texture right. Any guesses at what I did wrong?
For other recipes, I used the Lodge upside-down dutch over, baking it covered for 20 min first, retaining the steam. Was a lack of steam something I am missing?
My thanks.
Gino
Rebecca Eisenberg says
Hi Gino! Ciabatta doesn't need steam the way no-knead crusty breads do, so you don't need to worry about covering and uncovering it during baking. Did you measure by weight or volume? If you measured by volume, that would be the issue. But if you measured by weight, it sounds like you may have overbaked it or baked it at too high a temperature...if you don't have an oven thermometer I would look into getting one!
Gino says
Thank you, Rebecca. I bought a scale that morning (it's on it's way). I appreciate the comments.
Nicole says
The best!!
Megan says
I think this might be my favorite recipe to make out of all of Rebecca’s recipes. Something about folding this little pocket of dough is so satisfying! And it really helped build my confidence as a baker when I was first starting out.
My toaster oven is v finicky, so I’ve had some extra crispy ciabattas in the past (but still delicious!), so make sure you keep a close eye on it if you use yours!
Nandini Hunter Jones says
I made the ciabatta small batch for 2 people. It's so easy to follow and such fun to make. The ciabatta turned out exceptionally well, which we will have with soup vichyssoise. Perfection on plate. Thank you so much for sharing these incredible recipes!! I have tried a few of your recipes and they are just amazing, a delight to bake!!!