

Made with just one cup of flour (120 grams) this small batch focaccia recipe makes a single mini focaccia that bakes up golden brown and fluffy on top with a crispy bottom in a standard loaf pan.
It's become a favorite in The Practical Kitchen community for good reason! Many readers have shared their favorite creative mini focaccia toppings and many have had success making this with certain brands of gluten free flours, too. See comments below!

This small batch focaccia recipe is perfect for when you want focaccia but don't want to use up 4-6 cups of flour satisfy that craving. It's so good as a side with soup or pasta but also great for making sandwiches or slicing into breadsticks for dipping.
This mini loaf pan focaccia is part of my "small batch recipes" series. I love these little breads because they're the perfect size bread recipe if you're single or live alone and are cooking only for yourself, or if you're cooking for you and just one other person. It's also great if there are any ingredient shortages or if you just want to avoid using up all your best baking ingredients.
For a full size version of this recipe, check out my thick and fluffy overnight focaccia.
5 STAR READER REVIEW
“This was my first try at any type of bread. The recipe was so easy to follow. It turned out perfect! It was light and fluffy. No bread left. I will make it again soon. This recipe will be used often. Thank you.”
—Judy M.
Get Ready to Be Obsessed With Mini Focaccia
This small batch focaccia recipe uses just one cup of all-purpose flour. That's 120 grams of flour, which you should definitely measure by weight using a kitchen scale. I have provided volume (cups) measurements at the end of this blog post, but you'll have the best and most consistent results if you measure by weight.
The recipe uses about 3 grams (1 teaspoon) instant yeast, which means one packet of yeast (7 grams / 2¼ tsp) can make two mini loaves of focaccia.

To develop gluten and give the focaccia strength and structure, this recipe uses a technique called folding to "knead" the dough.
To build strength and trap air bubbles in the dough, you'll do folds every 15 minutes for 30 minutes (two sets of folds), letting the dough rest in between, which is great because it's very hands-off for you!
One of my favorite things about this mini focaccia is that it's a gateway bread for so many beginner bakers. So many readers have told me it cured their fear of bread making — it wasn't long before they felt confident enough to try making more complex or recipes like my overnight bagels or basic brioche bread!
Ingredient Notes
Here's what you'll need to make this mini loaf pan focaccia. No fancy or hard to find ingredients, and you can definitely get creative with your toppings! See recipe card (at the end of the post) for ingredient quantities!

Focaccia is a very olive oil-forward bread, so I do like using a bold-flavored olive oil for this mini focaccia because iI want to enjoy that delicious EVOO flavor. I also really like using focaccia as a canvas for infused and flavored olive oils! Think chili oil, garlic oil, rosemary oil, etc.
One reader told me they used this recipe to make a scallion pancake-inspired mini focaccia with sesame oil, topped with scallions and sesame seeds. Genius!
Instructions
Mixing this small batch mini focaccia dough is very simple and doesn't require any fancy equipment. If you have a bowl, a spatula, and at least one hand, you can mix this focaccia dough. Also, I believe in you. And you are capable of making great bread.
Start by mixing the dry ingredients together.

Once the water is absorbed, fold the dough over itself a few times to get the flour to hydrate a bit more. It will be quite messy and sticky. That's normal; don't panic. Just get the dough in a loose ball in the bottom of the bowl. Cover and let it rest for 15 minutes.

A Modified "Slap-n-Fold"
The "slap and fold" is a technique used to add structure and strength to bread doughs in place of kneading. It's particularly useful for very sticky, high-hydration doughs.
Usually it's done on a countertop, but because this mini focaccia recipe is so small, I like to do a modified version of the slap and fold right in the bowl.
![[gif] slapping and folding focaccia dough](https://thepracticalkitchen.com/wp-content/uploads/2020/06/Loaf-pan-focaccia-1.gif)
![[gif] slap and folding focaccia dough](https://thepracticalkitchen.com/wp-content/uploads/2020/06/Loaf-pan-focaccia-2.gif)
The dough will get easier to fold each time as it builds strength and structure. Make sure you're rotating the bowl 90 degrees (a quarter turn) between folds so that the gluten is being stretched in all directions.
As you repeat the folding and resting process, you're building a criss-cross network of gluten inside the dough that will trap air bubbles and enable the dough to rise. If you only fold in one direction, the dough won't have the strength it needs.
Here's what the dough looks like after mixing, and then after the two sets of slap-and-folds in the bowl with rests in between.


Gently stretch the dough into a vaguely rectangular shape in a loaf pan. It won't fill the whole bottom of the pan, that's okay. It will fill out the pan as it rises.


Drizzle the dough with a little more olive oil, and rub some olive oil on your fingers too. Now, it's time for the most fun step of all: DIMPLING.
Press your fingers down into the dough until they touch the bottom of the pan. Spread your fingers slightly when you hit the bottom of the pan to push the dough into the corners.

Cover the loaf pan and let the focaccia rise again in a warm spot. The dough will rise and bubble up in the pan. When the dough has doubled in size, it's ready to bake. Go by what it looks like, not the time on the clock.
Right before baking, drizzle one more glug of olive oil across the focaccia and add any herbs or finishing salts you want to use.

USA Pan Bakeware Aluminized Steel Loaf Pan, 1 Pound
Dimensions: 8.5 x 4.5 x 2.75. Durable construction with corrugated surface for optimal airflow. Non-stick finish is PTFE, PFOA and BPA free.

Practical Tips & Recipe Notes
- I usually top this mini focaccia with Maldon Sea Salt Flakes, but you can use any finishing salt you like. You can also top it with fresh herbs, veggies, or anything else you want (I've even done it as a mini version of my onion and pepper focaccia!). Just remember that the dough has to work harder to hold heavier toppings up, so if you're planning on using anything heavy (whole cherry tomatoes, etc.) less is more!
- If you ARE planning on using any heavier toppings — onions, tomatoes, etc — put them on the dough after dimpling but before the final rise. That way when the dough rises one last time, it rises around the toppings and secures them in place.
- I used a 9x4" (1 lb) loaf pan but you can use a 9x5" pan (1.5 lb) if that's all you have. Just know that the dough might not stretch out into all the corners in the larger pan.
- Yes, you can bake this mini focaccia in a toaster oven! You can actually skip the loaf pan in this case too. Drizzle olive oil on your toaster oven's sheet pan and plop the dough out there after the final set of folds. The focaccia may end up a little thinner and crispier as it will spread out into an oval shape rather than a perfect rectangle. It may also need a slightly shorter bake time, so check it after 15 minutes just in case.
💭 Have More Baking Questions?
I've rounded up answers to common baking questions and how-to guides, including:
- Ingredient swaps and FAQs
- Why my recipes are written in grams and not cups
- How to quickly bring eggs and butter to room temperature
- Ingredients I use (salt, flour, yeast, etc.)
- Step-by-step guides for bread and baking techniques
See my baking techniques & troubleshooting guide and ingredient swaps and FAQs for more!
BONUS: Weight to Volume (Cups) Conversion + Instructions
I really resisted including volume measurements here, because measuring your ingredients with a kitchen scale is much more accurate and will give you the right ratio of dry and liquid ingredients so that the focaccia dough behaves the way you want it to.
I tested and developed this recipe using weight measurements for accuracy. I can't promise how it will turn out if you measure with cups because not all measuring cups are the same! That said, I am making a rare exception because of how popular this recipe is and providing them for you here. **Please read this carefully!!**
- To properly scoop flour in cups: Stir and fluff the flour in your container well so there's plenty of air in it. Use a spoon to gently spoon the flour into the one cup measure, then sweep any excess off the top. The cup should feel pretty light and the flour should not be tightly packed into it. Think of it more like a ⅞ths cup.
- To properly measure water: Use a liquid measuring cup. Place it on a flat surface, fill with water just until the water reaches the correct marker when you look at it at eye level.
- To properly measure with measuring spoons: Scoop dry ingredients flat, do not use heaping scoops. Olive oil should not overflow the rim of the measuring spoon.
Here are the mini focaccia volume measurements (use at your own risk):
- 1 scant cup all purpose flour, well aerated and properly scooped (see above)
- ⅓ cup warm water
- 2 ¼ teaspoons extra virgin olive oil
- 1 ¼ teaspoon sugar
- 1 ¼ teaspoon Diamond Crystal Kosher Salt (use ½ teaspoon of any other brand of salt)
- 1 teaspoon instant yeast
Troubleshooting: If the dough seems overly dry, use wet (instead of damp) hands to mix the dough to incorporate more water or add water ¼ teaspoon at a time until the dough looks right. If the dough seems overly wet and isn't developing strength as you fold it, very lightly dust in more flour as you do the folds.
If you measure with cups and the recipe did not turn out right, that is likely why the recipe did not turn out right. Try again!
TL;DR - Recipe Summary
- Mix together the dry ingredients. Make a well in the center. Pour the water and oil into the well and mix the dough until combined.
- Cover and bulk ferment for 30 minutes, with slap-n-folds every 15 minutes for a total of two sets of folds.
- After the second set of folds, transfer dough to a greased loaf pan. Cover and rise for 1 hour.
- Drizzle with oil, then dimple the dough. Let rest for 30 minutes while the oven preheats.
- Drizzle with additional olive oil and add any toppings.
- Bake for 20-25 minutes until golden brown on top.
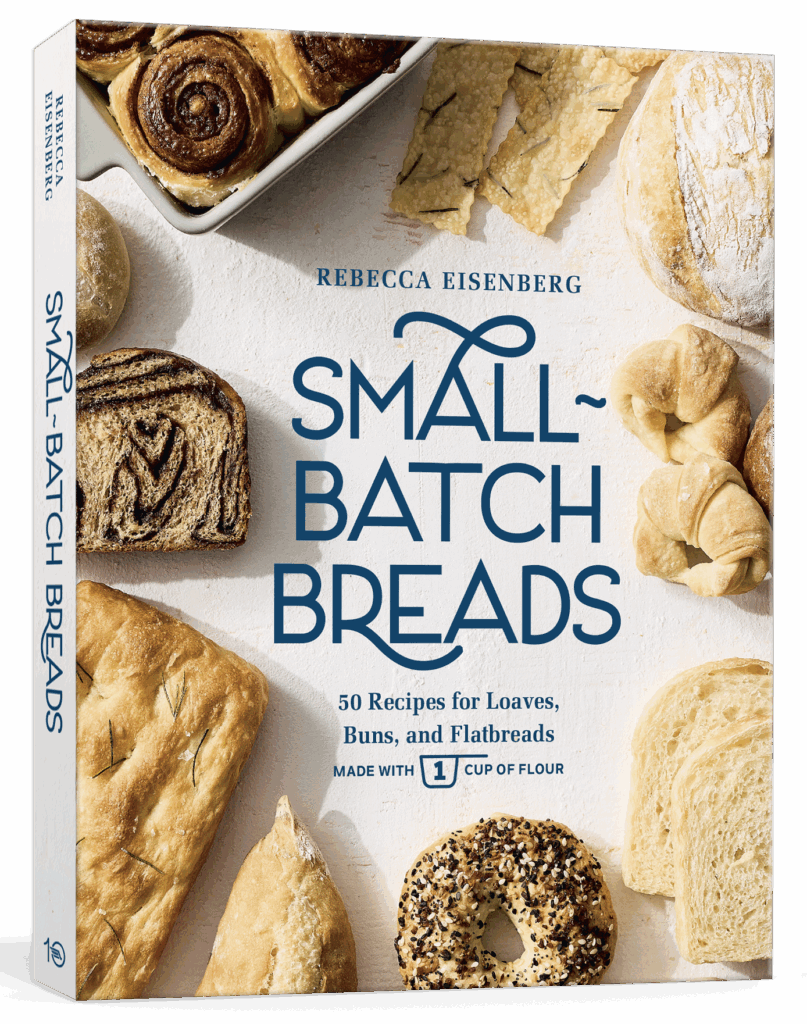
Want more small-batch recipes?
My Small-Batch Breads cookbook is now available!
Featuring fifty easy-to-follow bread recipes made using 1 cup of flour.
📖 Recipe
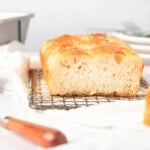
Small Batch Mini Focaccia in a Loaf Pan (Made with 1 CUP of Flour)
Recipe Notes
- How to measure ingredients: If you are measuring with cups, it is super important that you measure the ingredients properly. See my guide to measuring as accurately as possible by volume for how to do this. If you measure with cups/teaspoons and the recipe did not turn out right, that is likely why. Try again!
- Baking alternatives: For a thin and crispy version of this recipe, bake on a sheet pan instead of in a loaf pan so you can stretch it thinner while dimpling. Bake time remains the same.
- How to store: Honestly, don’t. Because focaccia is so oily and salty, it's best eaten on the day you make it. The salt draws moisture out of the bread, which means after 24 hours it becomes quite dry.
- If your kitchen is cold: The focaccia might rise slowly. Place the loaf pan on top of the preheating oven so the yeast benefits from the residual heat.
Ingredients
- 120 grams all-purpose flour (1 cup, aerated and loosely scooped, plus more for dusting)
- 5 grams diamond crystal kosher salt (1 teaspoon + a heaping ½ teaspoon)
- 5 grams sugar (1¼ teaspoons)
- 3 grams instant yeast (1 teaspoon)
- 10 grams extra virgin olive oil (2½ teaspoons)
- 90 grams warm water 90°F (⅓ cup + 2 teaspoons)
- 6-12 grams additional oil for the pan and drizzling on top (1½-3 teaspoons)
- additional salt and/or herbs for topping
Instructions
- Mix. In a medium mixing bowl, whisk together the dry ingredients. Make a well in the center and add the warm water and olive oil. Use a dough whisk or fork to stir the liquid in the center, slowly incorporating flour from the sides of the bowl until a sticky dough forms. Use a bowl scraper or your hand to fold the dough over itself, rotating the bowl as you go until the dough is lumpy, cohesive, and no sneaky dry spots of flour remain. The dough is very, very sticky at this point so do the best you can. Gather the dough in a messy ball in the bottom of the bowl. Cover the bowl and let the dough rest for 15 minutes.
- First fold. Once the dough has rested, perform a set of slap and folds in the bowl. With a damp hand, scoop the dough up, slap it down in the bowl and fold it over itself away from you. Repeat the folding process 4-6 times until the dough feels like it has tightened up slightly. Wet your hand as needed so the dough doesn't stick to you. Cover the bowl and let the dough rest for 15 minutes.
- Second fold. Repeat the slap and fold process once more, until the dough feels like it has tightened up slightly. Wet your hand as needed so the dough doesn't stick to you.Cover and let rest for 15 minutes.
- Pre-shape and rise. Spray a loaf pan with cooking spray, then drizzle in approximately 1 tablespoon of olive oil. Transfer the dough from the bowl to the pan, using oiled fingers to gently stretch the dough into a loose rectangle shape. It won't reach the edges of the pan yet.Cover and let it rise at room temperature until doubled in size and quite puffy, about 1 hour.
- Dimple and top. Drizzle the top of the dough with a little more olive oil, then use oiled fingers to dimple the dough. Cover the pan and let the dough rise until the dimples fill in slightly and the dough looks airy, another 15 to 20 minutes. Sprinkle with a pinch of flaky salt and/or any toppings you like.
- Preheat. During the final 30 minutes of rise time, preheat the oven to 400°F with a rack in the center position.
- Bake. Bake until golden brown on top, 20 to 25 minutes. Remove from the oven and immediately turn the focaccia out onto a wire rack so the bottom doesn't get soggy. Let it cool at least 10 minutes before slicing.
- Cool. Remove from the oven and run a knife around the edges to loosen the dough if needed, then turn it out onto a wire rack. This prevents the bottom from getting soggy as it cools.
Video
UPDATE 4/12/21 — A huge thanks to my volunteer recipe testers Beth, Sarah, Lisa, Cecile, Kelly, Rachel, and Christine who gave this a try after someone commented that the dough was "impossible to handle." They gave me some great feedback and sent so many gorgeous photos of their own focaccia loaves.
Kiana says
This recipe always turns out great, thank you for sharing! Baking in my oven is not an option right now, so I like to split the dough into two mini foil loaf pans and bake them together in my air fryer at 400f for about 12-14 minutes 🙂
Pamela says
I like this recipe. I might have had a heavy hand on the drizzles of olive oil. Next time I’ll use less. The loaf was just the right size.
Jody says
Hi Rebecca,
I've lost track of how many times I've made this recipe; in fact I have one resting right now. Even though I'm not sure I have mastered the "slap & fold" technique it always turns out. I have tried a few other of you small batch recipes but this is our favorite. I really appreciate that your recipes are developed using weight measurements, easy to follow and delicious. I'm working up the courage to try your small-batch challah next. I'm sure it will taste good but can almost guarantee it will not look as nice as yours...wish me luck!
Bessie says
First time making Focaccia, I said no guarantees on how it turns out! However, this turned out so good. I used a Tuscan infused olive
oil, herbs and a flaky salt for the finishing touch before baking. My son loved the flavor. I will say my bread pan was slightly larger, but it still turned out amazing. There is only two small pieces left!
Lynn says
Fabulous recipe. Prepared as directed and seasoned top with fresh black pepper and Maldon flaked salt. Light,fluffy,crispy crunchy. Very impressed with the results and so easy to make. Thank you!
Pallab Gupta says
Fantastic recipe! I used 90g all purpose with 30g while wheat with no other adjustments. I topped the bread with olives, sun-dried tomatoes and rosemary. Definitely a keeper.
Rebecca Eisenberg says
That sounds delish!
Megan says
The one that started it all… like many people, this was the recipe through which I discovered Rebecca, and I bake one of her recipes at least once a week. And this focaccia definitely lives up to the hype! We’re a two-person household, so this is the perfect amount to get fresh focaccia (and purposefully have no leftovers).
Debby says
My bread loving better half is in love with this recipe. No change to the recipe. It's perfect as written.
Ann says
This recipe is tasty. It is a time intensive process, but the steps are easy. We didn’t have any leftovers, which I was glad for.
Katie says
This recipe is amazing! The focaccia is super airy and crispy. The recipe is very easy to follow.
Michelle Langenbach says
We made this during a girls day in session. It was easy and so full of possibilities. You can use any kind of topping you want. I went with sea salt, pepper and pesto. So good. During the proofing sessions we visited and chatted. What a great activity! Wished we could share photos!
Jenbowd says
This recipe worked perfectly on my first try! I am not at all adept when it comes to baking bread, despite a strong desire. I’ve had several flops in the past and had just about given up. The steps and instructions were clear, and the methods were easy to follow. The focaccia was delicious! I’m looking forward to making this again, and trying other recipes from this site.
Kim says
Really, really, really good. Made no changes, used my scale, had no idea what I was doing, and I still ended up with a picture perfect loaf.
Lu B. says
Tonight I made the mini loaf pan focaccia. I did the version that Rebecca posted using a 1/8 sheet pan and made a pizza. I did mostly what she did, using gruyère cheese and pepperoni. But I also added a sliced Roma tomato. It was delicious. I did bake it higher than 400 degrees, more towards 450 in my Breville toaster oven. Great recipe, Rebecca.
Rebecca Eisenberg says
Love love love!! Adding sliced tomato and baking at a higher temp is a great modification — the higher temp probably helped prevent the tomato from being too wet in the final focaccia. Keep on baking!
ALG says
Delicious and easy to make it! Looking forward to trying the breadstick version of the recipe.
Susie says
Do you think it would work to replace the sugar with honey?
Rebecca Eisenberg says
Yep!
Lucy says
This was so good! I love focaccia and have tried a few recipes - from no knead to full-on stand mixer. This one is definitely the most reliable and the perfect size for a couple of people to share with some oil and vinegar for dipping, alongside a couple of other tapas bits and some good wine. So quick to make and so delicious, and none wasted due to the cute size. Thank you!
Rebecca Eisenberg says
I'm so glad you enjoyed it!! Happy baking! ~Rebecca
jljonesy says
Thank you for this! There is only two of us and I have no idea how to (nor the patience to) properly scale down recipes and I always end up throwing out a lot of my focaccia because we don't eat enough before it goes moldy!
Candi says
If I have focaccia more than 48 hours old, I cut it up into cubes and make croutons - so easy - just stick the cubes in a low oven in a sheet pan and bake until crispy and slightly golden. They hold for a long time after they cool completely and are stored in air tight container.
Candace says
Thank you for this recipe! Portion was perfect for 2pax. Texture was great, only thing was the bread was pretty salty! I'm not sure what went wrong? For reference, we followed the recipe exactly and only sprinkled rosemary at the end before it went into the oven. Would the recipe work if we cut the amount of salt down by half or down to 1-2g? Thank you!
Rebecca Eisenberg says
You can definitely cut the salt down if you prefer — salt helps control yeast activity so just keep an eye on it as it might rise a bit faster than usual!
Greg says
Does all 10g of the olive oil go into the mixture at the beginning, or is the 10g spread out to be used in the mixture, folding and drizzle?
Rebecca Eisenberg says
It all goes into the dough at the start!
Greg says
The Focaccia mini loaf turned out great! I baked 4 different cheddar cheeses onto it. It is so good!
I need to explore the rest of your recipes, especially the breads.
Thanks for your web page!
Kris S says
This is the first bread I have ever made and it was easy and came out great! Everything worked as explained and I love the tips. The dough starts sticky and the advice "don't panic, muddle thru and it will be ok" meant I kept going instead of pitching it.
I'm excited to try another the Overnight Focaccia next!
My question is, Can I use chickpea flour instead of AP?
Rebecca Eisenberg says
So glad you kept going! It really is amazing how the dough transforms if you just keep going 🙂 And I haven't tested this with chickpea flour but any non-wheat flour is going to struggle to develop the very crucial gluten network you need to make bread — it's just an entirely different type of baking science that I am not at all experienced with. If you're interested in making breads with alternative flour like chickpea flour, I recommend looking for recipes designed to use them instead of trying to adapt wheat recipes!
Hannah says
I wish I could give more than 5 stars!!! I have made this a few times over the weekend and everyone agrees this is amazing!! I added some fillings in my dough and the results were heavenly! I will definitely be trying some more of your recipe's!
Malyssa says
if using active yeast, do i need to separately bloom it first then add flour and such? or still follow steps of the recipe with the well
Rebecca Eisenberg says
You don't need to bloom it separately unless you're not sure if it's still good. Just add it to the dry ingredients and follow the recipe as written — it may just take a little longer to rise than the recipe calls for, but it will still work!
Jennifer says
Appreciate the level of detail and video here! First time bread baker and while it was all new, the recipe and steps help break down what to do even for a novice. Family loved it, thank you!
Connie says
Great recipe for just 2 people. I put a sprinkle of salt and Italian blend spices on top. Turned out much better than the ones I’ve made using rosemary on top. The only thing I’d do differently is less olive oil as I think I overdid it. Other than my mistake it was awesome. Hubby loved it.