This overnight focaccia has a super crisp bottom and pillowy, airy top. It's so easy and hands off to make and can be used for dipping in oil or sliced for sandwiches! With an 8 to 12 hour rise time, you can start this focaccia recipe at night and bake it in the morning, or start it in the morning and bake it at night.
Top it with fresh herbs, cheese, or veggies — you can really get creative! You can even use this dough to make my super-popular focaccia pizza!

This overnight focaccia is actually a full-size version of my Small Batch Focaccia, which is scaled down to use one cup of flour and can be made in just a few hours. If you're looking for a fast focaccia, check out my Thin & Crispy Ligurian Focaccia, a which can be done in just two hours and is topped with a saltwater brine.
While there is certainly no shortage of focaccia recipes in the world, my goal in developing this overnight focaccia recipe was to keep everything as simple as possible. That meant using simple, accessible, easy-to-find ingredients. No using fancy flours or flour blends here.
That also meant minimizing the amount of work required to build strength in the dough before letting it rise. So this is a no-knead overnight focaccia; You don't need a mixer to make it, either. (You will, however, need a kitchen scale.)
A lot of other focaccia recipes I looked at required several series of folds over a long (or long-ish) period of time, or required a mixer to get going. This overnight focaccia needs just two sets of folds in a 20 minute period. Then it goes right into the pan you bake it in, and you're done handling it until it's time to bake.
So if you're looking for a basic, beginner-friendly, minimalist focaccia recipe, this simple overnight focaccia is exactly what you're looking for.
5 STAR READER REVIEW
“This was by far the best pay off I have ever had from a bread recipe. 15 minutes of hands on work plus rise time and you have perfect focaccia for sandwiches for dinner. This will be in a weekly rotation for super easy dinners.”
—Beth
One of my favorite things about focaccia is how versatile it is. You can slice it into 6 or 8 squares to use as sandwich bread — I love it for deli-style tuna salad sandwiches.
You can also top it with lots of cracked black pepper to make Panera's famous black pepper focaccia sandwich bread. Or, slice your overnight focaccia into thin strips and serve it up as an appetizer with some briny Greek olives or capers, a seasoned olive oil dip, or even smear it with roasted garlic and parmesan cheese.
Special Focaccia Ingredient Notes
Here's what you'll need to make my easy overnight focaccia recipe. See recipe card for quantities.

Sugar - I tested a batch of this focaccia without any sugar, and the focaccia just would not brown on top, and the bottom was soggy instead of crisp — so don't skip the sugar! You do need it. Honey also works well here.
Olive Oil - Use a high quality olive oil. Focaccia is an oil-heavy bread, so you'll definitely be able to taste it! Pick an olive oil with a flavor you really enjoy.
Toppings - Fresh herbs, garlic cloves, veggies, flaky sea salt, black pepper, etc. (See "Focaccia toppings" section below.)
🔪 This is an Easy No-Knead Dough
Start by weighing your dry ingredients into a medium mixing bowl. Give them a good stir, then pour the warm water and olive oil directly into the center of the bowl.

The mixed-together dough will look super messy and sticky, that's normal. The gluten hasn't had time to build any strength yet. Gather the dough into a loose ball in the center of the bowl. Cover the bowl and let it rest for 5 minutes.


Then, perform a series of folds on the dough. This is super easy and helps build strength and structure so that the dough rises just the way you want it to.
Wet your hands and gently grab the top edge of the dough. Stretch it out and away from the dough, then fold it forward over the dough. Rotate the bowl a quarter turn and repeat until you've gone all the way around the dough.
Cover the bowl and let it rest 15 minutes. Then, repeat the same set of folds. Wet your hands as needed to keep the dough from sticking to you.
This time around you'll notice the dough is stronger, smoother, and stretchier. It just needed a bit of time to rest. (Resting builds strength — remember that!)


Spray your baking pan with non-stick spray. Then drizzle olive oil into the center of the pan and tilt the pan so the oil spreads out. (This is a tip I picked up from King Arthur Baking — the non-stick spray prevents sticking, but the oil is what will give you that crispy bottom!)
Gently slide the focaccia dough out of the bowl and into the pan. Cover the whole pan and let it rest overnight. ("Overnight" is baker for 8-12 hours).

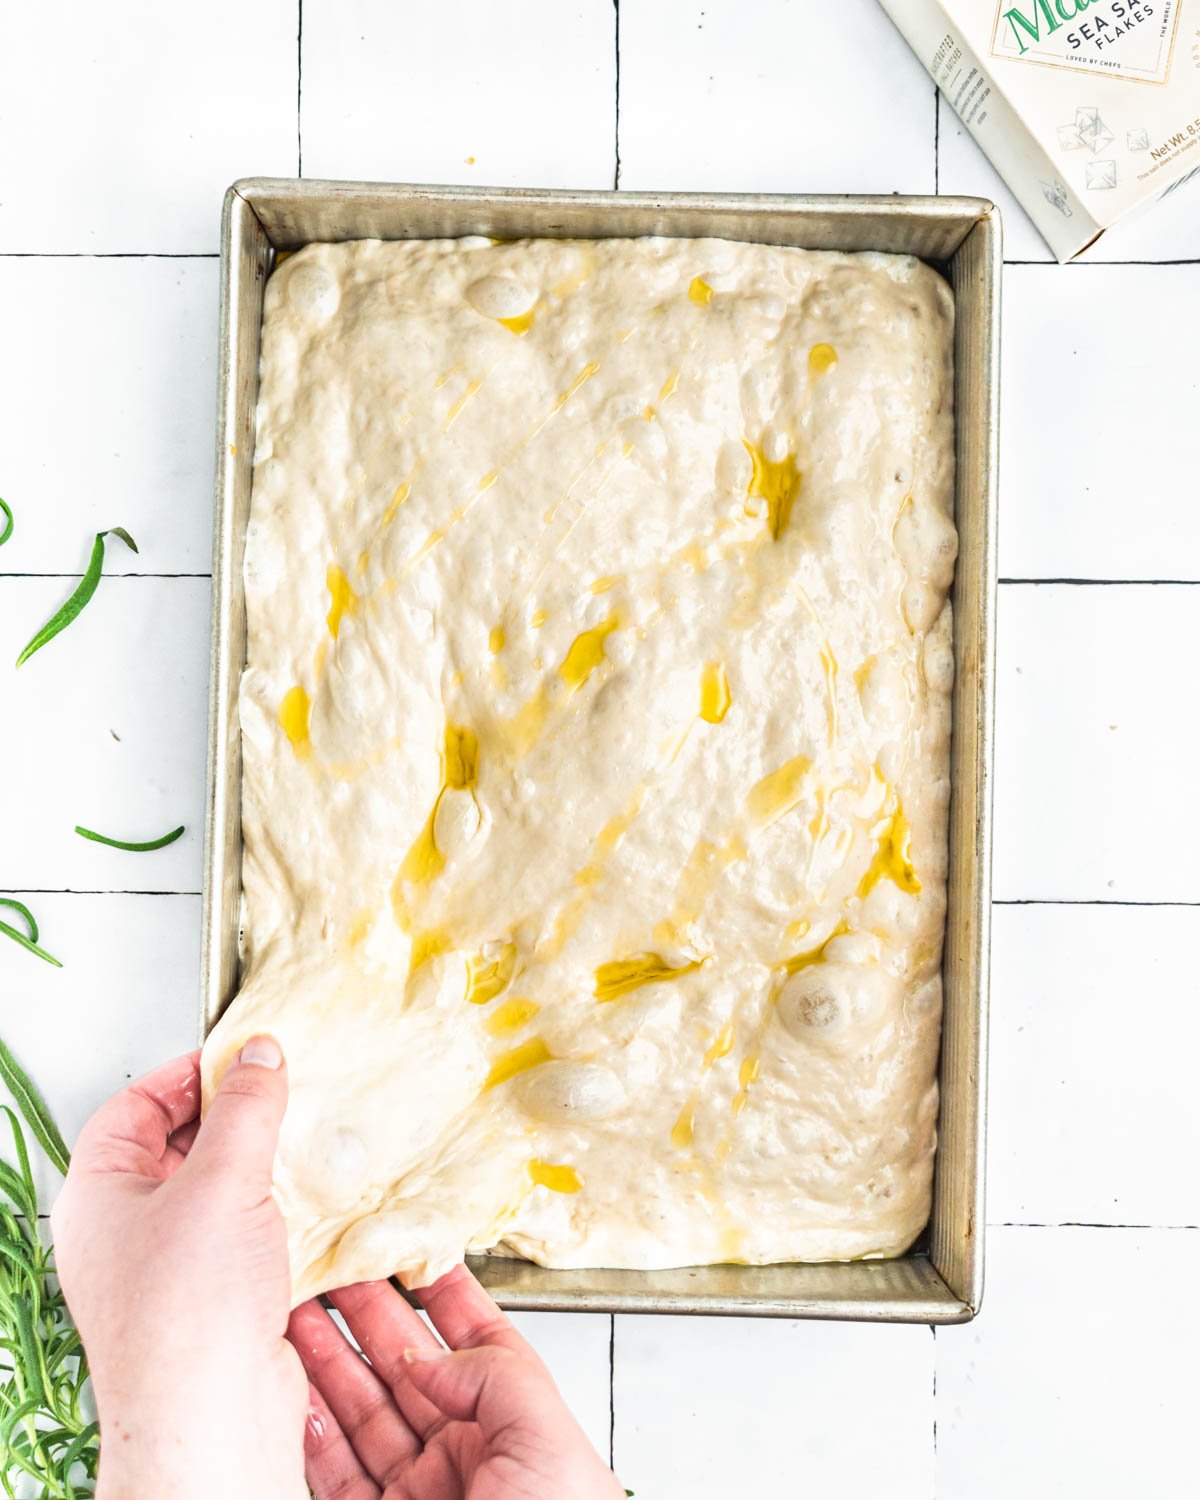
After an overnight rest at room temperature, the focaccia dough will have spread out into the corners of the pan. It will look airy and bubbly and should jiggle slightly when you shake the pan.
If it hasn't fully settled into the corners, oil your hands and gently stretch the focaccia dough to reach. It will continue rising while the oven pre-heats, so don't worry if it springs back a little.

About an hour before you plan to bake it, preheat the oven. If it's particularly cold in your kitchen, place the covered focaccia on top of your stove so the warmth gives the yeast one last boost of activity.
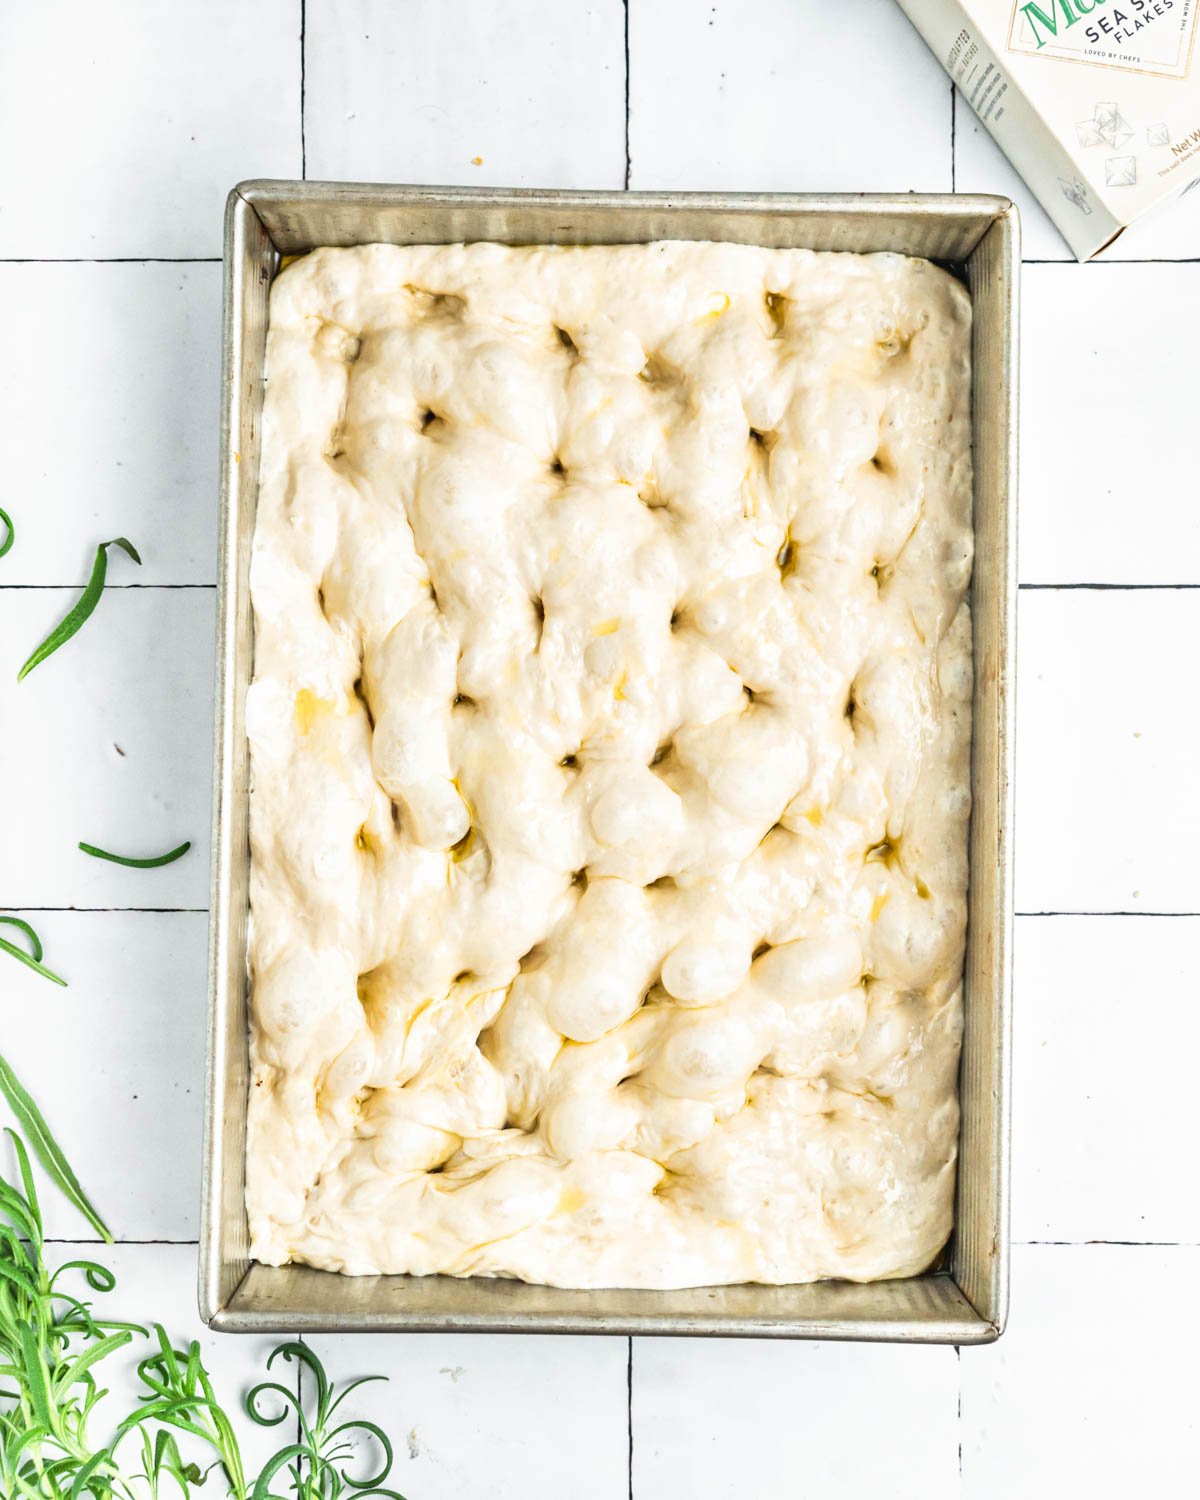
Thirty minutes before you plan to bake, drizzle the top with more olive oil. Use your oiled fingers to dimple the dough from top to bottom, pressing straight down until your fingers touch the bottom of the pan.
Top the focaccia with any fresh herbs you like — I like to use fresh rosemary — and sprinkle with flaky sea salt.

Then cover the focaccia and let it rest on the stovetop until time to bake. The dimples should fill back in slightly but not completely.
When it's done baking, the focaccia should be golden brown on top and have pulled away slightly from the sides of the pan. If you slide a spatula under it (gently!) it should lift in one piece and the bottom should look dark golden brown and crispy.

Immediately after removing the focaccia from the oven, run a knife around the edges of the pan, just in case any small bits got stuck. Then drizzle another 1 tablespoon of olive oil over the top to finish.
Let the focaccia cool in the pan for 5-10 minutes, then slide it onto a wire rack to cool completely so the bottom doesn't get soggy.
👩🏻🍳 Practical Tips & Recipe Notes
- The temperature of your kitchen can have a dramatic effect on how quickly or slowly your overnight focaccia rises. An "ideal" room temperature is around 70°-72°F. If your kitchen runs cool, your focaccia will likely take closer to 12 hours to rise. If your kitchen is warm, it will be ready closer to 8 hours after you put it in the pan.
- For a spicy finish, use chili oil instead of olive oil when topping the focaccia. Just be careful to wash your hands right after if you use it to dimple — you don't want the capsaicin to get stuck under your fingernails.
- Don't over-dimple! I know, it's super fun and is tempting to really go HAM on this thing. But you don't want to knock all the air out of it, either.
- Focaccia is best served immediately, or within 12 hours of baking. After 12 hours the salt will start to dissolve and absorb into the dough, and the bread will start to dry out and become oily. You can still eat it, it's not harmful, but it won't look as good as it did on that first day.
- For an extra crisp bottom: Pre-heat a baking steel or baking stone in the oven and slide the sheet pan right onto the steel to bake!
- Cold proofing in the fridge: The nice thing about a fridge rise is that it happens so slowly you have a nice long window of time in which your focaccia will be ready to bake. The longest I'd say you can leave it in the fridge before baking is about 48 hours. It's hard to put a specific time to how long it will need to continue proofing at room temperature once you take it out of the fridge though, so you'll just have to use your eyes. When it fills the pan and looks quite bubbly and airy, you're ready to start dimpling and topping.

9x13" Rectangular Baking Pan
Dimensions: 9 x 13 x 2.25 inches. A high-sided rectangular metal baking pan with a durable, environmentally friendly non-stick coating. Particularly appreciated for its precise 90° corners and edges. Max temperature: 450°F.


💭 Just remember...
Relax and enjoy the process! Focaccia is a low-effort bread that is very hard to mess up. Time will do most of the work for you. Don't agonize over it too much. If your focaccia looks ready to bake, get dimpling! If it looks like it needs more time, give it more time to rise. You got this!
📖 Recipe

Overnight Focaccia
Ingredients
- 480 grams all-purpose flour
- 14 grams sugar
- 10 grams diamond crystal kosher salt
- 2 grams instant yeast (⅔ teaspoon)
- 390 grams warm water (90°F)
- 40 grams olive oil
For topping
- 3 tablespoons olive oil (divided)
- 1 sprig fresh rosemary
- 1 teaspoon flaky sea salt
- ¼ teaspoon freshly cracked black pepper
- 1 tablespoon everything bagel seasoning blend (optional)
Instructions
- Combine flour, sugar, salt, and yeast in a large mixing bowl. Pour warm water and olive oil directly into the center of the dry ingredients. Mix with a dough whisk or spatula until completely combined. The dough will be sticky and very messy. With a damp hand grab a corner of the dough and stretch it over itself. Rotate the bowl and repeat to gather the dough in a loose ball in the center. Cover and rest 5 minutes.
- Dampen your hands and repeat the folding process, grabbing a corner of the dough, stretching it away and then down over the center of the dough. Rotate the bowl and repeat with each side of the dough.Cover and rest 15 minutes.
- While the dough rests, spray a 9x13" high-sided baking pan with non-stick spray, making sure to get the sides too. Drizzle 1 tablespoon oil in the center, and tilt the pan to spread the oil out.
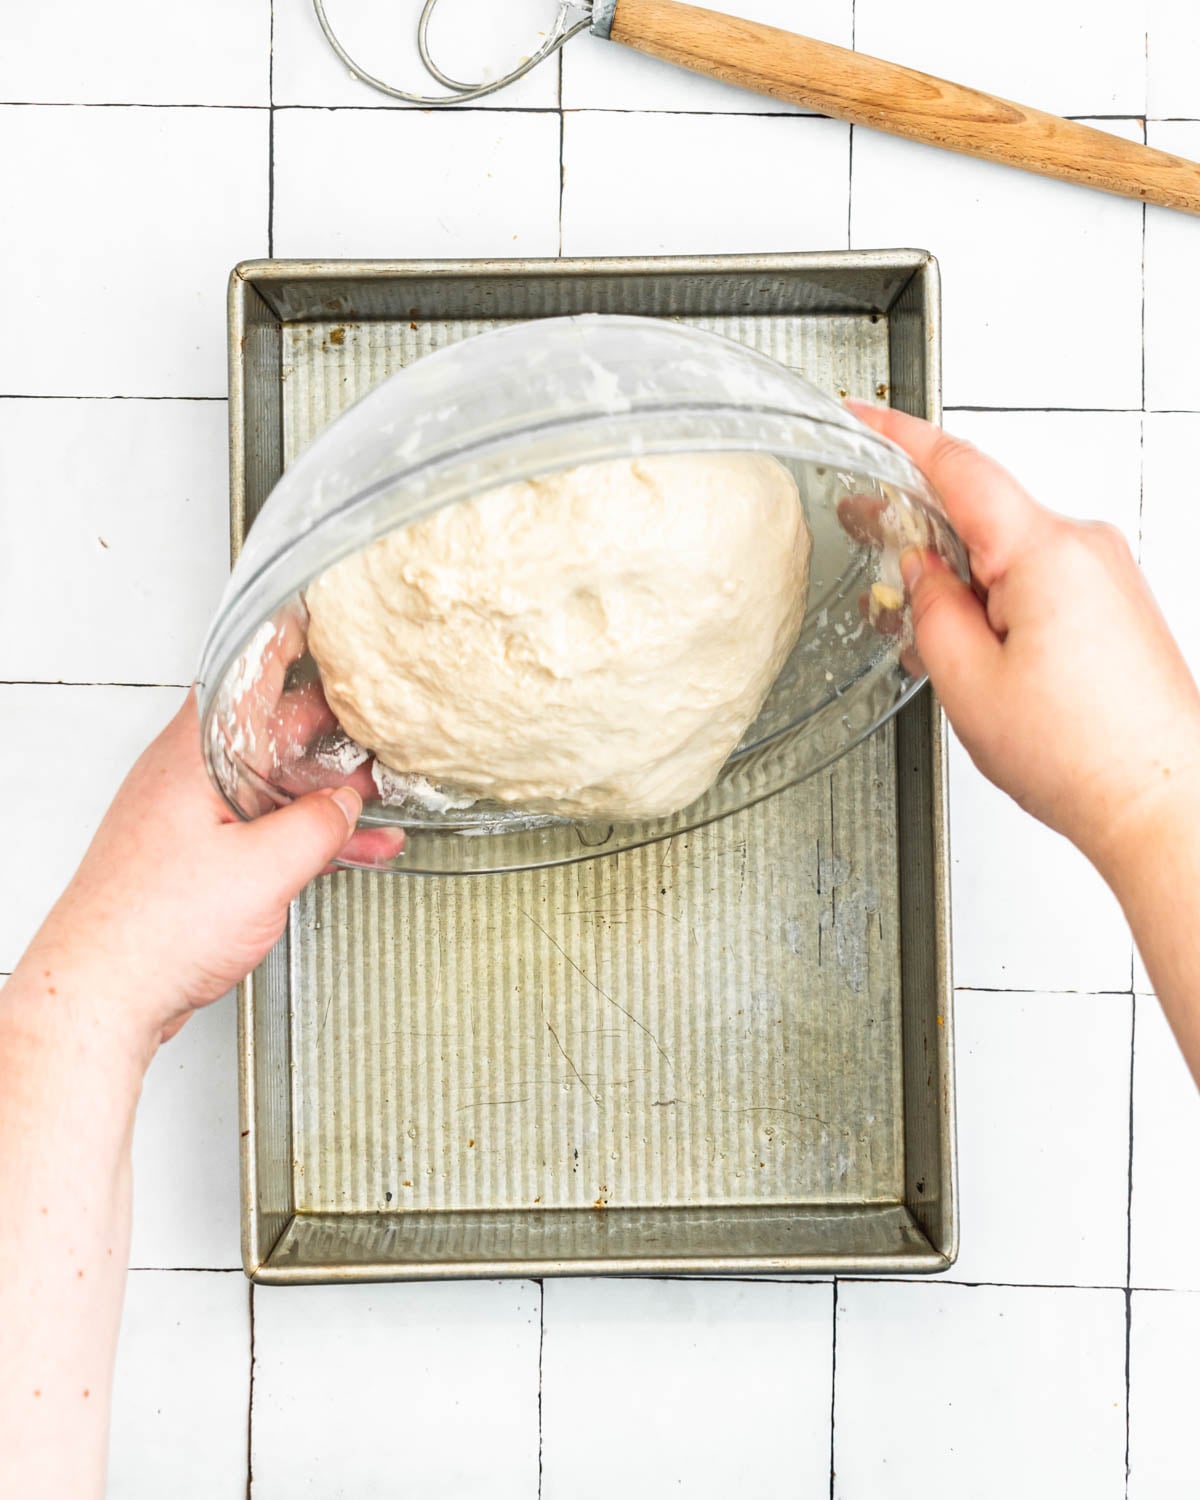
- Repeat the folding process one more time. The dough should be much smoother, stronger, and stretchier this time. On the final fold, flip the dough over so the seam side is down. Then slide the folded dough out of the bowl and into the oiled baking pan.Cover and rest 8-12 hours at room temperature.
- An hour before you plan to bake the focaccia, preheat the oven to 400°F. The focaccia should have relaxed and filled out the pan and look bubbly and jiggle slightly if you shake the pan. If it hasn't filled out the pan, use oiled fingers to gently lift and stretch the dough into the corners. Cover and place the pan on top of the stove while the oven preheats. The ambient warmth will give the yeast one last boost before baking.
- 30 minutes before baking, top and dimple the focaccia. Drizzle 2 tablespoons olive oil over the surface of the focaccia. Use your fingers to gently rub it around, then poke your fingers straight down until they hit the bottom of the pan. Repeat this all over the dough. Don't overdo it — you don't want to knock all the air out! Finish with fresh rosemary, herbs, freshly cracked black pepper, and a sprinkle of flaky sea salt. Cover and let rise until ready to bake.
- Bake. Bake the focaccia for 20-25 minutes until golden brown on top. If it browns unevenly, rotate the pan after 20 minutes and bake a few minutes more. Remove from the oven and immediately drizzle with 1 tablespoon olive oil. Let cool in the pan 5-10 minutes, then remove to a cooling rack. Cool completely (or almost completely) before serving.
RECIPE NOTES
- Focaccia is best served same day, but if you do need to save it for later you can always freeze it.
- To freeze: Cool completely, then wrap well and freeze. You can freeze it as one big piece, but I recommend freezing it in thinner slices or squares (wrapped individually, then stored in a large freezer bag). Defrost on your counter, then reheat in a 375°F oven until warmed through.


Leann says
I LOVE this focaccia. I’ve made it several times now and it’s fantastic. It’s super easy to make and it’s really nice to not have to knead or use too many bowls. I love being able to mix it up with new toppings (sea salt + pepper, garlic oil + basil, mushrooms + Parmesan, etc). Even though it makes a TON of focaccia for only two people, it never seems to last long in our house…
Beth says
This was by far the best pay off I have ever had from a bread recipe. 15 minutes of hands on work plus rise time and you have perfect focaccia for sandwiches for dinner. This will be in a weekly rotation for super easy dinners.
Paul says
So delicious. Usually make ours with some cherry tomatoes, roasted garlic and fresh rosemary with a sprinkle of parmesean cheese. Makes a great base for a thick crust pizza, too!
Steven says
Yes, I made this recipe and I am glad I did 🙂 I was short on time and found this recipe online and decided to give it a try. The results mirrored the recipe, yum! We served it as part of our appetizers. It was a hit. Thank you for allowing others to print and enjoy your recipe!
Laura says
I. am. OBSESSED. I’ve made this recipe 3 times this week and shared it with friends. It’s SO GOOD and SO EASY for me to make. Will definitely make this often and really excited that I can freeze it too if needed.
Lily says
I don't often bother to comment on recipes but I have to. Everyone need to try this. I made it with about a third of the flour weight in bread flour and added nutritional yeast to the topping. I think mine was rising for around 9.5-10 hours and it needed the full 25 minutes.
Literal perfection. I'm blown away. Highly recommend. Shared with everyone.
Marina says
Can I make this with out the kitchen scale ? Is the conversion different to cups with liquid vs dry ingrediantsw ? Thanks !
Rebecca Eisenberg says
You can't really convert it from weight to volume (cups) measurements because not all cups are made accurately to the same size, and depending on how tightly or loosely you scoop your flour you could end up with the wrong amount and the recipe will not turn out right. A kitchen scale is very affordable and will make you a much better baker! I recommend getting one.
hanna says
made this recipe for my friends and i to get together before our final exams and they called me a goddess of bread hahahahaha !!!!! literally this recipe is sooooo wonderful and clutch , im so happy to have found your work <3 !!!!!!!! i like to add tomatoes and italian seasoning ( like the literal italian seasoning shakers with basil and oregano and whatever hahahaha ) and it looks soooo impressive 😀 very easy to prepare esrly in the morning and serve later in the evening ^_^ !! thank you 😀
Rebecca Eisenberg says
Love this for you!!!
Anne says
Brilliant recipe!
Hannah says
I decided to try a family sized focaccia after countless mini focaccias. I thought I’d completely ruined it when I let it overproof, but it still came out delicious! I will definitely make this again and play around with toppings.
Things I love about this recipe:
1. The simple ingredients are always in my pantry, so I can make it whenever it strikes my fancy.
2. The way the dough sets up between sets of folds is like magic. I will never not be amazed.
3. The long proofing time allows you to stray from the kitchen for a few hours.
4. The resulting bread, of course. I’ve fooled my family into believing I’m skilled in the kitchen, when really, this is just a great recipe.
Angela Eaton says
I only have a toaster oven right now, do you think this would work if I use only half of all the ingredients?
Rebecca Eisenberg says
Hard to say without knowing the size of your toaster oven, but a half batch fits perfectly in an 8x8 or 9x9” square pan.
Angie Eaton says
Ty both those pans will work
Molly Ivins says
This is a tried and true recipe for me! Today I even made a double batch and it did great. If you follow Rebecca’s steps to a T this is a fail safe way for same day focaccia. Can’t stop and won’t stop using this to impress my friends and family!
Sam says
This was even easier than I imagined. I loved how this didn't bother my back and was simple to do on the weekend. We loved how soft it was and it froze well too for garlic bread.
JR says
Why did my dough in the morning have a crusty top
Rebecca Eisenberg says
It means you didn’t cover it well enough and some air got in and dried it out.
Michelle says
Absolutely love this recipe! In the future, if I only had active dry yeast on hand and not instant yeast, could I use that or would I need to make any adjustments to the measurements, similar to the loaf-pan focaccia?
Rebecca Eisenberg says
In this recipe active dry would be fine because of the long rise time. Active dry yeast and instant yeast are the same thing, active dry just has a little shell around the yeast granules that needs to dissolve before the yeast can start working. In a recipe with a shorter rise time like the loaf pan focaccia, it can help to increase the amount of active dry yeast and bloom it in water before adding to the dough so that the shell dissolves and the yeast can get to work asap. But in a recipe with a long rise time, you *can* do all of that if you want, but the long rise time means the shell will have plenty of time to dissolve for the yeast to start working without making any changes. Hope that helps!
Desp says
Made it twice but today it fell apart when I transfered it to the cooling rack. Any thoughts? Thanks
Rebecca Eisenberg says
That's always a bit of a risk transferring it out of the pan for sure, it happens to me still sometimes too. One thing you can try is just letting it cool in the pan a bit longer before you transfer it. The other option is to line the pan with a parchment paper sling before you add the oil and put the dough down. I don't always like using parchment paper with focaccia because I find it sometimes makes it harder for the bottom to get a crisp as I like, but the paper sling will help you lift it cleanly out of the pan!
Despina Nikandrou says
Thank you for your helpful reply. I can look into paper slings but not sure if they sell big enough ones in the uk. Do you think baking it for five more minutes would have helped?
Rebecca Eisenberg says
That may help! To make a parchment sling just take a sheet of parchment paper and use it to line the pan so that there’s a little overhang on each side. You should be able to cut it to size yourself!
Tre says
Does it mean I over proofed it if there's bubbles before I dimple it? And when I do dimple it, it loses alot of the rise it had. I left it in the fridge over night, pulled it out in the morning and let it rise for 7 hours at around 70-75 degrees. It still came out amazing and made a delicious pizza! Made another batch tonight! 10 out of 10
Rebecca Eisenberg says
It doesn't mean it's overproofed if there's lots of bubbles before you dimple it, but if you dimple it and it feels like it deflates completely that is a sign that it has overproofed. Is it possible your house is quite warm? That would make it rise much faster at room temperature. Luckily Focaccia is pretty resilient — even if it's overproofed it's still delicious!
Corinna says
Hi! Planning on trying this out tomorrow night 🙂 Just a question about the oven setting, do you use the fan (convection) or the upper and lower heat (translated from the german Ober- Unterhitze) setting?
Thanks!
Rebecca Eisenberg says
I don't use the convection setting! I'm not sure what the upper and lower heat settings are but if that just means its a normal oven, that's the setting to use!
Eva says
this recipe calls for 2 grams of yeast, but the mini calls for 3 grams. Am I missing something? Because this recipe didn't work at all.
Rebecca Eisenberg says
The mini calls for more yeast because it’s a faster recipe. It’s designed to be done in a few hours. This recipe is an overnight recipe so uses less yeast as there is more time for the yeast to work and for the dough to develop. I’m sorry it didn’t work for you — did you try to do it following the instructions for the mini focaccia? Or did you follow the instructions provided here?
Eva says
Thanks for the reply! I made it as directed here, weighed everything, and it rose a little bit, but was pretty flat and dense when I cooked it. I didn't leave it over night, but gave it 9 hours on the counter, so maybe that wasn't enough time? I've only ever made a couple of breads, but I'll give it a try again and let you know!
Kerri Whittemore says
If I wanted to add olives to this, when would I do that?
Nana Laura says
I would add them just before baking.
Rebecca Eisenberg says
I recommend adding a heavier topping like olives halfway through the final one-hour rise to give them time to settle into the dough. The dough will rise again after you dimple it, and you want it to surround your toppings so they stay on after it bakes. If you added them right before baking that would be fine too, but I prefer giving them some time to settle in.
Corinna says
Fantastic recipe! Have made this several times now and it is always a hit!
Rebecca Eisenberg says
Love to hear that! Happy baking!
Kate says
Made this on Monday night and enjoyed it on Tuesday. Delicious!
Molly Ivins says
This recipe WILL come out perfect as long as you follow the instructions! Yes, the water temperature does matter. I have made this multiple times. I suggest making 2 loaves at once because it never last long around our house. Thank you for teaching me how to make something I never thought I could do!!
Kasey says
Thank you, Thank you, Thank you! This recipe just won me 1st PRIZE in the KING ARTHUR FLOUR BAKING CONTEST at the Sheboygan County Fair in Wisconsin this weekend! I made this recipe ALONG with Samin's recipe. Both taste spectacular, but I knew that the height and sponginess were the texture that I figured the judge was looking for. There were 13 entries and most of them made a roasted vegetable garden mosaic on theirs, I was going to but opted not to. that was the right decision as the others got soggy on top from the veggies. Also, she read our recipes and mine was the only one with the proper lift, stretch, fold technique. wish I could add a picture.
Rebecca Eisenberg says
Congrats on your big win!!! I'm so happy for you! 🙂
Jessica Haleudeth says
I’ve made this 5 times now and it’s the only Foccacia to truly come out 3.5 inches tall and perfectly oily just like my favorite restaurant does! The instructions also ensure perfection every time if followed correctly and it freezes perfectly and thaw from frozen at 200 and it’s good as new!
brandi b. says
Stellar recipe! This was my first time making focaccia. I followed the recipe exactly with terrific results! It was so fun to make and I can’t wait to make it again! I brought this first batch to a work lunch today and I got so many compliments and requests to share the recipe (so of course I did!!). It’s clear that a lot of love and care went into writing, researching and testing this recipe - thank you!!
Issy says
Amazing bread. I top it with pizza ingredients and my girls and husband love it! Thank you.
Shelby says
My love for this bread recipe knows no bounds. I made this once to try it out, loved it, and made it for five weeks in a row after the initial try. I made two loaves as an appetizer for Thanksgiving for my family to have with bread dip and they all said "this doesn't need any dip" and proceeded to devour the two loaves. And then after THAT I made my entire family loaves of this for Christmas. What I'm trying to say here is: if you're thinking about trying this recipe, do it. It's literally SO easy; like easy enough it feels like you're cheating at bread a bit, like the amount of work you put into this should not have delivered you with this fluffy, beautiful piece of heaven. A little recommendation if you do make this tasty tasty bread: add thinly sliced garlic cloves to the top!! It will taste as good as it smells when it bakes, I promise!
Rebecca Eisenberg says
SHELBY!! I love this so much for you and your family! There is no such thing as cheating at bread, the truth is bread is often just a lot simpler to make than most people expect! I'm so glad you enjoy this as much as you do, I love the idea of giving it as gifts, and I REALLY love the tip to put thinly sliced garlic cloves on top. Garlic + focaccia = *heart eyes forever* <3
Kalene says
LOVE this recipe. It comes out perfect every time. Using a scale has changed my baking! I started with the 1 cup focaccia to see how it went (perfect!) and then scaled up to this one. Have made it probably 5 times in the last two weeks. If we have any leftovers after dinner we make breakfast sandwiches! I’ve made this plain (no toppings) and fully loaded for breakfast (sausage, potatoes, egg, cheese, peppers) and it comes out great every time!
Rebecca Eisenberg says
Yum!!! That sounds so good, and I love all those toppings! Thanks for being part of Team Kitchen Scale! Happy baking ~R
Gloria Denise says
When you say to cover the focaccia pan, is it with a dish towel or plastic?
Rebecca Eisenberg says
I recommend plastic for this since it's such a long rise! If you use something that allows air through like a towel the focaccia might dry out on top.
Stephanie says
I’ve made this several times and love it! I really appreciate how well written the instructions are so I always feel confident in what I’m doing. I also highly recommend using the oil from a sun dried tomatoes jar if you didn’t check how much olive oil you have left before starting the recipe lol. It tasted amazing!
Lisa says
I've made this focaccia twice, and both times the bread has been perfect. The recipe is spot on. Thanks again for another great recipe! Btw ... I topped mine with fresh garlic, finely minced, chopped rosemary, and after sprinkling of kosher salt ... delicious! Next time, I plan to try some sun-dried tomatoes as well.
Dan Donovan says
About the fifth time I’ve made this now. I pretty much just follow the recipe as written since the results are so dang good.
Julie Worrell says
Hu. I’ve made the mini pan focaccia and it’s fab. I was wanting to go larger and wondered why this recipe has so much less yeast than the mini focaccia sized up x 3? Thanks
Rebecca Eisenberg says
The amount of yeast affects how fast a dough rises. This is a no-knead focaccia that uses a long rise time to develop strength and structure. The smaller one is designed to be done faster so it has more yeast in it to help encourage that faster rise time.
Julie Worrell says
Thanks so much, that’s really helpful. I love all your bread recipes but usually just make the mini versions which always turn out perfectly! X