
Embark on a chocolate cookies 'n cream dessert adventure with this towering, fun Oreo pound cake baked in a bundt pan!
This dramatic black and white pound cake combines the deep midnight intensity of black cocoa powder, bloomed in milk and mixed with sour cream for an extra moist, tender cake crumb. But here's the twist – hidden inside is a layer of whole Oreo cookies, adding an unexpected crunch to every bite.
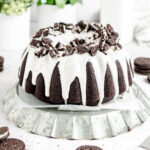
To top it all off, this Oreo bundt cake is finished with a thick vanilla icing and crowned with even more crushed Oreos. Because decorating cakes doesn't have to be hard!

This Oreo pound cake is truly excellent on its own, but it's even better served with a scoop of cookies n' cream ice cream or a cold glass of milk to wash it down.
For other easy dessert recipes that use black cocoa powder, check out my black cocoa crinkle cookies and my chocolate m&m cookies!
About This Recipe
This black cocoa bundt cake is a riff on my classic chocolate pound cake recipe, which bakes in a loaf pan and has a simple powdered sugar topping.
I scaled that recipe up to fill a 10-cup bundt pan and subbed a majority of the natural unsweetened cocoa powder for black cocoa powder, aka the cocoa powder used in Oreo cookies.
Black cocoa has an intense yet mellow chocolate flavor, so I didn't replace all of the regular unsweetened cocoa powder in the recipe. The black cocoa brings the intensity, while the unsweetened cocoa powder serves up an undeniably rich chocolate flavor without being overly sweet.
Black cocoa powder is an ultra dutch processed cocoa powder which has a higher fat content than unsweetened cocoa powder, adding even more moisture to this chocolate cake.

I tested a few different ways to mix Oreo cookies into this Oreo bundt cake, but ultimately settled on a hidden ring of cookies around the middle. It's such a dramatic visual when you cut a slice of cake and see that crisp, clean white line of Oreo cookie filling!
If you really want to up the amount of Oreos in the cake, you can certainly do two or even three layers of cookies inside!
Ingredient Notes
Here are the ingredients that you'll need to make this Oreo bundt cake recipe! See recipe card for quantities.

- Unsalted Butter - This recipe uses unsalted American-style butter (e.g. not European butter like Kerrygold). If using a salted butter, cut the amount of salt in the recipe in half. You'll also need about a tablespoon of butter for the Oreo cream icing drizzle.
- Sugar - Plain old regular granulated white sugar. Nothing fancy here!
- Brown sugar - I use dark brown sugar which has more molasses in it for extra flavor and moisture, but light brown sugar will also work.
- Eggs - This recipe uses large eggs, which weigh about 48 grams per egg. If you use another size egg, this will affect the outcome of the cake!
- Whole Milk - For blooming the cocoa powder. The fat in whole milk adds a lot of moisture to this cake. Skim or low-fat milk will give you a much drier cake. You'll also need whole milk to make the icing; skim or low-fat milk will make the icing watery.
- Black Cocoa Powder - Black cocoa powder is CRUCIAL for making anything taste like Oreos and give it that deep midnight black color. Black cocoa powder is not the same as dark cocoa powder. While you can use other cocoa powders in this recipe, for true Oreo flavor, you need a true black cocoa powder. If your grocery store doesn't have it in stock (and it's likely they don't), I recommend King Arthur Baking's Black Cocoa Powder which you can order online.
- Unsweetened Cocoa Powder - This recipe uses a small amount of unsweetened natural cocoa powder like the classic box of Hershey's you can find in most grocery stores. This adds a bit of sweeter chocolate flavor to balance out the intensity of the black cocoa powder.
- Vanilla - I usually use vanilla bean paste because it has a more intense vanilla flavor, but regular vanilla extract will work just fine here too.
- Sour Cream - Full fat sour cream works best — you really need the fat content to make the chocolate cake tender and moist. You won't get the same results with low fat options.
- Flour - Regular all purpose flour. Gluten free cup-for-cup all purpose flours should also work, but I haven't personally tested them.
- Salt - I use Diamond Crystal Kosher Salt which half as salty as other brands. If measuring by weight, it doesn't matter what brand of salt you use. But if you're measuring by volume and using a different brand of salt, even a different brand of kosher salt, cut the amount of salt in half.
- Baking Powder - This helps the cake rise. The air whipped into the butter by the sugar will provide a lot of the cake's rise, but since we're adding quite a bit of liquids and fats to this cake, adding baking powder will help ensure the cake rises nicely in the oven.
- Powdered Sugar - Also called "confectioner's sugar" this is needed only for making the Oreo vanilla cream icing that goes on top of the cake.
- Oreo Cookies - I'm partial to the "Double Stuf" Oreo cookies, but you can use regular Oreos, "Mega Stuf" Oreos, or generic brand chocolate sandwich cookies here too! You can even use fun flavored Oreo cookies if you want!
🍽 Mise en place (aka "the setup")
Mise en place is a French culinary term that literally translates to "putting in place."
It basically means: Measure all your ingredients and make sure you have all the right tools and equipment ready to go when you need them before you start working.
This can make a huge difference in a) how enjoyable you find the baking and cooking process and b) the success of your recipe!
Here's the mise en place you'll need before you begin this recipe:
- Bring the butter to room temperature. Let the butter sit out at room temperature (70°F) for an hour or two prior to baking. If you're short on time, microwave the wrapped sticks of cold butter for about 4 seconds per side. The butter should still feel slightly cool to the touch but and soft enough to press a finger into, but not so soft that it's greasy or melty — an internal temperature of 65°F.
- Bring the eggs to room temperature. Submerge the eggs in hot water for about 10-15 minutes. Cold eggs will cool down the butter, causing the batter to break and separate, making it harder for the cake to rise.
- Mix the dry ingredients together (NOT including cocoa powder and sugar). Whisk the flour, baking powder, and salt together in a bowl. I like using a tall 32 oz deli container because it's easier to pour from.
- Sift the cocoa powders. I wouldn't tell you to sift something if it wasn't important. Cocoa powder is naturally very lumpy and if you don't sift it, those lumps will end up in your final cake no matter how much you whisk them. Sift. The. Cocoa. Powders.

Bloom the Cocoa Powder
Blooming the cocoa powders helps intensify the chocolate flavor. It's a simple but super important step in this Oreo bundt cake recipe, since black cocoa has a relatively mild chocolate flavor. We want it to be at its best!
To scald milk, swirl the milk in the pot over low-medium heat until small bubbles form around the edges; when you tilt the pan you should see lots of tiny active bubbles on the bottom of the pot.

Turn off the heat and add the sifted cocoa powders all at once, whisking until you don't see any dry bits.

Then whisk in the sour cream until well combined and set it aside to cool until we need it later.
Do this step first so the bloomed chocolate mixture can cool slightly — you don't want the heat to scramble the eggs or melt the butter in the cake batter!
Instructions - Black Cocoa Cake Batter
Since this is basically the same cake batter process as I used in my chocolate pound cake recipe, I'm going to keep this part brief. I recommend popping over to that recipe post to read more about it and see the visual step-by-step in detail! (I've also got some ingredient substitutions in that post, in case you need them.)
This Oreo bundt cake recipe uses the Creaming Method of mixing which is characterized by the use of a solid, soft, room temperature fat (butter) that is aerated with sugar to provide lift to the cake.
There's basically three steps to this process:
- Cream the butter and sugars together until aerated. This step is super important! Be patient and make sure you pause to scrape down the bowl and beater at least 3 times. When properly aerated, the mixture will be light brown and look creamy and fluffy. If you rub it between your fingers the sugar granules should be almost dissolved but still feel slightly gritty.
- Add the room temperature eggs one at a time, giving each one plenty of time (at least 60 seconds) to incorporate. Scrape down the bowl before and after adding each one. Add the vanilla along with the final egg.
- On the lowest possible speed, alternate adding the remaining dry ingredients and wet ingredients (the bloomed cocoa powder), mixing just until combined. Finish mixing the batter by hand, scraping down the bowl one final time to get everything incorporated.
When it comes to aerating the butter and sugars together, it can take 3-5 minutes, sometimes even 7 minutes for the butter and sugar to reach the right texture, depending on how soft the butter was at the start.
This is what the butter and sugars will look like when they're properly creamed:

Scrape down then bowl, then add the eggs one at a time, beating for about 45-60 seconds after each one to give them time to fully incorporate. Scrape down the bowl and beater before adding the next egg.
Finally, on lowest speed, alternate adding the dry ingredients (the flour, baking powder, and salt) and the wet ingredients (the bloomed cocoa mixture). Start with the flour and end with the flour.
It's not as complicated as it sounds. You're basically adding flour --> chocolate --> flour --> chocolate --> flour. Mix on the lowest speed, stop when they're just barely combined, and pause between additions to scrape down the bowl and beater as needed.

Alternating adding the dry and wet ingredients on low speed and pausing to scrape down the bowl between additions is super important to help prevent over mixing.
Over mixing encourages the flour to begin forming a strong gluten network which will make the cake dense and tough.
When the last batch of dry ingredients has been added and just a few streaks of flour in the batter and the walls of the bowl remain, switch to a spatula to finish mixing.

This also helps you avoid over mixing your cake batter so it stays nice and tender when it bakes. Scrape to the very bottom of the bowl to make sure there's nothing hiding that still needs to be mixed in.
You'll end up with a luscious, glossy dark brown chocolate cake batter that has a silky texture almost like a thick brownie batter. It's honestly one of the most beautiful cake batters I've ever made.
Baking in a Bundt Pan
Generously spray a 10-cup non-stick bundt pan with non-stick spray over the sink so you don't get any on the floor (seriously, you do not want to slip on a rogue patch of non-stick spray).
To help the cake release cleanly after baking, spray from about 7-10 inches away for a nice even coating inside, and make sure you rotate the pan so it hits from multiple angles.
Get the non-stick spray on all the walls and nooks and crannies of the bundt pan and up the column in the middle.
At the same time, you don't want the non-stick spray pooling at the bottom of the bundt pan. A little bit is fine, but if you have a lot collecting at the bottom, use a paper towel to gently dab some of the excess away.

Dollop the chocolate cake batter into the bundt pan until it's approximately halfway full.
Then use a spatula to press it down into all the edges of the pan, making sure there's no air bubbles trapped inside and you have an even layer of batter.

Arrange Oreos in an even layer across the cake batter, as close to each other as you can so there's Oreo in every cake slice.
You may have to get creative with your Oreo configuration based on the shape of your bundt pan, but I can usually fit 8 side by side all the way around.
Scoop the rest of the chocolate cake batter into the pan and even it out again. This step is crucial for ensuring your Oreo bundt cake isn't lopsided when it comes out of the pan.
The cake batter doesn't need a perfectly flat surface, you just want to make sure it's distributed evenly all the way around the pan.
Also, honestly? Swirling the cake batter around to even it out and make sure that it's pressed into all the funky scalloped edges of the bundt pan is just really fun.

Bake the Oreo bundt cake at 350°F for 60-65 minutes, until a toothpick or small knife inserted into the center comes out with just a few crumbs (not wet batter) clinging to it.
Checking For Doneness: It's hard to tell when a chocolate cake is done because you can't see any browning. Checking for a few crumbs on the cake tester is the best way to know. If you're using an instant read thermometer, you're looking for a temperature of 190°-200°F.
Even with all the sour cream and milk we've added to this black cocoa cake for extra moisture, you really don't want to over bake it or it will come out dry.
Some carryover cooking will happen as the cake rests in the pan after it comes out of the oven, so err on the side of pulling it a couple minutes too soon if you're not sure.
Let the cake cool in the pan on a rack for about 10-15 minutes. Then it's time for the step everyone dreads — turning the cake out of the pan. Take a deep breath. You got this!

Place the cooling rack over the pan. Grab the pan on both sides, holding the rack in place.
Hold your breath, cross your toes, pray to the baking gods, assume your best power stance, and quickly and confidently flip it over.

The big reveal! Carefully lift the cake pan off the cake.
If all has gone well and your non-stick spray has done its job, the cake pan will release cleanly from the bundt cake without any sort of power struggle. Hooray!
If you don't have oven mitts you trust, place a kitchen towel under the bundt pan and pull the ends taught at the sides of the cooling rack so the towel holds the pan in place as you flip it.
If the cake doesn't come out of the cake pan on the first try, flip it back over and drape a lightly damp towel over the mouth of the pan. The steam should help it release from the pan.
Let the Oreo bundt cake cool completely on the rack before icing. If the cake is even slightly warm, the icing will melt right off, so give your cake plenty of time to cool!

The bottom of the cake will always be slightly curved, but as the warm cake cools, gravity will pull it down and flatten out the bottom slightly.
Vanilla Cream Oreo Bundt Cake Icing
To make the Oreo cake icing, start by sifting the powdered sugar (again, you can't whisk out lumps and clumps no matter how hard you try). Then whisk in 1 tablespoon melted butter, 1 teaspoon vanilla extract, and 4 teaspoons whole milk. (This is actually the same icing I use on top of my gooey cinnamon rolls!)
Depending on the brand of powdered sugar you have, what type of milk you're using (on the honor system, I'm assuming you're using whole milk as instructed), and how precisely you measured the butter and vanilla, the amount of milk you need can change dramatically.
After the initial 2 teaspoons of milk, add the milk 1 teaspoon or ½ teaspoon at a time, whisking it in well before adding more.

You're looking for a fairly thick icing. It shouldn't be runny, and it should move slowly in the bowl. If you lift the whisk up, it will very slowly drip off and may not even drip all the way back into the bowl.
If the icing is too runny or wet, whisk in more powdered sugar 1 tablespoon at a time until it thickens up.
The melted butter will help the icing firm up as it cools, giving it that Oreo creme-like consistency.
At first, the icing will look light brown due to the vanilla extract, but it will be white once it dries.

Transfer the icing into a piping bag (or a plastic bag with the corner snipped off) and pipe a thick zig-zag around the top of the cake.
Focus more on getting the icing to drip down the outside of the cake in the grooves of the fluted bundt pan pattern so you don't waste a lot pooling in the middle.
NOTE: The chocolate bundt cake must be completely cool before you add the Oreo icing or it will melt off of the cake.
Before the icing dries, top it with chopped Oreo pieces so that they stick in place. Voila! That's your Oreo bundt cake, done.

Use a 10-Cup Bundt Pan
This Oreo cake recipe is designed for a 10-cup bundt pan. A larger bundt pan will also work but the cake may not be as tall. For best results, I recommend using a non-stick bundt pan from a reputable brand like Nordic Ware or USA Pan.
A wire cooling rack will help the cake cool faster, so you can ice it sooner. Icing the cake while it's on a cooling rack inside a sheet pan will also allow any excess icing to drip off without pooling around the bottom of the cake.

Nordic Ware 10 Cup Elegant Party Bundt Pan
A 10-cup elegantly scalloped cast aluminum bundt pan with a gold finish. The inside has a silicon nonstick coating free of PFAS and PTFE that is easy to grease so that your cakes release cleanly.

Practical Tips and Recipe Notes
- For Oreo cookies mixed into the dough instead of just in the middle, cut the cookies into halves or quarters and stir them in when you finish mixing the cake batter by hand. If you cut the cookies smaller than that, they will melt and blend into the cake when it bakes and you won't really notice they're there at all.
- If the cake mixture begins to look split or curdled as you're adding the eggs, don't sweat it too much. It will come back together when you add the flour.
- When in doubt, SCRAPE DOWN THE BOWL. If it feels like you're stopping too often to scrape down the bowl, that means you're doing it right. You don't want any ingredients to go unincorporated or you'll end up with large air bubbles or clumps in your final cake.
- Mixing the dry ingredients on the lowest possible speed and stopping as soon as they're all combined is super important. The goal is to avoid developing gluten in the cake batter, which would make your old fashioned vanilla pound cake dense and tough, with lots of trapped tunnels of air bubbles inside.
- When adding icing to this bundt cake, you'll want to have the cake either on a cooling rack so any excess icing can drip through, or place it on a cake board, or whatever platter you plan to serve it on so the drips can be part of the overall look. Once you add the icing, you definitely don't want to be moving the cake around too much!
- To bake this cake in a loaf pan instead, reduce the recipe by one third and reduce the bake time by about 5-10 minutes.
💭 Have More Baking Questions?
I've rounded up answers to common baking questions and how-to guides, including:
- Ingredient swaps and FAQs
- Why my recipes are written in grams and not cups
- How to quickly bring eggs and butter to room temperature
- Ingredients I use (salt, flour, yeast, etc.)
- Step-by-step guides for bread and baking techniques
See my baking techniques & troubleshooting guide and ingredient swaps and FAQs for more!
📖 Recipe
Chocolate Oreo Bundt Cake with Vanilla Cream Icing
Recipe Notes
- Pay close attention to the temperature cues given in the recipe — they're very important to how the final loaf turns out!
- If the icing is too thin and runny, whisk in more sifted powdered sugar 1 tablespoon at a time.
- The icing will look light brown at first, but will dry white in color.
- To mix Oreo cookie pieces into the dough instead of a line in the middle, cut the cookies into halves or quarters and stir them in when you finish mixing the cake batter by hand. If you cut the cookies too much smaller than that, they will melt and blend into the cake when it bakes and you won't really notice they're there at all.
- This Oreo pound cake can be stored at room temperature in an airtight container for 4-5 days. You can also refrigerate it in an airtight container for up to 2 weeks. The chopped Oreos on top will begin to go stale and absorb some moisture from the icing after about 24 hours.
- The cake can be made up to 3 days in advance. Wait to put the icing and chopped Oreos on until the day you plan to serve it.
- The cake can be frozen, icing and all, for up to 3 months. To freeze, cut the cake into quarters and wrap well in plastic wrap, then place inside a large plastic bag. Defrost in the fridge before serving.
Ingredients
- 340 grams unsalted butter (1½ cups, 65°F, softened)
- 337 grams sugar
- 75 grams dark brown sugar
- 3 large eggs (room temperature)
- 1 teaspoon vanilla bean paste (or vanilla extract)
- 279 grams all-purpose flour
- 1 teaspoon baking powder
- ¾ teaspoon diamond crystal kosher salt (use half as much of any other brand)
- 187 grams whole milk
- 40 grams black cocoa powder
- 20 grams unsweetened cocoa powder
- 75 grams full fat sour cream
- 8 oreo cookies
Toppings
- 130 grams powdered sugar (sifted)
- 1 tablespoon unsalted butter (melted)
- 4-6 teaspoons whole milk
- 1 teaspoon vanilla bean paste (or vanilla extract)
- 4 oreo cookies (chopped)
Instructions
- Mise en Place. Bring butter and eggs to room temperature (the butter should be cool but soft to the touch, not melty or greasy). Measure both sugars into one container. In another container, whisk together flour, baking powder, and salt and set aside. Sift cocoa powder. Grease a 10-cup bundt pan with non-stick spray. Set aside.
- Preheat oven to 350°F.
- Bloom cocoa powder. Scald milk in a small pot over low-medium heat on the stove, swirling the pot frequently until small bubbles form around the edges. When you tilt the pot there will be lots of active little bubbles on the bottom of the pot. You're aiming for a temperature of 170°-180°F. Do not boil the milk. Remove from heat and add the sifted cocoa powder all at once. Whisk well until no clumps remain, then add sour cream and whisk until smooth and combined. Set aside.
- Cream butter and sugar. Cut the butter into large chunks and place in the bowl of a stand mixer. Beat on medium speed to soften, about 1 minute. Scrape down the sides of the bowl and add both sugars. Beat on medium-low speed until there's no loose sugar in the bowl, then increase speed to medium and continue creaming for 3-7 minutes, pausing to scrape down the bowl and the beater at least 3 times. Properly creamed, the butter and sugar will be pale brown and have a fluffy, airy, and paste-like texture. Scrape down the sides of the bowl.
- Add eggs and vanilla. One at a time, crack an egg into a small bowl (to avoid getting shells in your cake!) then dump the egg into the mixer bowl, beating on medium speed for at least 60 seconds and scraping down the bowl again before adding the next egg. Add the vanilla along with the final egg. Scrape down the bowl and beater again at the end.
- Alternate adding dry and wet ingredients. With the mixer running on the lowest possible speed, alternate adding one third of the dry ingredients with one half of the wet ingredients, starting and ending with the dry ingredients (dry —> wet —> dry —> wet —> dry). Pause the mixer and scrape down the bowl and beater between each addition. Stop the mixer when the batter is mostly combined and just a few streaks of flour are visible. Use a spatula to mix in any final bits of dry ingredients from the sides of the bowl or beater, making sure to scrape and stir all the way to the bottom of the bowl where sneaky bits of butter and sugar may be hiding.
- Assemble. Spoon about half the batter into the greased bundt pan. Use a mini offset spatula to smooth out the batter, pressing it down into all the nooks and crannies of the pan so there aren't any trapped air pockets. Arrange a layer of whole Oreo cookies around the center of the pan, as close together as you can get them. Then spoon the remaining batter overtop and smooth it out into all the corners and creases of the pan. Tap the pan against the counter a few times to knock out any excess air bubbles.
- Bake. Place the bundt pan in the center of a 350°F oven for 60-65 minutes, until a toothpick or cake tester inserted in the center comes out with just a few crumbs clinging to it.
- Cool. Remove the pan to a cooling rack. Let cool 15-20 minutes, then invert the cake onto a cooling rack to finish cooling. Let cool completely before adding icing.
Icing & Topping
- Icing. Sift powdered sugar into a medum mixing bowl. Add melted butter, vanilla bean paste, and the lesser amount of whole milk. Whisk to combine. Slowly add additional milk 1 teaspoon or ½ teaspoon at a time, only as needed until you have a thick but fluid icing. The icing should fall slowly off of ithe whisk when you lift it out of the bowl and hold its shape for about 10-15 seconds seconds in the bowl before sinking into itself.
- Topping. Pipe or drizzle the icing around the top of the cake. Top the wet icing with chopped Oreo cookies, then sprinkle any remaining Oreo crumbs overtop. Allow the icing to set up for a few minutes before slicing.
Kerri Whittemore says
Do you think your vanilla pound cake recipe would work with this and golden Oreos?
Rebecca Eisenberg says
omg what a DREAM combo that would be! you’d likely have to scale it up by about 50% for the bundt pan, or you could hide golden oreos inside the pound cake! if you give it a try let me know how it turns out!
Jamie Charles says
Can I crumble the oreos in big chunks between the layers or does it need to be whole oreos?
Rebecca Eisenberg says
You can do that too! Keep the chunks pretty big though. When I tried it with chopped Oreo chunks they basically just melted into the cake and you couldn’t see them at all. Aim for like, quartered cookie pieces but I wouldn’t go smaller than that.
Eddie says
This is probably a silly question, but would this work in a regular cake pan?
Rebecca Eisenberg says
It will work, but you'll have to Google around to figure out the right the pan conversion yourself! I know if you scale the recipe down by 25% it will fit in a regular pound cake pan.
Christine says
What's the texture of the baked in Oreos? This looks deliciously moist - do the Oreos soften up like an ice box cake layer?
I can't wait to try this. Thanks!
Rebecca Eisenberg says
They soften up and blend in with the cake a lot but there's still a little bit of a crunch when you get to them!
Veronica Canilao says
Thank you for posting this recipe! I am excited to try it. Do you know how long I should bake this if I use a pan for 6 min bundts instead of a large Bundt pan?
Rebecca Eisenberg says
I haven't scaled it down to bake that way, so I'm not entirely sure! I would check after 25-30 minutes and then every 5-10 minutes after that until it's done!