
Learn how to make light, chewy homemade plain bagels with this easy recipe. Made with instant yeast and ready in under 3 hours, you’ll have warm-from-the-oven bagels on your countertop in no time — and ready for slathering with butter, cream cheese, and more. Once you know how to make your own homemade plain bagels, you’ll want to make them again and again (and again!).

5 star reader review
“These bagels came out so good! This felt pretty ambitious for me (I’ve tried making bread exactly twice with not a ton of success), but the gifs of how to shape the bagels were super helpful in making them come out amazing. I cannot wait to make these again!!”
—Leann
Is there anything better in the morning than freshly toasted bagels slathered in cream cheese? If you answered yes, then you must know that the correct answer is freshly toasted homemade bagels slathered in homemade cream cheese. Congrats, you win points.
But how hard is it to make homemade bagels, really?
The answer is VERY EASY. Like, SHOCKINGLY EASY.
Once you know how to make my quick and easy plain bagels, you'll make them over and over again because, while you know how secretly easy they are to make, your friends don't — and getting to bask in those impressed reactions? Priceless.
Soon you'll feel confident enough to try all my other easy bagel recipes with different bagel flavors and toppings. You can even take your bagel-making skills to the next level with my overnight New York-style bagel recipe, which uses more traditional ingredients and a different shaping technique.

Making bagels is what started my love of bread-making. You can draw a direct line from me learning how to make homemade bagels from a recipe I found on Tumblr back in 2014, to me going to pastry school in 2020, to you reading this blog post right now.
That very first bagel recipe I made was from the Sophisticated Gourmet and though the bagels I made were lumpy and misshapen, they tasted amazing. I was hooked. The more I made bagels, the prettier they became.
I've made my own adjustments to that recipe over the years to streamline and simplify the process wherever possible, finally landing on a version of this easy bagel recipe that is very much my own.
Also, even though homemade bagels are way easier to make if you have a stand mixer with a dough hook, I've made bagels many times without a mixer (I JUST LOVE HOMEMADE BAGELS THAT MUCH, OK?) and, while it requires a bit more upper-body strength for kneading, they turn out great that way too.
There are some recipes I'd go nowhere near if I couldn't use a mixer, and I would tell you if I didn't think they were worth doing without a mixer, but that's not this recipe. This easy bagel recipe is worth making, with or without a mixer.
To Make Bagels You Will Need...
Here are the ingredients you'll need to make your very own homemade plain bagels. See the recipe card at the end of this blog post for the quantities!

I use all-purpose flour to make my bagels, even though bagels are traditionally made with a high protein/high gluten bread flour. I use King Arthur Baking's all-purpose flour, which has a relatively high protein content for an all-purpose flour. If you're using another brand of flour (like a generic store-brand flour) you may have better results with their bread flour.
How to Make Homemade Bagels
To make the bagel dough, whisk all the dry ingredients together in the mixer bowl.

Start the mixer on low and let the dough hook do the work for you. Be patient.
At first, you're just mixing the dough. The goal is to get the ingredients to combine and collect on the dough hook. Then, once the dough comes together on the dough hook, increase the speed slightly and knead until the dough is smooth.
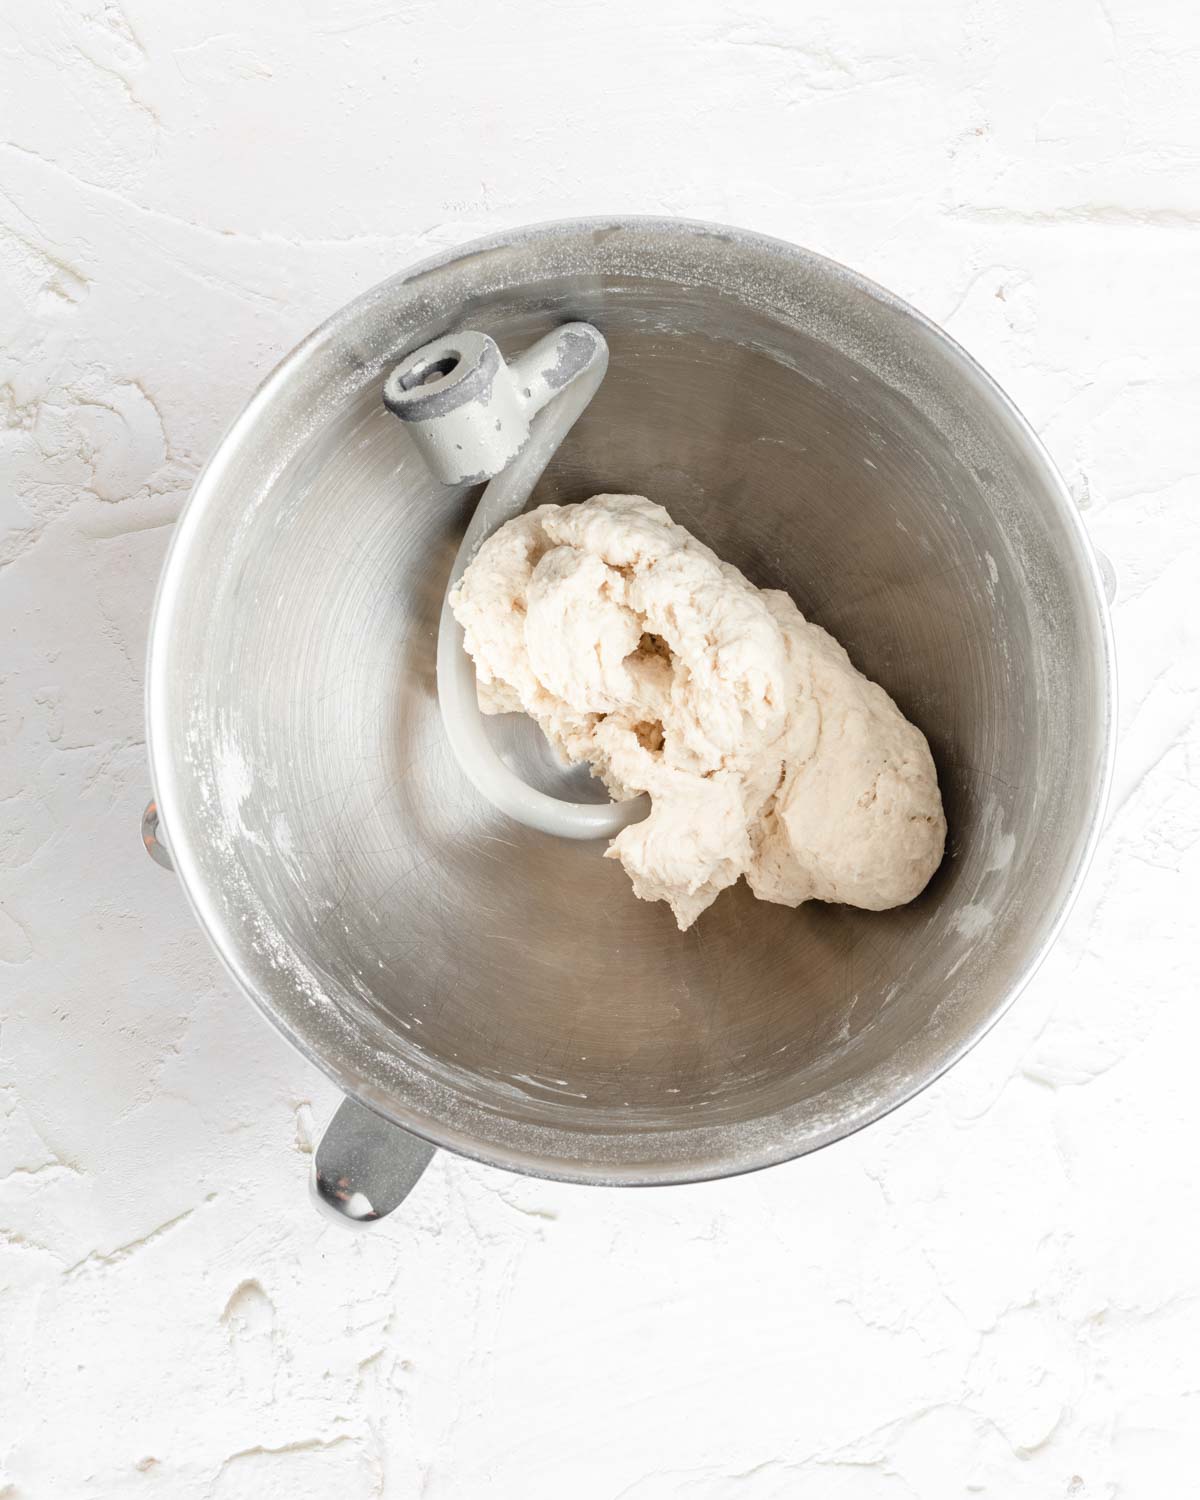
After mixing, the dough will look rough but will pull clean from the sides of bowl.

After kneading the bagel dough, it will be smooth and elastic.
Bagel dough is a low-hydration dough, meaning the ratio of water to flour is relatively low. Bagels have a tight crumb with small air pockets. That density comes from the way the dough is kneaded to create a tight web of gluten that traps smaller air bubbles, and from the relatively low amount of water in the dough.
This homemade bagel recipe has a hydration level of 60%. It's a dense, smooth, and cohesive dough that should easily form a ball. You're looking for something that is smooth and slightly tacky to the touch, but that doesn't stick or cling to your fingers.
The "Roll and Poke" Shaping Method
For this plain bagel recipe, I like to use a simple bagel shaping technique known as the "roll and poke" method.
Divide the dough into eight equal pieces using a kitchen scale. If you combined a few pieces of dough to get the right size dough ball, stack the smaller piece(s) on top of the largest piece. Gently flatten the piece of dough against your work surface, then tuck all the edges up into the middle, pinching them together to form a smooth surface on the underside of the dough.


Flip the dough ball over and cup your hand around it, with your pinkie-finger flush against the counter. Slide your hand toward your body, dragging the dough ball with it. You'll see the front of the dough snag on the counter slightly, pushing the edge under itself and creating surface tension on top of the dough.
The dough will form an oval shape, so rotate it 90 degrees and repeat to get a nice round ball with a smooth top and the edges pinched together underneath.
Once you've shaped all eight pieces of dough into little boules and let them rest for a few minutes, dust your thumb with flour and poke it through the bottom of the dough ball until it comes out the other side.

![[gif] a thumb pokes a hole through the bottom of a round ball of dough](https://thepracticalkitchen.com/wp-content/uploads/2019/08/How-to-Shape-a-Bagel-4.gif)
When you poke your thumb through the bottom, use it to push any extra edges or seams on the bottom of the dough ball into the center of the bagel, sealing them shut.
Once your thumb is all the way through, wiggle your other thumb in as well so the backs of your thumbs are pressed against each other, and gently stretch and squeeze the ring of dough until the center hole is at least the same width as the sides of the bagel.
![[gif] two thumbs through the hole in the bagel dough rotating it and gentle stretching it](https://thepracticalkitchen.com/wp-content/uploads/2019/08/How-to-Shape-a-Bagel-5.gif)
![[gif] a fully stretched out round of bagel dough](https://thepracticalkitchen.com/wp-content/uploads/2019/08/How-to-Shape-a-Bagel-6.gif)
The bagel dough shrinks back slightly before boiling and will shrink again when the dough expands during boiling and baking, so don't be stingy in your stretching.


Boiling Homemade Bagels
The boiling process gelatinizes the starches in the crust, setting them in place while also activating the yeast and air inside the dough to encourage the bagels to expand. The gelatinized crust will also prevent the bagels from expanding too much in the oven.
Think of it like "bagel botox." Boiling is what gives homemade bagels their smooth, shiny, taut bagel crust. The boiled bagels will have a slight texture to them, but will smooth out in the oven.
Right before boiling, stretch the bagels one more time. This will help keep the bagel holes from open as they bake!


The longer you boil the bagels, the thicker the crust will be and the chewier the texture of the bagels will be. You can control the texture and size of your finished bagels depending on how long you choose to boil them. I like to boil my bagels for 1 minute per side, but you can do as little as 30 seconds/side or as long as 2 minutes/side.
Get Creative By Adding Bagel Toppings
To get your toppings to stick to the bagels while they bake, vigorously whisk an egg to make an egg wash.

Bake immediately or sprinkle with any toppings you like. Even if you aren't going to use a topping, I still recommend using an egg wash to get the beautiful shiny crust.
Practical Tips & Recipe Notes
- Be careful not to tear the dough when you stretch the bagels. Bagel dough isn't like play-dough or pie dough, where you can simply combine all the scraps and stick 'em back together. Tearing your dough destroys those beautiful strong gluten strands you spent so much time kneading. When the dough rests, those raw edges and seams will begin forming new gluten connections, so don't worry about them not being perfectly smooth all the way around. This is one of the hardest things to get right (and honestly, your bagels will still taste great even if you don't get this perfectly) so just know that it's something you'll get better at with practice.
- If you want the full history of bagel making history and tradition, check out Maria Baliska's excellent book The Bagel: The Surprising History of a Modest Bread which charts the bagel's turbulent sociopolitical and socioeconomic journey from Jewish bagel peddlers in 17th century Poland to Europe, eventually crossing the Atlantic to New York City and the United States (did you know that the bagel didn't enter into mainstream popularity in the U.S. until the 1970s???). Fascinating!
💭 Have More Bagel Questions?
I've rounded up answers to common bagel questions and how-to guides, including:
- How to knead bagel dough by hand and what it should feel like
- Why bagels are always boiled
- Step-by-step guides for bagel shaping and baking techniques
See my bagel-making 101 guide for more!
Want this recipe, only smaller?
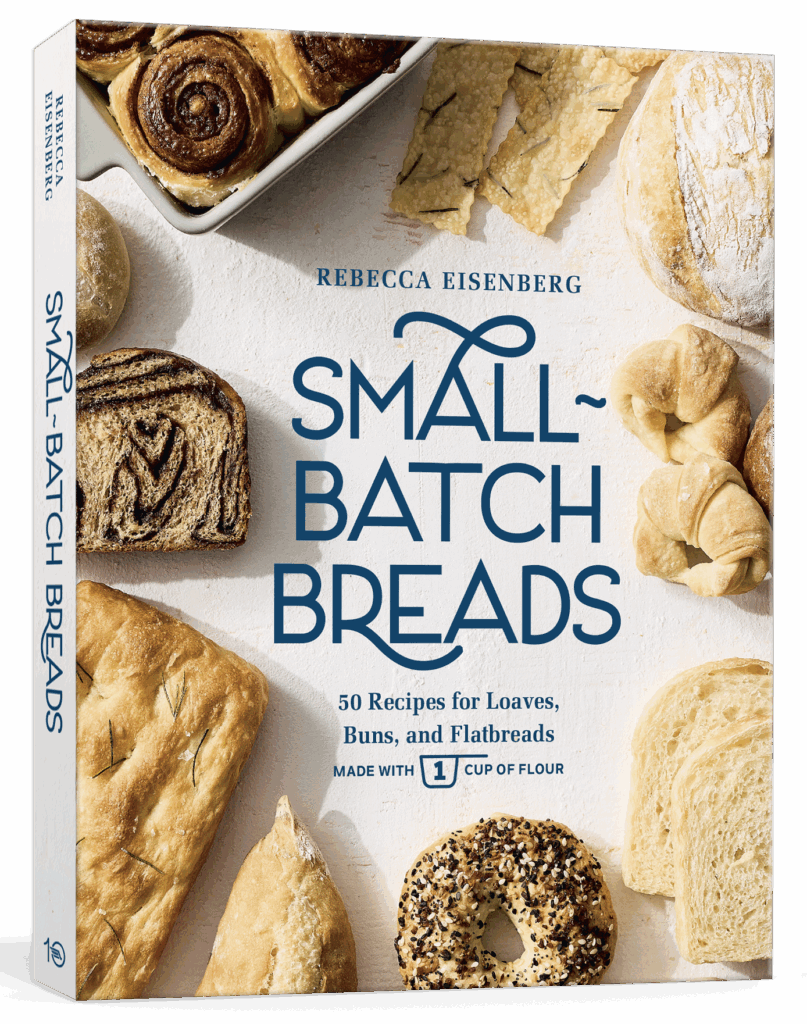
Find it in my Small-Batch Breads cookbook available now wherever books are sold!
Featuring fifty easy-to-follow bread recipes made using 1 cup of flour.
📖 Recipe

Homemade Plain Bagels in Less Than 3 Hours
Recipe Notes
- To test if your dough is ready after it rests for an hour, gently press into it with one finger. If it immediately fills in the indentation when you remove your finger, your dough needs more time to rise. If the indentation only fills in part way or fills in very slowly, your dough is ready. If it doesn’t fill in at all or the dough seems to collapse, your dough has overproofed.
- You can mix in a ¼ cup of your preferred topping right into the dough to infuse your bagels with maximum flavor. Just make sure your topping doesn’t include salt, or it can throw off the chemistry of the dough.
- Store in an airtight bag with a paper towel to absorb moisture. Stored properly, they will stay good for 3-4 days. They’ll get a bit hard after the first day or so, but soften up if you toast them. You can also run them briefly under water (!!!), then microwave them for 10 seconds, slice them, and toast them (or put them on a rack in your regular oven for 10 minutes at 350°F).
- *If measuring salt by weight, you can use any type of salt. If measuring by volume, and using any brand that is NOT Diamond Crystal Kosher Salt, cut the amount of salt in half.
- If you cut the bagels before they have time to cool the steam inside will turn the starches to mush. I know fresh-baked bagels are tempting but you really will be a lot happier if you give them some time to cool before slicing!
Ingredients
- 500 grams all-purpose flour
- 18 grams sugar
- 10 grams diamond crystal kosher salt
- 6 grams instant yeast
- 300 grams warm water (90°F)
- 1 egg (for egg wash)
- 2 tablespoons bagel toppings (optional)
Instructions
- Mix. Mix flour, salt, sugar, and yeast in the bowl of your stand mixer. Make a well in the middle and pour the water into the center. Use the dough hook on low speed to mix the dough until it comes together in a shaggy mass, pausing to scrape down the sides of the bowl as needed. This can take 3-5 minutes.
- Knead. Increase the mixer to low-medium speed and knead the dough for 3-5 minutes until the dough is smooth, elastic, and slightly tacky to the touch. It shouldn’t cling to your hands or the bowl.
- First rise. Tuck the dough into a smooth round ball, and place it in a lightly oiled bowl (you can use the mixer bowl). Let it rise in a warm spot (70°F-ish) until about doubled in size, about an hour.
- Preheat. Preheat your oven to 425°F and fill a pan with at least 2 inches of water. Bring it to a low boil on the stove while you shape the bagels. Line a sheet pan with parchment paper or a silicone mat and set it aside.
- Pre-shape (roll). Deflate the dough and divide it into eight equal pieces (use a kitchen scale for precision) and shape them into balls. Gently flatten the piece of dough against a lightly floured surface, then tuck the edges up into the middle, pinching them together to form a smooth surface on the underside of the dough. Then flip the dough over, cup your hand around it, pinkie against the counter, and drag your hand towards your body. Rotate the dough 90 degrees and repeat as needed until you have a nice round ball with a smooth surface on top and a pinched-together seam underneath.
- Shape (poke). Starting with the first dough ball you shaped, dust your thumb in flour and poke it through the underneath seam-side of the dough ball, pushing any rough edges into the middle. Slide your other thumb in and gently stretch the dough out until the hole in the middle is at least the same width as the sides. The hole will close as the dough rests and will close again as it boils and bakes, so don’t be stingy.Cover the shaped bagels with a damp paper towel and let them rest for 5-10 minutes until the water is ready to boil.
- Boil. Briefly stretch each bagel again, then gently drop them into the boiling water, top-side down. Work in batches as needed (I can usually do 4 at a time). The bagels will expand, so don’t crowd them. Boil bagels for 30 seconds to 2 minutes per side, then remove to the prepared sheet pan.
- Bake. Brush each bagel with egg wash, making sure to get the sides and centers. Add any desired toppings. Bake until golden brown, 20 minutes.
- Cool. Remove the bagels from the oven. Let cool on the sheet pan 5 minutes, then transfer to a wire rack to cool completely. Try to wait at least 20 minutes before cutting them open, but I honestly can’t blame you if you crack after five.
Patricia Jean Palmer says
I have tried several bagel recipes and not found any success. This recipe was PERFECT!!!! They turned out so well and the process was very very easy. I can't wait to try making some with add-ins to change up the flavors!!
Rebecca Eisenberg says
So glad you enjoyed these and had some bagel success!! Check out my other bagel recipes for some inspiration on other bagel flavors to try! Most of those recipes use this one as a base. Happy baking!
Abby says
My kids beg for these bagels every weekend. I have found that a cold overnight proof yields better bagels, according to my teenage food critics.
Tatum says
What an amazing recipe!! … I was halfway through and I almost gave up as it is my first time making bagels and I was unsure of what to expect throughout the process and had lots of doubts! I stuck it through and had some amazing bagels in the end.
Petrina says
I've made this recipe twice and even my Dad liked them! I don't really remember having bagels in our house before. I made some for the neighbors and they said these were the best bagels they'd ever had! It's such an easy recipe and yet so yummy😋. Thank you!
Ashley says
Would there be any additional flour needed or water depleted if added fresh blueberry puree?
Rebecca Eisenberg says
Check out my recipe for blueberry bagels! It’s already formulated to incorporate blueberries.
Dinka says
Hi! Can I make the dough in a breadmaker?
Rebecca Eisenberg says
Yep!
Brie says
I LOVE this recipe. I’ve made it a few times and they always turn out delicious, smothered in everything bagel seasoning or plain. The directions are easy to follow and the boule help is top notch. I think back to this recipe often as I bake other things now!
A question - I’m prepping for postpartum. Has anyone tried to freeze these (once totally cooled out of the oven)?? I’d think they’d freeze well, especially without toppings, but want to see if anyone has experience!
Rebecca Eisenberg says
Bagels freeze AMAZINGLY well once they're completely cool. I like to slice them almost all the way through (so the two halves stay together) and then wrap them well in an airtight bag in the freezer. Let them defrost for a few minutes on the counter so you can break the two halves apart, then pop in the toaster oven and they'll be basically good as new!
AG says
My first time making bagels and this was an amazing turn out! They were delicious! Will definitely try this recipe again but this time with toppings. Thank you!!!
Jackie Watson says
I’m not a baker by any means, but this recipe was so simple and easy to follow! I added the Lipton Onion soup mix on top of the egg wash for my onion bagels (1 package covered 8 bagels), and cinnamon sugar for the others. I’ve also shared this link with my friends. I especially appreciate the tip for the bagel shaping, I just need a little (lot) more practice lol. Once I’ve made in the past told me to roll it and lock the ends in, but I didn’t like that at all.
Rebecca Eisenberg says
OK using onion soup mix to make onion bagels is GENIUS, love that so much. I will definitely have to give that a try. Thanks for sharing, and keep on enjoying the bagels!
Daz says
I've been working from your recipes for a few months now and these bagels came out even better than I expected!
Your instructions are always so easy to understand and remember, even when the chaos of baking has fully consumed my attention. Thank you so much for providing such a fantastic resource for us home bakers, I wouldn't have ever even tried baking my own bread if your recipes didn't make me feel confident that things would turn out alright!
Looking forward to having my own fresh bagels for many mornings to come!
Jenny says
Like the English muffin recipe, I was doubting my ability to make what I thought would be so complicated. But these bagels were so easy and so fun to make (like the English muffins!). Your instructions are so easy to follow, and the gifs make it that much clear. My husband said we are never buying store bought bagels every again!
PoPo says
As an empty nester I did everything in this recipe in half just to make 4 bagels & all I can say is I’ll probably never buy a bagel again…They came out PERFECT…Thsnks😊
Leah Russell says
So, this will be my third time making bagels... Second time around for these.. These are super easy.. I bake a lot and have only tried making bagels once before and didn't get it right... Grateful for this recipes and the savings it gives ...
Rebecca Eisenberg says
Aww yay, welcome to the world of successful bagel making! 🙂
Kelley says
Today is my third time making this bagel recipe. It works perfectly, and my bagels are beautiful and yummy! My husband and son are now requesting specific flavors and asking me to make more. I doubled the recipe this time and, after kneading the full amount, divided the dough into 4 equally weighed balls. Next, I added in different inclusions in each ball of dough. They are almost done resting for an hour, so I’m very eager to see how they will turn out. I expect great things, because everything looks perfect so far! I’m going to freeze half of them. Thank you so much for sharing this recipe! You included helpful details and photos that really helped.
Lisa says
These bagels are amazing and so much better than store! Chewy on the outside, soft on the inside. I'm more proud of these than my degree. Thank you for this detailed recipe. I look forward to making these again, plus other bread recipes on your website!
Casey says
I may have missed this in the article, but, can you add anything in the dough-as in blueberries? (I did see the blueberry recipe after this one, but a friend made these and they were so good. I would love to use this as a “base recipe” if it is possible.
Rebecca Eisenberg says
You certainly can add blueberries to this one but depending on how much water is in the blueberries it can affect the dough hydration which will affect the outcome of the bagels. My blueberry bagel recipe does already uses this recipe as a base which is why I recommend using that one!
Valerie says
Okay WOW. Bagels are my fav. I've just started baking with yeast so I was looking for a simple recipe to try. These came out SO good! My shaping was a bit funky but it was my first time. I split off some of the dough and made a few cinnamon bagels. I'm genuinely excited and already making notes on additions and flavors. Thank you!
Emily says
Can I freeze the bagels? I’ve made these twice now, bread flour definitely makes them better and I’m so excited to try out new flavors!!
Rebecca Eisenberg says
Absolutely! I usually slice them almost all the way through and then freeze. That way I can easily pop the frozen halves apart to toast. Enjoy!!
Faith says
You need to fix the measurement section. I wanted to make 16 bagels so I doubled the recipe. While, yes, it doubles the side that shows measurements in grams, I wasn't weighing my mixture but rather using measuring cups. It did NOT double that side. Once I finished mixing everything abd the dough had risen for an hour I cut it into 16 pieces noticing that it seemed a little small. So I checked the recipe again and saw the mistake on the website. So I attempted to combine the 16 pieces back into 8 and resulted in lumpy bagels that cracked in every way. The taste was fine but the presentation was ruined by the error.
Rebecca Eisenberg says
Unfortunately I can’t do anything to change that, the 2x button only changes the numbers on the left. You’ll have to double everything on your own if you want to use cups. Sorry!
Rob says
Easy as can be. Follow recipe and bagels are perfect.
Sherry says
1st time trying making/baking bagels. This recipe turned out perfectly
Rebecca Eisenberg says
So glad to hear it!! Welcome to the world of bagel making 🙂
Carrie Nelson says
Wow- delicious...easy and a crowd pleaser
Kay says
Can I put the dough in the fridge overnight?
Rebecca Eisenberg says
Yep! Refrigerate before you shape the bagels. You may want to reduce the yeast by a gram, but it should be fine regardless!
Sadie says
Hi! I was wondering can I substitute the instant yeast for fresh and/or active dry yeast? Thanks!
Rebecca Eisenberg says
You can absolutely use active dry yeast instead! If using active dry yeast add an extra 1 gram of yeast and just know the dough might take a little longer to rise. Otherwise you can keep the amount of yeast the same, just stir it into the water for the recipe and let it sit for 5 minutes before adding the water to the dry ingredients.
Butch Johnson says
Trying tomorrow