With so many homemade bagel recipes on my site, I figured it was about time I created a main post with all my best bagel-making advice for you in one handy reference guide. Bagels are my personal favorite thing to bake, and I want you to feel confident making them in your kitchen too! Here you'll find my best tips for troubleshooting bagel dough and an in-depth guide to how I shape bagels.
Depending on who you talk to, there are lots of things that do/don't make a bagel a "true" bagel. The advice you'll find here is specific to how I personally approach bagel making and is specific to my easy bagel recipes. Most (but not all) of my bagel recipes would probably make a bagel purist cringe (not using bread flour or barley malt syrup, no overnight rise, etc.), but they're a great place to start if you're a casual baker or new to bagel making.
Jump to:
Bagel Dough — What To Expect
Bagels are made from a low-hydration dough, which means they have a low amount of water in the dough relative to the amount of flour. Bagel dough typically falls anywhere from 50-70% hydration. Most of my homemade bagel recipes are somewhere around 60% hydration. This makes bagel dough that is soft, smooth, supple, and not too sticky or tough to work with.
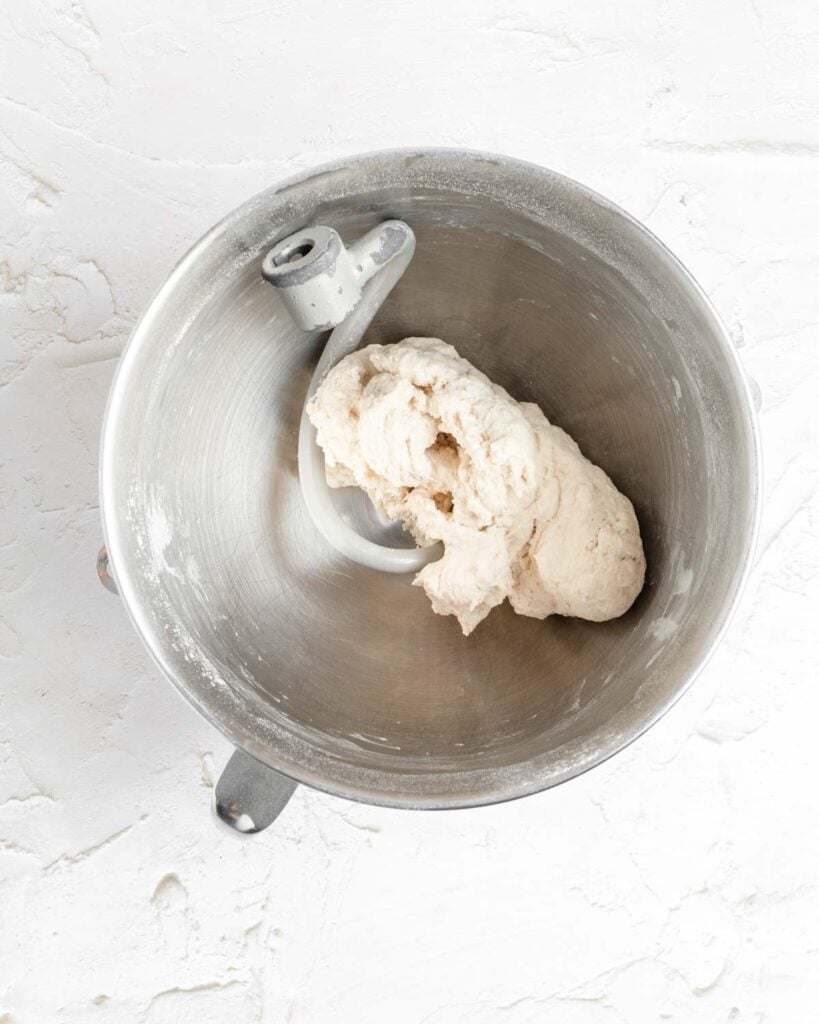
Bagel dough, like most bread doughs, comes together in two stages. First, the dough is mixed, then the dough is kneaded. The goal of mixing the dough is just to get all the liquid absorbed and the dry ingredients hydrated. When the dough is mixed, it will look rough and "shaggy" but will have collected on the dough hook in one mass. Mixing can take several minutes.
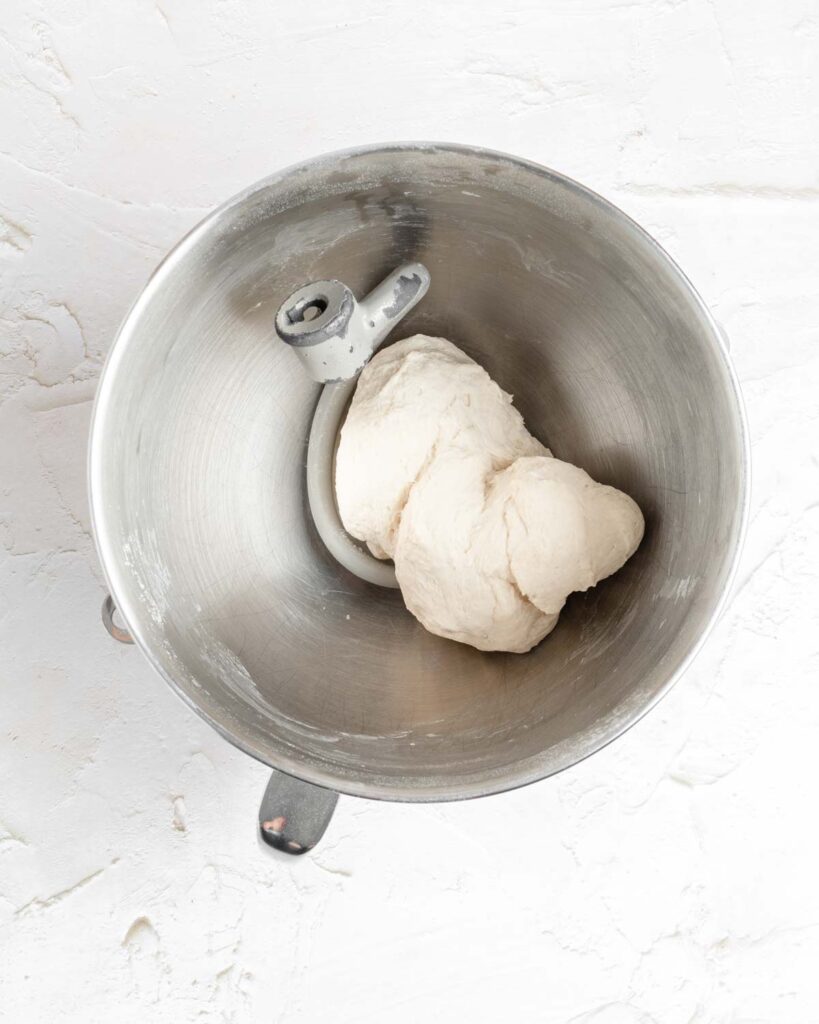
Kneading can also take several minutes. But unlike mixing, kneading is when the gluten network in the dough—which provides the strength and structure that allows you to shape the bagels and allows the bagels to hold their shape—is developed by folding the dough over itself repeatedly until it becomes smooth and elastic.
I use my KitchenAid bowl-lift stand mixer to knead my bagel dough, and I rarely go above speed 4 on the mixer. Usually I have it around speed 2 or 3. KitchenAid’s official recommendation is not to go above speed 2 when kneading dough, but I take my chances. If you’d rather play it safe and not go above speed 2, add a few minutes to the kneading time.
Bagels have a very tight, dense interior crumb. This comes from the low-hydration dough and also from how long the bagel dough is kneaded. One of the biggest mistakes people make when making bagels is that they don’t knead the dough long enough. I always set a timer to keep myself honest.
Kneading Bagel Dough by Hand
Use a dough whisk or a wooden spoon to mix the dough together, then knead by hand on a lightly floured work surface or countertop for 8-10 minutes until the dough is smooth, elastic, and slightly tacky to the touch. Dust in more flour as needed to keep the dough from sticking. Once again, I recommend setting a timer to keep yourself honest! The rest of the recipe follows as written.
There are lots of different kneading techniques out there, but I usually rock the dough forward with the heel of my hand, fold the top edge down over the middle, rotate the dough a quarter turn, and repeat. As long as you're rotating, stretching, and folding the dough over itself repeatedly, it is being kneaded.
Bagel Dough Troubleshooting
If you live somewhere very humid, I recommend holding back about 40-60 grams of water when you initially mix the dough. Add it in gradually while mixing if it seems the dough needs it.
In very moist, wet environments, there can be enough moisture in the air and flour that you don’t need the full amount of water the recipe calls for. If you do add all the water and find the dough is too wet, just keep dusting in flour until it reaches the right stage (smooth, elastic, slightly tacky but not sticky to the touch).
Unless otherwise specified, bagel dough should pull cleanly away from the walls of the mixer bowl by the end of kneading.
- If the dough is clinging to the bottom of the mixer bowl, dust in more flour until it pulls clean.
- If the dough is so dry it appears to be tearing as it kneads instead of smoothing out, add water ¼-½ teaspoon at a time until the dough smooths out.
- Always give the dough at least 30 seconds of kneading before you add more flour or water so you can assess if it really needs it.
Using All-Purpose vs Bread Flour
Traditionally, bagels are made with a high-protein/high gluten flour like bread flour, which is ideal for creating a strong and elastic dough with a nice chewy texture.
Most of my bagel recipes use all-purpose flour instead of bread flour. I do this because I want my bagel recipes to be as accessible to beginners as possible, and I know most people don't keep bread flour around.
I do call for bread flour in some of my bagel recipes where it really makes a difference, like in my easy rye bagels, because the rye flour absolutely needs the assist from a higher protein flour to form a strong gluten network.
You can use bread flour in any of my bagel recipes. Bread flour is more absorbent than all-purpose flour, so you'll just need to add a little more water during the mixing and kneading stages to get the dough to that perfect smooth and supple texture.
Roll-And-Poke Bagel Shaping Method
Divide the dough into equal portions on an unfloured surface. If you're combining a few pieces together to make a portion, stack the smaller pieces on top of the bigger pieces. Tuck the edges up so the dough is smooth against the counter with a seam pinched together on top. Repeat until the dough ball feels fairly tight. Don't tear the dough, just stretch it.
Then, flip the dough over so the seam side is down against the counter. Cup your hand around the dough and slide it toward you. The dough will take on an oval shape. Rotate it 90 degrees and repeat to turn the oval into a round circle.
(Or, cup your hand around the dough with your pinkie-side flush against an unfloured counter and your thumb and forefinger making an O- or C-like shape above the dough. Move your hand in quick circles without picking your pinkie off the counter, and the dough will quickly shape itself into a nice smooth ball of dough.)


![[gif] a thumb pokes a hole through the bottom of a round ball of dough](https://thepracticalkitchen.com/wp-content/uploads/2019/08/How-to-Shape-a-Bagel-4.gif)
![[gif] two thumbs through the hole in the bagel dough rotating it and gentle stretching it](https://thepracticalkitchen.com/wp-content/uploads/2019/08/How-to-Shape-a-Bagel-5.gif)
![[gif] a fully stretched out round of bagel dough](https://thepracticalkitchen.com/wp-content/uploads/2019/08/How-to-Shape-a-Bagel-6.gif)
Once the dough has been shaped into balls, coat your hands in flour and stick a thumb through the bottom seam of the dough. Slide your other thumb in and gently squeeze and stretch, rotating the dough through your hands until the bagel hole is at least the same width as the sides of the bagel if not bigger.
You may want to repeat the stretching process again before boiling to keep the hole from closing up in the oven.


It is super important that you don't dust down flour until you are poking the hole through the middle of the bagel. When you're shaping the round ball of dough you don't want any flour on your hands, the dough, or the counter. The flour will keep the dough from sticking to itself and you want the dough to cling slightly to the counter to help create surface tension as you shape the ball.
Dust a bit of flour on your hands or the bottom of the dough ball when you poke the hole through. At this point, you don't want the dough to stick to itself anymore; a bit of flour is fine.
Pro-Tip: When you poke the hole through the bottom of the dough ball, use this as an opportunity to push any edges or seams into the middle of the bagel to hide them.
Why Bagels Are Always Boiled

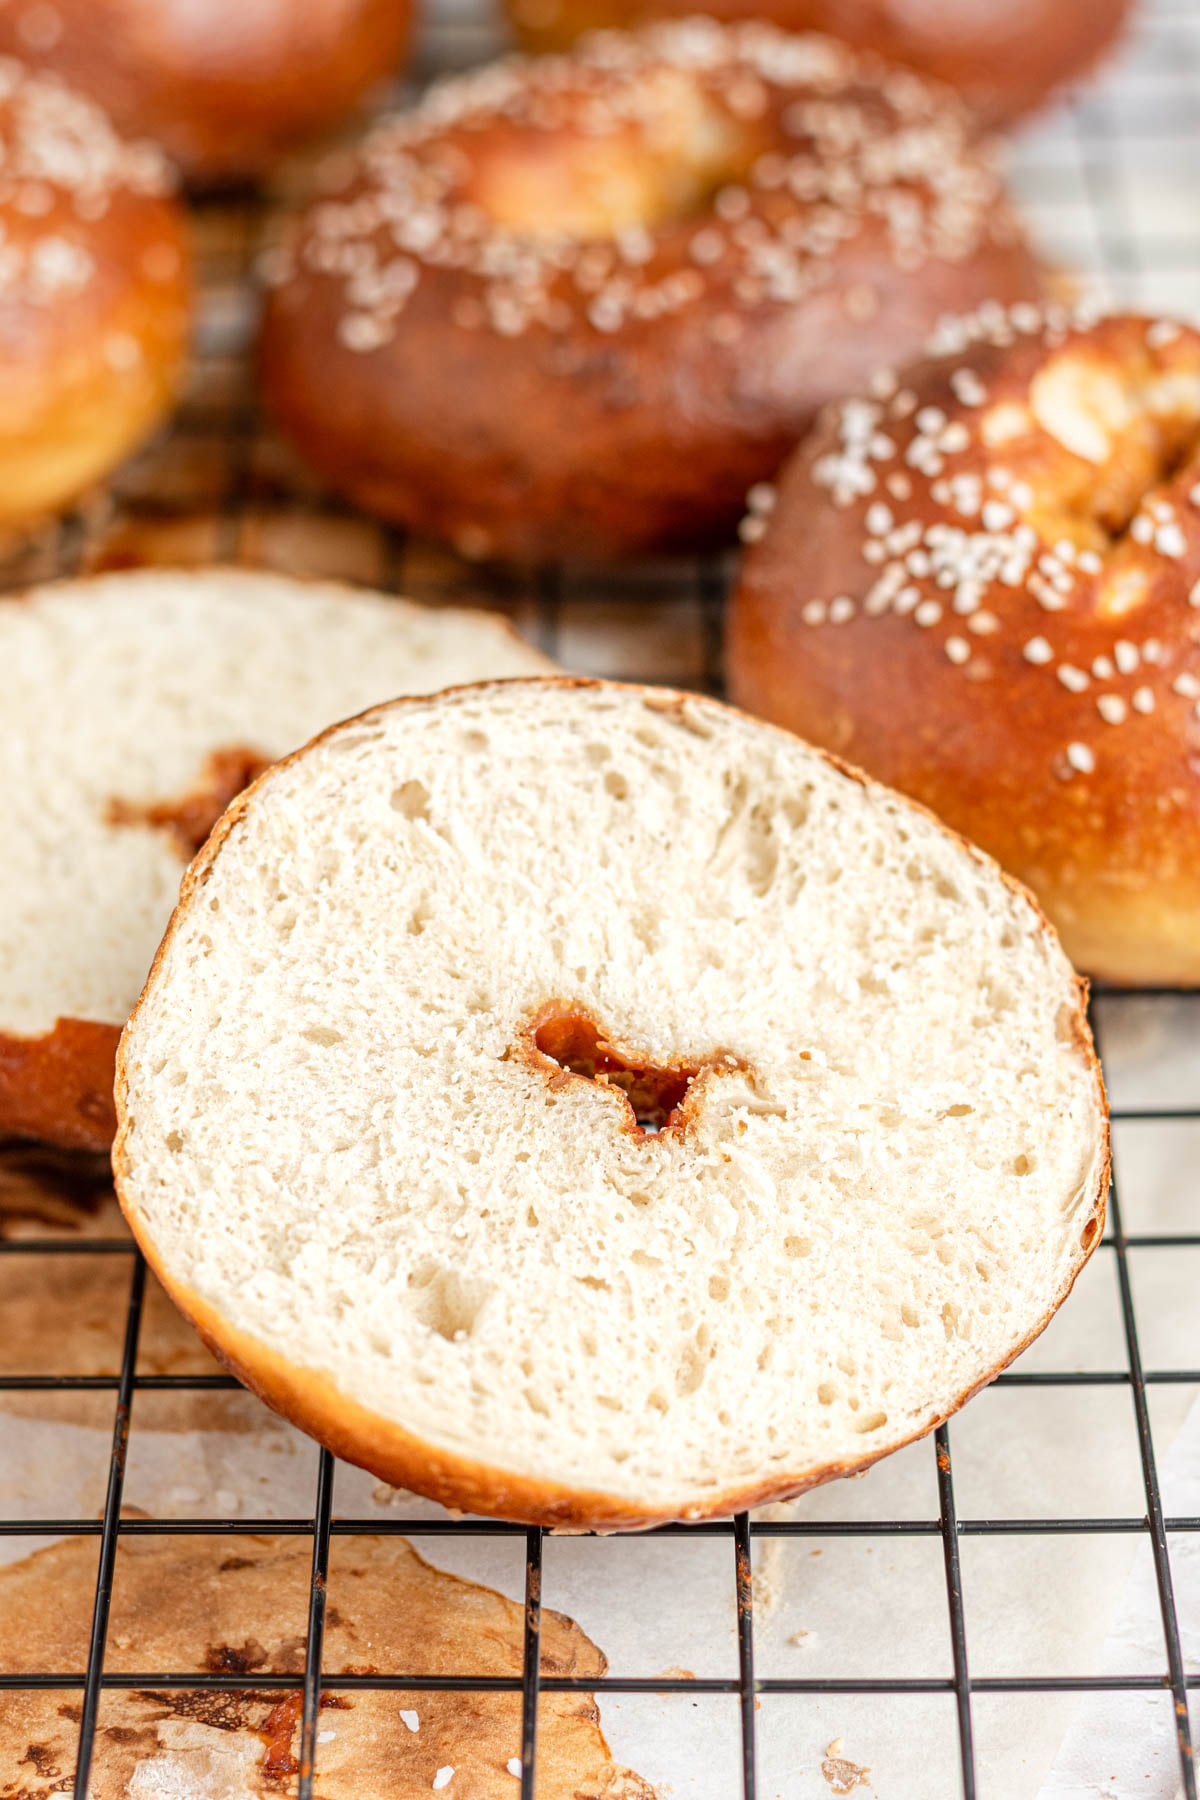
If they’re not boiled, they’re not bagels! Boiling is a crucial part of the bagel-making process. Boiling gelatinizes the starches in the crust, setting them in place while activating the yeast inside the dough to encourage the bagels to expand. The gelatinized crust also prevents the bagels from expanding too much in the oven.
Think of the boiling process like "bagel botox." Boiling plumps the bagels up, giving them a smooth, shiny, taut bagel crust. The boiled bagels will have a slight texture to them, but it will smooth out once you bake them.

Any creases, lines, or seams that are visible on the shaped bagel before you boil it will be visible after boiling. The boiling water will find its way into any weak spots, creases, or seams and break them apart. The smoother and more seamless a bagel is before it goes into the water, the smoother it will be coming out!
I always put my bagels in the boiling water with the smooth top side facing down and the seam side facing up. That way, when I flip them, the smooth top side is facing up and the seam side is underneath. This makes it easier to lift the bagels out of the water and slide them off the wire spider onto my sheet pan with the pretty side facing up.
The longer you boil the bagels, the thicker the crust will be and the chewier and airier the texture of the bagels will be. You can control the texture and size of your finished bagels by how long you choose to boil them. I usually boil my bagels for 1 minute per side, but you can do as little as 30 seconds/side or as long as 2 minutes/side.
Most traditional bagel recipes, like my overnight New York-style bagels, are boiled in a mixture of water and barley malt syrup, which gives the crust a little bit of sweetness. You could also use honey or brown sugar, but for most of my quick and easy bagel recipes, I just boil the bagels in plain water. I personally don’t find that the barley malt syrup makes a noticeable enough difference to justify calling for a specialty ingredient. But you can definitely experiment with different boiling solutions for your bagels when you make them!
Bagel Toppings
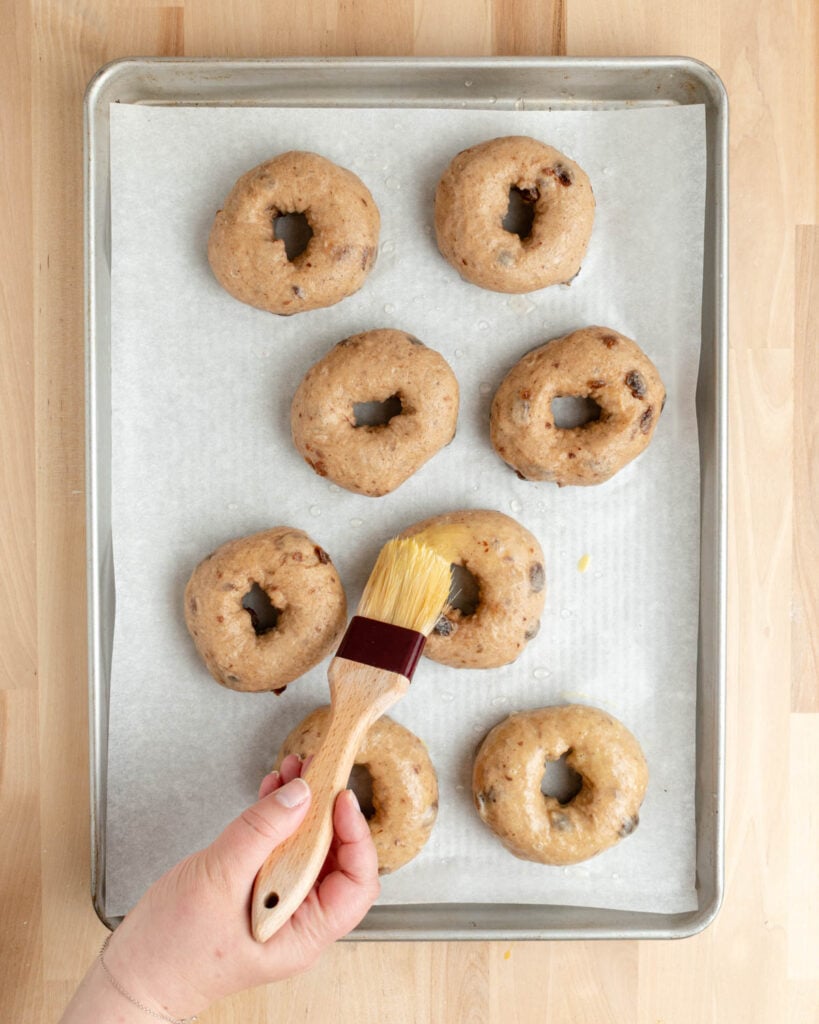
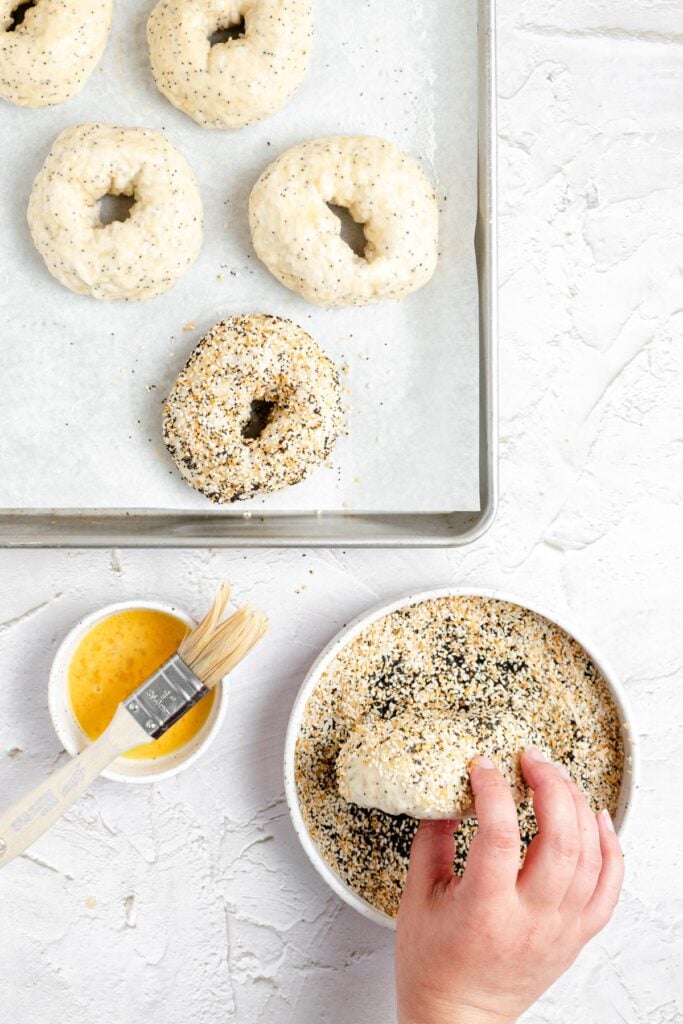
There’s a bit of a debate in the bagel-making world over whether or not bagels should be egg-washed before baking. Personally, I always use an egg wash. I like the extra shine and browning the egg wash gives my bagels, and the egg wash helps any toppings stick more reliably and securely.
Most of the time, I sprinkle toppings onto my bagels, but in some recipes, like my everything bagel recipe, I dip the bagel in the topping for more even coverage.
💭 Have More Baking Questions?
I've rounded up answers to common baking questions and how-to guides, including:
- Ingredient swaps and FAQs
- Why my recipes are written in grams and not cups
- How to quickly bring eggs and butter to room temperature
- Ingredients I use (salt, flour, yeast, etc.)
- Step-by-step guides for bread and baking techniques
See my baking techniques & troubleshooting guide and ingredient swaps and FAQs for more!