The Practical Kitchen

  • Recipes
    • Recipe Index
    • Appetizers
    • Breads
      • Bagels
      • Biscuits, Scones & Loaves
      • Sourdough
    • Breakfast
      • Muffins
    • Condiments & Dips
    • Desserts
      • Bars & Brownies
      • Cakes
      • Cookies
      • Ice Cream
      • Pies & Tarts
    • Main Dishes
      • Pasta
      • Pizza
    • Salads
    • Side Dishes
    • Snacks
  • About
  • Shop
  • Newsletter
  • Tip Jar
menu icon
go to homepage
  • Recipes
    • Recipe Index
    • Appetizers
    • Breads
    • Breakfast
    • Condiments & Dips
    • Desserts
    • Main Dishes
    • Salads
    • Side Dishes
    • Snacks
  • About
    • Tip Jar
  • Shop
  • Events
  • Cookbook
    • Amazon
    • Facebook
    • Instagram
    • Pinterest
    • TikTok
    • Twitter
    • YouTube
  • subscribe
    search icon
    Homepage link
    • Recipes
      • Recipe Index
      • Appetizers
      • Breads
      • Breakfast
      • Condiments & Dips
      • Desserts
      • Main Dishes
      • Salads
      • Side Dishes
      • Snacks
    • About
      • Tip Jar
    • Shop
    • Events
    • Cookbook
    • Amazon
    • Facebook
    • Instagram
    • Pinterest
    • TikTok
    • Twitter
    • YouTube
  • ×
    Home » Breads

    Crusty French Dinner Rolls (Restaurant-Style)

    No ratings yet
    Published by Rebecca Eisenberg ⁠— September 8, 2026 — Leave a Comment

    Jump to Recipe Jump to Video

    This post may contain affiliate links

    Several round, lightly golden bread rolls with slits on top are resting on a white cloth. Text above the rolls reads, homemade restaurant-style bread rolls. A website link appears at the bottom.

    My recipe for crusty, hard French dinner rolls is super easy and makes the best restaurant-style bread rolls to go with your dinner. They are crusty on the outside, soft and fluffy on the inside, and super easy to make, too. Once baked, these dinner rolls freeze and reheat beautifully, so I like to make a double batch and stash some away for later!
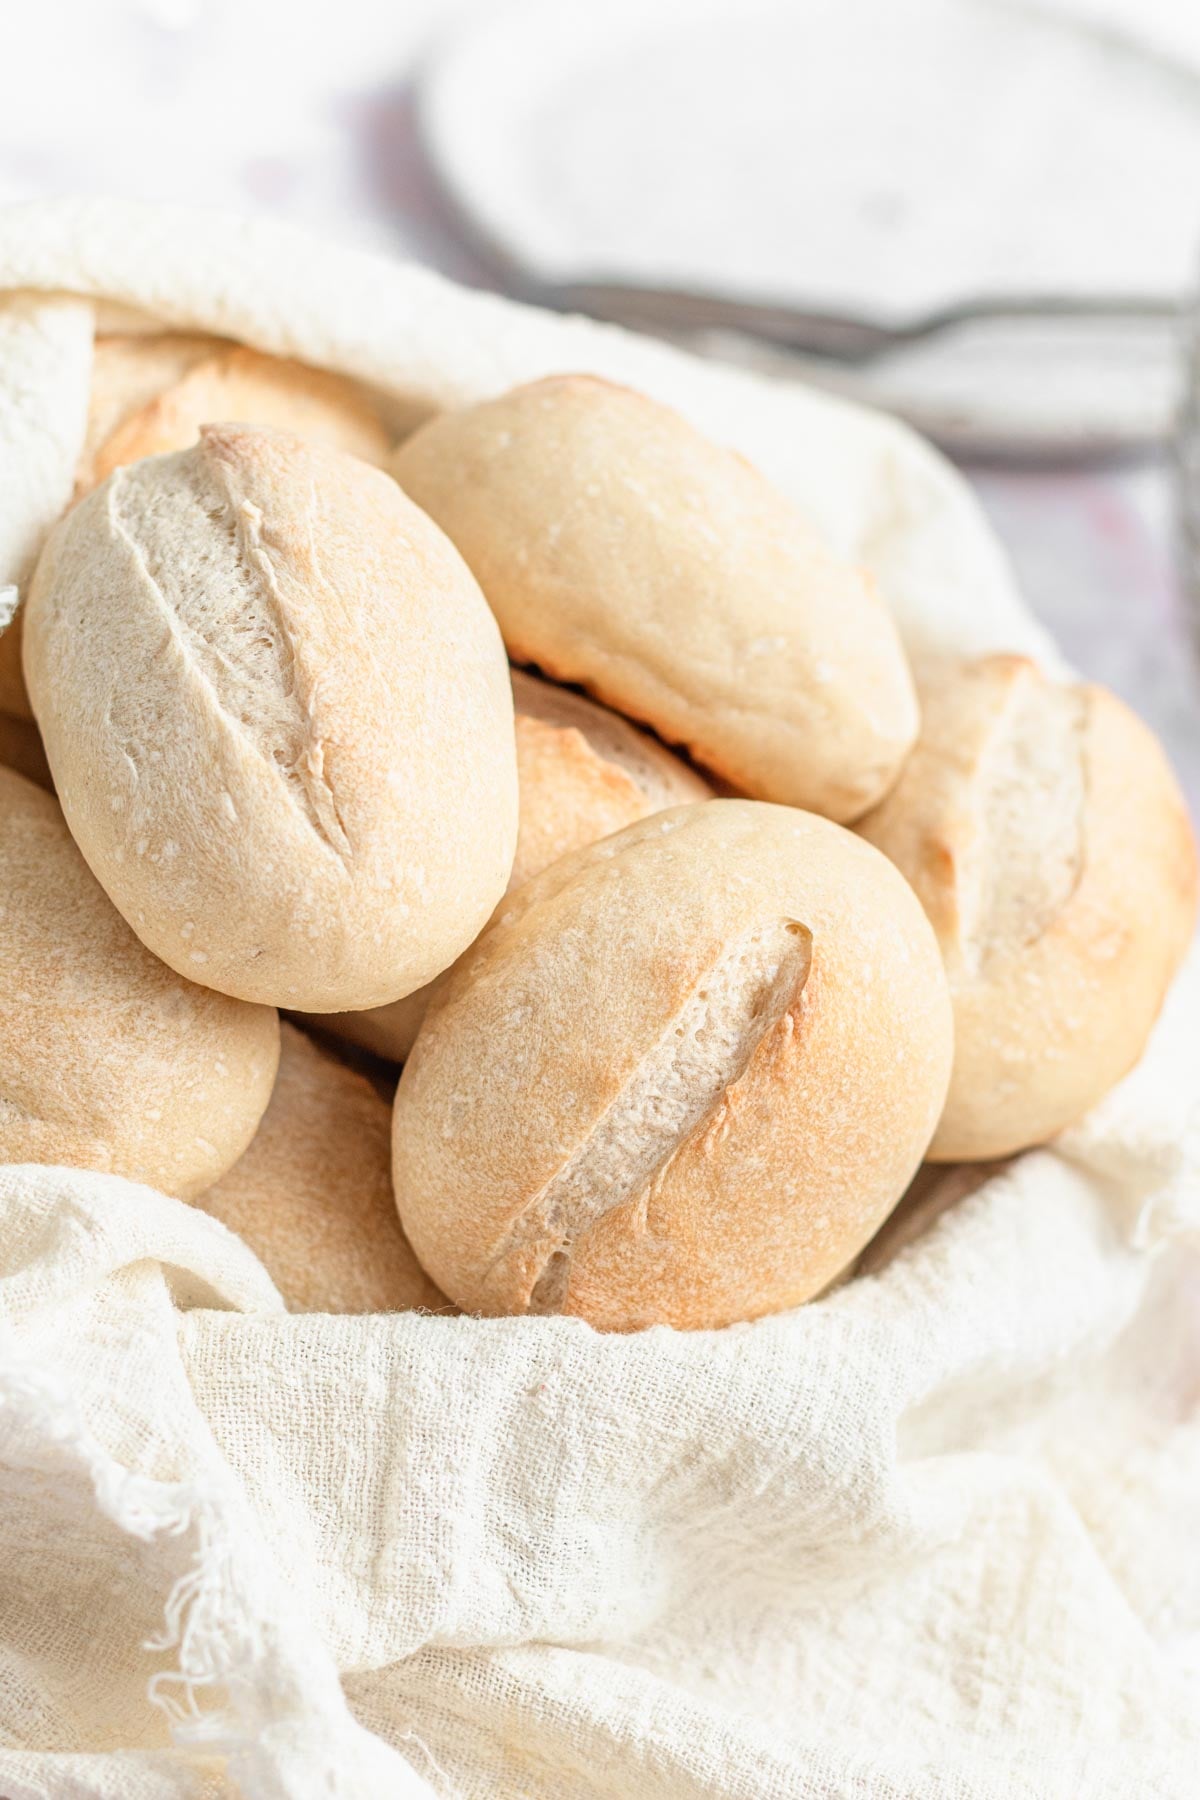
    A basket lined with a white cloth holds several small, round, crusty bread rolls with a slit down the center. The background is light and out of focus, highlighting the fresh bread.
    These rolls are just like the ones you get in a bread basket at a restaurant!

    I looooove a restaurant bread basket. You know, the kind you get at a mid-tier restaurant with the bread tucked in a napkin, still slightly warm from the kitchen, served with foil-wrapped butter on the side? It's an elite way to start a meal.

    So when I was working on my cookbook Small-Batch Breads: 50 Recipes for Loaves, Buns, and Flatbreads Made with One Cup of Flour I knew I wanted to include a recipe for classic crusty French bread dinner rolls. And that recipe (which made just four adorable dinner rolls) turned out so well that I found myself often scaling it up so I could bake off 16 rolls at once.

    I love having a stash of these in the freezer to reheat when we have guests over, or when I just want a couple of rolls with dinner. It's such a simple dinner rolls recipe that making a big batch so I can have extra just makes sense.

    Homemade French bread rolls are so great for tearing and dunking in this reader-favorite olive oil bread dip or spreading with salted butter. I've also served them as part of an appetizer spread with some charcuterie, and it was so fun using them to make little snacky sandwiches.
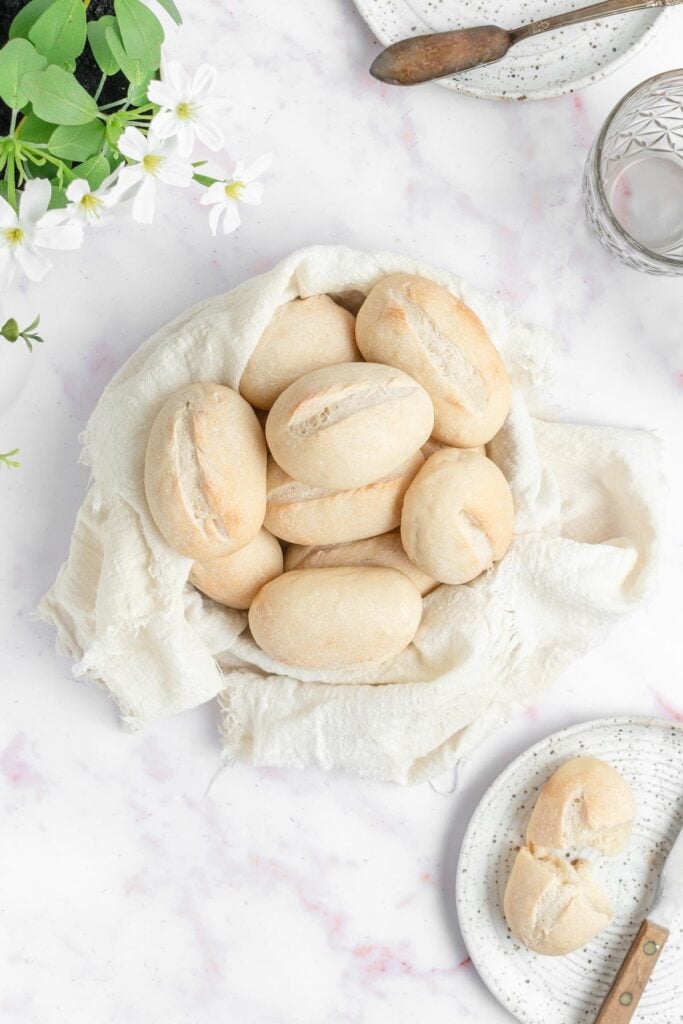
    A basket lined with a white cloth holds several oval bread rolls on a marble surface. Nearby are a glass of water, a butter knife, a plate with a roll, and white flowers in a pot.
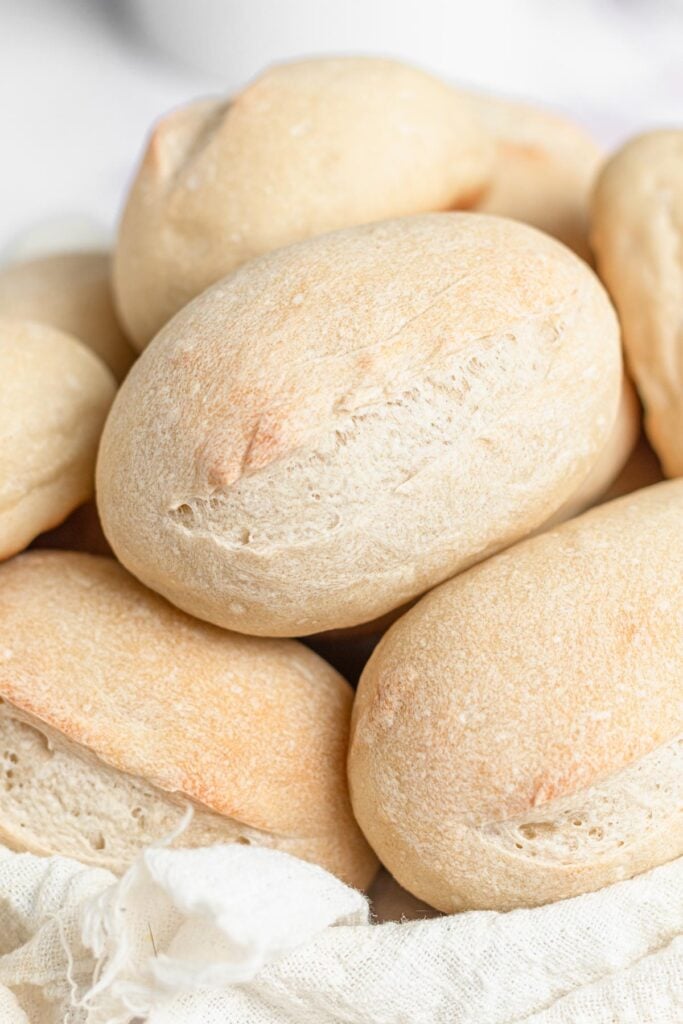
    A close-up of several oval-shaped, lightly browned bread rolls stacked together in a basket lined with a white cloth.
    The loveliest basket of homemade French bread rolls!

    This is a Very Basic French Bread Dough

    French bread is known for being a lean dough, super simple and straightforward: flour, salt, yeast, and water.

    For my version of French dinner rolls, I found that adding a little sugar gives them the best flavor and texture and helps them brown in the oven. So there's a tiny bit of sugar, not enough to make the rolls sweet, just enough to give them that perfect French dinner roll flavor and color you expect.
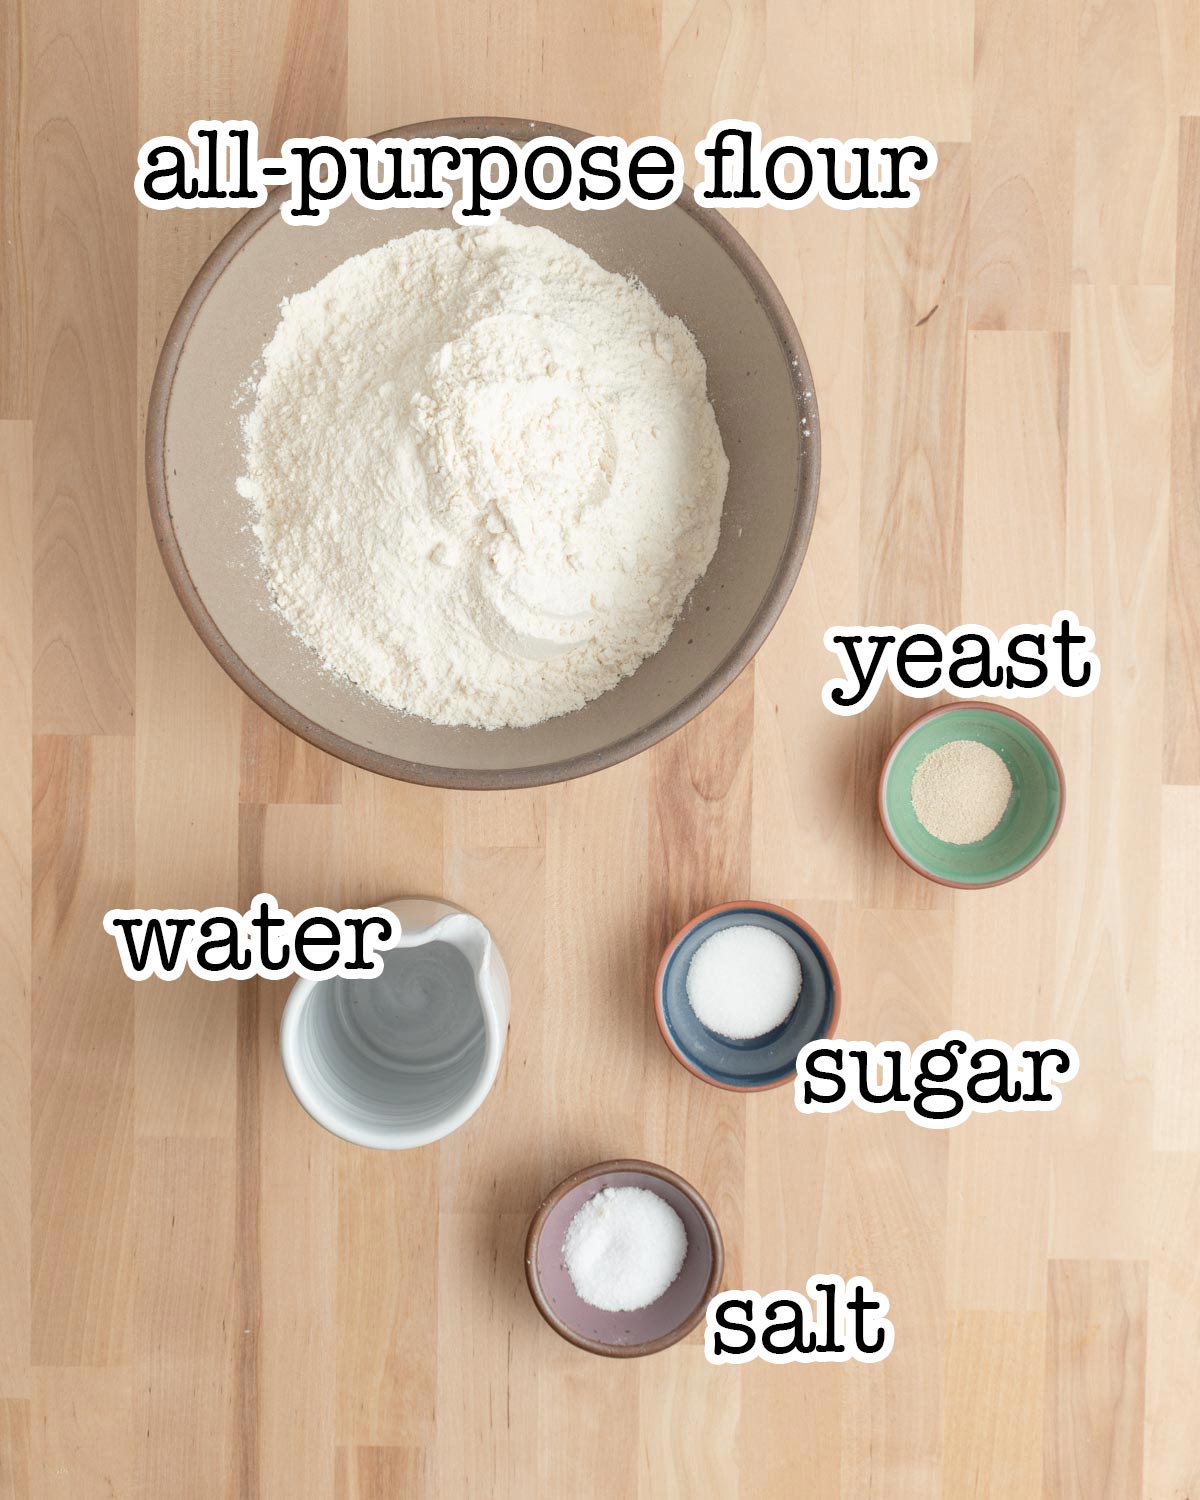
    A bowl of all-purpose flour, a small bowl of yeast, a cup of water, and small bowls of sugar and salt are arranged on a wooden surface.
    French bread roll ingredient quantities are at the end of the blog post in the recipe card.

    As for making the dough, I use the direct mixing method; I mix everything together in my mixer bowl without any fancy pre-ferments or proofing steps beforehand. I find it's easiest to start by whisking the dry ingredients together first so the salt, sugar, and yeast are dispersed through the flour before I add the water.

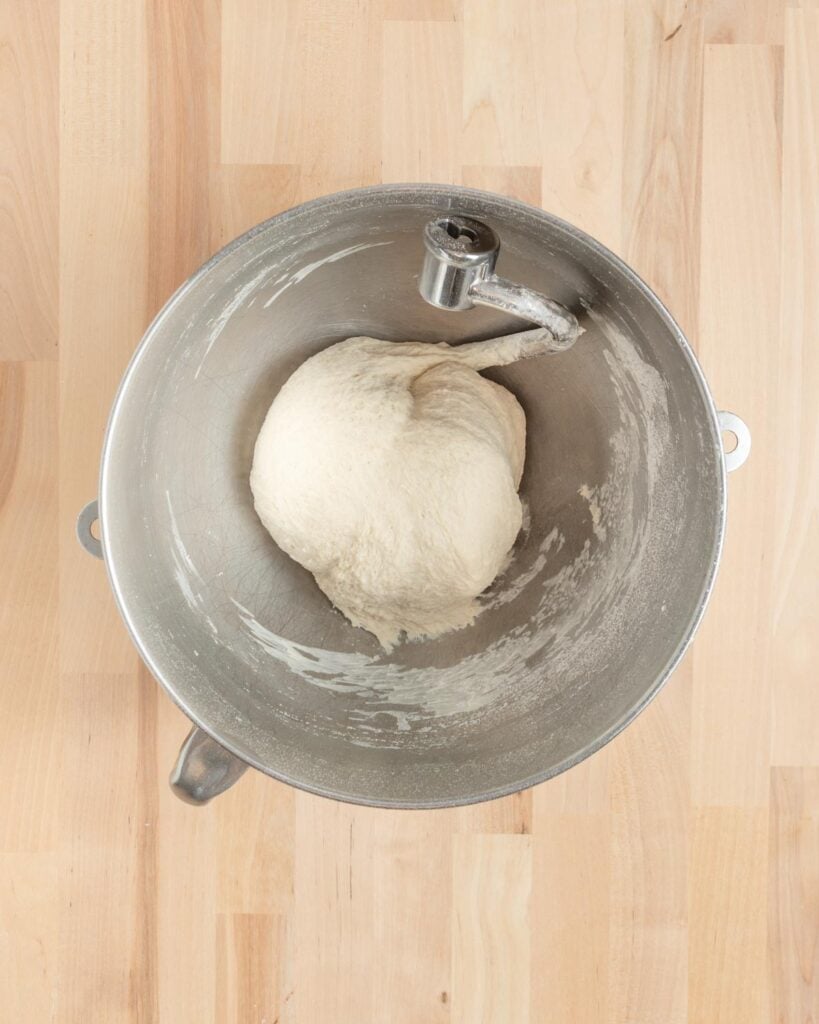
    I let the dough hook on my mixer do the work for me to mix the dough into a shaggy/messy ball in the bowl, and then knead it until it is smooth.
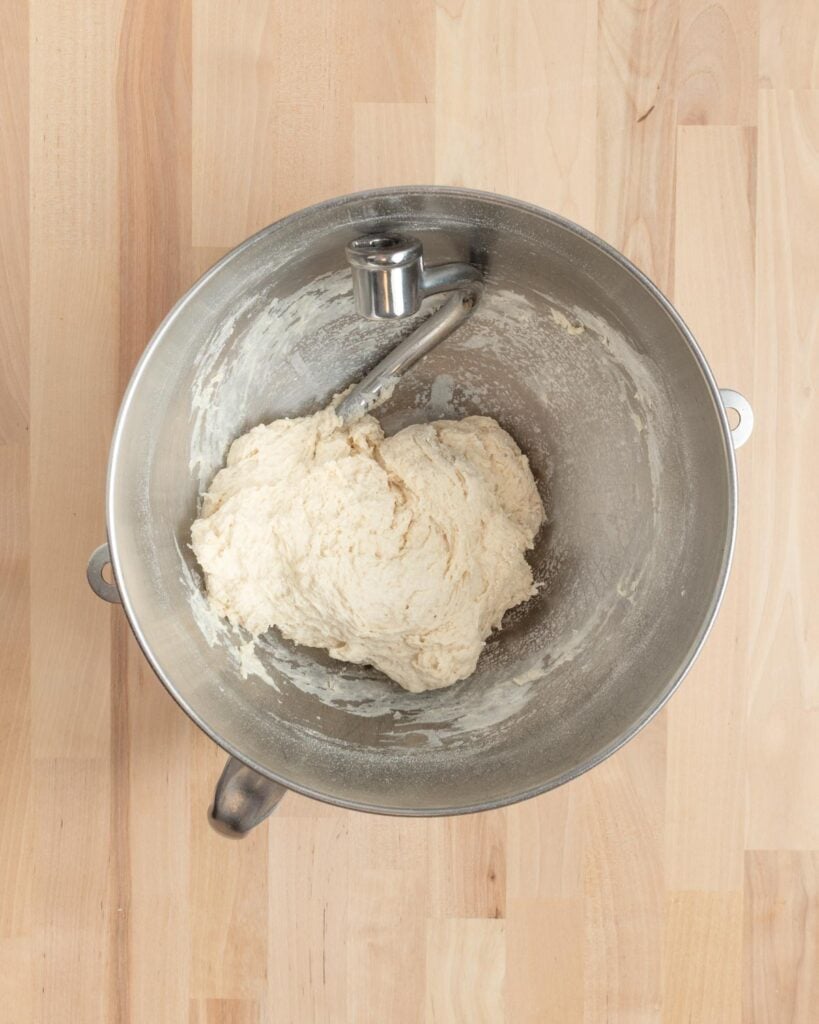
    A metal mixing bowl with a dough hook attachment contains a rough and shaggy ball of dough. The bowl is placed on a light wooden surface.
    After mixing
    A smooth ball of bread dough sits in a metal mixing bowl with a dough hook attachment, on a light wooden surface. The dough is clinging slightly to the bowl around the edges but the walls of the bowl are mostly clear of dough and flour.
    After kneading
    Read more about the difference between mixing and kneading here.

    After kneading, the dough is still a little sticky (you can see in the photo above it is clinging to the wall of the mixer bowl just a tiny bit at the bottom) but should mostly pull clean from the bowl when you take it out.

    I dust my counter with the tiniest bit of flour and knead it into a ball by hand to rise.
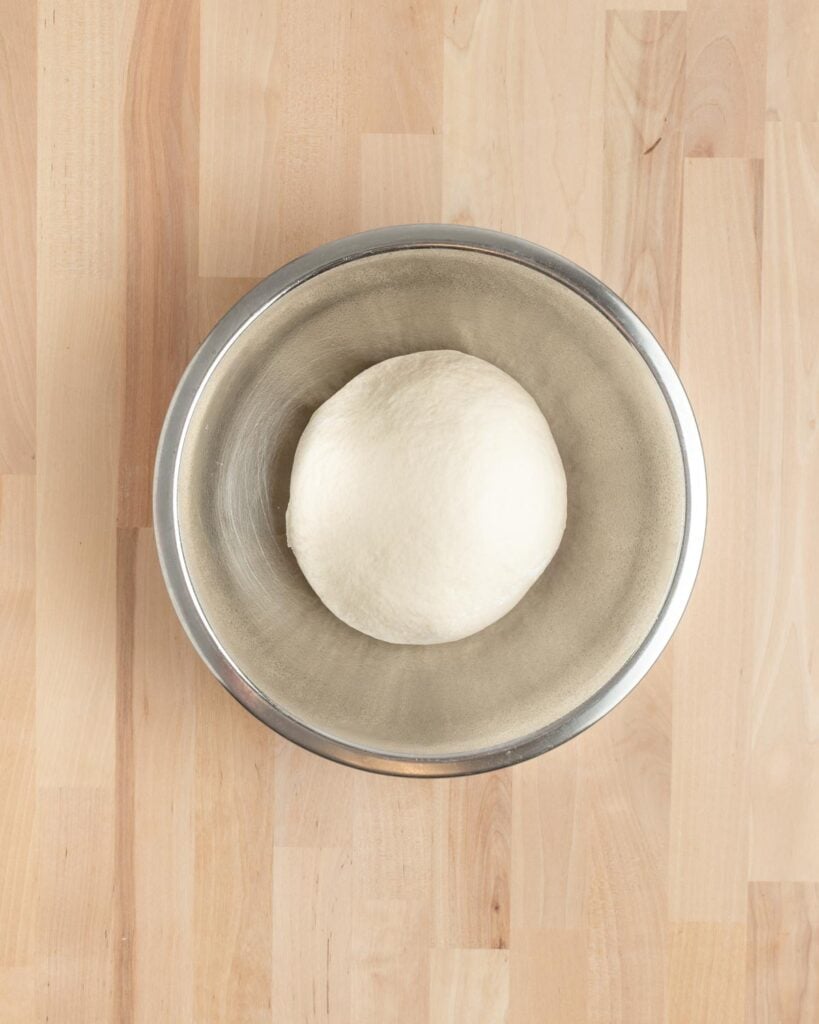
    A round ball of dough sits in a large metal mixing bowl on a light wooden surface, viewed from above.
    Before rising
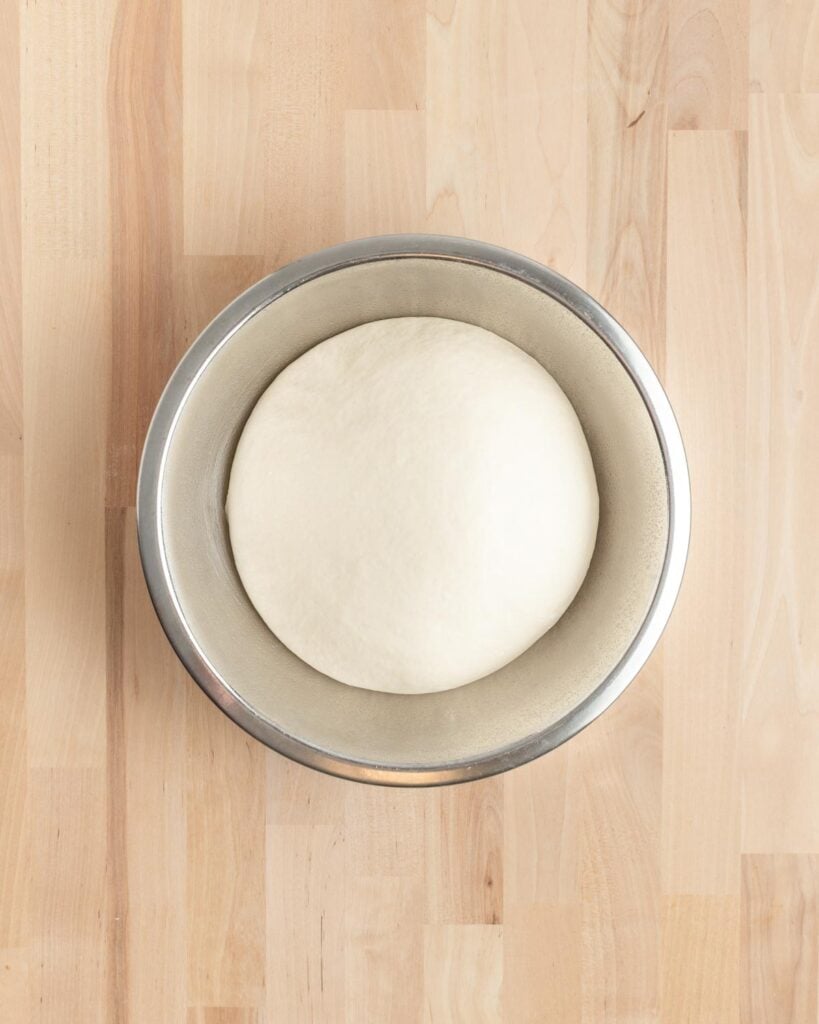
    A round, smooth ball of white dough rising in a stainless steel bowl, placed on a light wood surface.
    After rising

    The dough for making these French bread rolls really is so wonderfully soft and stretchy! At room temperature, it doubles in size nicely.
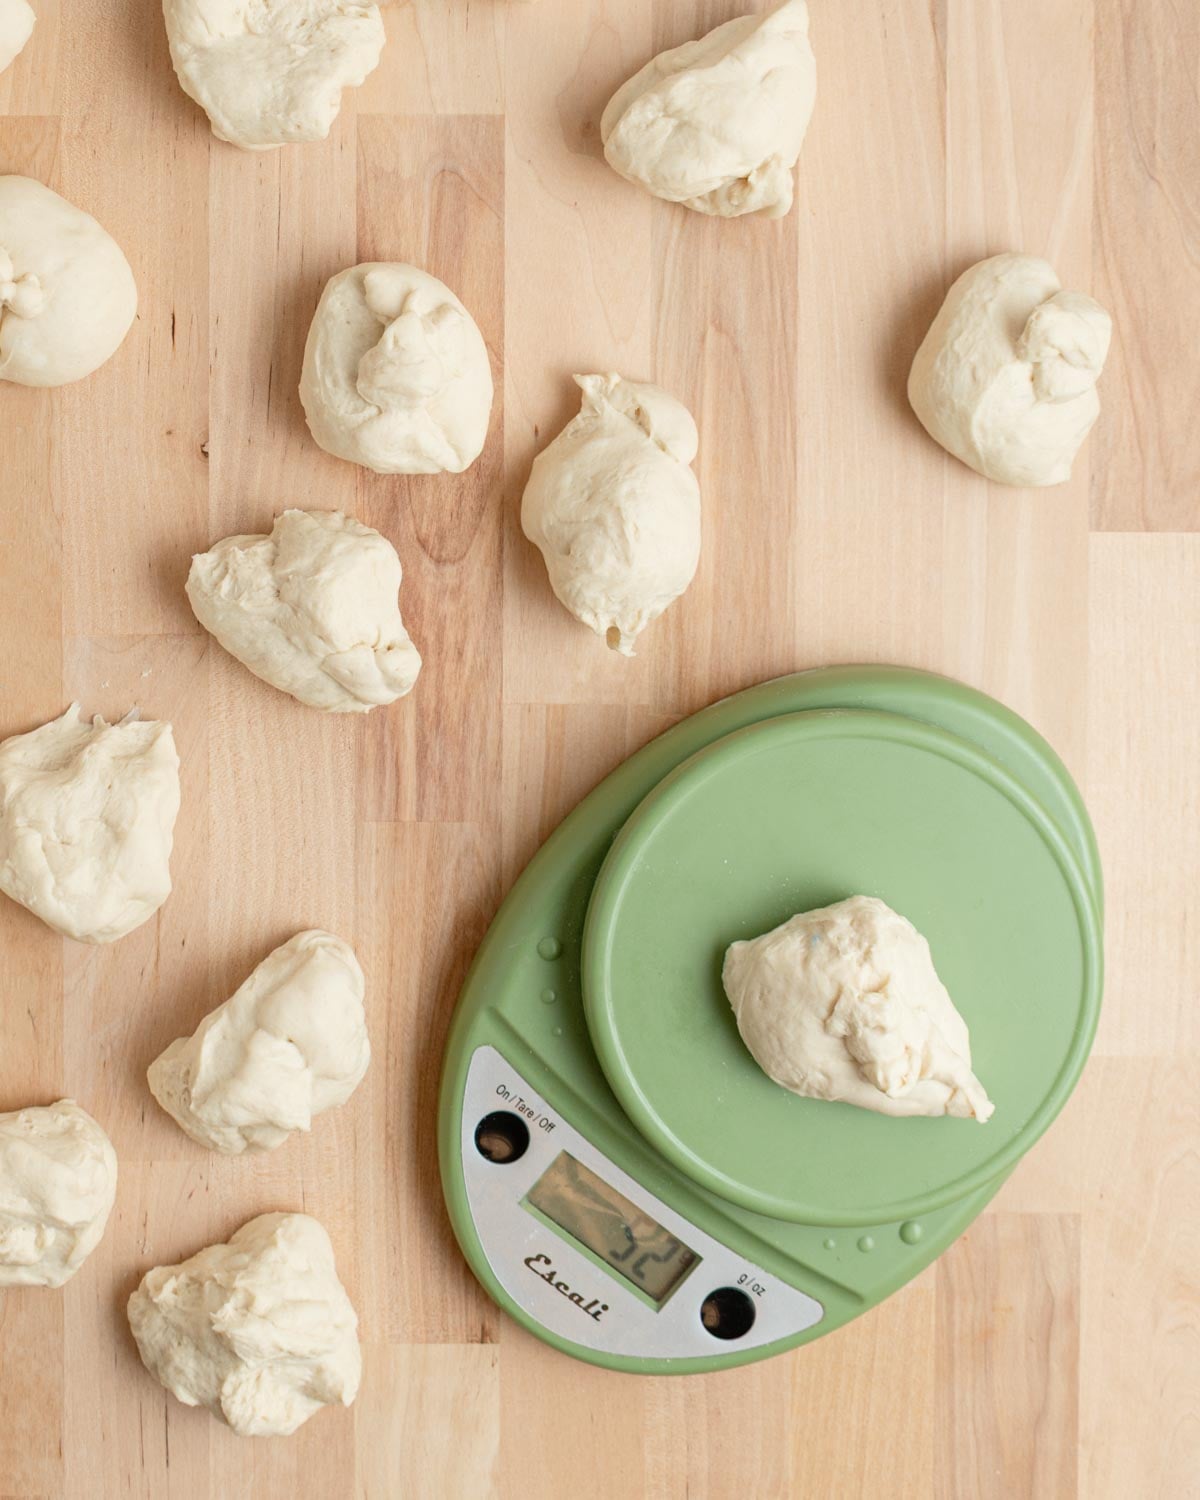
    Several pieces of dough are placed on a light wooden surface. One dough piece is being weighed on a green digital kitchen scale, which displays 27.1 grams.
    Each roll should weigh about 52g.

    Shaping French Dinner Rolls

    I tested a few different ways to shape these French bread dinner rolls. You can absolutely just shape them into round balls and bake them that way, but I wanted to replicate the oval shape I usually see at restaurants. I ended up using a two-step shaping process.

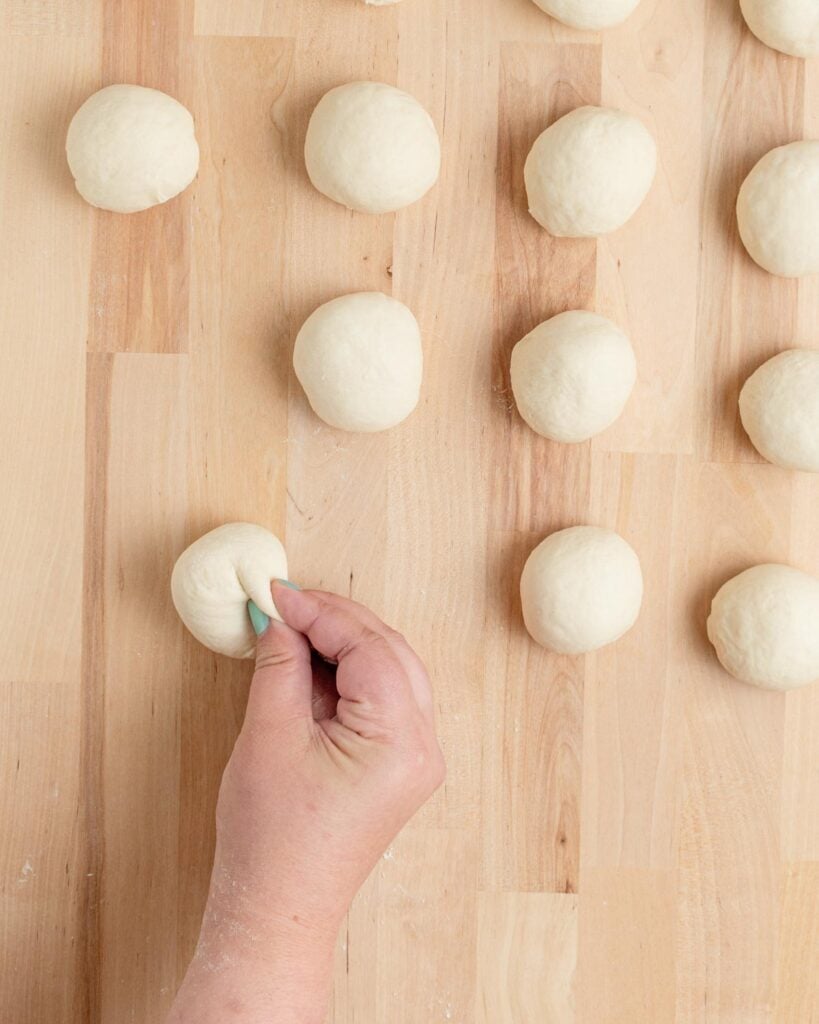
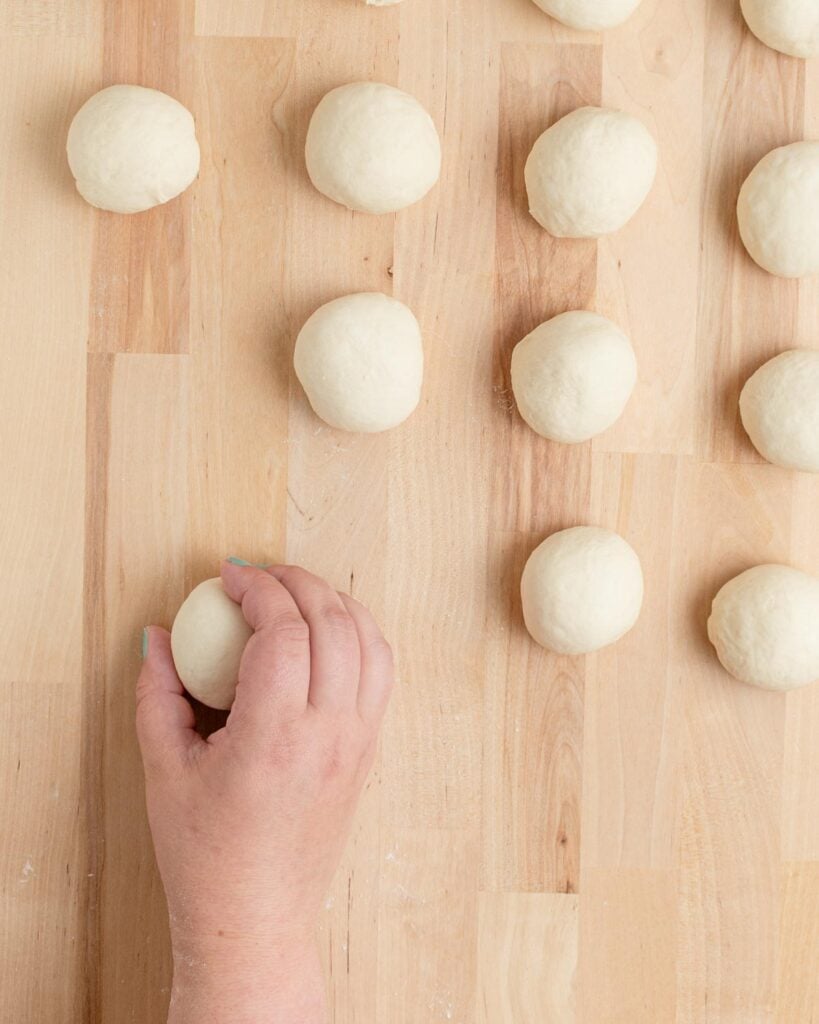
    First I shape the dough into balls:
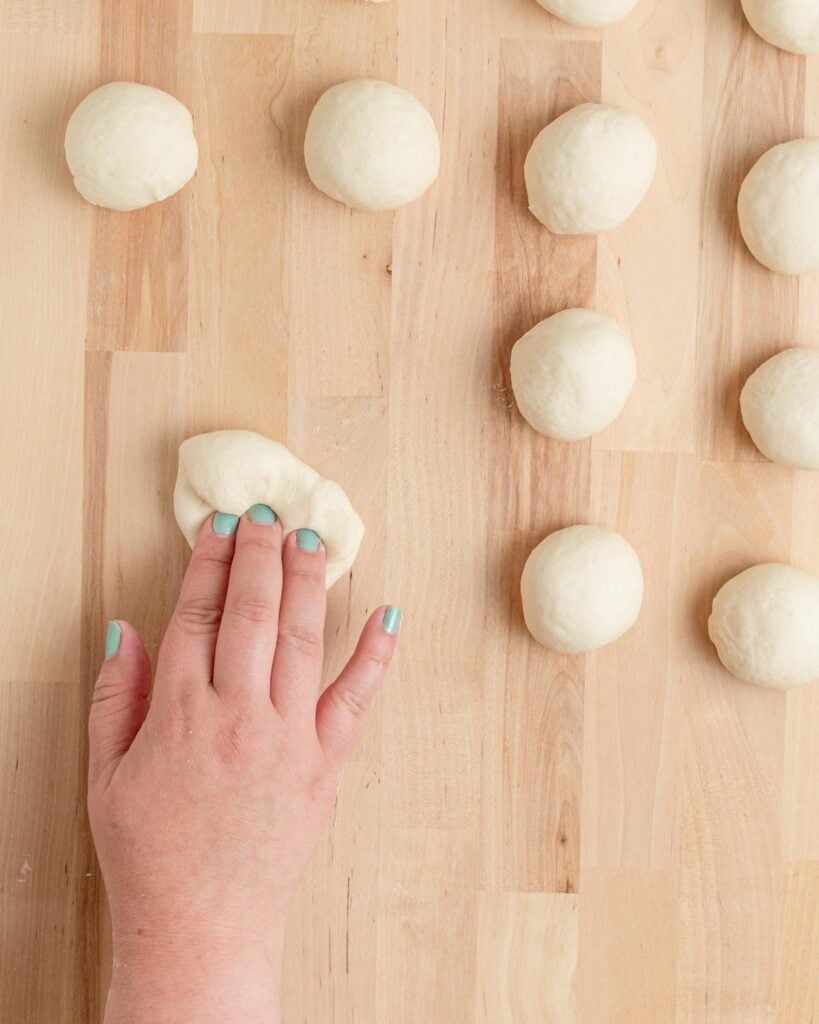
    A hand with aqua-painted nails shapes a ball of dough on a wooden surface. Eleven other dough balls are arranged nearby, ready for baking or further preparation.
    Tuck the edges in
    A hand pinches a ball of dough on a wooden surface. Several other dough balls are arranged nearby, ready for baking or further preparation.
    Pinch together to seal
    A hand is holding a small ball of dough on a wooden surface, with several other dough balls arranged nearby.
    Tighten up the bottom seam
    Fifteen evenly spaced dough balls are arranged in a 3 by 5 grid on a light wooden surface.
    16 perfect dough balls!

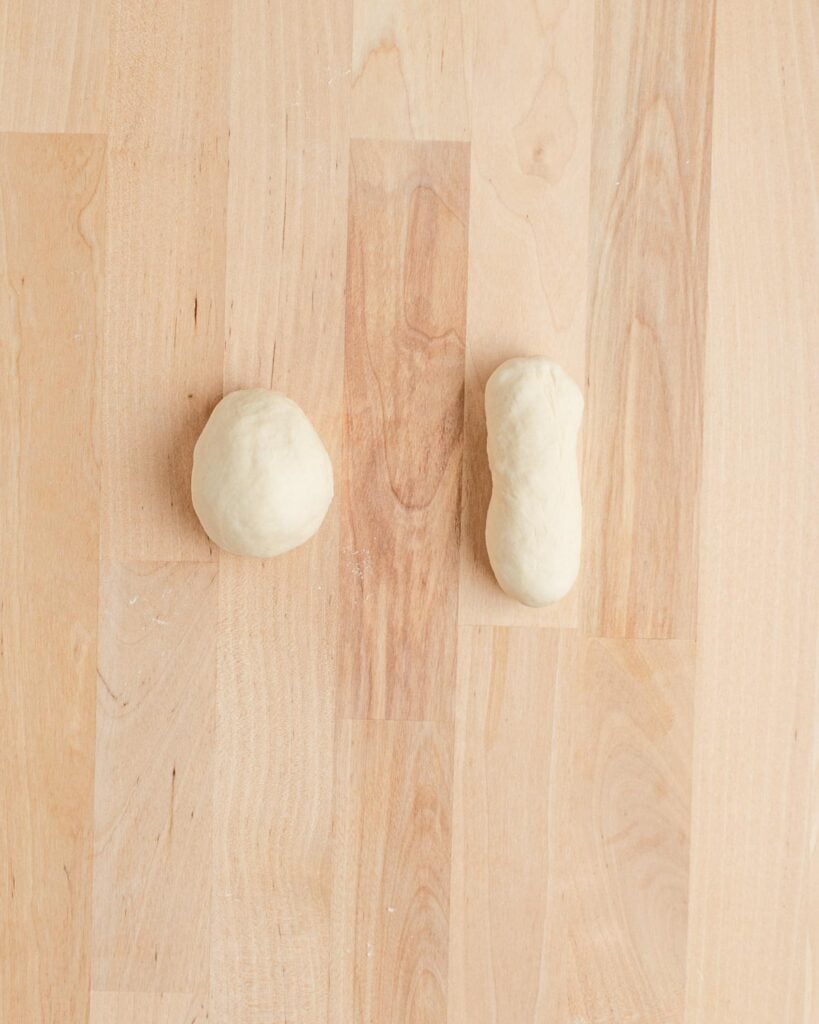
    Then, I roll each dough ball into a log about 3 inches long x 1.5 inches wide:
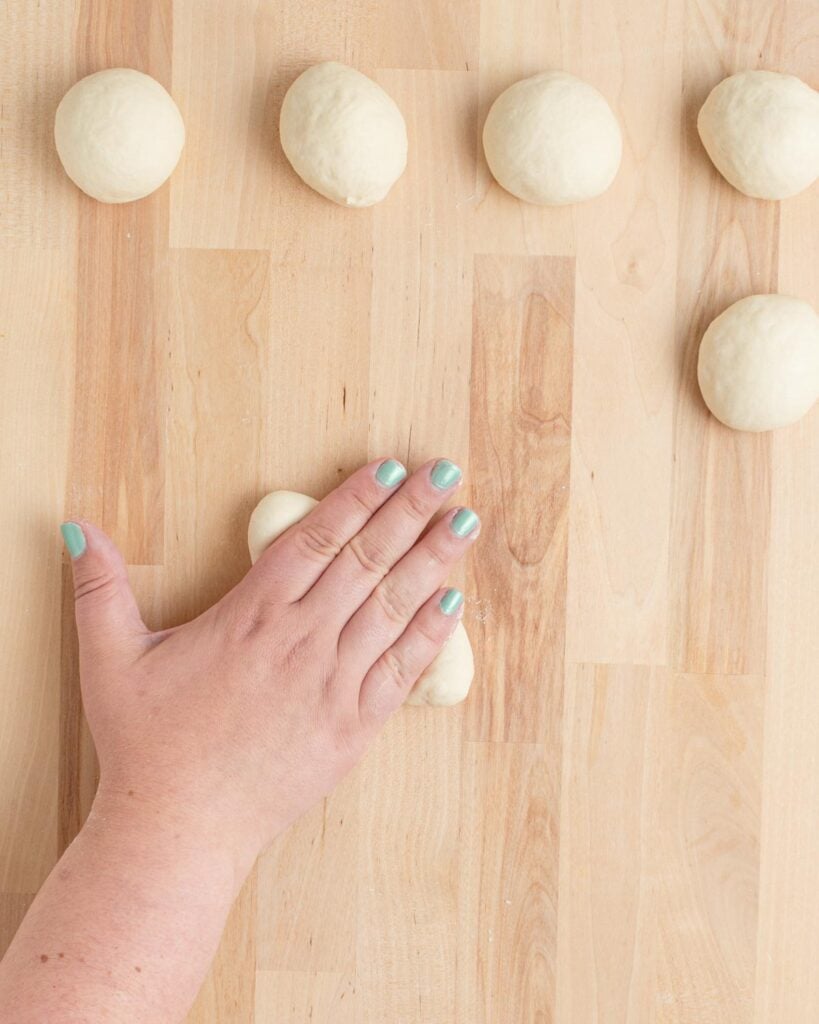
    A hand with teal nail polish presses down on a ball of dough on a wooden surface. Five other dough balls are arranged nearby.
    Two pieces of dough rest on a light wooden surface. The dough on the left is round, while the dough on the right is oval-shaped. The wood shows natural grain patterns in varying light brown tones.

    The dough shrinks back slightly when I roll it, so I usually roll about 4 inches long and let it shrink down to 3 inches.

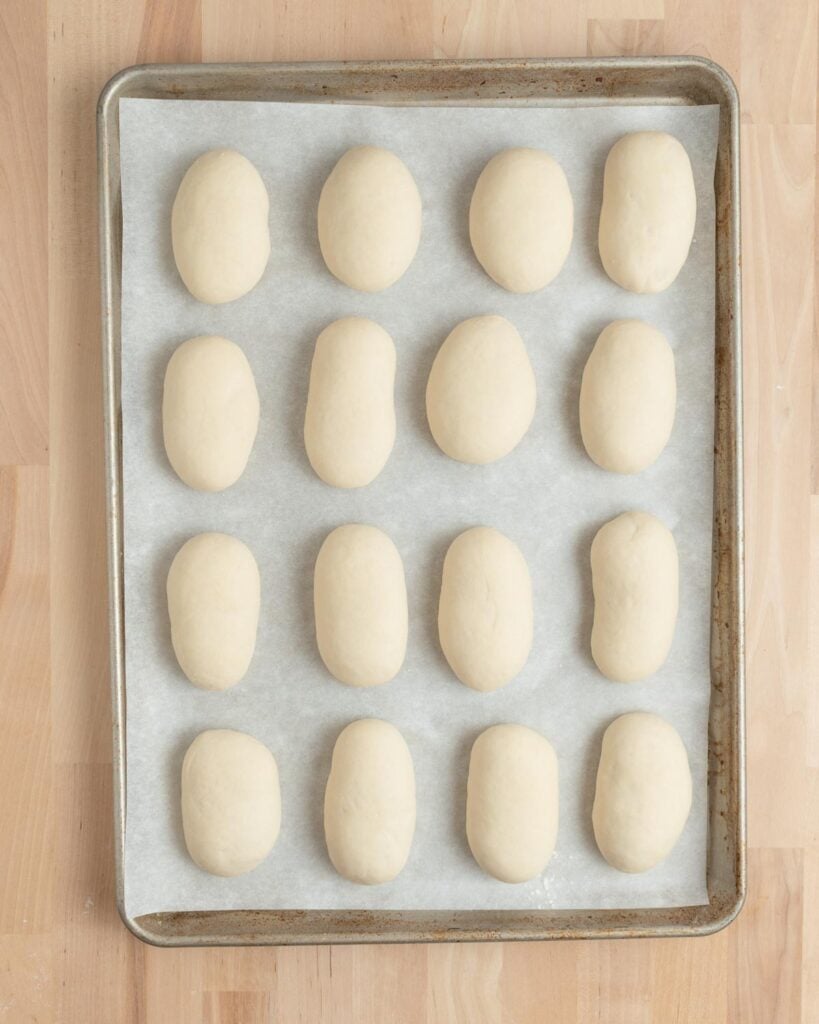
    I let the rolls rise one last time before baking, during which they will get noticeably puffier on the baking sheet, though not quite doubled in size.
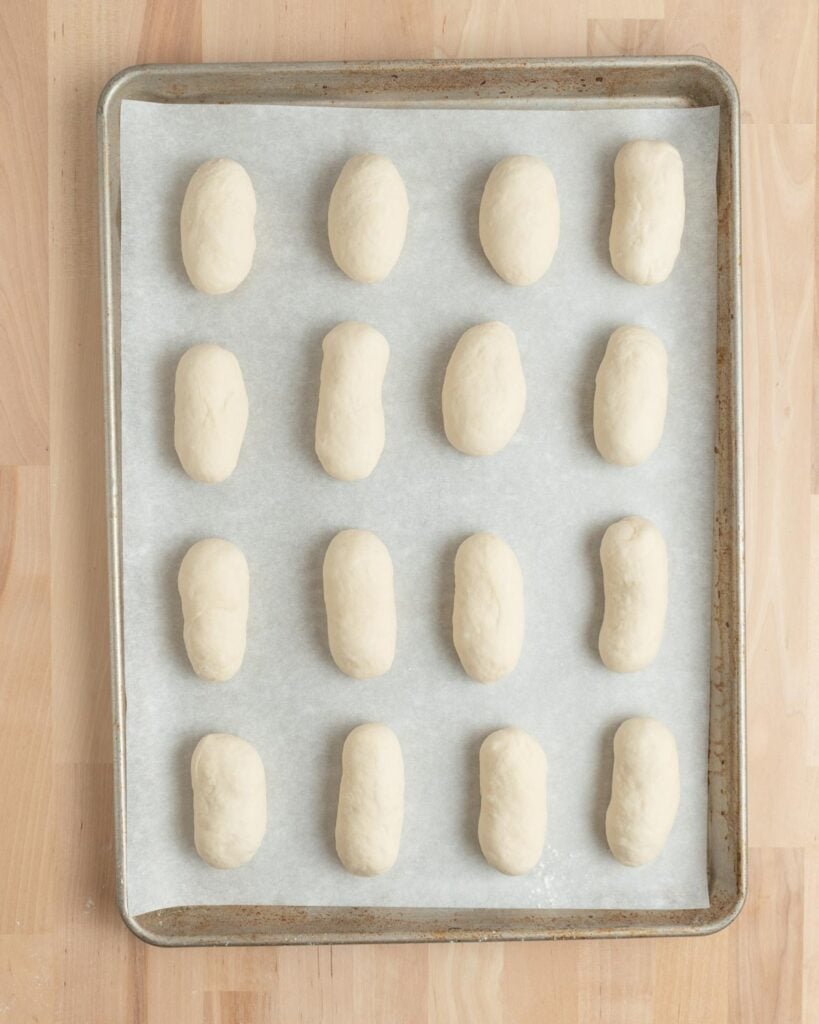
    A baking sheet lined with parchment paper holds fifteen evenly spaced, oval-shaped pieces of dough before baking, arranged in a 3 by 5 grid on a wooden surface.
    After shaping
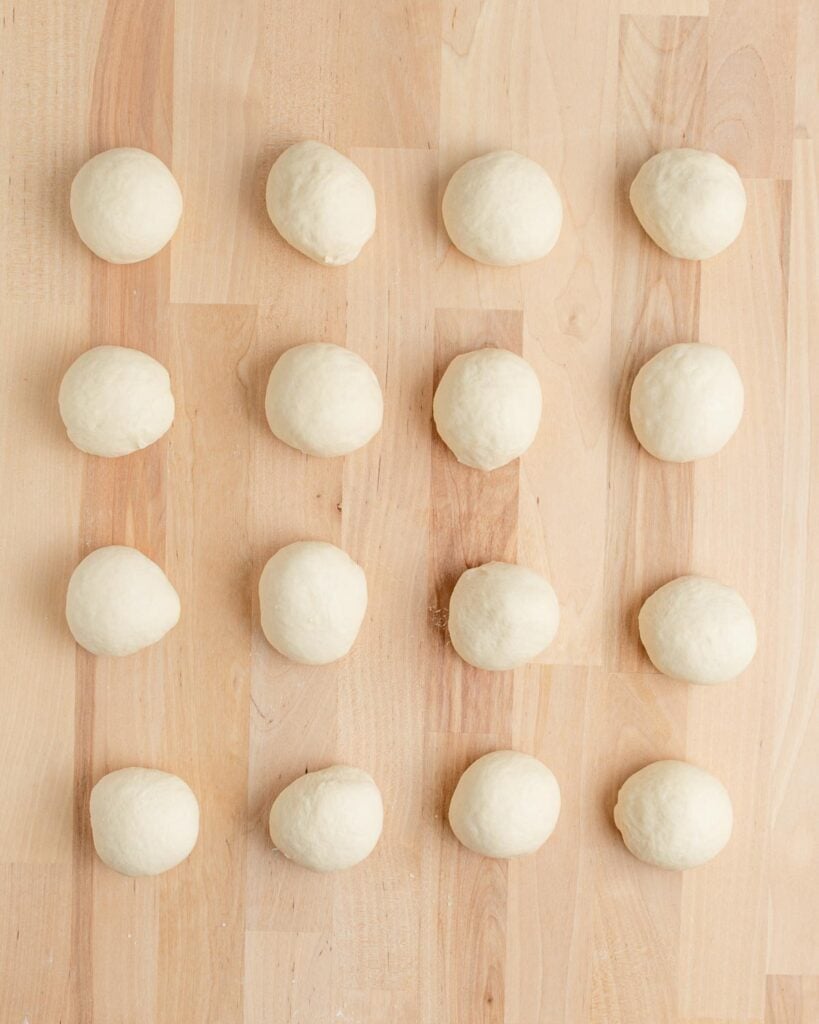
    A baking sheet lined with parchment paper holds sixteen evenly spaced, oval-shaped balls of raw dough, arranged in four rows of four, on a light wooden surface.
    After rising

    Water gives the best crisp crust

    I tested using different washes for my French dinner rolls recipe (egg, milk, oil, bare, etc.) and the one that gave the best crunchy-yet-pliable crust was a simple water wash. I use a misting spray bottle to spray the rolls all over with water before scoring and baking them, but you can also just brush them with water.
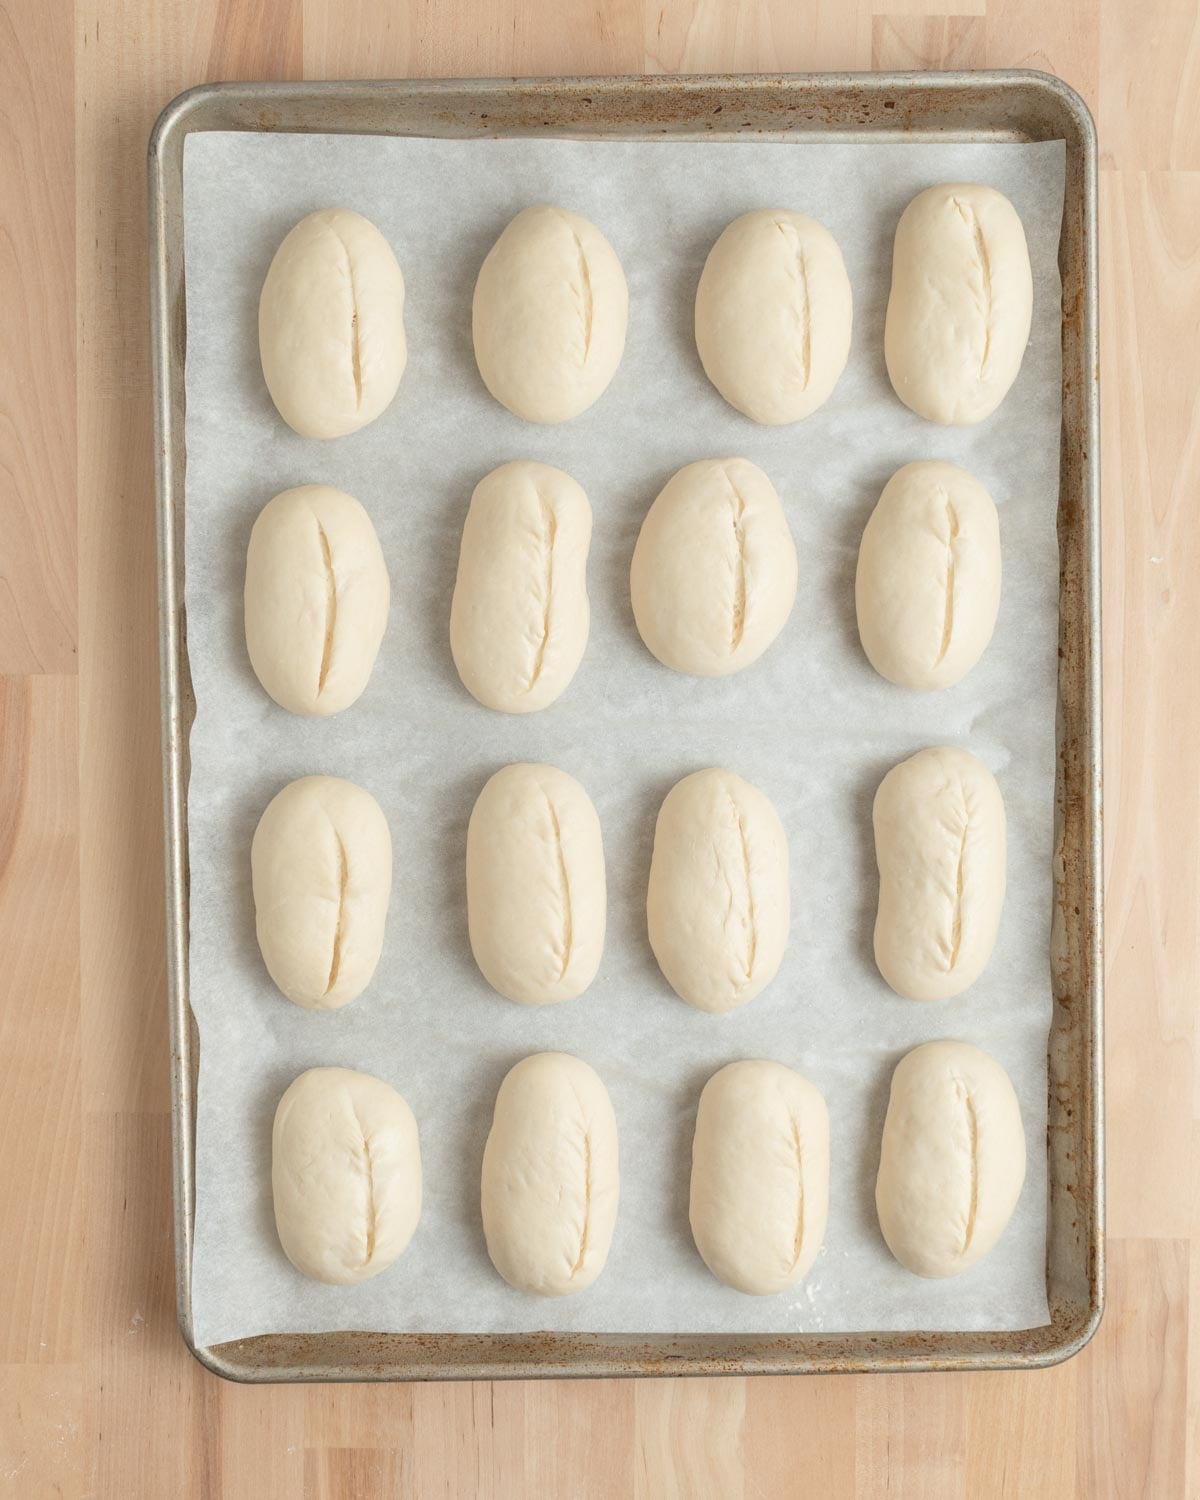
    A baking tray lined with parchment paper holds sixteen evenly spaced, unbaked bread rolls, each scored with a single line down the center, arranged in a 4 by 4 grid.
    Score from end to end for best results.

    The rolls come out of the oven quite pale with just a bit of browning around the top, and they are so good served still warm with a pat of butter.

    They also microwave quite nicely, so if you have some left over the next day, pop them in the microwave for 10 seconds and they'll be good as new.
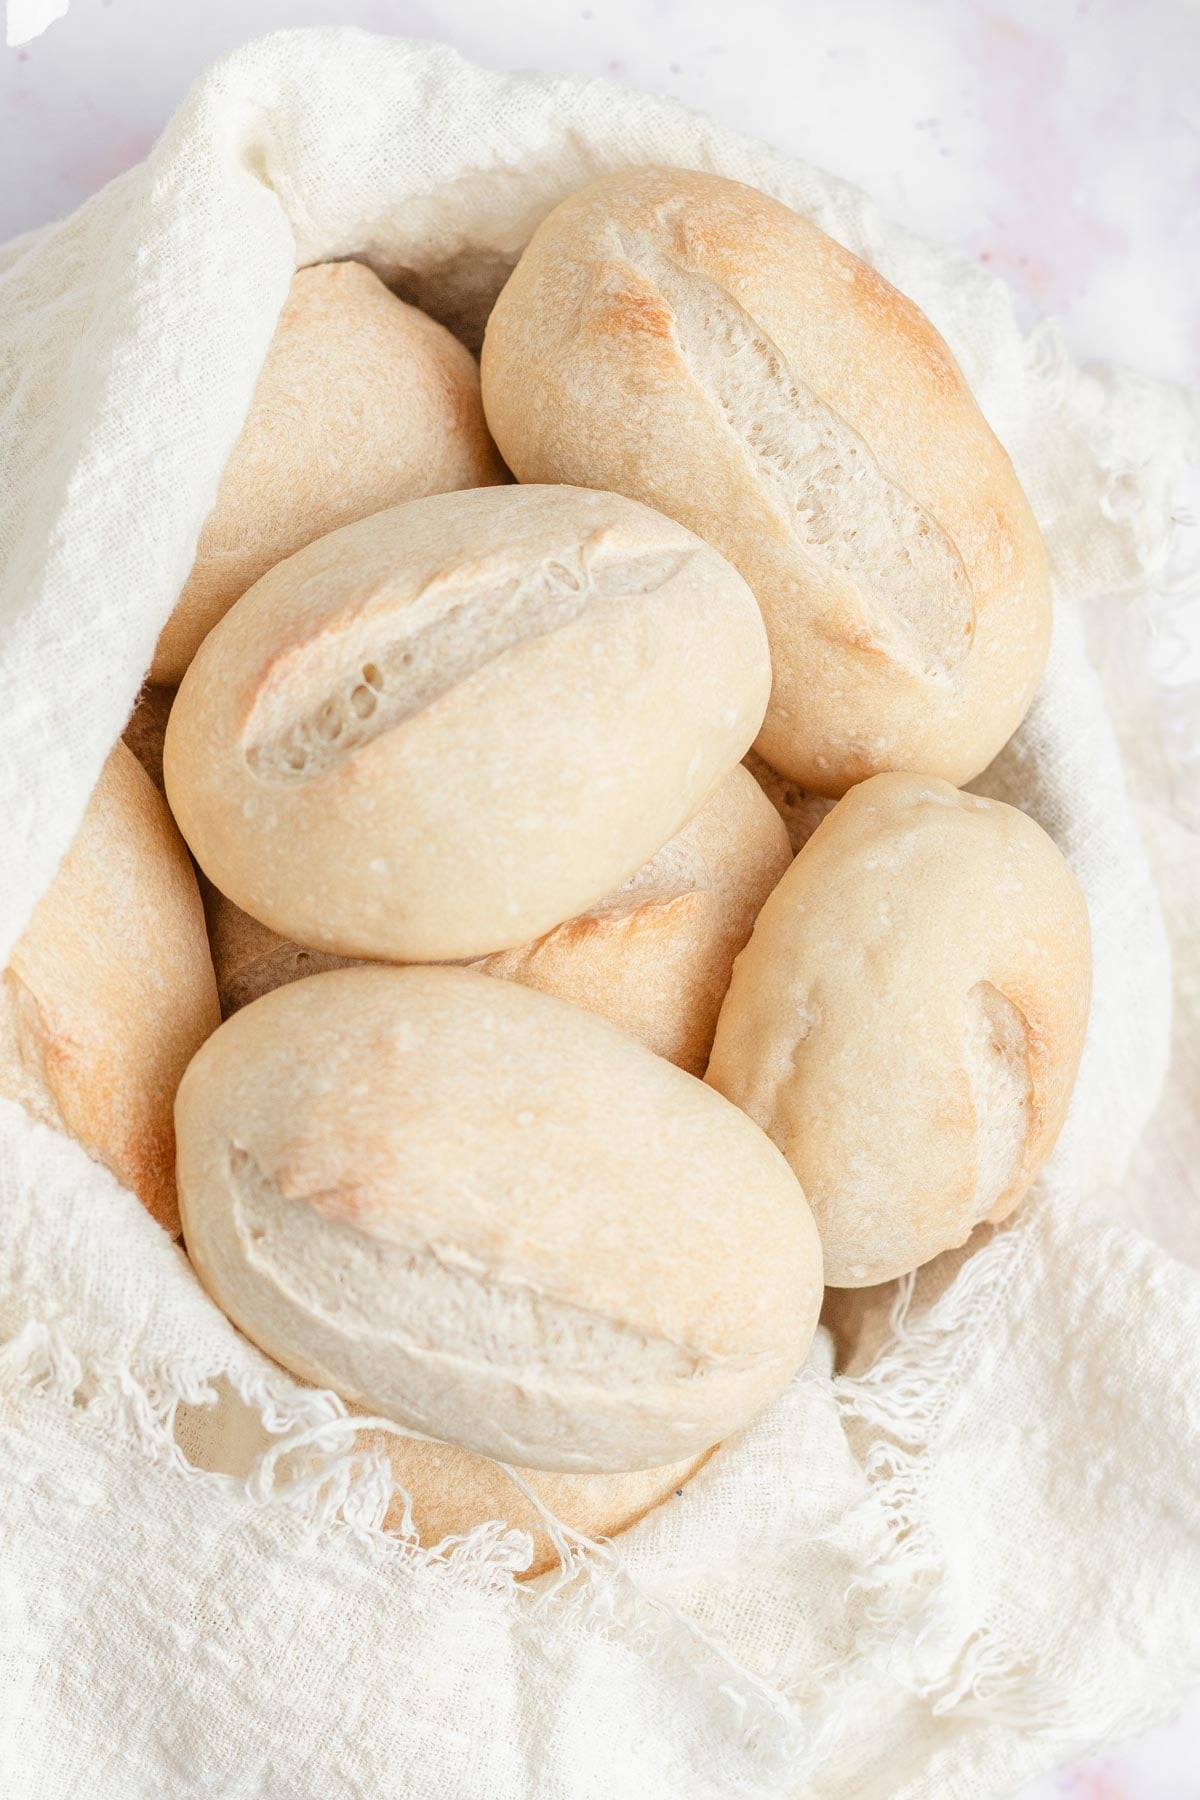
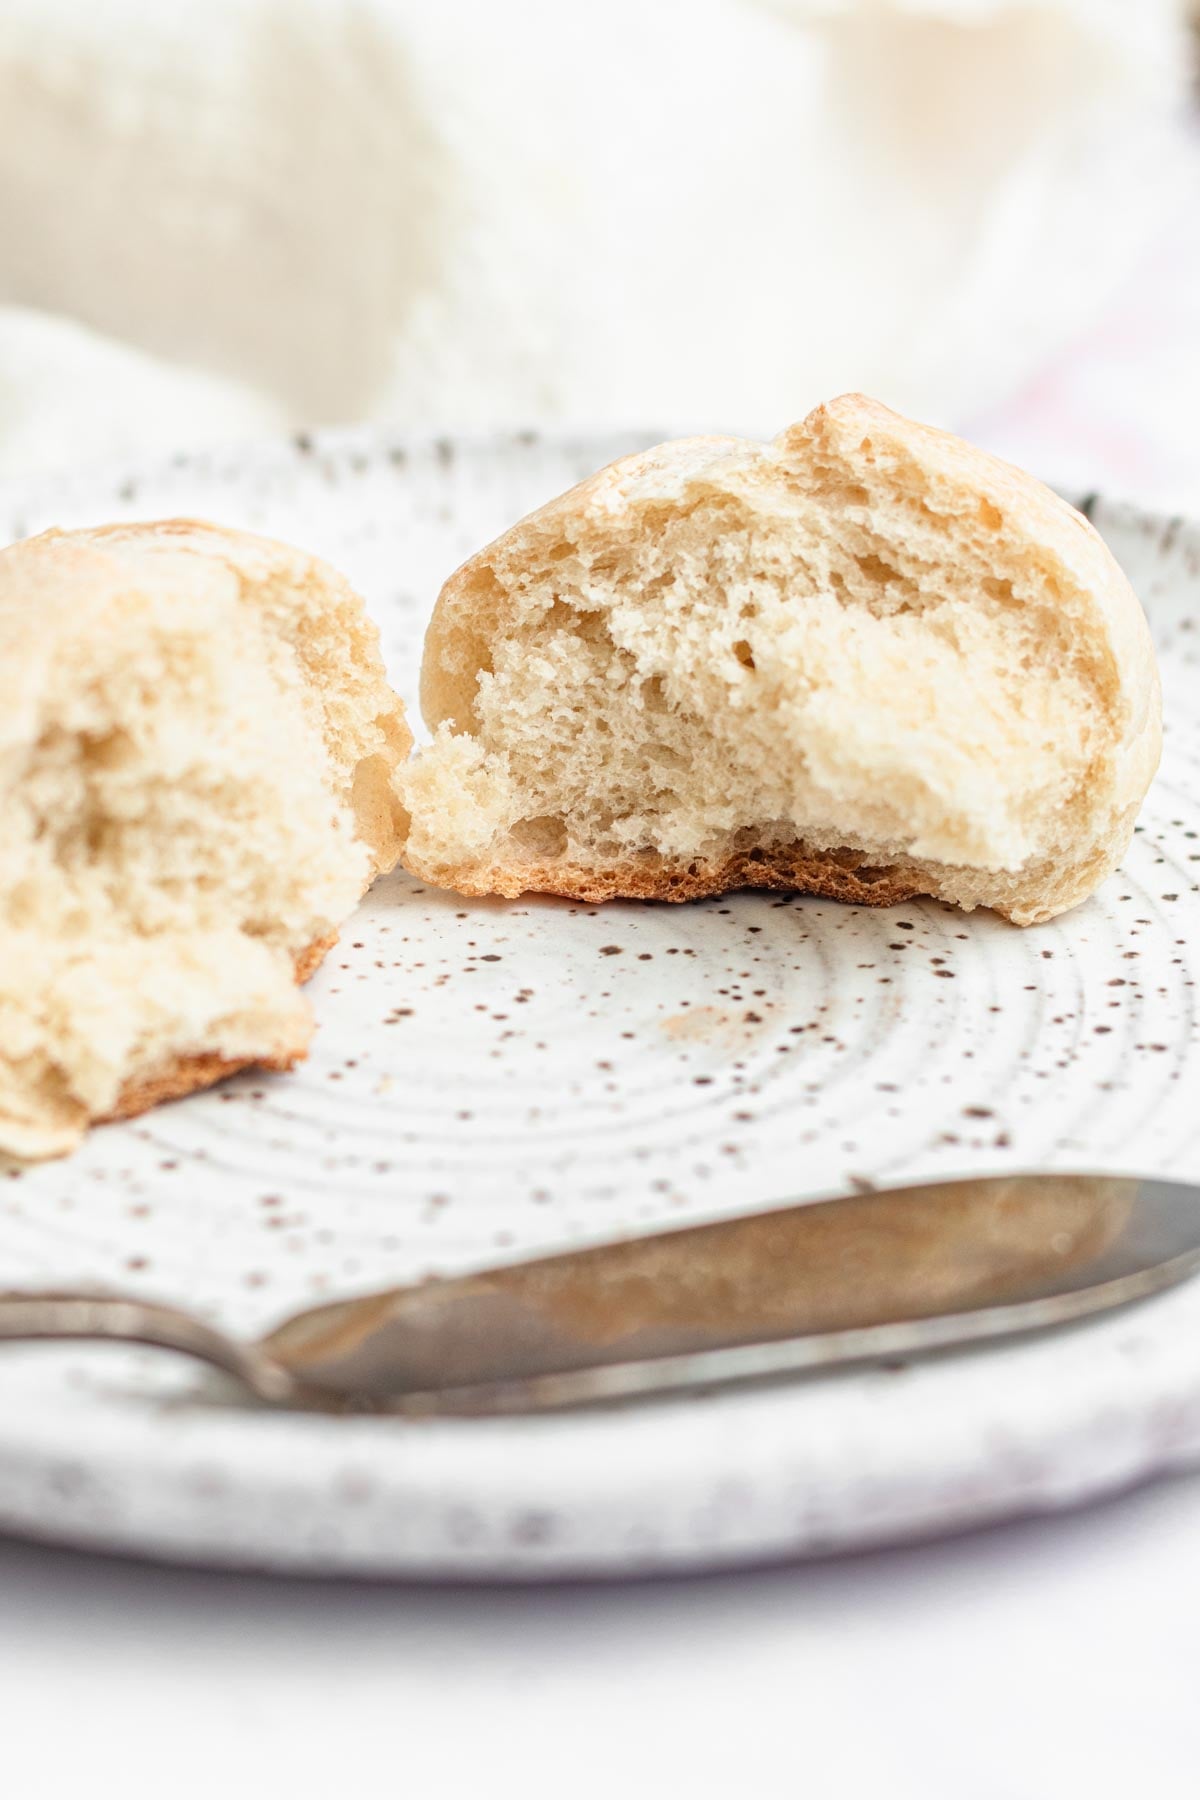
    Seven round, light brown bread rolls with a split top sit in a white cloth-lined basket on a white surface.
    A round bread roll is split in half on a white speckled plate. A butter knife rests nearby. The rolls inside texture is visible, and the background is softly blurred.

    💭 Have More Baking Questions?

    I've rounded up answers to common baking questions and how-to guides, including:

    • Ingredient swaps and FAQs
    • Why my recipes are written in grams and not cups
    • How to quickly bring eggs and butter to room temperature
    • Ingredients I use (salt, flour, yeast, etc.)
    • Step-by-step guides for bread and baking techniques

    See my baking techniques & troubleshooting guide and ingredient swaps and FAQs for more!

    Want this recipe, only smaller?
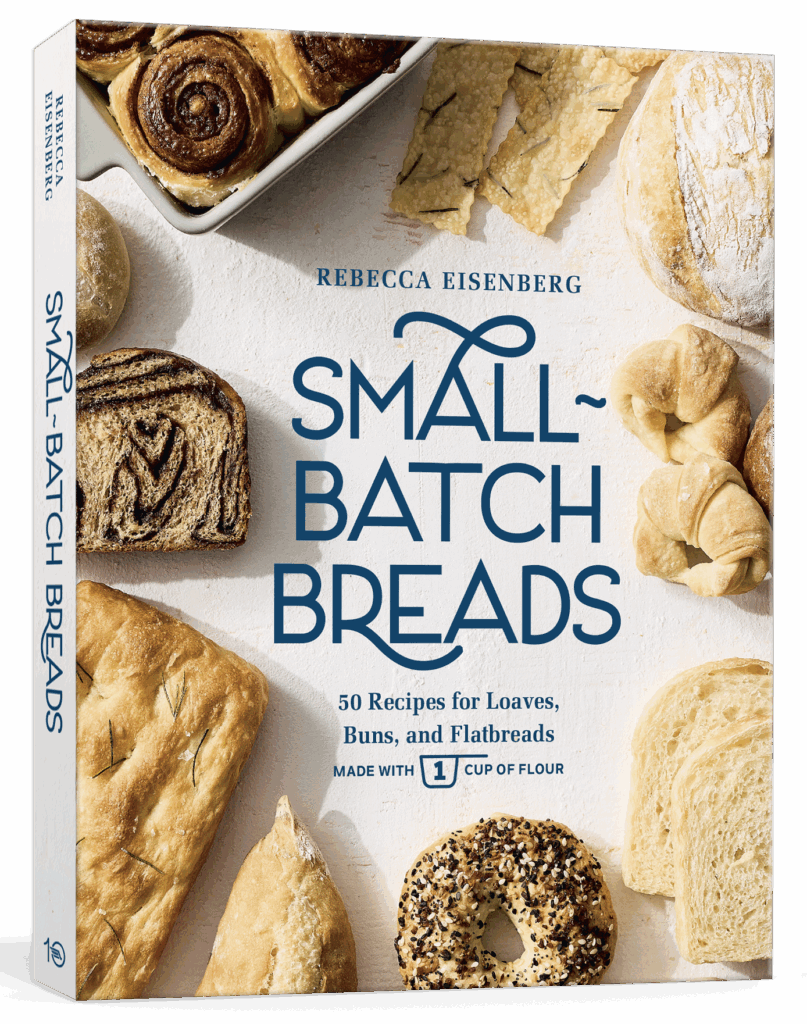
    A cookbook titled Small-Batch Breads by Rebecca Eisenberg, featuring various loaves, buns, flatbreads, and rolls on the cover. The book promises 50 recipes made with one cup of flour.

    Find it in my Small-Batch Breads cookbook available now wherever books are sold!

    Featuring fifty easy-to-follow bread recipes made using 1 cup of flour.

    On Sale Now!

    📖 Recipe

    A close-up of several oval-shaped french bread rolls with light brown crusts and slits on top, arranged in a cloth-lined basket.

    Hard French Dinner Rolls (Restaurant Bread Basket-Style!)

    Servings 16 rolls
    Author Rebecca Eisenberg
    My recipe for crusty, hard French dinner rolls is super easy and makes the best restaurant-style bread rolls to go with your dinner. They are crusty on the outside, soft on the inside, and super easy to make, too. Once baked, these dinner rolls freeze and reheat beautifully, so I like to make a double batch and stash some away for later!
    Print Recipe Email Recipe Pin Recipe

    Recipe Notes

    • For a shinier crust, brush the rolls with an egg wash or an egg white wash before baking instead of using water. A whole egg wash will give a darker brown crust, while an egg white wash will make them shiny without extra browning.
    • If you have a perforated baguette pan, you can let the shaped rolls do their final rise in that. Place the whole baguette pan on the baking sheet to bake — you'll get that little dotted pattern on the bottom, like you see on some restaurant rolls!
    • Overnight rise: Immediately after kneading, place the dough in the fridge to rise overnight. The dough will be fine for up to 24 (mayyyyybe 48) hours in the fridge before shaping and baking.
    • Reviving day-old rolls: Pop day-old rolls in the microwave for 10 seconds and they'll be practically good as new! 
    • To Freeze: Place the cooled, baked rolls in an airtight bag with as much air pressed out as possible. Defrost to room temperature, then microwave for 10 seconds, or pop the frozen rolls in a 350°F oven until warmed through.

    Ingredients
     

    • 480 grams all-purpose flour
    • 8 grams sugar
    • 8 grams diamond crystal kosher salt
    • 4 grams instant yeast
    • 324 grams water (90°F)

    Instructions
     
    Prevent your screen from going dark

    • Mix. In the bowl of your stand mixer, whisk together flour, salt, sugar, and yeast. Make a well in the center and pour in the warm water. Use the dough hook on low speed to mix until all the water and flour are incorporated into a rough, messy dough that collects on the dough hook, about 3-4 minutes.
    • I do all my mixing and kneading on speed 2-3 on my KitchenAid mixer. Sometimes I'll go up to speed 4, but mostly I keep the mixer at speed 2-3.
    • Knead. Increase the speed slightly and knead until the dough is smooth, soft, and a little sticky to the touch, about 4-5 minutes. It should pull cleanly from the walls of the bowl, but might stick to your fingers slightly if you pinch it. If needed, dust in additional flour while kneading, just enough to help the dough pull away from the bowl.
    • Rise. Turn the dough out onto a lightly floured work surface and knead briefly to tuck all the edges into the middle to form a ball. Lightly grease the inside of the mixer bowl, then place the dough ball inside. Cover the bowl, then let the dough rest in a warm spot (72°F) until just about doubled in size, about 1 hour.
    • Use the fingerprint test to determine if the dough is ready!
    • Pre-shape. Line a sheet pan with parchment paper. Gently deflate the dough, then knead it back into a ball. Use a kitchen scale to weigh the dough and divide it into 16 equal pieces (they should each weigh about 51g). On an unfloured surface, knead and tuck each portion of dough into a tight ball with a smooth top and a barely-visible pinched-together seam underneath.
    • If the dough is really sticking to you as you shape the dough balls you can dust in the tiniest pinch of flour. Don't overdo it or the flour will prevent the dough from sticking to itself.
    • Shape. With the seam of each dough ball against the counter, briefly press down on the middle and roll it back and forth once or twice with gentle yet firm pressure to shape it into a short oval log, about 3 inches long and 1½ inches wide. The dough will shrink back slightly, so I find it works best to roll to about 4 inches first and let it shrink back to the right size. Transfer the shaped rolls to a parchment-lined sheet pan in four rows of four.
    • Rise. Dust the tops of the rolls lightly with flour, cover with a clean dish towel or plastic wrap, and let them rise until puffed up and almost doubled in size, about 45-60 minutes.
    • Preheat. Toward the end of the rise time, preheat the oven to 450°F and fill a small misting spray bottle with water.
    • Score. Immediately before baking, spritz (or brush, if you don't have a spray bottle) the tops of each roll with water, then use a sharp knife or a lame to cut a ¼" deep slash down the center of each roll. Make sure the score mark goes end-to-end for the best results.
    • Bake. Bake until pale golden brown on top, 13 to 15 minutes. Transfer the rolls to a wire rack and let cool almost completely before serving — these are best served slightly warm!
    Liked it? Rate this Recipe!

    Video

    Breads
    « Quick Irish Soda Bread with Buttermilk

    Comments

    No Comments

    Leave a Reply Cancel reply

    Your email address will not be published. Required fields are marked *

    Recipe Rating


    rebecca wearing a black t-shirt with her left hand on her hip and her right hand holding a whisk upright

    Hi, I'm Rebecca! I'm a pastry chef with a home cook mentality and New York Times bestselling author of Small Batch Breads. I'm on a mission to make spending time in the kitchen fun and accessible — that's why so many people love my beginner-friendly bread recipes. I'm always looking for new and creative ways to get the most out of my favorite ingredients and flavors!

    More about me →

    Summer Favorites

    • cross section of a loaf of deli rye sandwich bread
      Fresh Deli-Style Rye Bread Loaf (with Seeds)
    • cornbread cut into 12 wedges in a cast iron skillet on a butcher block surface
      Sweet Homemade Cornbread in a Cast Iron Skillet
    • a bowl of everything bagel goldfish.
      Everything Bagel Goldfish Crackers
    • a slice of double chocolate banana bread.
      Loaded Double Chocolate Banana Bread

    Get in touch

    Want to work with me? Just have a question? Shoot me an email!

    rebecca@thepracticalkitchen.com

    Treat Yourself

    • the best plus size aprons
      15+ Places to Buy Plus Size Aprons
    • 15+ best salt cellars for any kitchen.
      15+ Best Salt Cellars to Keep on Your Counter
    • flour storage containers for 5 lbs of flour
      Flour Storage Containers That Fit Five Pounds of Flour
    • ADHD Kitchen Organization Tips and Tricks
      8 things in my ADHD kitchen that just make sense

    About Me

    • Facebook
    • Instagram
    • Pinterest
    • Twitter

    Journalist turned pastry chef, on a mission to make cooking and baking fun and accessible. I'm always looking for new and creative ways to get the most out of my favorite ingredients and flavors! A Pittsburgh native currently calling Boston home.

    Footer

    ↑ back to top

    Links

    • About
    • Recipe Search
    • Editorial Policy
    • Privacy Policy
    • FAQ

    Newsletter

    • Sign Up! for emails and updates

    Resources

    • Shop
    • Links & Resources
    • Cooking Tips
    • Web Stories

    As an Amazon Associate I earn from qualifying purchases.

    Copyright © 2026 Foodie Pro on the Foodie Pro Theme

    Rate This Recipe

    Your vote:


    A rating is required
    A name is required
    An email is required