

Learn how to make adorable little mini bagels at home with this step-by-step guide. These mini bagels are perfect for making homemade mini pizza bagels, brunch platters, picnic spreads, school lunches, and more! Yield: 1 dozen mini bagels.

This easy mini bagel recipe is a smaller version of my popular plain bagel recipe. Shrinking the recipe down to make these mini bagels required enough changes to the base recipe that I wanted to give them their own home on my site.
You can use this same mini bagel process to make mini versions of any of my unique bagel recipes. Those recipes make a bit more dough, so will make 16 mini bagels instead of 12.

Mini bagels are always a hit at my family's annual lake trip. We put them out on a platter with my best-ever tuna salad and creamy smashed egg salad, a selection of cream cheeses, hummus, etc. Unlike full-size bagels, which obligate you to one sandwich filling, mini bagels allow you to enjoy a variety of sandwiches in one sitting.
Mini bagels are also great for kid-sized hands and appetites — these mini bagels will be a huge hit in school lunches and after-school snack time!

How to Make Mini Bagels
We're following standard dough-making procedure for these mini bagels. First, combine the dry ingredients in the bowl of your stand mixer. Then, pour the lukewarm water into the center of the bowl.

The mini bagel dough should pull cleanly away from the sides of the bowl. No matter what size bagel you're making, bagel dough is a low-hydration dough. It has a relatively small amount of water compared to the amount of flour. It is not a sticky dough.
Shape the mini bagel dough into a ball, place it in a greased bowl, cover it, and let it rise until doubled in size. To check if the dough is ready to shape, use the fingerprint test.
🥯 How to Shape a Mini Bagel
Shaping mini bagels is just like shaping regular bagels, only smaller. You have to be a little gentler with the dough, but otherwise you're following the same process.

To poke the holes in the mini bagels, I like to first dust the bottom of the dough ball with flour and then carefully stick a thumb through the bottom seam and out the other side. Then I slide my other thumb in and gently squeeze and stretch, rotating the dough through my hands until the bagel hole is at least twice as wide as the sides of the bagel.
Boiling and Baking Mini Bagels
If you've heard me say it once, you've heard me say it a million times: If they're not boiled, they're not bagels!
Boiling is a crucial step in the bagel-making process. It gelatinizes the starches in the outer crust of the bagel, giving them their characteristic chewiness. Because these mini bagels are so small, they only need to be boiled for about 20-30 seconds per side.

You can work in batches for this step — depending on how wide your pot is you should be able to do two batches of six bagels each.
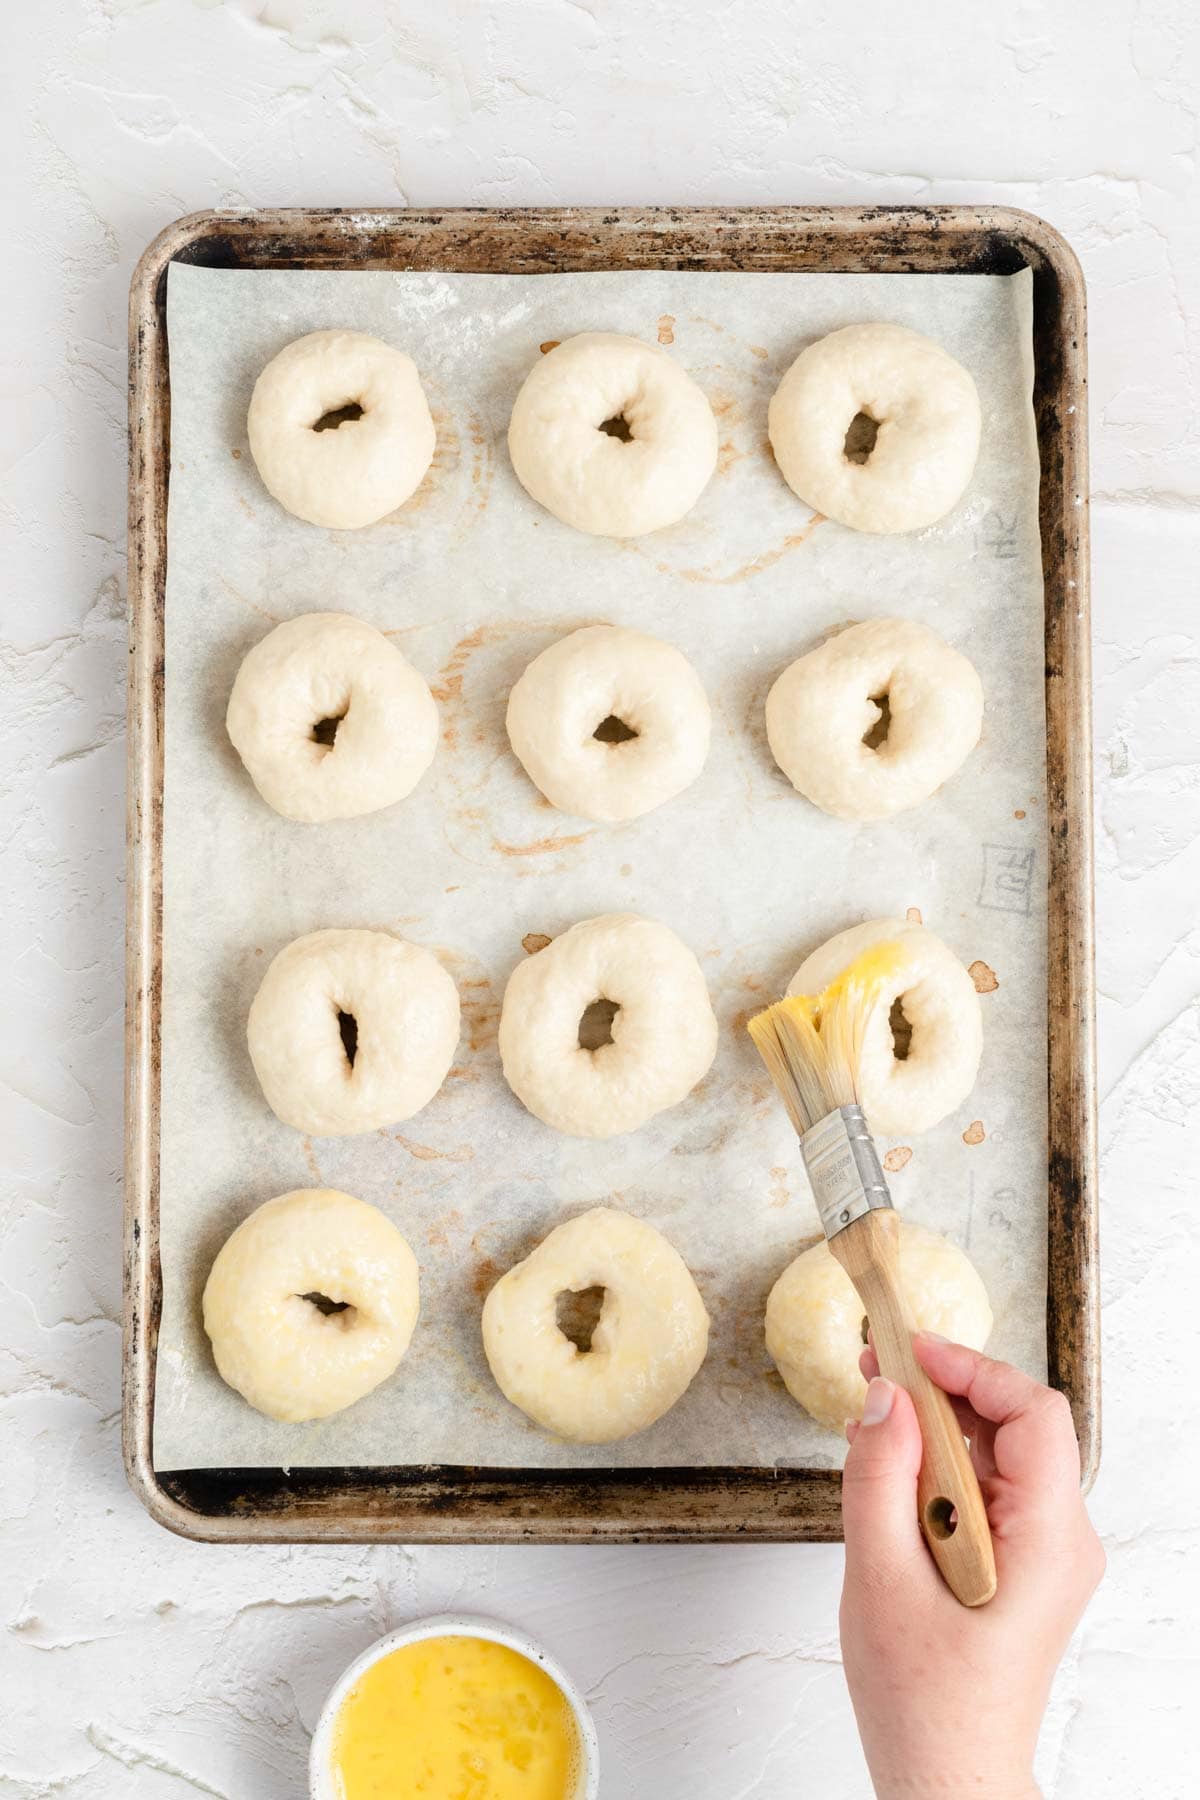
Remove the boiled mini bagels to a lined sheet pan and brush with egg wash.

You can add any toppings you like to your mini bagels. These are great with my homemade everything bagel seasoning!
💭 Have More Bagel Questions?
I've rounded up answers to common bagel questions and how-to guides, including:
- How to knead bagel dough by hand and what it should feel like
- Why bagels are always boiled
- Step-by-step guides for bagel shaping and baking techniques
See my bagel-making 101 guide for more!

📖 Recipe

How to Make Mini Bagels
Recipe Notes
- Store mini bagels in an airtight bag with a paper towel to absorb moisture or in a paper bag inside an airtight bag. Stored properly, they will stay good for 3-4 days. Do not refrigerate bagels.
- If you need to let the bagel dough rest or relax at all during the shaping process, cover it with a damp paper towel to prevent it from drying out.
- To make a mini bagel version of my everything bagels that have everything bagel seasoning in the dough, add 3 tablespoons everything bagel seasoning to the dry ingredients and increase the amount of yeast by 1 gram.
- If using Active Dry yeast, increase the amount to 5 grams, mix it with the warm water for the recipe, let sit for 5 minutes to get foamy before adding the water to the recipe.
Ingredients
- 375 grams all-purpose flour
- 14 grams sugar
- 8 grams diamond crystal kosher salt
- 3 grams instant yeast
- 225 grams warm water
- 1 egg (for egg wash)
- ⅛ cup any desired bagel toppings (optional)
Instructions
- Mix. Mix flour, salt, sugar and yeast in the bowl of your stand mixer. Make a well in the middle and add the water. Connect the dough hook attachment, start the mixer on the a low-medium speed and give the dough a minute or two to incorporate, pausing and scraping down the bowl as needed until the dough comes together in a shaggy, messy ball in the bowl.
- Knead. Increase the speed to low-medium and let the mixer run for 3-4 minutes, dusting in more flour if the dough is sticking to the bowl. You’re looking for a dough that is smooth and elastic and just slightly tacky to the touch. It shouldn’t cling to your hands or the bowl.
- Rise. Shape the dough into a smooth round ball, and place it in a lightly oiled bowl. Let it rise for an hour in a warm spot (70-75°F) until about doubled in size. When you press a finger into the dough, it should fill in partially but not completely.
- Preheat your oven to 425°F and fill a wide, high-sided skillet with at least 3 inches of water, and bring it to a low boil on the stove. Line a sheet pan with parchment paper or a silicone mat and set aside.
- Deflate. Gently deflate the dough, knocking the air out of it. Gently knead it back into a ball.
- Divide. Use a kitchen scale to divide the dough into twelve equal pieces (about 50-55 grams each). Flatten the dough gently against the counter, tuck the edges up and pinch them together on top. Flip the dough over and cup your hand around it. Drag your hand toward your body against the counter to create surface tension and shape the dough into an oval. Rotate the dough 90 degrees and repeat to create a circle shape.
- Shape. Starting with the first dough ball, dust your hands in flour and poke a thumb through the bottom, pushing any extra seams into the middle. Squeeze gently and slide your other thumb in. Slowly stretch the dough out, rotating it through your hands until the hole in the middle is at least twice as wide as the sides.
- Boil. Right before dropping each bagel into the water, quickly stretch it out again to prevent the hole from closing up. Boil mini bagels in batches for 30 seconds per side, then remove to a lined baking sheet.
- Egg wash and toppings. Brush each mini bagel with egg wash (1 large egg + 1 teaspoon water, whisked together) and add any desired toppings.
- Bake. When all the bagels have been boiled, egg washed, and topped, transfer the baking sheet to the oven and bake them for 17-19 minutes, until golden brown and shiny.
- Cool. Remove the bagels from the oven. Let cool for a few minutes, then transfer a wire rack to finish cooling before slicing.
Sam says
These were so much easier than I expected! Who knew bagels were so easy. These are the perfect size snack. I topped them with everything bagel seasoning and they were tasty!
Alicia says
This recipe was amazing and so easy to follow! Bagels turned out fantastic and the perfect size for kiddos! Can't wait for them to try tomorrow! Thanks so much for the great tutorials
Rebecca Eisenberg says
So glad you enjoyed them!!!
Ree says
Can we use bread flour instead of all purpose flour?
Rebecca Eisenberg says
Yep!
Elena says
Do you think you can shape them smaler then 50 grams?
Rebecca Eisenberg says
Yep! They might need a shorter boil + bake time though so you'll have to do some experimenting on your own.
TwoHundredPlants says
These were so simple to make! It's a short fermentation so it's not the most amazing bagels ever, but for "I want bagels in two hours" they will go on my recipe rotation! (I used the leftovers to make bagel bites and those were amazing as well!)
Rebecca Eisenberg says
Yep these are definitely a speedy bagel! You could reduce the yeast and do a longer ferment time or overnight cold ferment if you really wanted to, but for bagel bites speed is a priority for sure! Glad you liked them.
Caitlin says
These mini bagels were incredibly easy to make and so delicious. Mine were not as pretty as yours but beautiful for a first time making bagels. Excited to make them into breakfast sandwiches in the morning.
Rebecca Eisenberg says
Enjoy!!!
Lisa Clay says
Yummy bagels for lunch today thanks to this easy and delicious recipe! You've created a winning recipe in my book. Thanks!!
Jocelyn says
I’ve made several bagel attempts over the years and this has been my very best attempt! The recipe was extremely simple and unfussy, they rose beautifully, and look great! I subbed the sugar with 14g of honey because I was out of sugar. Still worked great.
My kids eat a mini bagel almost every morning for breakfast, so they’re so excited for tomorrow morning!!
Marissa says
Can I make these without a mixer?
Rebecca Eisenberg says
Yep, it’ll take about 8-10 minutes of kneading the dough by hand dusting in extra flour as needed!
Linda says
Hello, can I freeze these? Thank you
Rebecca Eisenberg says
Yes, you can freeze them once they're baked.
Joy Buckle says
Simple recipe. Easy to follow. Great bagels!
Sarah says
Hello! What are the nutritional values?
Rebecca Eisenberg says
This is an anti-diet, diet-culture-free food blog! I do not provide nutritional information for my recipes, you are welcome to calculate it yourself.
Happy Cyclist says
These turned out fantastic! Thank you for providing this recipe to make mini-bagels. It was exactly what I was looking for. I bet these were the original sizes of a regular bagel back in the 60's.
Rebecca Eisenberg says
Hahaha, you're probably right! So glad you enjoyed them 🙂
Agnes says
Really good recipe my bagels turned out great!
Rebecca Eisenberg says
So glad to hear it! Enjoy the mini bagels!
Helen says
So easy! The recipe and photos made it so simple to follow and produce a great product. My friends think I’m a super cook but I’m not, I’m a devotee of the practical kitchen!
Rebecca Eisenberg says
I have news for you: you ARE a super cook!
Aubrey says
I have baked these before and loved them! Have you ever added in chocolate chips? Since Panera discontinued chocolate chip bagels, I am really wanting to make my own.
Rebecca Eisenberg says
I haven't tried adding chocolate chips — you'll definitely want to use mini chips or hand chopped chocolate to make it work! It's on my list of things to try one day. If you give it a go, let me know how it turns out. 🙂
Carol says
Easy to make and delicious! FYI, I used bread flour as I had it on hand. Will definitely make again
Rebecca Eisenberg says
So glad you liked them! Bread flour is traditional for bagels so always a good safe substitute if youve got it!
Kearston Denham says
My second recipe that I have attempted of The Practical Kitchen, amazing recipe and easy to follow! delicious and chewy bagels that the whole family could not stop eating.
Rebecca Eisenberg says
I'm so flattered! Thrilled your family enjoyed the mini bagels. happy baking!
Megan says
I've never made bagels before but this was so easy and turned out so well! I made plain, everything, and mini chocolate chip, they all were so yummy!
Rebecca Eisenberg says
omg mini chocolate chip — genius! i've gotta give that a try. 🙂
Chandra says
This was my second time making bagels. I love this recipe, they were both soft AND chewy. I do have a question, my son's favorite are brown sugar and cinnamon. I added to about 1/3 of the dough AFTER I made smaller balls. One i added it, they were do hard to mix and incorporate the mixture, and were kinda "ugly." Any suggestions on how to keep dough workable after adding the extras, like cheese and this mixture?
Rebecca Eisenberg says
I'm so glad you liked the bagels! I would be wary of trying to incorporate more sugar after the dough is kneaded — that's definitely going to inhibit the gluten formation of the dough and make them lumpy and ugly. I would recommend adding cinnamon directly to the dry ingredients when you mix the dough (you may need to add a bit more water since cinnamon is pretty absorbent!) and then, instead of trying to mix the brown sugar into the dough, just use it as a topping (maybe mixed with a bit of cinnamon if you like!) so it caramelizes and browns on top of the bagels. Good luck, let me know how they turn out for you!
Megan says
This recipe was so easy to follow! The bagels came out SO good!! Thank you!
Kathleen says
I’ve made these several times and they always turn out perfectly! They’re so good and easy to make. Thank you so much!
Rebecca Eisenberg says
I'm so glad you enjoy them! Keep on baking! ~R
Tracey says
This recipe is fairly easy and the bagels are so good. Hope they are just as good after they are frozen!
LL says
What is the rough nutritional info for the bagels?
I will be making these regularly now, so simple and yummy!
Rebecca Eisenberg says
I don’t provide nutritional information, you’ll have to figure that out on your own. Glad you’re enjoying the bagels!
Carol says
This recipe never fails! And the size is perfect for a one egg breakfast sandwich. And if I want more than one bagel, I can have 2 different flavours!