
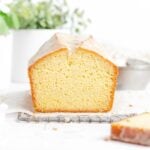
You can't go wrong with an old fashioned vanilla pound cake! This recipe is all about a handful of simple ingredients coming together to create a classic moist and buttery cake you'll love sharing with friends.
We're talking flour, sugar, butter, eggs, a pinch of salt, and a bit of baking powder as an insurance policy for that dramatic domed pound cake top. But the real star of this recipe is the concentrated vanilla bean paste which gives it that extra oomph of flavor.

Whether it's a casual get-together or a special occasion, my recipe for old-fashioned vanilla pound cake will absolutely steal the show. This is the base recipe I use to make lots of my other homemade cake recipes, so it's a great starting point if you're new to cake baking! Serve it with a dollop of whipped cream, fresh berries, and a drizzle of my easy strawberry syrup if you want to be fancy!
5-STAR READER REVIEW
“The cake turned out so fluffy and moist, not dry at all! The cracked top method at the top was super helpful!”
—Fara
A true old-fashioned pound cake calls for equal amounts of just four ingredients (a pound each of flour, eggs, butter, and sugar, hence the name "pound" cake) and usually produces two or more loaf cakes. No chemical leaveners, no additional flavors needed. All of the rising power comes from the way the sugar whips air into the butter in the first step of the recipe.
This ratio produces a cake that is dense and buttery but ultimately kind of a blank canvas for whatever you're serving with it. And there's nothing wrong with that. But as a baking blogger, I'm all about finding ways to make strong flavors the star of the show.

So when I started working on my version of a traditional pound cake recipe, I wanted to make flavor just as important as achieving that perfectly moist, dense crumb and golden pound cake crust. I wanted to take vanilla, a flavor that is often dismissed as plain, ordinary, and boring, and really make it shine.
I've added just three more ingredients to the core four: vanilla bean paste, salt, and baking powder. It's still a very simple pound cake recipe, just seven ingredients total! Powdered sugar and milk are optional eighth and ninth ingredients, necessary only to make the vanilla bean glaze.
Trust me, with the bold vanilla bean paste in this buttery old fashioned vanilla pound cake, vanilla flavor is anything but plain.
For the record, this is technically a "half-pound" cake; with half a pound (8 ounces, aka 226 grams) of each of those core ingredients, it makes just one loaf!

I use double-acting baking powder to ensure a dramatic rise when making my old-fashioned pound cake. In a true old-fashioned pound cake, the aeration of the butter and sugar is technically all you need to provide that lift, but I consider the baking powder a little insurance policy to give my cake an extra boost.
I use Heilala Vanilla's vanilla bean paste in all my baking. It's a high quality vanilla with plenty of flecks of vanilla bean in every drop that give amazing vanilla flavor. I buy it in large 13-ounce jars which are a great value for how long they last (I've been using mine for over a year), but they have smaller 2-ounce vanilla bean paste jars as well that you can sometimes even find at HomeGoods. Vanilla extract will also work; the flavor just isn't quite as strong.
Making Old-Fashioned Vanilla Pound Cake requires patience
Making an old-fashioned pound cake is all about technique. This is not a recipe that can be rushed!
Pound cake is a classic butter cake and a textbook example of the creaming method of mixing. This is one of the three main mixing methods, so foundational to baking that I learned it on day one of my pastry school classes.
The first step — creaming the butter and sugar together — is particularly important when you're making my old-fashioned pound cake. Taking the time to do it right is crucial for producing a tall old-fashioned pound cake with a beautiful domed top.


During the creaming process, the sugar granules tear lots of tiny holes in the butter (aerating it), which are then sealed up, trapping air inside. This trapped air helps the pound cake rise.
The next step is to add the eggs in a way that won't break or collapse all the air we just worked into the butter. To do this, we add them one at a time, giving each one plenty of time to incorporate before adding the next.


As soon as the flour in the bowl has mostly been incorporated, stop using your mixer and switch to a spatula to finish mixing by hand. This prevents overmixing.
Plop the vanilla cake batter in a prepared loaf pan. To control where the cake cracks open on top in the oven, arrange a line of cold butter cut into matchsticks in a line down the center of the pan.


I've also seen people achieve the cracked top by running a wet knife down the middle of the cake right before baking, or by piping a line of softened butter down the middle of the cake. But this method is the one that works best for me.

USA Pan Bakeware Aluminized Steel Loaf Pan, 1 Pound
Dimensions: 8.5 x 4.5 x 2.75. Durable construction with corrugated surface for optimal airflow. Non-stick finish is PTFE, PFOA and BPA free.
The simplest vanilla glaze icing
My vanilla bean glaze for cake is one of the SIMPLEST things I have ever made in my whole dang life. This vanilla bean glaze for cake will look brown when it's first mixed due to the vanilla bean flecks, but as it dries on the cake, it will look white in color.


One teaspoon each of vanilla bean paste and milk should get you the perfect consistency, but depending on the brand of powdered sugar, the fat content in the milk, etc. there can be some variety and you may need to adjust.

💭 Have More Baking Questions?
I've rounded up answers to common baking questions and how-to guides, including:
- Ingredient swaps and FAQs
- Why my recipes are written in grams and not cups
- How to quickly bring eggs and butter to room temperature
- Ingredients I use (salt, flour, yeast, etc.)
- Step-by-step guides for bread and baking techniques
See my baking techniques & troubleshooting guide and ingredient swaps and FAQs for more!
📖 Recipe
Old Fashioned Vanilla Pound Cake in a Loaf Pan
Recipe Notes
- For citrus flavors: add 1-2 teaspoons fresh citrus zest, rubbed into the sugar before adding it to the butter. You can omit the vanilla or leave it in. Alternately, swap the vanilla extract for another flavored extract or even an alcohol like bourbon or rum!
- Storage: This old-fashioned vanilla pound cake can be stored at room temperature with an airtight cover for 4-5 days. You can also refrigerate it in an airtight container for up to a week. The pound cake itself can be frozen for up to 3 months without glaze. Defrost in the fridge, then glaze and let come to room temperature for serving.
- I usually like to let the glaze sit for an hour or two before serving so that it forms a crust, but you can definitely serve it shiny and freshly glazed too.
- When in doubt, SCRAPE DOWN THE BOWL. If it feels like you're stopping too often to scrape down the bowl, that means you're doing it right. You don't want any ingredients to go unincorporated or you'll end up with large air bubbles or clumps in your final cake.
Ingredients
- 227 grams unsalted butter (65°F, softened)
- 227 grams sugar
- 227 grams all-purpose flour
- 4 large eggs (room temperature)
- 1 teaspoon diamond crystal kosher salt (use half as much of any other brand)
- 1 teaspoon baking powder
- ½ teaspoon vanilla bean paste (or vanilla extract or the seeds of one vanilla bean)
Vanilla Bean Glaze
- 60 grams powdered sugar
- 1 teaspoon vanilla bean paste (or vanilla extract)
- 1 teaspoon milk
Instructions
- Mise en Place. Bring butter and eggs to room temperature (the butter should be cool but soft to the touch, not melty or greasy). Measure sugar into one container. In another container, whisk together flour, baking powder, and salt and set aside. Locate vanilla bean paste. Grease an 8x4" loaf pan and line with a parchment paper sling. Set aside.
- Preheat oven to 325°F.
- Cream butter and sugar. Cut the butter into chunks and place in the bowl of a stand mixer. Beat on medium speed to soften, about 2 minutes. Scrape down the sides of the bowl and add the sugar. Beat on medium-low speed until there's no loose sugar in the bowl, then increase speed to medium and continue creaming for 5-7 minutes, pausing to scrape down the bowl and the beater at least 3 times. Scrape down the sides of the bowl
- Add eggs and vanilla. One at a time, crack each egg into a small bowl (to avoid getting shells in your cake!) then dump the egg into the mixer bowl, beating on medium speed for at least 60 seconds and scraping down the bowl again before adding the next egg. Add the vanilla bean paste along with the final egg. Scrape down the bowl again at the end. The mixture may begin to look slightly curdled, that's okay.
- Add dry ingredients. With the mixer running on the lowest possible speed, add half the dry ingredients. When they are mostly combined, scrape down the bowl and beater, then add the rest of the dry ingredients with the mixer still running on low. Mix just until fully combined, then stop and scrape the bowl down. Use a spatula to mix in any final bits of dry ingredients from the sides of the bowl or beater. Do not over mix!
- Bake. Scrape the batter into the parchment lined loaf pan. Use a mini offset spatula to smooth out the batter, pressing it down into the corners and sides of the pan so that there aren't any trapped air bubbles. Cut a ⅛-inch thin slice of a stick of butter into small sticks and arrange them in a line down the middle length of the pan to help control the crack in the top of the loaf as it bakes. Bake in the center of a 325°F oven for 65-75 minutes, until a toothpick inserted in the center comes out with just a few crumbs clinging to it.
- Cool. Remove the pan to a cooling rack. Let cool 15-20 minutes, then use the parchment sling to lift the cake out of the pan to finish cooling. Let cool completely before adding icing.
Vanilla Bean Glaze
- Sift powdered sugar into a medium mixing bowl. Add 1 teaspoon vanilla bean paste and 1 teaspoons milk and whisk together until smooth. You may need to add more powdered sugar or milk to reach the right moderately thick consistency. If you lift the whisk and draw a zig zag or spiral in the air over the bowl, you should see the ribbon of glaze sitting on the surface of the glaze for about 1-2 seconds before sinking into it.
- Use a mini offset spatula to spread the glaze over the top of the loaf cake. Let sit to form a crust or serve immediately!
Melissa says
This pound cake turned out so well! I followed the directions exactly and made the most smooth, fluffy, luxurious-looking cake batter I have ever seen. I added lemon zest along with vanilla extract - perfect light flavor.
Rebecca Eisenberg says
I’m so happy to hear that!! Lemon zest is such a good addition! Enjoy!
Melissa says
I made this today and it turned out amazing! A great pound cake I'm sure we will make again. Light, fluffy and full of flavor.
Lloyd Cubillos says
76 yrs old baker - and that's the most beautiful crumb, exterior browning, and dome i' be seen in years. Anxious to try it.
Meggen says
Same amount of butter, sugar and flour? Just checking.
Rebecca Eisenberg says
Hi! Thanks for checking. As I wrote in the blog post section “about this recipe” that is correct. Pound cake gets its name because the recipe uses a pound each of butter, flour, eggs, and sugar. I’ve scaled it down and written it in grams so it just makes one pound cake.
Odalys Mercedes Alvarez says
This recipe was an absolute dream to make. From your precise MEP beginning to the end. I’m so very glad that I saved the vanilla pods that I brought back from our Tahitian vacation!!
I baked it in a small Bundt pan and did add the lemon zest.
Absolutely a delightful concoction, that is worth every one of the calories!!
Thank you!
Rebecca Eisenberg says
Hi Odalys, Thank you so much for your comment and I am thrilled you like the cake! One housekeeping request for any future comments, however: My blog is a body positive, anti-diet talk space. I don't discuss calories or provide nutritional information for a reason. All bodies are good bodies, it's okay to be fat, and I don't want anyone visiting my blog to see anything that would make them feel bad about their bodies or what they're eating. Every recipe is worth the calories — calories are just energy, it's okay to consume them! We need calories! Please help me keep this space free of diet talk in any future comments. Thanks!
Connie says
It looks sooo good. Will this recipe also work with a 9" round cake pan?
Rebecca Eisenberg says
I haven't tried it in a round cake pan. In terms of amount of batter, it should work just fine in a 9" cake pan, but I can't tell you how you might have to adjust the bake time or if it will bake up flat or domed. Give it a try and let me know how it goes!
Deb says
Can this Old Fashioned Vanilla Poundcake be doubled or tripled?
Rebecca Eisenberg says
It absolutely can! In fact, if you double it you'll truly be working with a pound each of butter, eggs, sugar, and flour! With a larger batch, you'll need to be a bit more patient in the creaming steps to make sure everything is fully combined and the bowl is well scraped down, but it will work just fine.
Deb says
Thank you so much! What about tripling the Small Batch Crust Bread?
Rebecca Eisenberg says
If you're going to triple it, you might as well just make my full size no-knead dutch oven bread!
Deb says
I'm thinking gifts for people and we supply gifts to our local coffee shop.
Rebecca Eisenberg says
In that case, I'd still make the full size loaf and just divide it in thirds. You don't need to scale the yeast up and down as much as you increase the recipe, it'll be easier to just use the bigger recipe to start with.
Deborah Cooper says
Ahhh makes sense. Thank you! Cooked all my life but never made many breads.
Rebecca Eisenberg says
That's a great recipe to start with! Enjoy!
Ellen says
Absolutely delicious!
My family enjoyed this pound cake and commented before me asking them it they liked the cake.
This recipe was so easy to make and the directions along with the pictures to visualize what the batter should look like.
The recipe was so easy and using a scale makes it even easier.
I will keep this in my rotation for sure.
Thank you for a wonderful recipe!!
Rebecca Eisenberg says
Yay! Enjoy!
Rick says
My mother in law would like this for her wedding cake. Can this recipe be baked Ina an 8" and 10" round cake pan
Rebecca Eisenberg says
I'm sure it can be but I'm not sure how it will bake up — if it will be flat or not, etc! I would suggest doing a trial run before you commit to it for a wedding cake. Good luck!
LaTeya says
I was SO excited to make this pound cake because it just sounded like ke the easiest thing to do and IMMEDIATELY got discouraged seeing some of the ingredients in grams. I don't have a kitchen scale. It would of been cool to see the ingredients in both versions that are equivalent to cups, tablespoons or teaspoons for those of us that don't bake often and are new to this. But I will save this recipe in case I get a kitchen scale one day. This will be the first thing I make!
Rebecca Eisenberg says
Hi LeTaya! Unfortunately I don't provide volume measurements since they're super imprecise and lead to a higher rate of failure when people are following recipes. There's just so much room for measuring error based on what brand of measuring cup you're using, how loosely or tightly you scoop the flour, how well aerated your flour is, how much ambient moisture is in the flour from the humidity of your kitchen, etc. A pound cake is called a pound cake because of those weight measures — it's equal parts butter, sugar, flour, and eggs by weight. So unfortunately I can't provide cup measurements for this and still trust that it will turn out well when you make it. I highly recommend picking up a kitchen scale; your bakes will turn out much more consistent and with much fewer issues using weight measurements!
[ED. NOTE: Removed 4-star rating since you didn't make the recipe ;-P]
LaTeya Green says
Well, thank you for your reply, first of all! It's appreciated. I can definitely tell you that I bought a kitchen scale just because of THIS recipe. I highly doubt I'll use it ever again, unless I'm making a recipe by you probably! LOL Seriously though! *smiles* But in ALL honesty, I put the 4 stars because I like how detailed you were in this recipe. It's super easy to understand besides the grams part, obviously for me. LOL I'm not a baker. But I loveeee Pound Cake. It's just about the only cake I'll eat besides cheesecake, which is more like a pie to me. But you're personable, I liked that part. So, that's why I gave the 4 stars based off that alone. So, now that I got you here, can you explain the butter part for me? I know that 227 grams mean 2 sticks of butter. But could go into more detail on how to add the butter into the mixer? When you say 2 tablespoons, do you mean at a time until all is in there? That's the part I'm confused on. Thank you in advance!
Rebecca Eisenberg says
So glad you liked the recipe and welcome to the world of baking with scales! 227 grams is 2 sticks of butter, and when you cut it into 2 tablespoon chunks you add them all at once to the mixer; the chunks just help the butter soften faster so the sticks don't get stuck in the beater! Enjoy the cake!
LaTeya says
Got it now! I'll try this recipe out soon and I'll be able to come back with my real rating! 🙂
Rebecca Eisenberg says
Looking forward to it!
Mary Allen says
Can this be made in 12 cup Bundt pan?
Rebecca Eisenberg says
Yes!
Fara says
The cake turned out so fluffy and moist, not dry at all! The cracked top method at the top was super helpful!
Dayna Carpenter says
Wish you used standard measurements instead of grams. That was a turn-off for me using this recipe.?
Rebecca Eisenberg says
It's almost like I write my recipes to be accurate rather than to turn you on.
PS Please see the section of the blog post titled "Why is this recipe in grams? I want to use cups!" as to why I don't provide what you call "standard" measurements. Cups are not actually standard, they're incredibly inaccurate which is why I don't use them. Read more.